Our Wonderful Followers who come back again and again to read about us...

Thursday, October 28, 2021

Rainy Day Projects

Now that we practiced with putting the crown molding trim over the top of the closet doors, it was time to put the same configuration on top of the new window in the master bedroom. 

Steve did all of the measuring and cutting out in the garage and I took care of the painting. Then he was able to bring it inside all in one complete piece, to nail it up to the top of the window trim.


It sure looks nice and finished at the top. It's a close match to what is in the rest of the house. Even though the windows are new and modern, I still like the old-fashioned look of the crown molding around the tops.


Now that the trim is up everywhere, I don't think we're going to put up any curtains or valances. Not for now. The venetian blind is helpful for night if we want to close it off, and it still lets in plenty of daylight even in the down position. 


Now I just have to hang some artwork...


~~~~~~~~~

Oh, Monday night we had a visitor in the back yard:


Yup,
A big ole possum wandered in. 
The security cameras alerted us,  
and Binney barked her head off till it left. 

~~~~~~~~~~

After watching the weather reports, we decided to not go camping this week. Tuesday was a beautiful day, though. The sun was shining and the temperatures were up in the high 50s. Steve thought this would be a good time to tackle the north side of the garage. It has vinyl siding out there and the northern side was not only dirty but was kind of getting a tinge of green mold or mildew. We found this product to use with the pressure washer.


Steve wetted each area with the product in a pump up sprayer. He put on coveralls just in case it would do harm to his blue jeans or his favorite red checked flannel shirt.


After it soaked for a little bit, he used the wide soft bristle brush that he uses for washing the motorhome. It was amazing how well it loosened up all of the dirt.

The pressure washer was acting up a little bit, but he was able to get it working again and gave it a good spray down. Look at that dirt just roll down the siding.  


So when he got the entire North side completed except a little teeny section down where the kids have already parked their motor home for the winter. Now it should stay good for a while because it's supposed to have mildew inhibitor built into the cleaner. I never liked vinyl siding, that's even more of a reason why.... how moldy it gets on the north side of buildings.


After he put away all of his cleaning toys, we were able to move the motorhome back over and park it where it belongs alongside of the garage. It is not winterized yet because we might try to go camping again next week. Did you know last year on November 6th we had a 60 degree day? Maybe we'll get lucky and get some warm weather yet.


It's like we lost the whole month of September for beautiful fall camping due to covid. With both of us getting sick, even though we weren't sick that long, the quarantining for 14 days took a big chunk out of our camping. Fall camping is so nice because the weather is more comfortable, less bugs, and all of the kids are back in school so it's easier to get a campsite during the week. Oh well, there's always next year.

~~~~~~~~~~~

It was raining on Wednesday and I was able to finish up the last few blocks and put together the rest of the center top of this quilt that I am working on. I'm not sure what name I'm going to give it yet before I list it up for sale in my Etsy store. It will be a queen size quilt when it's done. This is just stretched over the full-size bed in our guest room for now.


I still have a white border to put all around the edge of the main body of the quilt. Then the final border will be what's called piano keys. Which is nothing more than long rectangles. It will go around all of the edges to make it the proper width for a queen size bed. This is just to give you an idea of what it will look like. I just laid the fabrics next to the edge of the main body of the quilt.


I really like how that one is coming out. 
I have a couple more in my mind 
but nothing started yet. 
I try to finish one before I start another.


~~~~~~~~~

Another good reason to not go camping, Tuesday evening I was able to have the two youngest granddaughters come over. This is Whitney and Claire. If they weren't already cousins, they would be best friends! It sure is fun having them come over because they chitter-chatter all the while and keep each other entertained. I just kind of hang around the edges and listen to them. They are silly, hilarious and adorable all rolled into one.


Watching them play reminds me of myself and my cousin Pam playing together at Grandma's house when we were kids. All we ever did was beg to be together at Grandma's house and spend time with each other.  Even though we were cousins we acted like best friends. Pam was older than me, but we sure enjoyed our time together. Especially at Grandma's house.


It was Whitney's turn to learn how to sew and make her own stuffed bunny toy. Claire had made one a couple weeks ago and I actually had two pieces of the same pre printed bunny fabric. So now it was Whitney's turn to learn to watch carefully as the needle slowly goes up and down. I have a speed control on this sewing machine that I can slow it way down. Then as we got near each stick pin, Whitney was able to pull it out and put it back on the magnetic pin cushion. It was cute to see how she watched that needle carefully go around the entire edge of the shape of the bunny.


Once we were done sewing the bunny it was time to turn it right side out and stuff it. Now she could actually use the scissors (a blunt topped safety scissors) and cut open the bag of the stuffing. Claire watched carefully, because using a scissors is something that they both are getting practice with.


Here they both explained with imaginary handheld scissors, (really their fingers) how we cut all of the way around the bunny. Special thanks to Grandpa for taking all of these photos. Otherwise we wouldn't have these pictures... because there's no way I could hold the camera, take pictures, sew, and monitor the scissors and stick pins.


The stuffing part was fun --- each time they thought they had enough in there, Grandma said "Nope nope nope, the bunny is hungry, it needs more!" The giggles were infectious. 


Once we were all done stuffing the bunny from the bottom, then I had to sew across carefully with a needle and thread. Whitney got to use the scissors to cut the thread after I completed the closing seam.


And there you have it, the two little cousins who created a bunny! Now they each have a bunny friend to play with and sleep with. Claire says it's a "bunny pillow".


Meet Little Miss Bunny, she is created with LOVE! Whitney says it's a girl because she has eyelashes. Of course!


~~~~~~~~~~~~


Now it's Thursday and it's quite a rainy day again. 

I'm really glad we didn't go camping. We would have gotten one nice day out of three. The rest were rainy and cold and damp. 

Steve was pacing around looking for a couple of jobs to work on indoors. We had never finished installing the baseboard molding on the long wall in the she shed. This is where my quilting machine was before we rearranged things. Now that the machine was moved, it's easier now to access the wall. The big barn loom slides away easily as well as the cabinet in the corner. 

I had pre-painted the baseboard the other day, set on saw horses in the yard while Steve was pressure washing the side of the garage. It's a lot easier to paint this stuff outside, rather than after it's nailed up into place. Not to mention, having to cover all the beautiful floor flooring to protect it from any stray paint splatters.


Steve crawled around on his hands and knees and got it nailed into place. Now he is happy that job is finished. It's been bugging him in the back of his mind that the She Shed was really not complete, until he finished that piece of baseboard.


Steve is also getting antsy about starting the French doors that are going between the living room and the guest room. He took care of puttying up any little scratches or nicks and started sanding off the varnished finish. We will be painting them all white. Well, really our trim color is called String of Pearls. It's a little bit pearly grayish off-white. If the weather warms up enough, I will be able to get a couple coats of primer and paint on them. Then we will we will remove the plastic covering the beautiful beveled glass panes and brass caming.


We are tossing around the idea of changing the guest room into an office. Then the French doors will be leading into a nice office area. Our present smaller office we will make into a tinier guest room and playroom for the grandkids. 

We will see what happens. For now, as long as he has a project to work on ---- like installing these doors in place of the present configuration, he will be happy.


Monday, October 25, 2021

Blustery Monday

I looked outside on Saturday night and saw this most eerie looking moon surrounded by very strange looking clouds. This is just a shot with my cell phone, snapping a couple times until I got one that actually came into focus. It looks perfect for a Halloween picture doesn't it?


Today it is very windy and blustery outside. Winds are up to 40 to 45 mile-an-hour gusts. Not a good day to be out driving in a motorhome. It is cloudy and dull, and scattered rains throughout the day. We had been thinking about going camping this week. Now with the weather reports, we are not so sure. We are almost out of time to go camping and soon it will be time to winterize the rig.

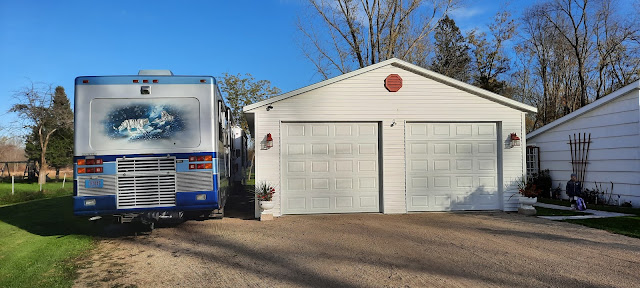
Our kids brought over their motor home last night, fully winterized, to park in our yard for the winter. They have a narrower driveway that makes it a little more difficult to get around when there's snow. So it's easier to just park their motorhome here in our yard when it's not being used for the winter.  They do keep it in their yard for spring, summer and fall. They hung around for supper and we enjoyed a nice evening visiting and catching up.

~~~~~~~~~~

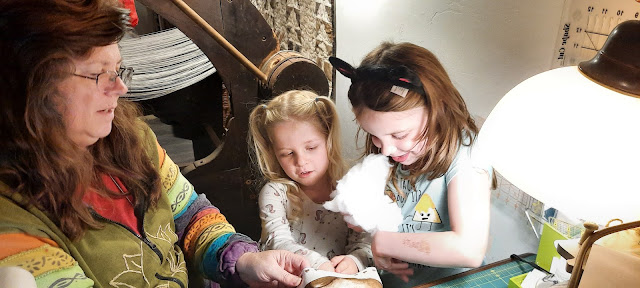
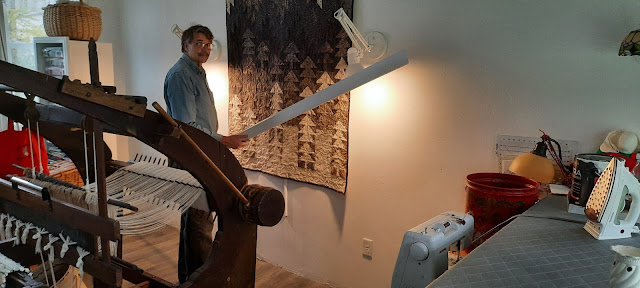
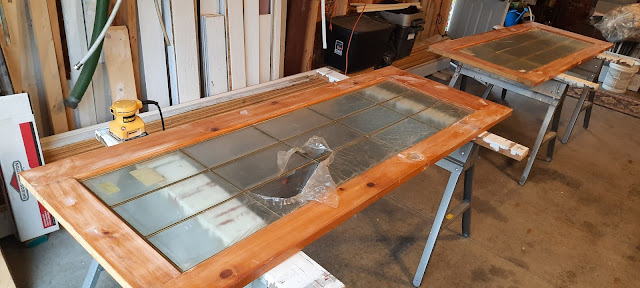
Since we are at home, yesterday I took care of a few odds and ends and started to work on some of my fiber projects again. I finished weaving up this rug on the Sanna Kangas Finlander Barn Loom and unrolled it to cut it off. I will get it hemmed and listed soon in my Etsy store.  It reminds me of a cold winter day with the creams and greys and black bits, and some turquoise sky peeking through.


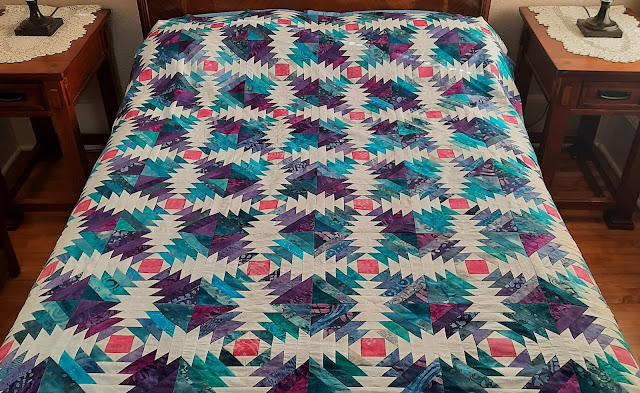
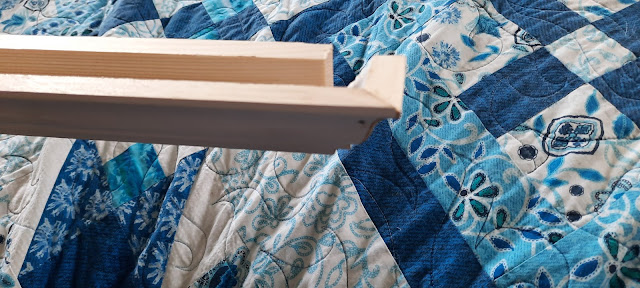
While the Packer game was playing (Go Pack Go, yayyyy they won), I was working on my quilt blocks. This is the quilt that I started this summer and I have been working on just a little bit at a time.  I love my little sewing desk at the She Shed. I have everything at my fingertips and it's such a nice cozy spot to sew from. If I look out over the ironing counter, there are the big windows that show the view out to the back yard. It's a very pleasant place to be.


I am almost done, I think I have two more blocks to go... this is called a pineapple pattern. Once it's done, I will surround the edges with what's called a piano key border and then get it onto the big frame to quilt it.  This one will go for sale in my etsy store too,  Perhaps in time for the Christmas Shoppers! 


~~~~~~~~~~~

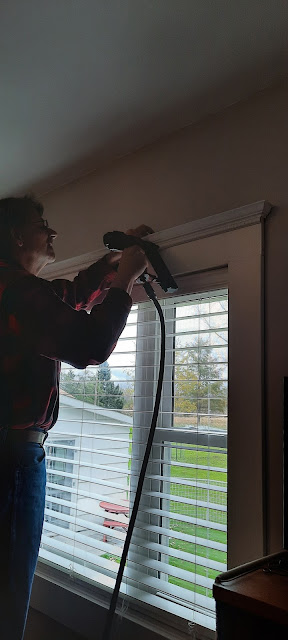
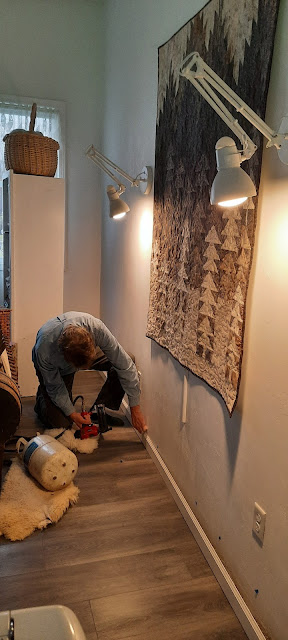
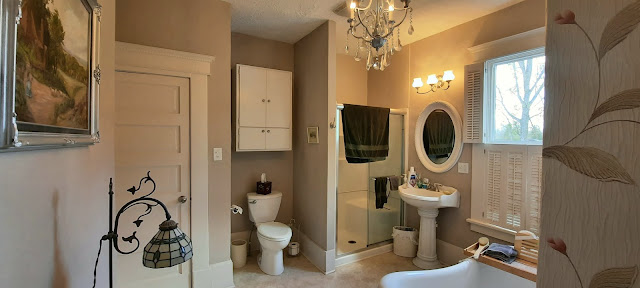
Steve started working on the top crown molding trims for both the closet door and the new window in the master bedroom. This took a lot of trial and error, in and out, double checking and triple checking before he cut into the crown molding trim.


It's kind of a one-man job. There's not a lot I can do except hold one end while he nails the other end once he gets the pieces cut correctly. Because he was trying to adapt over an existing piece of trim on the closet, it wasn't quite the right height to match the doorway and the master bathroom next to it. It took a little extra figuring and extra trips back and forth to the saw in the garage. To make them work out level, he needed to add an extra spacer behind the crown molding. That way he had some "meat" to nail into. 


Finally he was ready to nail up the trim and I was there helping on the other end. Holding things level and making sure it's lined up correctly. Then when I am done holding, I can quick grab the phone to take a pic. 


Suddenly the gun jammed up and wouldn't work. How frustrating. He opened it up and found one of these very thin fine finishing nails was crunched up so crazily. Amazing it has that much power to bend it from inside of the machine.


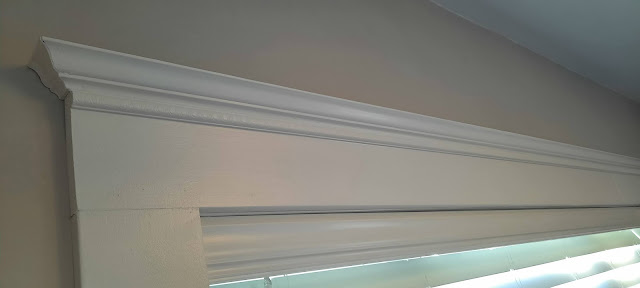
He got it un-jammed and we were able to continue with the trim. It's not an exact match to the original trim next to it but it is close enough for what we can do ourselves.


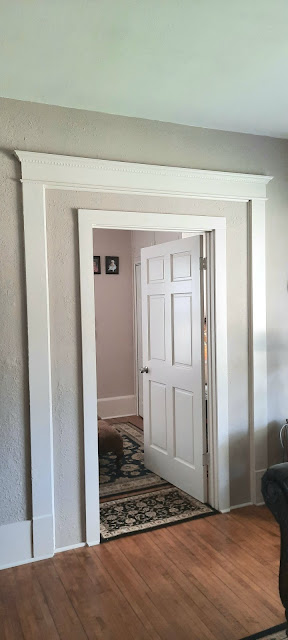
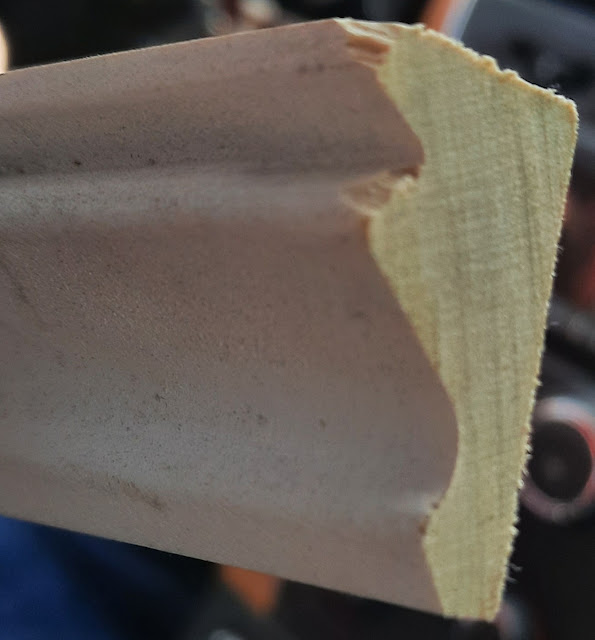
Other than having custom millwork created and having a special knife made to exactly replicate the original trim, we did the best we could. I think it's good enough for us!  The top piece is called "crown" and the thin bottom piece is called "egg and dart".  I think because of the oval sections are eggs and the little arrows are darts? 


He had to do some complex cuts on the compound miter saw to get the top angles just right, plus trim off some of the top edge to make it match what we originally have.  The top lip was thicker, and it took some skill to get these thin pieces of wood cut evenly on the table saw. 


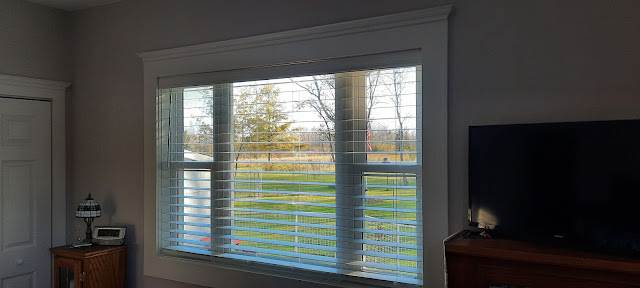
Once he was done getting it into place we puttied up the little nail holes. Then I was able to give it a final coat of paint. I had already applied two coats of good paint while it was horizontal out in the garage on the saw horses.  There... the closet trim is done! 


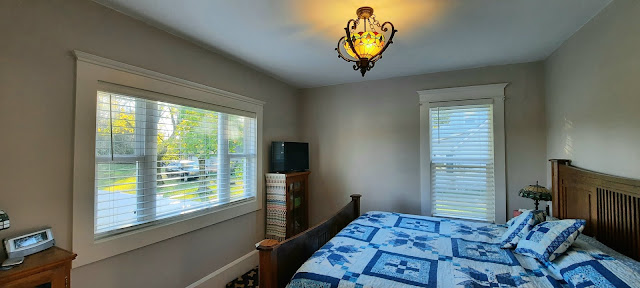
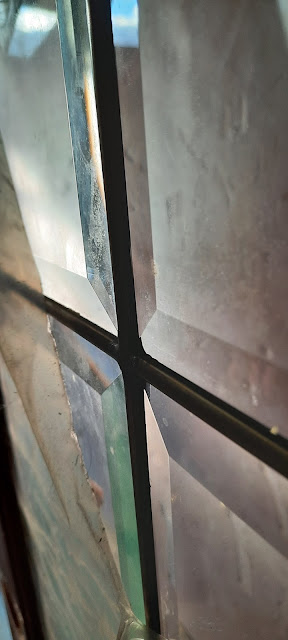
He felt like he did the piece of crown on the closet doors as a trial run. Now today he will work on the window piece of crown for the new window that we installed earlier this month. 

I had encountered the problem that our trim color, called "String of Pearls", does not match the standard ivory or the white colored face plates available in the stores. If you paint them, they just chip and flake and scratch off.  

But I did happen to find these beautiful ceramic plates that have a little bit of a beadboard look to them. They match our trim color perfectly. I saw them last year and put two of them on each side of the island in the kitchen. They are $6 each and I really can't afford to do the entire house. 


But I did splurge and buy a few. If I buy three or four each time I'm in that store, eventually I will have enough to redo the entire house! At this time they only had four of the switch plate covers and one of the outlet covers in stock. Sadly, one of the switch plate covers was already broken in the package at the store so I could only buy three of them. But they are the exact right color and I like the look of them. Kind of Old Farmhouse-y... just our style.

~~~~~~~~

Things are pretty chilly today. We kicked in both of the fireplaces instead of running the big furnace in the house. It's enough to take the chill out and make things cozy. Here is the one down in the She Shed that helps to distribute the heat down there.


I'm pretty proud of Steve. When we installed this unit in the She Shed it had a remote control with room sensor so it could thermostatically kick on and off. It senses whatever temperature the remote control was preset for. Also, wherever in the room you set the remote control, it would monitor the temp and signal back to the fireplace when it was going to kick on or off. We never had it set up correctly and never really messed around with the remote control. We have been just using the fireplace manually.


Well, Steve said since we have the technology we might as well use it. He took out the book and he read it from cover to cover and figured out all of the settings. He got it all configured correctly and now the remote control operates properly. What a guy! I was pretty proud of him for figuring it out. It was something I never got around to doing, and I am glad that he was able to get it operating correctly as intended.  

Now he doesn't have to get down on his hands and knees and ignite it and control it from the little panel near the floor.

The gas fireplace in the living room isn't as fancy, and doesn't have a remote control. Although we might see if we can add one to it.  Steve manually lit that one in the living room for me today as I'm zooming around here and there and everywhere. It is keeping the main part of the house very comfy.


On second thought, rather than zooming around so much, maybe I should take some time to sit down on the couch or in my recliner, take out a stack of my quilting magazines, a mug of coffee, and take it easy this morning.


I think I will do just that!

Saturday, October 23, 2021

Gathering Supplies for Winter Projects

Now that Steve and I are just about done with all of our summer long projects: putting in the windows & siding in the kitchen nook area, then the big bedroom window & siding on the east wall.... we were sitting back and relaxing----

Relaxing??? You have to be kidding! 

We were having a discussion. We were asking each other what would be our own next priorities for what projects we wanted to do. This is to get ideas for inside projects to work on this winter. It is good to set goals.

One of the items that bothers Steve has always been how someone adapted this double wide doorway down into a single door. It is located between the living room and the guest bedroom. Perhaps long ago it had been a parlor?  We are sure the two French doors are long gone and were never relocated in the house. 

I suppose they adapted this to be more private for an additional bedroom. It seemed they did it as best they could, and made it look okay. But it has always bothered Steve. 

Being that the doorway is only 5 feet wide, most new French doors would not accommodate this opening.


Steve is such a good lookout shopper on Facebook Marketplace, he has been watching for just the right doors. The only problem is that the opening is also very tall, 90 inches high. Most doors are only 79 or 80 inches tall. But he figured that if he found just the right doors in the right width, we could add a transom on top and do some decorative glass work or something to fill in the space. 

Last night, he finally found the right doors.... at the right price!!!

They're actually new doors that still have the plastic on them. But they had been temporarily mounted into place.  We have no idea why somebody never took the plastic off. She said in her ad there are some scratches that need refinishing.


If you look close in this picture of the glass, it has thin brass caming between the panes. It should look really interesting.... and old-fashioned.  That's our goal. 


We will paint the wood portion to match the rest of the trim in the house. That will be my part of the project. Sanding down the flat wooden areas and giving them a few new coats of our matching trim paint will bring them around to our liking. 


It will be Steve's project to figure out how to remove the old doorway and somehow hopefully the floor underneath will be in good shape. We can maybe work a little magic with some spot sanding and polyurethane like we did over in the kitchen by the half bathroom door.


~~~~~~~~~~


Now it came time for my priority wish idea of an inside project. I had come up with this idea last year, and kind of put it on the back burner for a while. I knew the supplies that I would want to buy to create it, I just haven't gotten around to buying them yet, or justify the cost to the budget. Because it was just a decorative item, and not a structural or necessary thing. Just a "whim" of mine. 

I had an idea, and it required some packs of beadboard planking. We had put lovely bead board planking around the bathroom in our house in Chilton.  We installed it as wainscotting with a trim piece along the top. It came out so cute and adorable, really old fashioned looking. It was a great way to update to that bathroom, to restore it back to original 1914 era, and get rid of the ugly 1950s plastic tile that was in there.

Here is the bathroom from our Chilton house:


But I would do white in this bathroom in Oconto. 

The thin bead board planks I want are sold in packages of eight foot lengths. Six pieces to the pack. Each piece is two strips of the board and groove pattern. They are 3 9/16" wide. It is real wood (pine) and not printed paneling.

Steve knew it was something on my "Someday Supply List" to do this project again in this master bathroom.

Last night, after he found his French doors, he spotted someone selling 18 packs of the exact plank pieces I needed! The price was less than half of new! This is 108 pieces of beadboard planking.  Yayyyyy!


It's the exact same stuff I would have been buying sometime this winter.  Boy, he sure is a good Marketplace shopper.


We were able to get $250 worth of wood for only $100. Here it is listed at Menards. 


This was very exciting to me. Originally I had only thought to do the area around the bathtub. I was a little concerned about any splashing from the tub getting on the wallpaper. Especially with the handheld shower device that I sometimes use to rinse my hair. Or the splish splash of grandkids having a bubble bath. By putting this beadboard up for the first four feet, it would protect the wall. Plus, I think it would look absolutely adorable.


Steve said there is more than enough wood in this batch to do the entire bathroom, all of the way around. That will be even more harmonious and look less patched together. I really like that idea.

Then there will be enough leftover to probably do the small office room as well. Even if we have to buy a couple more packs to add to that room later, we know we at least have enough to get a good start on at least 3 of the walls in there. 

We contacted the seller and made arrangements to go first thing this morning to get the planking pieces. Our children happened to borrow our little trailer because they were using it to haul drywall up to the cabin.

But Steve measured and we know we can haul 8 ft long things in the Saturn. If we flip down the passenger seat, we can lay the boards in on an angle and it allows us to close the back hatch.


This does cause a slight problem for me though. As a passenger, my seat has now been taken up by 18 packages of planks. So where am I? I am wedged in on the folded down back seat behind Steve on the driver's side. I know it's not entirely legal, but it was only for 20 miles back home.


We backed up to the garage and before I could untangle my legs from behind the seat, I gave Steve the phone to take a picture of me and where I was riding. Sometimes you just got to sacrifice, so you can get what you want! 


We unloaded the planking into the garage where they are stowed away---- until we are ready to start that wintertime project.


Here is the master bathroom with a couple wide angle shots, which kind of distorts a little. But envision 4-foot high beadboard all of the way around the room.


I think it will look really cute. Plus I think we will use the router and cut some V grooves in the doors of the cabinetry over the toilet to make it all match.


Here is some of the top trim profile that we will use around the top edge of the beadboard. It is kind of a chair rail effect. The bottom will be butted up to the wide baseboards.  


We ate a quick lunch after picking up the planking. Now we are enroute down to get the french doors. They are a little further away. We hope they are what we are looking for!

~~~~~~~~~~


We have the doors loaded up and we are heading home now. This is the first time ever buying things on Facebook marketplace where the seller was late to the meet up location. There were two other sets of buyers also waiting at the warehouse where she had the items stored. After some miscommunications and delays, she arrived to conduct the transaction. She also nicely allowed us to bargain down 20% off the price. We only paid $80.

Steve says we got paid $10 a piece for waiting. LOL 

The wood was in a little rougher condition than what we could see in the photos, but it will easily be puttied up and sanded down before we paint. If we had wanted to keep them natural, I think it would have been a problem.

In the sellers ad, she never said it was beveled glass---- That makes it even better! Each door has 15 pieces of beautiful beveled glass separated by brass caning.


 The doors are pretty heavy and were made in Canada. I think they will work out perfectly for what we want.


The seller helped load them up and we got them wedged into the back of the Saturn. This time I don't have to ride in the back, there is room on the passenger side and Steve still has visual access to his side mirror. 

Heading home now to unload our Facebook Marketplace Treasures!


Home now.  In the garage and ready for some putty, sanding and painting when Steve wants to tackle this project. 


Time to go make supper.