I am gonna post and explain each one, alphabetically, from my photos files…..
Some are actual rehab and alterations, and some are just darn good things we have bought that we found making our camping lives easier.
Air Intake Relocation:
As I stated in yesterday's blog, the air intake for the air cleaner is located in the rear of our diesel motorhome, as most are. But the problem is that it is located UNDERNEATH the motorhome by the engine. Things get pretty dirty and dusty back there, especially with driving on any dirt or gravel roads, out in the desert, or just around blowing winds from newly plowed farm fields. You ever see a dirt devil over loose soil?
Anyhow... our friend Mel, who also has a Safari, came up with this one. He figured out how to relocate the air intake by some creative piping and cutting a side vent through the fiberglass. Here he is with his saved piece of fiberglass! Yes, he framed it! haha

Steve measured and figured and futzed around... and soon he said he was ready to cut!! OH MY! Cutting into the fiberglass on our vintage motorhome is pretty scary (to me) but he was not daunted in the least. He grabbed his drill and made four pilot holes and used a sabre saw to cut out the rectangle.

Here is his crazy looking inner workings for the intake vent. It looks very rigged, but it works. Thankfully it is hidden up inside the back engine compartment and nobody can see it. LOL PS he said that is super duper heat resistant aluminum fibered duct tape.

With a little bit of sputtering, partial swearing, and a few bruised and scraped knuckles, he got it into place. Laying in the driveway is how Steve does most of his projects. Of course we do not have a garage space large enough to pull it inside. I am the ''gopher'' to bring him tools, take the pics, and basically support and encourage him as he does a great job.


And there it is... all complete! He sprayed a regular steel household vent grid with silver paint to match the motorhome color scheme. It would have been impossible to match the blue, so he went with the silver to go along with the stainless steel lower compartment doors.

I am pleased to report that it has been three plus years since we replaced the air filter housing because this reconfiguration works so well. The little filter minder device is only showing a small amount of dirt picked up since the replacement, so our air flow is fine. Engine temps are fine.
Air horn button on passenger side:
This one is a recent improvement. You are going to think it is really STRANGE.... but it is a great idea--- And it works!!
See..... when you are in a long long rig, with a towed vehicle behind, you can not just whip over to another lane to avoid the merging idiots who do not seem to see you. Countless times we have had idiots who cannot merge safely into traffic. They are immersed in their cell phones, their coffee, their GPS settings or whatever. They cruise right alongside of us, mindlessly involved in their own little world, going the same speed until they suddenly run out of pavement from their on ramp! We have had soooo many close calls of possibly having them crease right down the side of our rig. We do not want to go through the trouble of being laid up for weeks to have have our rig repaired, or trying to match the stainless steel doors and paint, nor cause injury to other folks around us if we did have an accident with a dumb merging idiot. Not to mention the insurance hassles.
Usually Steve does not have room to move over to the left, and we find ourselves struggling with either trying to rapidly slow down or speed up to try to avoid the collision with the idiot who does not know how to merge. ARGGHHHH
I swear they just do NOT see us! We are blue on top and silvery/grey on the bottom. I think they think we are sky and pavement????
When this happens, Steve is busy looking in the mirrors, driving straight ahead to stay in his lane, but trying to see if he can move, trying to see the tiny car in his almost blind spot on the passenger side, etc., that he does not always have time to beep the air horns to wake up the idiot.
I warn him to blast the horn, but he does not always have time.... when he does, it does help! It wakes up the person who suddenly either speeds up and cuts in front of us, or drops back to safely merge behind us.
Ssoooooooo to help with this tension filled event, Steve installed an extra horn button on MY side of the rig! Seriously!!!

I can look down out my passenger window and determine if the person needs a blast to wake up and realize we are there! Our dual air horns blast out sounds similar to a big ocean liner.... and it is enough to get their attention before we are both in an accident. It is the GREATEST thing ever and so far it has saved us twice since he installed it this summer.
Plus, it is kinda rewarding to see the idiot suddenly realize we are there and look up and react --- and either look stupid or sorry .... or worst of all angry! Then they drop back, intending to swing around us to quickly to flip us off as they speed by. But then they meet up with our towed Tracker behind us, which makes them having to back off even more to get around behind us. By now, they are pretty ticked and zoom up alongside of Steve to flip him off. He smiles broadly and waves a nice wave at them. No sense giving them the satisfaction of getting US mad... right?
Air Conditioner Gasket change:
As many of you know, our motorhome is 20 years old! Old enough to vote, but not quite old enough to drink and drive itself, thank goodness. LOLRoutine maintenance has kept it up in tip top shape, with 99% of it being done by ourselves. The few things we have let other people do, we realize we could have done ourselves with a bit more information. And also I think we would have done a better job, with more attention to details, and cost us much less in labor and parts.
So I try to take pics of the things we do ... step by step... and hope they will help someone else to do the job themselves too. (rather than paying someone $100 an hour to do it)
We noticed a bit of water leaking down onto our bed from the back rooftop air conditioner. This has happened once before on the front unit, and we learned a trick to remove the bottom plastic housing and tighten down on the three big bolts... compressing the gasket a bit more.
This time, we realized the gasket was squished down almost flat and not doing it's job on the back unit. So we picked up two new gaskets to replace both of them when we had time. Gaskets are generally available at most RV dealers. We bought ours at Merz RV in Fond du Lac and they were pricier than what we found online. We paid $35 each, but Steve wanted them NOW.... and not wait to order them I guess. Gotta keep the local RV dealers in business too.
Here is one I found online so you can get an idea of what I am talking about. Yup, it is just a square shape of closed cell foam rubber that is sticky on one side. We didn't use the leveling pads, perhaps those are for some fifth wheels I see with sloped rooftops where the AC unit is attached.... I think most RV's use the same gasket, as the hole in the rooftop is pretty universal in size.

First .... UNPLUG your rig from any power source! Then assemble all of the needed tools:
- aluminum sticky tape,
- oscillating power tool,
- permanent marking pen,
- rags,
- acetone,
- ladder
- an assortment of various screwdrivers, ratchets, sockets
- and a camera to take pics
THE STEP BY STEP DIRECTIONS ARE NOTED ON EACH PICTURE:


We looked up inside and saw why our gasket was leaking:


this part might be easier if done with TWO people, but Steve is strong....


I would suggest here that before you remove the old gasket material,
to make some marks with a permanent marker.
This will show you exactly where the new gasket needs to be attached...
so it will perfectly line up with the rooftop hole.


If you had marked with a permanent pen here,
you wouldn't have to guess where the gasket needs to be applied.

Again, this next part would work better
with two people lifting,
and a third person on the inside
to eyeball how it's lining up
with the hole in the roof.


You could use duct tape here, but Steve had some of this on hand too

now to take care of a couple air leaks that were never done from the factory either.


We feel the air will flow better by plugging up the leaks
that should have been plugged from the time it was built.


AC VENT:
Back in June I did a blog post about our air conditioner in the front livingroom area of the motorhome. blog link It had to do with increasing the air flow downwards instead of out each end of the unit. Mel (our fellow Safari-ite with great ideas) had opened up a hole in the lower cover portion to allow the cooled air to come downwards into the living area space.

Well, Mel had gone one step further. He added a nice cream colored matching grid that can control the flow if you wish. It has little louvers and a lever to close or open for more comfort.
Fortunately Mel bought TWO of these grids! He gave us the other one.... so Steveio jumped right on it and got out his tools to install it in our motorhome.
First he took off the bottom cover and measured carefully where to enlarge his circular hole into a rectangular one.


He took it outside and cut it out with a skill saw. Then he used a drill and rivet gun to use rivets instead of screws to attach the grid, which might crack the plastic. Soon he was back in the rig installing it back into place.

Snap the filters back into place.... Voila! now we can control the air flow that comes down on our heads if we wish, or with a little flick of the lever, the louvers close on the grid and instead it blows out the black end vents like it did before!

Awning shade screen:
This is an awning sun screen that came with our rig. We never realized how nice it was until we were camping in desert one year. When the sun comes down at such an angle in the winter months, this really helped keep the light off the sides of the rig. Some days it was 95 degrees out there and this really made a difference during the days! These shots were snapped after supper, so the sun is even lower in the sky and kinda on an angle now. But it was great for mid-day use!


The top edge of the screen has a thick rubber bead sewn into the top hem. It slides in the extra unused awning track on the bottom surface of the roller. It has some little grommets on the bottom edge to attach ropes and tie to stakes in the ground. It was kinda tough to pound in stakes into the hard packed desert gravel. I think even tying around a large rock on each corner would work too.


It is thin enough that we could possibly roll it up with the awning each time, but can also be removed and stowed it away in it's bag in a compartment.
Whatever the reason, we have replaced alternators five times. It is NOT fun to be stranded. We have had to drive with holding down the ''boost'' button on the dash that connects our engine (chassis) batteries to the camping (coach) batteries and running the generator to keep up the charge level to get home. If too low of a battery charge, the transmission will not shift, its electronic. Nope not fun.
After the third one went out while down in Florida last winter, Steve even tried to rebuild it, but that didn't solve the intermittent charging problem either. It would fluctuate and not charge steady. Then he ordered a fourth alternator while in Florida to bolt up just so we could get home. That burned out in just 100 miles on the road.
Obviously, that still didn't solve the problem so we ran jumpers from coach batteries to chassis batteries to get home. We ran the generator the whole way for 1,300 miles. Whew.... And I might want to mention also that the inverter which changes our coach battery power from 12 volt DC to 120volt AC was acting goofy too.... Hmmmm?
This leads us to a sub subject also starting with the letter A is
Access to Our Engine Compartment:
When Steve does this kind of work, we are fortunate that our whole king sized bed lifts up for access to the engine compartment. Motorhomes with bedroom slides usually only have trap doors and acceess holes to reach things from above the engine. That is why many semi truck places do not want to work on motorhomes, or charge a higher labor rate per hour. We do not have a bedroom slide out unit, so our entire king bed lifts up insead.
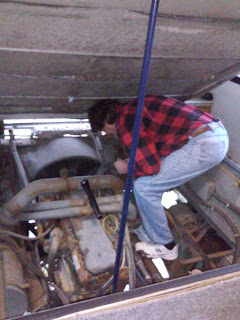

The compression struts have long ago given out, so he lifts up the bed and also supports it with an extra prop pole that is really a cargo retaining rod for delivery trucks (found at Harbor Freight around $15)


Okay.. back to the alternator and what we found out was REALLY the problem....
Once we got home, we chatted with a local guy who rebuilds alternators. He said we should replace the alternator again with a brushless larger one, they run in the $300 range but he had one on the shelf for $160. He said all the semi trucks with Cat engines were going to this one. It cost more but we decided to try it.

Since the fourth alternator was a fairly newly rebuilt, we were perplexed as to why it was not putting out enough amps. It was intermittent, sometimes 12 or 12.5... and other times 13 or higher. He said he would bench test that one for us.... and hooked it up. I got to watch and learn. It was not putting out a charge of course. He took off the rotor section to test and the regulator was shot as well as some other parts inside. All the diodes were burnt right off, like over fried from something back feeding!
He said to go home and test our isolator. That is an electrical unit that splits the power from the alternator and sends it either to the chassis batteries or the house batteries, but doesn't let them bleed over into each other. Well, Steve bypassed the isolator on the chassis battery post by putting all three wires onto one post just to hold them together.
BINGO! that was it! The isolator must have been malfunctioning and back feeding into our alternators and burning them out. The rebuild guy said that is how the others got fried. It made sense.
Nobody locally carries isolators, so we had to place an order on Amazon to get one delivered in a few days.
Here is the old isolator... it is mounted on the wall in the engine compartment which is open to the dusty road and dirty diesel engine. That is probably 20 years of accumulated dirt on it. LOL...


But here is the trick to reach the topside. Unhook your awning arms where they attach to the side of the rig. Now carefully lower them down so they can slide underneath the body of your RV!


Alternator Woes:
Our motorhome with a 3126 Cat diesel engine has burned through FIVE alternators in the last 10 years since we have owned it.
- Some motorhome folks believe it is the added strain on the alternator of leaving in the morning and having to charge up the camping (coach) batteries after being drained overnight.
- Other motorhome owners say it is from not being used every day like a car alternator.
- Some motorhome folks say we need a larger one than what originally came in our rig, and to stop replacing it with the same size.
After the third one went out while down in Florida last winter, Steve even tried to rebuild it, but that didn't solve the intermittent charging problem either. It would fluctuate and not charge steady. Then he ordered a fourth alternator while in Florida to bolt up just so we could get home. That burned out in just 100 miles on the road.
Obviously, that still didn't solve the problem so we ran jumpers from coach batteries to chassis batteries to get home. We ran the generator the whole way for 1,300 miles. Whew.... And I might want to mention also that the inverter which changes our coach battery power from 12 volt DC to 120volt AC was acting goofy too.... Hmmmm?
This leads us to a sub subject also starting with the letter A is
Access to Our Engine Compartment:
When Steve does this kind of work, we are fortunate that our whole king sized bed lifts up for access to the engine compartment. Motorhomes with bedroom slides usually only have trap doors and acceess holes to reach things from above the engine. That is why many semi truck places do not want to work on motorhomes, or charge a higher labor rate per hour. We do not have a bedroom slide out unit, so our entire king bed lifts up insead.


The compression struts have long ago given out, so he lifts up the bed and also supports it with an extra prop pole that is really a cargo retaining rod for delivery trucks (found at Harbor Freight around $15)


Okay.. back to the alternator and what we found out was REALLY the problem....
Once we got home, we chatted with a local guy who rebuilds alternators. He said we should replace the alternator again with a brushless larger one, they run in the $300 range but he had one on the shelf for $160. He said all the semi trucks with Cat engines were going to this one. It cost more but we decided to try it.

Since the fourth alternator was a fairly newly rebuilt, we were perplexed as to why it was not putting out enough amps. It was intermittent, sometimes 12 or 12.5... and other times 13 or higher. He said he would bench test that one for us.... and hooked it up. I got to watch and learn. It was not putting out a charge of course. He took off the rotor section to test and the regulator was shot as well as some other parts inside. All the diodes were burnt right off, like over fried from something back feeding!
He said to go home and test our isolator. That is an electrical unit that splits the power from the alternator and sends it either to the chassis batteries or the house batteries, but doesn't let them bleed over into each other. Well, Steve bypassed the isolator on the chassis battery post by putting all three wires onto one post just to hold them together.
BINGO! that was it! The isolator must have been malfunctioning and back feeding into our alternators and burning them out. The rebuild guy said that is how the others got fried. It made sense.
Nobody locally carries isolators, so we had to place an order on Amazon to get one delivered in a few days.
Here is the old isolator... it is mounted on the wall in the engine compartment which is open to the dusty road and dirty diesel engine. That is probably 20 years of accumulated dirt on it. LOL...

NOCO IDG200HP $55.27 from Amazon


Steve hooked up the wires and double checked and triple checked each one....
- 2 wires on the left are to the chassis batteries and solenoid boost switch on the dash...
- (next post is skipped)
- the center post is the alternator and the engine clock.
- The far right post is for the chassis (house) batteries.
Everything is working properly... even the inverter!
Whatever was back-feeding with the old isolator is now corrected.
Whew.... and since then everything has been fine as frogs hair.
Here is my third A hint:
Awning Arm Trick for Cleaning:
Awning Arm Trick for Cleaning:
Cleaning an RV awning is not a fun job, but it needs to be done a couple times a year. We found out this little trick for making it easier. Of course you can lower your awning like this to scrub the underside.

But here is the trick to reach the topside. Unhook your awning arms where they attach to the side of the rig. Now carefully lower them down so they can slide underneath the body of your RV!

Now you can easily reach the topside surface, scrub it with a long handled broom or
brush on an extension pole, and easy to spray off with a hose!

P.S. We clean our fabric awning with mild car wash soap.
Some folks with the plastic coated awnings find that
Bleche-White automotive tire cleaner works well for them.
Some folks with the plastic coated awnings find that
Bleche-White automotive tire cleaner works well for them.
~~~~~~~~~
Our motorhome has a 50amp detachable cord for power. This handy dandy adaptor allows us to plug into our 20amp in the garage when parked in our driveway, but not have to keep our thick big black 50amp snake cord sitting out in the open. Sure, we could just adapt it at the other end and leave the thick cord out... but we had a rash of copper thefts going on in our rural area. This adaptor and orange cord are a bit cheaper to replace than the big black snake. (One Wisconsin RV dealer had all the recessed type cords pulled out, cut off and stolen from all the travel trailers on his lot)

AWNING LOCK:
A lot of folks have had their awnings unfurl when driving in windy conditions. The arms stay upright but the awning will unroll right up at the top roofline and billow out off the side of the rig. ACK! Happened to my folks last year on their way back to Florida, and had to repair in the windy cold dark night. Soooo we made this awning lock similar to one we saw on RVnet. The forward side of our roller already has a lock on it, and the back side here in the photo has our extra rod stuck into the awning roller as an extra safety precaution.


AWNING LIGHT CLIPS:
Our awning is made of a lightweight fabric, and does not have a thick hem like most vinyl awnings have. So the good ole clothespin clamps don’t work on the thin fabric types. They slide right off. I found these metal two-ended clips in the Camping World catalog. The are very similar to the little clips we used to hold our childhood mittens to the cuffs on our snowsuits! I have 16 of these to hold on our tacky lights when we do camp with electric hookups. I think they came four clips to a set for under $5 each


BOARDS FOR LEVELERS:
Our motorhome has three hydraulic levelers. The center front one is located quite a ways in between the front tires. By holding the end of the rope, he can just give it a kick or push back under the rig as far as it can go, and then slowly pull it forward till it is lined up with the jack! Lot easier than getting on the hands and knees and trying to position a block way back under the jack. We are often camping in dirt or gravel, so these blocks also prevent the leveler from *setlling* so quickly and making a divot in the dirt and commence rocking again. Also nice to use these if stopping in a friend’s driveway or to boondock on blacktop to prevent divots in their surface.


Backup Camera Monitor Replacement:
We are up to the letter B in my files of Motorhome Modifications. This one is about our backup camera monitor. The camera is working fine, even at 20 years old, and is located behind a little glass lens in the rear cap. Access is through a rear cabinet over our bed. We did replace the glass once, as the previous stuff was a plexi plastic that was scratched up. We use it to check on the Tracker as we tow it down the road, or to check while backing up into campsites. Even while parked, we use it as a security set of eyes when boondocking and we want to see if someone is back there.

You just KNOW that Steve has to make a change to it, don't you? He removed the tv and the cabinet. He cut it down from the top edges to make it the same size as the other cabinets across the front of the rig. A fellow Safari-owner had an extra smoked plexiglass door for us to cover up the existing hole.
No More ''Head Banger'' !!

We bought a lighter weight flat screen tv we hung from a bracket over on the side of the living area instead for better viewing than in the original position.
That leaves us with the dilemma of how to view the backup camera, since we removed the monitor source from overhead. Steve rerouted the cable down from the top cavity along the padded covered windshield side post. He found this great little LED monitor that runs off DC power from Amazon for $50. Easy peasy!

We positioned it between the two dash consoles.
We can swivel it for either the driver or passenger to view it.
I seem to use it more from the passenger seat
to check on the Tracker being towed behind
to check on the Tracker being towed behind

We try to keep things neat around the doorway and avoid clutter. With two dogs, there are always leashes, tie-out ropes, toys, brushes, and gear laying near the doorway, along with our moccasins and flashlights.

CAMPING MAT
I bought this camping mat about 15 years ago and it’s been just wonderful for us. It’s similar to the rubber shelf coating, but much heavier and does not rip or tear. Sometimes we spray it down with the pressure washer on a concrete slab to perk it up. We fold it up and stuff it in a heavy duty trash bag for storage. It’s been used almost every weekend in spring, summer and fall. With kids, dogs, and chairs set on it and not one hole anywhere.

CAMPING SIGNS:
This is the only thing Steveio got outta his divorce from his first marriage. Of course she didn’t want it, as she didn’t have that name anymore. To top it off, his folks had originally bought it for them, so she REALLY didn’t want it anymore LOL! I spruced it up with new paint and varnish, and added our first names too. I laid *claim* to the sign, his name, and him! Her loss. The folks are glad we have the sign now.
(in this pic, that is Steve’s folks fiver camped next to us, so we put the sign between us, seeing as we are both Pfundtners!)

This camping sign was from one of our kids, and it goes up on the awning every time.

CUP HOLDER:
Lots of folks are getting these type of *zero gravity recliners* and the camping stores recently started getting these removable swivel tables for them. The bracket clamps into place and stays on the chair frame, even when folded up. The angled brace and tabletop set into place once the chair is unfolded. It can swivel out of the way, and stays level even as the chair is reclined or set up into any position. Recessed cup holder and large area is big enough for a dinner plate. It’s great for my knitting, my scissors, and my glass of wine! It was an xmas present to me from Steveio, so we had to bring my chair into the house to try it out!


COLEMAN SMALL LANTERN:
I don’t think we have broken a mantle yet with this lantern, compared to the big two mantle versions… heck we even break a lens on the big ones a few times a year. Not with this little one though. They are about $15 and the nicest little lantern we have found!

CLOCK:
Our motorhome has lots and lots of windows, and very little wall space, even for a clock. So we did the next best thing…. The front three cabinets in our rig are smoked glass with stereo and tv electronics behind them. So it was easy to mount the velcro to the glass.

CONTROL SHIFT PAD COVER:
Steveio made this cover from molding hard plastic. We have read of instances where a pet stepped on the Alison shifting control pad and put the motorhome in gear. We make an effort to always use the emergency brake too. But all it takes is one time, for an accident to happen. Now we ALWAYS flip this down over the panel.

We decided to remove the two couches in our rig.. for a while we did a few recliners, but they took up a lot of room. Then we found a reclining wall-hugger design loveseat by LaZyBoy. It was delivered in three pieces, the base and two back rests. They snapped into place and done!


Well, that is it from A-C…. next post will start on my modification photos from D to ?


Found you just by chance - I was researching how to keep interior step covers in place.
ReplyDeleteI have a '96 Green/Silver Safari Sahara, 36', and have lived in it full-time since 2000. Very happy - can't imagine going back to a house.
I have also made some major changes: carpet removed, wood panel flooring. Painted inteior cream, removed window coverings and valances and had 2" real wood venetian blinds in antique white (faux wood tends to sag with these big windows). Removing the valances and sides made the rig appear to be SO much wider! Rather than the green interior, I now have all cream with turquoise throw pillows, etc.
really enjoyed your blog and have noted your improvements and ideas-if you get a chance check out our blog-our first trip in MH and sparked the new hobby-will be doing more of the same in the near future-Rich & Audrey-pauperspride.blogspot.com
ReplyDeleteLove the basket by the door idea. The mat! Where did you get that? Gotta have one.
ReplyDeleteEnjoying your blog! THanks for sharing!
-ella