Our Wonderful Followers who come back again and again to read about us...

Tuesday, July 30, 2019

Let There Be Light - Windows - Steps - Beets - Dogs and Fish

Life has been a flurry of grandchildren visits. We are so blessed to have our grandchildren nearby and able to watch them to help out the parents when the need arises.

Here is a YouTube video clip of our grandson Mason catching a monster fish when he came to spend the weekend:


We've been having so much fun alternating between the grandkids' visits, working on projects with them, and taking them places for some fun.

I love the sounds of clump clump clump up the front porch steps and a bang bang bang on the door as I look at their smiling faces shouting "Hey Grandma and Grandpa, we're here!!!"

~~~~~~~~

One of the items we have been meaning to get done on our National Folk Farmhouse is to add some exterior lighting. Especially around the garage. We decided to install some motion flood lights on alternating corners of the garage. That way the bulbs can aim in each direction and completely cover all four sides of the garage.

We picked up some motion-detecting units and some LED flood bulbs. Steve got to work mounting them up in the corners of the eaves on the garage.


I know motion detector lights are not the most beautiful, but we did manage to buy white ones that will kind of blend in with the rest of the garage trim, soffits, and fascia.


We waited anxiously for the darkness to fall, and then sat in the partially finished she shed looking out the windows. There was nothing moving out in the backyard so Steve finally went out there and walked near the lights so they would fire up.


Ahhhhh Let There Be Light!!!

I think this is going to be especially nice in the winter time. I love sitting at night and looking out at the snow falling, as it's reflected in the exterior lights. When we lived in the log house on North River Road, we had exterior lights on the outside of the patio doors aiming outward. It would reflect on the snowflakes falling down and make such a beautiful sight, reminiscent of a snow globe.  Bring on winter?

~~~~~~~~


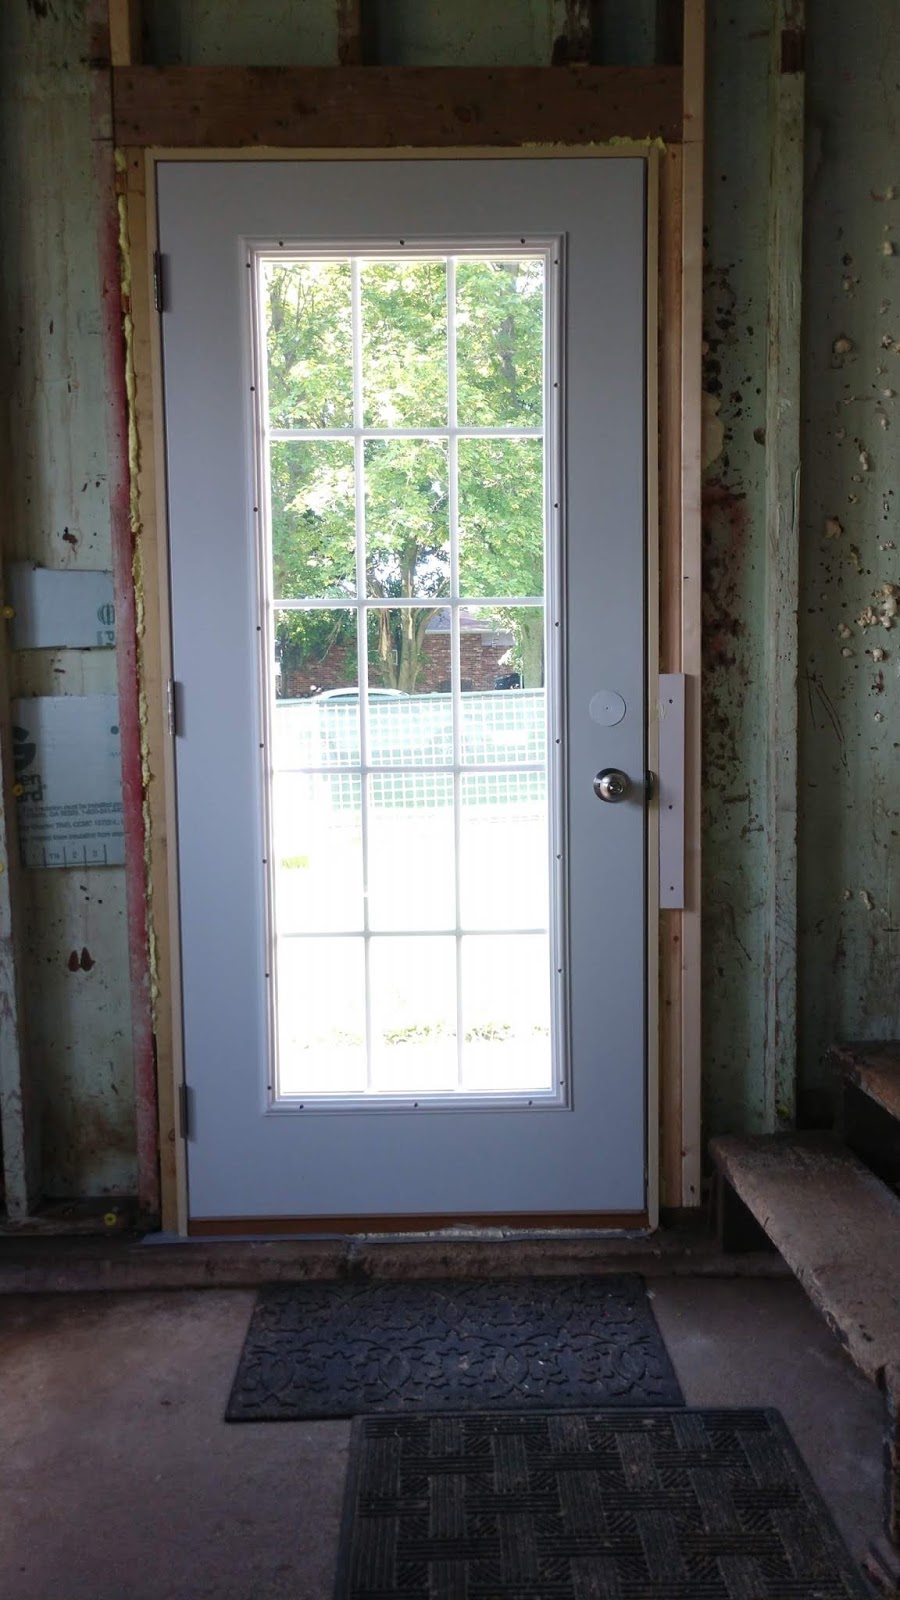
As for the She Shed, our next project was installing a little window near the top of the stairs that leads into the kitchen.  This is a really odd shaped window. It was only single paned glass and an old wooden frame.  It needed to be replaced with a thermal-pane or double paned window.  We measured it up and inquired at Menards about having one special made to fit the space. Ack!!! $290.00 I kid you not.

We managed to find one at Habitat for Humanity ReStore that was for $20, but it was also their 75% off sale on all windows and doors. So we got it for five bucks! it wasn't quite as tall as we needed for the space there would be an extra inch on the top and the bottom. It is a nice high quality window with the same matching grids between the glass.  It cranks out in a vertical method, but we needed to mount it horizontally, like an awning window.  Hey, that's okay, Steve would make it work.


With Steve working from the outside on the ladder, and myself on the inside holding it and placing the shims until we had it level and plumb. We make a good team and figure out how to make the best with what we have.


Soon he trimmed out the window on the exterior and I was able to give it a coat of paint before it started to rain. It's best to get the wood sealed in and not have it absorb any additional moisture.
This morning I went back out and gave it a second coat of paint, as well as touching up all of the other windows that we have installed so far.


~~~~~~~~

Steve is gone today, helping his brother Pete on a garden shed at his house in Menasha. Steve, Pete, and their brother Mark are all working together to make their garden shed a pleasing feature in Pete's backyard. Brotherly love.

I worked on some projects myself while Steve is off doing these other adventures.

Since we are not able to move the front steps, due to a crazy new city ordinance that won't let us put anything new within a 25 ft setback of the road, we had to leave the steps where they already are. That means they are grandfathered in where they are at right now, so we will make the best of it.


I painted the wood of the stringers a matching red. Then I gave the existing stair treads two good coats of the grey oil deck paint.  I added bit of red to the pipe underneath our mailbox. The box is already a nice matching gray. I'm considering some pretty lettering on the side in red to put our name and house number on it. That will be another project for another day.


~~~~~~~~


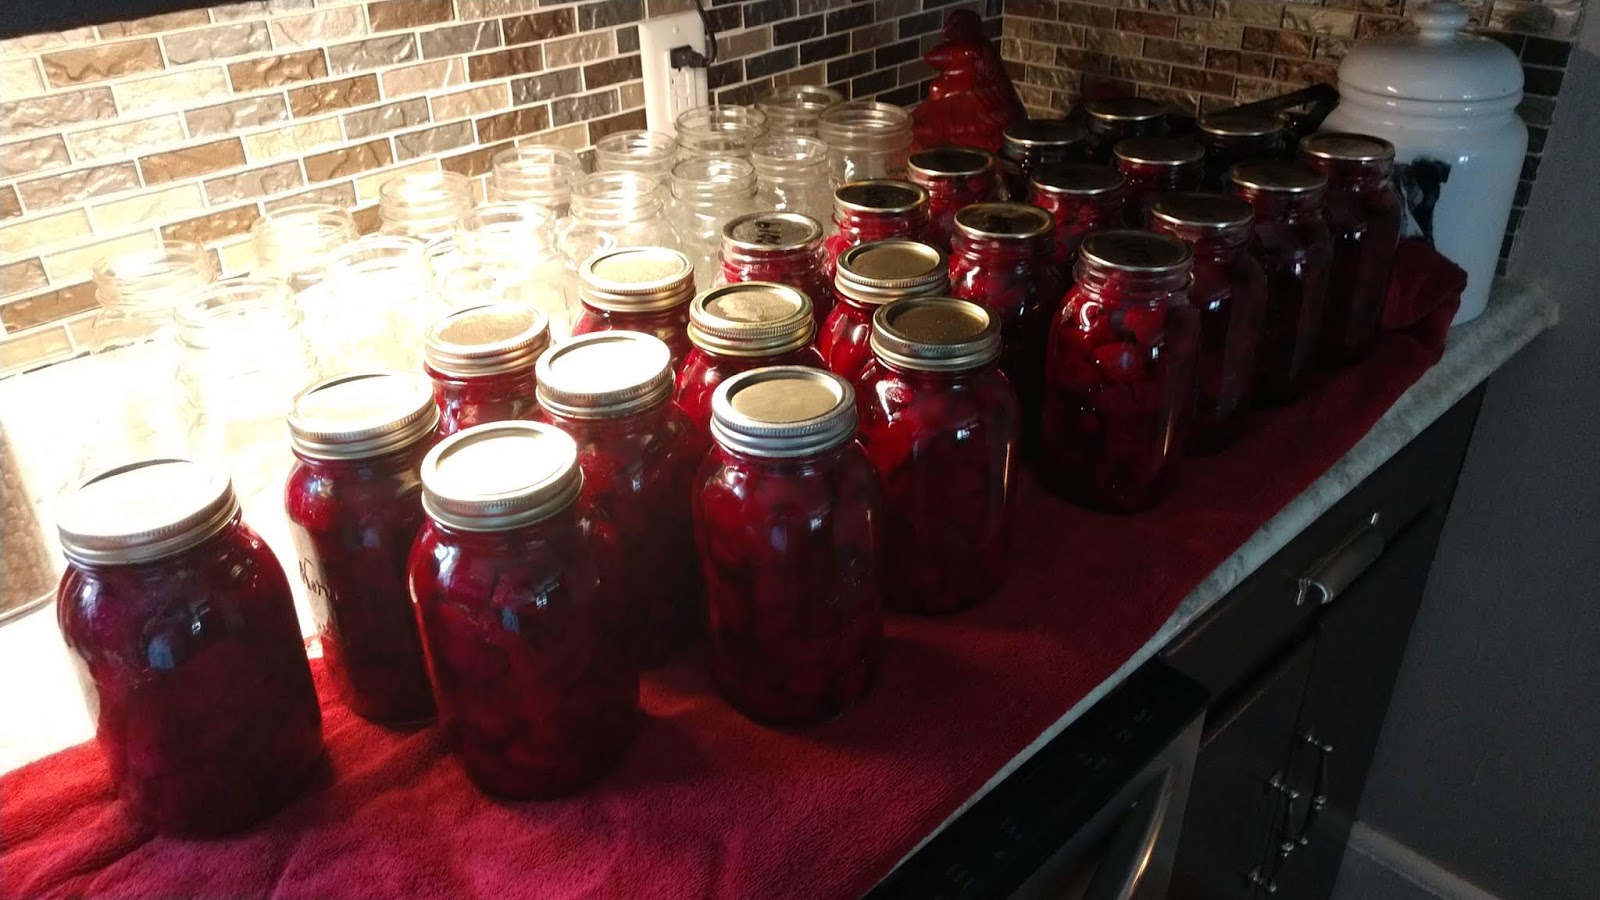
I accomplished another thing last week. I ordered up a bushel of beets from the truck farmer on the corner by the grocery store in Oconto Falls.

I love to make pickled beets, using my mother's recipe that never fails. Year after year I make the same ones, and year after year they always turn out great.


I have childhood memories echoing in my head of all of the years I learned to can fruit, vegetables and make pickles and sauerkraut at my mother's side. We had a large family and not a lot of money. We also had a large garden. Everyone had to pitch in and help. My father would also haul large bags of vegetables or cabbage or potatoes back from a place called "The Muck Farms". It was a large commercial growing place that would sell their seconds, the ugly or misshapen vegetables, at a discount. We would buy huge quantities and can them up and sell excess produce to our friends and neighbors.

I remember standing alongside my mom in our sweaty hot kitchen, humid with the moisture from the boiling canning kettles on the stove. Washing jars in hot hot water to keep them clean and boiling the lids for sanitary canning. Why is it always the hottest part of the summer when vegetables come into season and are ready to be harvested and preserved?? Lol.

We would work for hours cleaning, scrubbing and cutting up vegetables. We had many many shelves in the basement with multiple rows of jars that would be filled up by the end of Summer. With a large family, it was so handy to reach for a jar off the shelf in the middle of winter and pop it open to add to a meal. Stewed tomatoes, sauerkraut, and all different types of vegetables lined the shelves, including things like pickles, jams and jellies, and mom's famous pickled beets.

I distinctly remember Mom standing with a smile of satisfaction on her face, surveying our rows and rows of finished products lining the shelves in the basement. And one time she said to me, it echoes in my brain, "My oh my, aren't we rich!!"


Back to my canning day:

I started cooking up a couple pounds of beets at a time in my tall kettle. I started doing them in the house on the kitchen stove.  It was hot outside, but I had the central air going, and a big hood vent to help with the steam.


The beets need to be cooked up enough so that the skins "slurp" off, as my mom says. Then I can cut them into chunks and fill the jars with pieces of beets and then ladle in the hot brine.


Once the jars are capped off with lids and rings, they are set in a hot water bath in a canning kettle on a slow simmer for 35 minutes. By the time I finished the second batch in the house, I was battling the central air.  It was running non-stop and not keeping things cool. It was in the 90-degree range outside and the humidity levels were atrocious.

Steve came home, and I asked him to set up the outside propane burner unit. It's actually for deep frying a turkey, but we use it for steaming crab legs, dyeing wool, or putting my canning kettle on to simmer.

Doing this task outdoors was a lot easier. I would simmer up a pot full of raw beets until I could slide off the skins. Then I would switch over and put on my canning kettle to simmer the next batch. My canning kettle holds seven jars at a time. It took a couple batches to finish up the rest of the bushel of beets.


Look at that!
 "My oh my, aren't we rich?"


~~~~~~~~


To finish up the blog today, 
here is a little YouTube clip 
we made of the dogs 
out enjoying our big big backyard....


Stay tuned to our next project 
on our National Folk Farmhouse.


Monday, July 22, 2019

When A Door Closes - We Just Add More!


We've made it through that miserable stretch of hot humid weather. Today is a gorgeous summer day in Wisconsin with temperatures only into the low-to-mid 70s. The humidity has dropped. And things are starting to feel normal again.

In between family commitments this weekend, we were able to cut out an old rickety door that leads to the doggie potty yard to the South.   We ordered a second door that matches the one we put on the north side of the She Shed. It is insulated and has a 15 pane grid between themopane sealed glass panels. It will let in a lot of light, but has low E glass to help protect the items inside, since it is facing South. 

Steve cut out the old framework and added a new header to make sure everything was up to code.  It might not be required on a non-loadbearing wall, but he put one in just to be safe.


In no time flat he had the new door plum-d and shimmed and into place.  This one went quite easy, and he will trim out around the outside once the sun moves to the west and he can work in shade.


Now that we have the new door on the South wall installed, we also put up an old fashioned screen door. We bought the wooden screen door and I painted it up so it would look ever so cute on this National Folk Farmhouse. I will add some curlicue bric-a-brac pieces to the corners when I find them somewhere. 


We installed the screen door into place and then we added a nice old fashioned noisy spring so it makes that obligatory sproinging sound and the big "whap" as it slams shut.  Nothing says "SUMMERTIME" as well as the sound of the banging of a screen door. We had one similar to this on our log house out on the river years ago. I just love it. We also added a door sweep to the bottom to keep the bugs out. It's just one more step to making my She Shed a pleasant place to hang out.


This afternoon, Steve has started building the temporary wall along the east set of windows. The temporary wall will hold the roof up, level and even while he works on the window opening. He will be adding a big header beam, up to code, and then we will install two insulated floor to ceiling French door panels to act as windows.


It's going to be exciting to say the least.

I keep looking out these rough and rugged single pane garage door windows at the beautiful view outdoor in our backyard facing to the East. I can't wait until someday when they are the full complete floor-to-ceiling windows to enjoy the entire view.


~~~~~~~~~

Now to catch up my blog on some of our past projects we have done on the house during my hiatus of not blogging for over a month.  We were busy!

This is one of the projects we worked on:

Many people who work in construction know that nowadays new dimensional lumber when it's called a two-by-four is really only 1 and 1/2 inches by 3 and 1/2 inches. It's not really 2 inches by 4 inches anymore. Why do they do that? It's still called a two-by-four??

Since our home was built way back in the old days, when boards were really two inches, the spindles on our front porch are also made from two inch lumber. They are a sturdy 2 inches by 2 inches.

When we bought the house there were a number of missing spindles. We moved a few around to make it at least visually symmetrically balanced but we had big gaps. We decided it was a good idea to finish filling in the gaps for now. Somewhere down the line when we replace the entire porch railing, it will have to be newly created up to code and made taller. For now it's grandfathered in for the height it is at.

When Steve removed all of the framework of the west She Shed wall, he was removing the single garage door, he saved all of the original two-by-four wood around the opening. Some of the bracing for the shelving up above the door was also made from real two-by-four wood.

Re-purposing!

Now we were able to cut spindles that were actually 2 inches by 2 inches by running these old boards through the table saw.  Steve cut them up and I got out my little saw horses and my paint roller and went to work. Everything got two coats of paint on all four sides.


Soon we were able to fill in all of the gaps. 
Using a little spacer, 
we placed them in as symmetrically as we could.


Ahhhh that looks so much better now!! 

Almost done in this pic. 
Just a few more to do on the side
 by the new little trellis.


The added benefit is that there is no chance of some sassy little dogs deciding to dive off the front porch from in between the missing spindles.  They get a little excited when people walk by, or bikes riding past the house...  so we keep leashes on them while sitting out there, to grab them just in case.


Finnegan kind of looks like a 
cow in a stanchion. 

Got Milk?


So that was it for the newest projects to the front of the house. Since we are not allowed to move the front steps over to line up with the front door (per a new city ordinance that won't let them be constructed within 25 feet of the road)... now I will paint the steps where they are, and just leave them for now.


The front side of the house should pretty much be done.


In the backyard we did a little something too.  We have this white portable metal fence set up from seven mesh display panels. We got them from a grocery store that was going out of business back in Chilton. The panels are wire tied together to make a portable play yard. There are no fence posts into the ground. It just sits there and we can move it around a little bit in either direction to mow the lawn that grows up around the edges. Our dogs don't jump on it and don't lean on it, so it just kind of sits there in a big semi circle. Each of the ends just kind of butt up to the corners of the house. It makes a great way to surround a small area of our back door for a potty yard.

We discovered one problem though. Our very nice neighbors have two dogs. One who is a very large Great Dane named Oliver who is just under a year old. The problem is that if our dogs are out in their little potty yard, and one of their teenage daughters attempts to bring out the Great Dane Oliver on his leash for a potty break, our dogs bark bark bark at him!

Oliver then proceeds to rush over into our yard to the fence to get nose-to-nose (in a friendly manner) with our dogs. The problem is that he is dragging their teenage daughters, literally, on their bellies, across the lawn from their yard to our yard. Dog Surfing!!!

We feel so very bad about that! We tried to notice as soon as they are coming out to let out their dogs in their yard on leash, we try to get ours corralled up and rushed into our house quickly. But that doesn't always happen. I feel so bad that the two daughters who are getting the rough end of the deal. We've apologized to them and try to make our best effort to keep our dogs from barking, which is enticing their dog to drag them over here.

Finally we came up with this next best idea. We bought a roll of four foot high screening that we found in the fencing department at the local home improvement store.


The grandkids were over and helped us roll it around the outer perimeter of the paneled in fenced area. We wire tied it down onto the mesh and it really seems to be working.

Our dogs are less inclined to bark if they don't see what's going on next door. We all have very large yards so ours don't really hear them --- it's only when ours see the dogs that they start barking.

It's been up for a week now and I really think it has helped.


Our sassy puppy hounds don't get as distracted now when they are out doing their thing. For now this will work. Maybe later we will consider putting up a permanent privacy fence in a small area. We could never afford to fence in our entire yard which is 2 1/2 acres. But this might be a good alternative for now.


Here is a big backyard shot from the south side of our property. 
So you can get a good idea of the layout.
Then it extends to the east for another 600 ft or so to the right of this photo.


Ahhhhhhh
this is our Big Backyard!


I think it's time to get this blog done and get some supper cooking. It's so beautiful out I think we are going to do barbecued ribs on the grill. We stopped at the local truck farmer who sells vegetables on the corner and stocked up on good Farm Fresh veggies. I ordered a bushel of beets to pick up tomorrow.  I can maybe make some pickled beets in my canning setup if the weather stays cool.


Friday, July 19, 2019

Heating Up and Cooling Down - Next Phase of She Shed

Aaacckk!!! We are miserable in this horrible heat and humidity that is engulfing most of the country right now. As I type this we are at 88 degrees with a heat index of 98. That's hot enough, thank you very much. In the meantime we are staying inside and not working at all on our She Shed.

Ahhhh but I can still write a blog! This is a preview of the upcoming attractions!

We just got our building permit approved for the rest of the work that we are doing on the exterior of the She Shed. This garage room conversion is going to be my studio space. It will hold my weaving looms, quilting machine and frame, my sock knitting machine and spinning wheel, plus a little sunroom area looking out to the East over our big big backyard.

Some time back among the previous owners or renters, somebody had covered some of the walls with a buffalo chip board material. Around the edges was some grey flannel felt and we were thinking it might possibly be insulated behind there. Now it was time to rip it off to see. Nope. No insulation. But that's okay, we are going to insulate the ceiling and the walls and finish them off with a nice clean fresh drywall or tongue and groove carsiding.  We will see what the budget is like when we get that far.

But before we can really think about walls or ceiling we are going to put in the new windows and one more door to the far right in the photo below. That exterior door will lead out to the doggies' potty yard. It matches the one we just installed on the other side of the room. It will be a full insulated glass with little French pane grids in between the layers. We just picked up a cute old fashioned wooden screen door that will also go there on the outside, to let in fresh air but keep the bugs out.

This will be our "BEFORE" picture:

The two sets of junky old garage windows that you can see in this photo above will be coming out soon. They are just single pane glass and in very rough shape.

In their place we are going to put something really cool. After the headers are installed correctly, up to code, we will be placing these large panels of heavy insulated Anderson French exterior doors. We bought four of them brand new in the boxes that were a custom order that someone never followed through on. Another guy had bought them to use in his house and never got around to doing it either. So he sold them on Facebook Marketplace to us. They are a bit shorter than the normal 80 inch tall doors, so nobody wants them. After wheeling and dealing a little bit we ended up with them for $20 each!!! They retail for $800 each online!!! That means Steve found over $3,000 worth of doors for $80.

Steve will frame them all around in place as stationary window panels unless we decide to make them as opening doors. We really don't see the need to make them open up.  Using them as windows will work well too. They even have weatherstripping built in on all four sides. We do have the special brand specific hinges that correspond to these doors, in case we change our mind and make them into operating French doors.

Here are pics from where Steve set them into place. The two doors take up the same space as the three windows in both Eastern facing sections of the She Shed. After framing around them properly, they should fit perfectly!


They will reach almost from floor to ceiling and give the most beautiful access view out of the back of the She Shed. The view out into our backyard is one of the main reasons we picked this house to live in. 2.5 acres of beauty with a nature conservancy behind us (never any backyard neighbors) and lots of deer, turkey, foxes and a few coyotes we are told. 

This little scribble drawing from my phone gives you an idea what this East side will look like. Once we cut away the excess wood underneath the existing windows, we will have enough of the cedar shake siding leftover pieces to repair other damaged areas of siding.


On the inside, here's another scribble drawing that gives you an idea of how the windows will be from just about the top to just about the bottom. I can just imagine the dogs laying on their little ottomans in front of the windows, looking out at anything they can find to bark at.  Thinking of night time with back yard flood lights shining out to find the elusive deer and foxes, or maybe snowflakes falling softly while inside we will be cozy and warm. I think we will be spending a lot of time in the She Shed. 


There is one other little tiny window at the top of the stairs leading into the kitchen. It's an odd shape of 41" x 21". We inquired at Menards about having a small window custom-made to put in that spot. Holy cow! They wanted $290!

We had stopped by the Habitat for Humanity ReStore in Marinette. Their ad said they had 75% off all windows and doors. You just never know...

OMG! We found a used window that was 39 in by 21 in that will fit that space with a 1-inch spacer on each side! It is a very high quality Pella window with insulated thermal pane glass with the little pane grids in between just like all of our other entrance doors and French windows! It's a vertical casement crank out window, but we are going to mount it horizontally in the opening.

And the price of this bargain, you ask? Well! It was marked at $20. And then with the 75% off and brought it down to only $5.00 --- Score!


Okay. That was the preview of coming attractions. Once this hot weather settles down we can get out there and get started on some of those things.


~~~~~~~~


Right now, on the inside, Steve is finishing up the last few details on our laundry room half bath conversion that we started last month.

Originally the only bathroom to this home was in this room. The previous owners removed the toilet and sink and just had a washer and dryer in there.

Instead they had made a large bath with master access out of the third bedroom space, so they figured they really didn't need another bath. They wanted a first-floor laundry. I could see that making sense.

But we could also see the convenience of having an extra half bathroom in the house as well. Steve agreed.

The other thing that we wanted to do was to change was the entrance into that laundry room. It was located on the longest wall of the dining room. I wanted that full span of wall to set my large buffet against. So Steve figured out that he could close off that existing doorway and make a solid wall for me. Then he would make a different entrance to that room from the kitchen.


Here is where he closed off the wall and studded the opening, adding sheetrock. After that was finished I painted it to match and he added new trim baseboard.

Voila! My buffet now fits
 in a place of honor
in the diningroom.


I love having a large formal dining room that can hold both my buffet and my hutch. Plus having the dining table spread out with both leaves and all eight chairs around it. Perfect for family gatherings and much better than storing chairs and leaves in closets or in other rooms of the house.


A new doorway went well in the space in the kitchen. This is the space where the gas cooking stove used to be. The previous owners had removed the stove and installed a new electric one in the middle of their island that they created. This awkward space was left behind with cabinetry over the top. The top cabinet we are going to re-purpose into a coffee bar later. It's waiting in the garage for another day.


A little creative weaving in with spare pieces of hardwood flooring matched well. Then an oak threshold spanned the space into the half bath. I still have to stain it and poly seal it to match the rest of the kitchen flooring.


The laundry room half bath flooring was in pretty rugged shape. We decided to cover over it with some of this snap together vinyl plank flooring. Our son-in-law Waylen and daughter Erin put this in her bathroom and kitchen as well and it holds up wonderfully with kids and dogs.


Look how easily it snaps together. No gluing no nailing. It's a free floating floor that just sets into place. Then you put the quarter round trim back on the edges which holds it down.


Next on the list was to add some cabinetry over the washer and dryer. We looked at a few home improvement stores and they wanted $100+ for a utility cabinet. We figured we wanted three cabinets across the entire span of the wall over the washer and dryer as additional pantry space.  Ouch.. $300.00?

Back to my Bargain Hunter Steve. Somehow he ran across a Craigslist listing of someone who had some office cabinetry to sell. One of the cabinets is exactly what we wanted for the laundry room! The deal was for $100 we had to take all of it. That's okay. For the price of what one utility cabinet would have cost us, we will now have a full span over the washer and dryer. The rest of the cabinetry will be re-purposed for in my She Shed.


They needed a couple coats of paint, because they are butt ugly!!! There are two lower filing cabinets, a center island desk type cabinet with angled ends, a big half circle piece of laminate countertop, and then a half pony wall with a counter on top of it as a kind of registration desk surface. Just wait to you see what I have in mind for that!!


We hauled it all home on our cute little trailer and the rest of these pieces are stowed away in the garage until the She Shed is done. The cabinets are solid wood and very heavy.

I got out my palm sander and roughed up the surface a little bit. Then a coat of primer and two coats of paint transformed the butt ugly cabinets into a nice row of heavy white wooden cabinets. 10 times better than the junky utility cabinets at the home improvement store.


We put the laundry room back together and suspended the cabinets up over the washer and dryer.  Once they were in place, we screwed the doors back on and Steve added shelving inside at the heights that we wanted for our laundry items, pantry items, and a dog food cabinet.


The half bath laundry room also had a really crappy single pane glass window and a piece of plexiglass over it.  Luckily, it was a common size and did not cost us an arm and a leg for a replacement window.  It went in easily and Steve trimmed it out neatly. It has a nice wide window sill and I put up our little cactus garden from a vacation to New Mexico. It won't get bumped on there and it's up out of reach from the grandchildren.


Now it was time for the toilet and the sink. Since this was already a bathroom, all of the plumbing was right there underneath and Steve just had to hook things back up.

We waited for this adorable little sink to go on sale. It's just the right size for the room, and still allows us to open the dryer door easily.


Now, isn't that the sweetest thing you ever did see? We re-purposed the faucet from replacing the sink in the master bath and it sure looks cute in there.


I also added a sturdy white enamel metal shower curtain rod across the room, just in front of the washer and dryer. It does double duty.

First, it is handy for hanging clothing on hangers as we take things out of the dryer. Most of our clothing goes up on hangers as we don't have dresser drawers. Socks and underthings are kept in fabric bins on the shelf in the closet. Makes for a bigger more roomy bedroom, and less clutter being dumped on top of a dresser!

The second purpose of the shower curtain rod is that with the shower curtains, they can be pulled across the washer and dryer when we have company. Then the bathroom appears to just be a full bath with a shower/tub combo.


The washer and dryer are spaced apart which allows the heating/cooking register vent on the wall behind to circulate into the room unhindered. A laundry basket slips right down in between the washer and dryer in a handy position while folding clothes.


As I type this, Steve just finished up the connections for the little sink. Good "inside" project on a sweltering hot day.  The temps came down a little, not a lot.  Staying inside and eating cool foods for supper.