Our Wonderful Followers who come back again and again to read about us...

Showing posts with label next steps for she shed. Show all posts

Sunday, November 17, 2019

Stairway To Heaven

We are almost to the end of the blog posts on the transformation from the attached garage and mud room into my she shed.

This post has to do with the stairs. The original stairs were quite rugged and worn. They were not spaced correctly for the the riser height or for tread length to correctly fill the span. The top step and the bottom step had huge unexpected drops (and were dangerous).

Steve re-measured, recalculated and made new stringers and built new stairs. The stairs have been in place for a couple weeks but we knew we needed to get railings up to comply with code, as well as to be safe when the little ones were over.


After scribbling a few ideas on paper, we decided we would put not only one railing along the outside of the staircase, but we would also add another railing along the white wall side. Not only is it a bit safer, but it may encourage the grubby handprints of children to stay on the railing instead of being dragged up and down on the white plaster wall! Lol...

We bought some nice heavy duty silver railing mounts and a 12 ft length of unfinished handrail.

I gave the railing a couple good coats of grey oil enamel paint, to match the stair treads. We cut it in half so we would have two 6 foot long pieces. Steve mounted the one on the wall first.  It came out perfect.  Then he worked with mounting the big 4x4 end post, securely attaching it to the stairs.


Then he made up side slats that could make a good sturdily constructed railing.  Getting the angles cut to meet with the walls was a bit tricky, but we figured it out together.

He added a middle slat for little kids hands to grab onto. We informed Whitney and Claire that that middle railing was made "just for them" by Grandpa.


Underneath the stairs is the cutest little Cubby Hole. 

I mentioned in yesterday's blog that when I was a child growing up, we had a cubby hole under our stairs. It was a great place to hide and play. My mom also stored her sewing machine in there. Plus we hung up our snowmobile suits and had a big box of mittens and hats near the entrance. It was larger than this cubby hole, I still have fond memories of crawling in there to hide behind all of the things. Like a secret getaway hideout.

While we were working on the stairs, the dogs thought the Cubby Hole was a cool spot to hang out.


I put an extra doggy bed to put under there and thought it would become their own cute little hangout spot.

But once we moved the comfy porch furniture into the she shed, they gave up the cubby hole and decided that they would prefer to spend their time in comfort on the cushions.


The grandkids, 
on the other hand, 
think it's just the greatest place ever!

We put down an old southwestern saddle blanket and a couple big hunks of comfy sheepskins. Toss in a few pillows and they are all set. We gave the grandkids a couple of flashlights and let them go in there and read books, giggle and play!


Who? Us? 


We need cookies PLEASE! 


Reading Stories 


Even some time on Grandma's Tablets


So the stairs are complete, and they are truly my Stairway To Heaven each time I walk down them into my wonderful She Shed!


~~~~~~~

One of the other projects we did this last month that really wasn't in the she shed, but it did involve the ReStore. So I thought I'd write about it here:


Early in the summer I bought a cute little light fixture for the front porch while we were shopping at the ReStore. I gave it a fresh coat of red paint so it matched the shutters. Grandson Jameson helped to mount it up on the front porch. It was so cute and adorable and I just loved it.


Fast forward 2 months later and we go walking into the ReStore. We've gotten friendly with the lady who is usually there and she said "Look what I have for you!"  There were THREE more light fixtures that matched that original one we bought for the one on the front porch!! These three were larger in size, but they matched the exact same style and make as the first one we bought 2 months before.

Someone donated them at two different times, and we were fortunate to be there both times on the very day they came into the store!


Wow, they were absolutely perfect! We had just been talking about wanting to add some exterior lights to the garage. The garage was newly built last year by the sellers, but they never got around to installing any exterior lights.

We snatched up all three lights and took them home. I gave them all a fresh coat of paint because they were a funny dusty rose mauve color.


TicTacToe  3 in a row! 


Steve wired up the lights so the two front ones would go on simultaneously with a 180 ° motion detector if anyone comes in the front or from either side.


Aww those are just so stinkin cute! 


At the same time, the ReStore also had this decorative vent piece to go up on the gable of the garage. That was faded out hunter green. So again, with my handy little red paint brush, I made that match too.


The third light fixture was put on the side of the garage by the passageway door. In that one we put a screw in motion detector light bulb that would go on any time we opened either door. The detector is built right into the bulb!  So when coming from the garage or from the she shed, it turns on to  automatically illuminate the walkway between the two buildings.


Now the garage has a little more stylish pizzaz that matches the house, and new usable lights that make our yard safer to maneuver after dark.


This is just about it for the She Shed posts...

We are just laying the ceramic tiles in the entryway and are about 2/3 of the way done.  Steve is suffering from a sinus thing today, and I am not quite up to snuff either. So we laid low, watched football and I did some weaving and made some cool snowflakes from dollar store hangers.  Will post more about those tomorrow. Stay tuned! 

Saturday, November 16, 2019

More Finishing Touches - Car siding (we are not siding our car!)

We are almost caught up with the posts about our She Shed construction over October and into November now.

The next project we tackled was finishing the ceiling in the entryway which is a 4 foot by 12 foot area. I was trying to recreate the feeling of the front porch that we had at our home in Chilton. That enclosed porch actually had a painted white beadboard ceiling.  We decided to go a little bit wider and more substantial than beadboard and use a different product.

Car siding is a tongue and groove board that is already sanded to a nice smooth finish.  It has notches and tongues on the edges so it can fit together nicely. The smooth exposed surface of the board also has a long center notch all of the way along the length to give it the effect of being two boards notched together. Even though it's one big board 7 inches wide.


We purchased enough car siding to do the entire ceiling in the entryway, and to wrap the large beam and also the two side vertical supports.

I put two coats of paint on every board in advance on the saw horses set out in front of the garage. Then they were ready to be cut and nailed into place.  All of these boards are 12 ft long and a little easier to handle with one of us on each end.

Working overhead is never easy, but at least this was only 8 feet high instead of 11 feet high at the other end of the room. The entryway ceiling space is already insulated and stapled over with a layer of tyvek house wrap.


We put board by board up on the ceiling with careful measuring to get a tight fit at the edges. Then we didn't need to finish the edges where the ends met the walls. Steve nailed them on with the air nail gun. I was holding them at one end and he was working his way across to tack them into place.  Some of the boards were slightly warped and we had to really pull them into place.


It was very pleasing and satisfying 
to see each board go up and cover the rafters.

The entryway was feeling BIGGER and BIGGER
as we worked our way across it.


That went really quick and we got it done in about a hour.  It was instant gratification to see it all smooth and pretty and finished!

~~~~~~~~

If you look way back in my blog in June, we added this big thick beam to the ceiling to help support the slight sag in the roof. Steve made a temporary wall to hold up the roof during the process. (remember this was back in June, not recently, so you can see just what we had to start with --- four yucky walls and ceiling and floor!)


Our son-in-law Waylen's father Gaylen was here visiting from Oklahoma. He just happened to stop by at the exact time that Steve needed help pounding this huge beam into place on top of both of the side supports.  This beam just barely fit in after getting pounded over and over multiple times with those big hammers.  He was able to take down the temporary wall and the beam now held the roof straight and level again, no more sag!


The beam might have been a little overkill for the specs needed to comply to code. (Grin Grin) When the building inspector was here, he said it was a fine job. He wanted to know if Steve could be hired to come and do projects at his own house!

Although we could have maybe just sanded out all the hammer marks and painted the beam white, we preferred to give it a more finished look. We decided to wrap the beam around with these tongue and groove car siding boards too.

The beam was actually three pieces of 2 x 12's screwed tightly together to create the proper thickness. Then in the photo you can see the pieces of tongue and groove on each side of that!


Just putting up the first board made a difference along the beam. We were able to snug it nice and tight to the plaster ceiling without any gaps. It's kind of hard to figure out how to trim it out if there had been gaps. I am glad that the beam was nice and straight and even, which made it easier to attach these car siding boards.


Once we had the entire beam wrapped around on all three sides, now we could cover the up-and-down support boards too. Everything was looking neater and cleaner. Not so much like a construction zone anymore.


A very handy little tool we found to use on projects is called an oscillating tool. You can get a variety of different sized and shaped blades that can help out in almost any situation. Here one board was a little longer than the rest after we already had it nailed into place. Probably my mistake of measuring and not remembering the number when it came time to go out to the garage to the cut off saw. Probably my mixing up 3/8 and 5/8. It looks to be off by 1/4 of an inch. The board was already nailed up so we could use this little oscillating tool to cut off the excess. Easy peasy!


Steve carefully ran a bead of caulk along the up-and-down cracks between the boards. Then as they are nailed into place you don't see the little crack or gap on the corner pieces of wood where they lap over each other. Once it is smoothed out and painted over, everything looks well finished and put together.


I like how the top beam boards lap over the up and down boards. Kind of makes a big picture frame around the entryway.  We added a little strip of wood along the side of wall to complete the look.  I had to paint that one board while up on the wall, because it was a last minute addition and not pre-painted like I had done to all of the other boards.  I really like painting the boards in advance, much easier than painting once they are nailed up on the walls.


Steve finished off the trim around the entry door too, and soon we were ready for my final touch-up painting.  Once all of those nails were in place, I put tiny dabs of spackling in each hole before giving a final coat of paint. The paint was needed to kind of cover-up the spackling, and all of our finger marks and hand hold marks from putting the boards up into place.


The room is looking more and more finished.


The only things we have left to complete at this point of the story, were the railings on the stairs and the ceramic tile by the 4 foot by 12 foot entryway.  The railings are now complete as I type this, and the 2/3 of the ceramic tiles were laid today.  So tomorrow I will be able to blog about both of those.

Then my blog will be all caught up and I can get back to regular posting of our day-to-day activities, as well as some pictures of the entire finished room.


P.S. Thank you for all your kind thoughts and prayers for my nephew.  He is still in the ICU, but off the ventilator and out of the medically induced coma.  He is now able to breathe on his own. He had some kind of anaphylactic reaction and they don't know what caused it. He is so far away in Illinois, but his parents are by his side. We are waiting for updates.

Tuesday, November 12, 2019

We are Floored By This Next Step


Sorry I didn't get a blog post written yesterday. I spent a delightful day with my dear friend Connie who came up to visit from Oshkosh. We spent the entire day talking and chattering, sharing our quilting projects, catching up on family situations, and having a wonderful lunch together.  Dangnabbit, I forgot to get any pics of us together!

After a day's hiatus from writing the blog, I am back to the catch up posts about the work we did in October on the she shed.

As I said in my last blog, we had reached a fork in the road and needed to stop for a minute and make some choices.  We've reached a point of decision making. Originally, a few blogs back, I talked about the wonderful load of 660 square feet of Douglas fir flooring that we had picked up to do this entire room. It was a great idea and the wood tongue and groove flooring was beautiful.


But then I started imagining all of the work ahead of us. Thinking of renting the air-powered nailing tool and doing all of the work to nail each floorboard into place. Then of course we would have to rent the big sander and buy piles of disks to sand everything smooth and prep it. Filling in knot holes and removing any blemishes. Then the next step of course would be cleaning up all of the sawdust and starting the staining process. Lots of hands and knees work. Then finally following up with coats of polyurethane. This could take weeks. I think, myself personally, I was hitting some kind of a brick wall.

I started to dread the thought of doing the wood floors. The rest of our entire home already has hardwood flooring. I love hardwood flooring, but I just think I had enough of the work involved in making this raw wood into a beautiful floor. When I had initially envisioned this addition room, I had thought about wide gray plank flooring, either a textured laminate or vinyl plank.

Although Steve had made a really good choice and a great bargain on buying this flooring, I thought this would be probably the fork in the road moment of deciding what to do next. We talked about alternative plans.  Steve thought I made some good points, so we should delve into alternative ideas before going any further.

We went and looked at grey plank flooring. Some of it appears blotchy from end-to-end on the four foot long strips, being lighter on one end and darker on the other. It made big sections of open floor appear leopard printed. I didn't care for that.

I did find a nice textured laminate flooring with much more even tones of gray coloring and not such contrasting streaks. Actually, these planks were even wider than the first stuff we looked at. This was much more to my liking, and a lot more of what I had initially envisioned for the room.

Steve really liked this too. 

So after talking it over and thinking about the steps involved in doing the Douglas fir floor, we both agreed to swap horses midstream.  Being flexible is important when working together.

We put the wood up for sale on the Facebook marketplace and immediately we had four or five people clamoring to buy it. We sold it for what we paid for it, and a woman gratefully drove here all the way from Rhinelander, Wisconsin to pick it up. We helped her load it up and away it went. She was happy and so were we.

~~~~~~~

But now we had to wait for a sale on the flooring that we had decided on.

In the meantime, we picked up the 4 by 8 sheets of subfloor that we needed to cover the entire room over the floor joists. Before laying each one into place, we put a bead of heavy construction adhesive on the top of each joist before screwing the subfloor into place. This will prevent any squeaks.


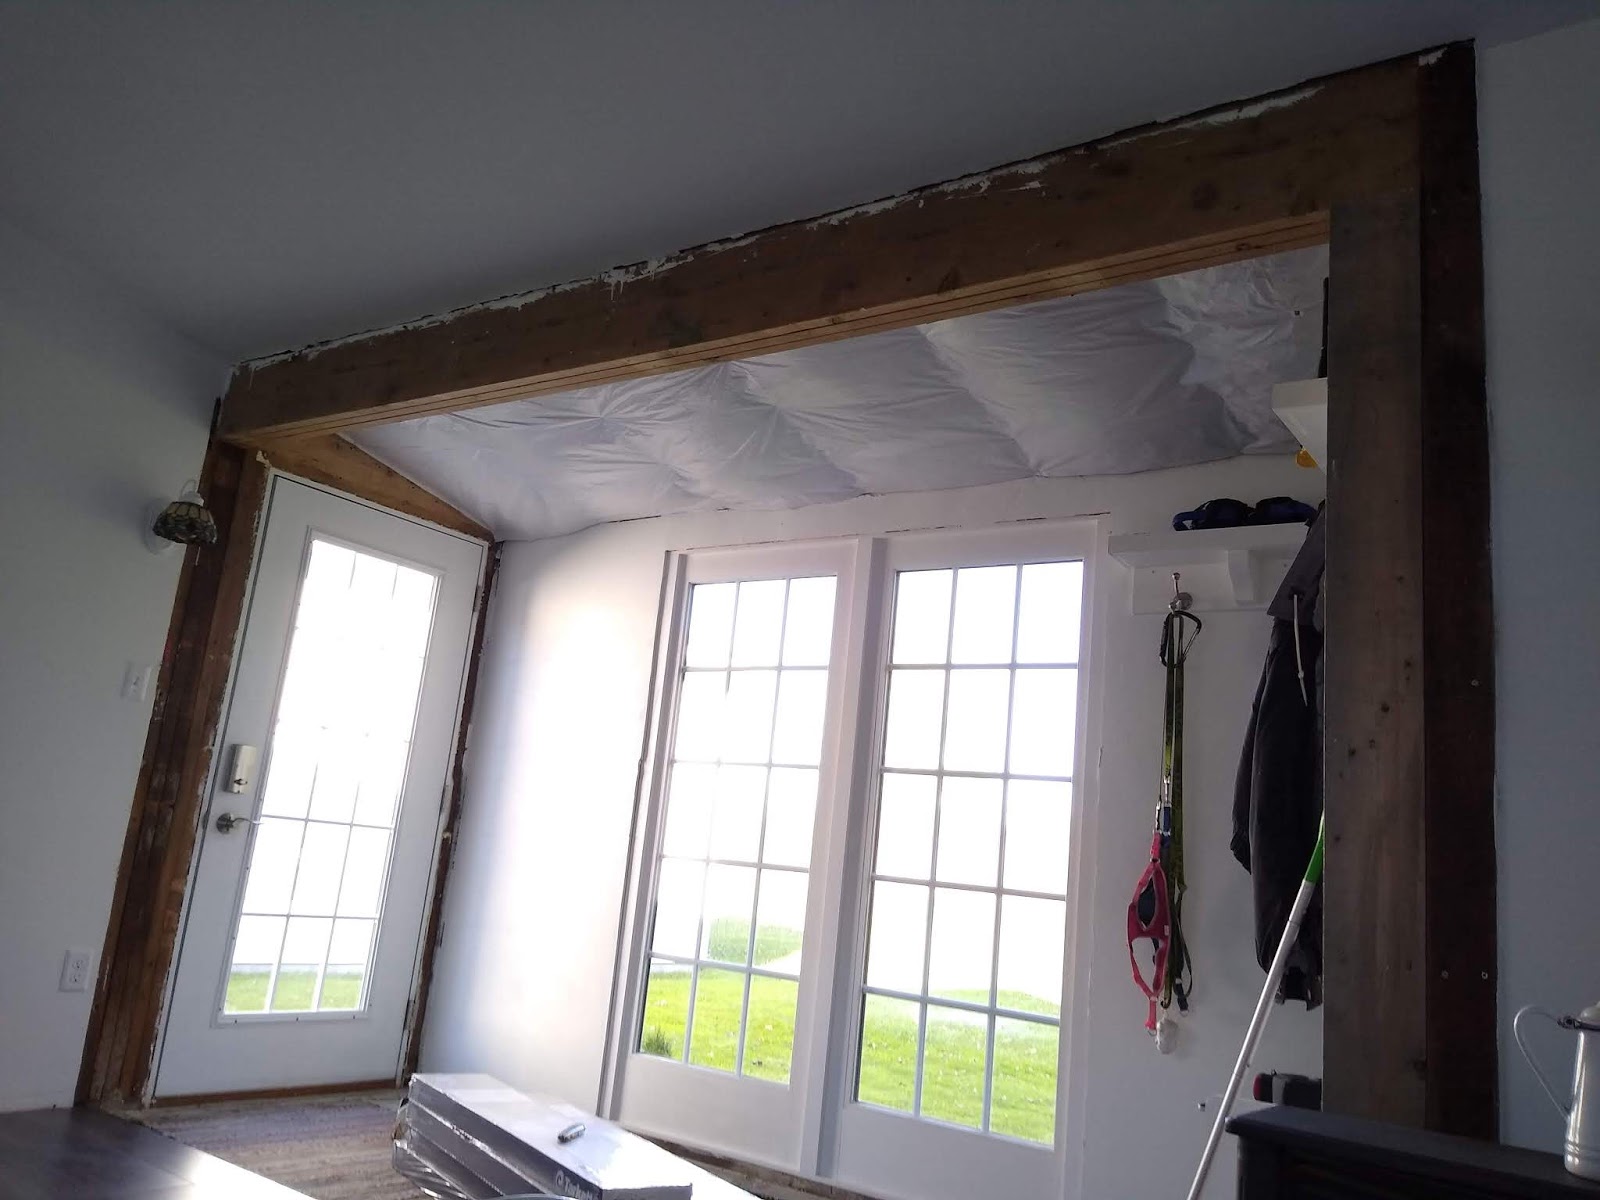
Steve added the floor vent and ductwork from the main part of the basement.  Now the room will have central air and heating!  This is the partial door entrance scuttle hole into the basement, and the closed off old stone stairs from the past blog.  This grey door will be covered over with some cabinet doors to disguise it to look like a built-in cabinet instead. 


It felt like we could do a barn dance in this room once all of the subfloor was in place. it was so huge! I was delirious in how much space that is she shed was going to allow.

Our son-in-law Waylen helped carry over a big wall cabinet unit to mount on the wall over the scuttle hole.  I will write more about that later in the next blog, but it appears in some of the pics now.

Next we working on making the new stairs.  We had been using the original old stairs which we put back into place each time we pulled them away from the wall to do work.  They were many many years old and worn and not of the right riser and tread lengths for the space needed.


Steve is really good at figuring stairs out, and cut the stringers correctly the first time, do I ever doubt him?  Nope. Not with these projects!   He made the stringers with super strong with 2x12 boards, placing three of them to span 44 inches. 


Then we bought long lengths of bull nosed stair treads and I gave them double coats of thick oil based grey porch paint.  


Once they were dry, Steve cut them down to lengths of the treads and mounted them into place. We would construct the railings later, after the flooring was finished.


~~~~~~~~

Now it was time to wait for the next sale.  Even the 11% rebate sale would net us about $100 savings on 380 sq ft of flooring.

3 days later the plank flooring I wanted went on sale!

Just check out that happy face, this is like the home stretch!!!


We loaded up our little trailer and got our bundles of flooring back home and unloaded them into the room to acclimate for a day.  That way we are not constructing under too damp or too dry conditions with flooring fresh out of the box from the store.


Now the fun begins. We figured out where we wanted to start and where the baseline should be. Four rows done and this was easy peasy!


This flooring was a lot of fun to put together. We had already used some of it in the small laundry room and half bath earlier in the summer, so we knew what we were doing.

This has very nice thick pieces of engineered laminate flooring, with attached pad underneath each piece. No need to lay out large rolls of conventional padding like vinyl plank floors require.

To install this product, just lay one plank up against the previous row at a 45 degree angle, drop it down into place and it snaps into place.  Then give it a tap tap with the hammer on one end to join it to the previous piece. Then the edges meet up perfectly and you are done! Next piece, please.


We did careful cuts around the two electrical floor outlets.  I made little templates and we cut the planks with little rectangle holes to line up.


Then as were got further along, closer to the other wall, where the heat register was going to come into the room from the central heat and air duct. We made a template and carefully cut around to make it line up.


We completed the entire 24 by 16 area quickly (except three final pieces in the far corner under the stairs a.k.a The Cubby Hole. When I was a kid, we had a Cubby Hole in our house that went under the stairs. It was great to hide in, but it was also tall enough to hang our coats and snowmobile suits in. Kind of made a curtain to hide behind and nobody could find us back there.


The Cubby Hole in this she shed will now be a perfect hiding spot for the grandkids or the dogs.


When we got most of the floor installed, Steve helped me carry in rest of the white rattan patio furniture that we had residing out on the front porch. It had taken quite a beating over the summer being left out in the elements.


The week before, I spiffed it all up with a fresh coat of paint and we anxiously were waiting for the time to bring it in and set it in the room. This is the furniture that I had on the front porch at our last house.

Over the last few months during construction, I could envision it being used in this room.

Back to the floor installation: It was actually fun and when we were done, we had an instant floor. Now we didn't have to spend any time sanding and staining and varnishing.

The room was looking amazing,
and I was giddy with excitement! 
(the dogs --- not so much) 


With this weather resistant plank flooring, we won't have to worry about wet boots in and out, or dogs in and out with wet paws. Compared to our original idea of the wood flooring. This will be more water resistant and durable in the long haul.

We will add ceramic tile to the 4 foot by 12 foot entryway this week. We picked up a great bargain of some gray / black speckled ceramic tile from the ReStore that will harmonize beautifully with this gray plank floor.  We paid about 30 cents a tile and I think it will be perfect.


On the day after the flooring was complete, Steve went to spend the day with his brother and dad up in Sister Bay. Do you think I was going to just sit here and twiddle my thumbs? Heck no!

I started carrying in my big rug weaving loom, one piece at a time. Bit by bit, I carried it all in and started assembling it----


I can assemble this loom in my sleep. I have done it so many times. I had the loom all together except for the heaviest back beam which requires two people to carry it in and set it into place. I would have to wait for Steve to get home to help me with that part.


WELCOME HOME LOOM,
 after being packed away for 6 months


Next I started carrying in the pieces for my 12 ft long quilting frame. Each roller, each pole, each base piece etc found its spot along the north wall of the she shed. Soon I had that all put together too.


It was so exciting to see the things come in and start taking their spots in the room. This is the longest wall meant for my quilting frame, with the articulating lamps overhead.  Perfect!


I could close my eyes and see us setting in front of the big windows as the sun is rising with our coffee, or in the lovely mid day sunshine, or in the waning evening hours.  We could sit here looking out over the big backyard and the trees and the sky and nature and birds as they flutter in and out of our yard.

Actually, right now as I am typing up this blog, I am sitting on the middle of the couch looking out at the very scene that I just talked about.

Last night we had some gray foxes stop by, and we regularly have deer visiting us. The birds are fluttering up and down to the bird feeders eating the suet block, sunflower seeds, and thistle seeds in the feeders. Squirrels hop around and we haven't seen any bunny rabbits yet, but they left little paw prints in the snow this morning. There is word that there's a big old bear rumbling around town. We haven't seen him yet but he did leave some claw marks in the tree next to one of my bird feeders. Part of the feeder was cracked off and the seeds were out of it. So I know he came to visit.

This is the stuff that dreams are made of, having this room slowly come to fruition. Bit by bit, step by step. I am thinking I need to pinch myself to realize that I am not dreaming.

Tomorrow's blog post will be about installing some cabinetry, hooking up the natural gas stove and working on the trim.