The water seeped underneath the carpeting and was growing MOLD in our bedroom! After being closed up in the hot humid weather for a few weeks while parked in our backyard, Steve was shocked with horror at mold growing in our bedroom! He yanked out all of the bedroom carpeting, fixed the leak where it entered the rig, and we sealed the floor with Minwax Wood Hardener after it was completely dried out. Then we sealed the entire floor with a thick coat of porch and floor enamel paint as well. (that is in detail 2 blogs back)
Around the base of the bed (which is where our diesel engine is) he also removed the carpeting that was vertically glued to the sides. We covered that the other day with a sheet of soft flexible cream vinyl flooring, glued to the sides. (that is in detail one blog back)
The next step was to get some new carpeting on the floor around the bed.
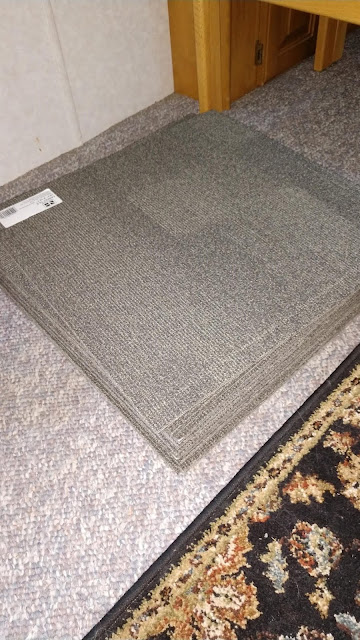
The other night we picked up 14 interesting carpet tiles on sale. They are pretty thick and rigid and the edges are treated so they don't unravel. We picked out a kinda blotchy grey pattern with no real true direction. We only needed 12 tiles but thought grabbing a few extra for mistakes or damage would be a good idea.
We picked a color that also somewhat blended with the flooring in the rest of the motorhome. The main section of our motorhome has grey/cream berberish carpeting which is 22 years old. We take our shoes off at the door, clean it once a year, and try to vac it often to keep it nice.
Here are the new carpet tiles laying out in the livingroom area until we get started.
We shop on a budget, and these ended up being only $1.77 per tile after rebate/sale at Menards. We bought 14 tiles and a roll of double stick carpet tape, so we were good to go for under $30.00!
Steve was chomping at the bit early this morning
to get on task and start laying the carpet tiles
in the motorhome bedroom!
I wanted to snuggle into bed
and stay warm and cozy for a little while longer.
Sigh.
See how cold it was here this morning in Wisconsin?
Hard to believe last week we were running the central air!
We had a plan to use my rotary cutting tool with a new fresh blade. That worked, but it was tough. There are three layers to these thick tiles, the bottom one is felt, then a rubbery jute layer, and then actual carpet fiber layer.
Then I had an idea! I have this great tool I use to cut up multiple layers of denim fabric when weaving rugs. Many years ago, my friend Norma showed me how well it works for weaving. I bought this about 10-12 years ago I think at Menards for about $20. I see now they are made in a reddish color by Rockwell and Worx, and sell between $30-40. I even found them on Amazon:
Steve did most of the measuring and I did most of the cutting. We marked each piece on back with marker as to which direction it was going to lay and which cuts went where....
It went all around all four sides snugly to the edges.
The yellow layer of plastic then gets pulled off
to reveal the other sticky side of the tape.
Steve carefully laid the first piece, after pre-figuring out exact placement for the location of the seams on either side of the platform base and along the other wall. The last thing you want to do is start with full pieces on one side, then have to cut all little pieces when it runs on the other side of the rig!
Tah Dah! First piece!
Since it was a narrow route around the bed, Steve worked one piece at a time across the bottom, then up each side after that. I managed to snap one shot from up overhead. And no, that is not red underwear hanging out, it's his red t-shirt under the sweatshirt.
Some of the pieces were more intricate cuts... this one we had to cut around a heating vent. We found the scissors handy to get into the tiny inside corners. See how we peel away the yellow layer to expose the sticky part of the tape?
We did take a lunch break, and then a nap break too... Plus Steve wanted to get the grass cut before it rains tomorrow. (plus there is a Packer Game on at noon tomorrow so who wants to cut grass then?)
Here is the space across the end of the bed....
see how the blotchy pattern makes it easy to lay?
Nothing to match up and make even.
We finished up laying along both sides of the bed.
We have to reroute that one cable on the right side yet.
We came back out after supper and finished up the last few pieces.
Steve brought out his air compressor and nailed in the threshold trim.
Once that cable is rerouted, we can finish that far edge better.
Whew... we cut it close! We thought perhaps one roll of double sided carpet tape would be enough, but we weren't sure. Look at what we only have left!
Yup, I think this makes a nice clean look, after ripping out the old carpeting around the base and on the floor. By adding the cream vinyl to the vertical box, it really helped to make it blend together with the cream walls and backing over the headboard.
I think it looks better now,
from front to back.
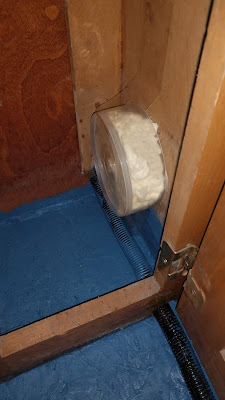
Steve sealed up that port flapper door on the outside of the motorhome completely with silicone and it won't leak anymore. From the inside, in the cabinet, we also filled a CD stack cover with Great Stuff spray foam and stuck it on over the disconnected power fitting. Now nothing can catch on it from inside the cabinet. It won't be used as a power port anymore because he rerouted that power cable directly to the power compartment below.
Guess I figured wrong!
He was looking at the compartment today and realized it was vented with three holes already cut into the side wall! He removed one of the vent circles, and lined the edge with some wire "loom" plastic tubing to protect our power cord from sharp edges. What a smart guy!
The vent opening leads out into the open compartment where our generator is located. That section is wide open to the ground. Now the cord can drop down through that space to be used at a power post.
Now both compartments can be shut and locked up, whether we are out camping somewhere or even while parked at home.
~~~~~~~~~~
Oh, I did mention a nap today....
I always pre-wash my fabrics before starting to sew with them, so I know they won't shrink or pull apart during the first washing. But after sewing, I like to wash and dry the quilt right away, to make it soft and comfy and smell great.
Washing it softens up the newly sewn batting,
and makes it all kinda bumpy and cosy and soft.
When it came out of the dryer,
I could not resist.
I HAD to cuddle up and take a nap with it.
This busy Saturday went by fast. We didn't even get the dogs out for a walk, and they let us know this evening they were not too happy about that fact. Maybe tomorrow morning we will get up and get them out and about for a brisk fall walk.
Tonight we are cuddled up in our chairs, we have HGTV on, and a fire in the fireplace. Oh, and yes, I am cuddled under my quilt as I type this.


Nice job on the carpet can't even tell that it is squares. Love the new quilt too, can't wait for it to be that kind of weather here.
ReplyDeleteAnother chore well done. You two make a great team. What one can't do the other can.
ReplyDeleteRV Manufacturers should take note what Improvements Owners make to their rigs. They could start selling Perfect RVs.
You'll have to make up an extra walk for the Doggers.
You're a little cooler then we are and that Quilt does look inviting.
Be Safe and Enjoy!
It's about time.