Our Wonderful Followers who come back again and again to read about us...

Tuesday, July 25, 2017

Our Old House Project- Fixing Back Shaker Porch Post

If you have been reading our blog here for any length of time, you know we love this 104 year old home we fondly refer to as "Our Old House".

Of course, old homes need updates, repairs and maintenance.  We try to keep things as original as possible, but comfortable for modern day living.

One of the features on Our Old House is called a "Shaker Porch" off the upstairs back hallway. Two years ago we replaced the horizontal railings to get them up to code by raising the upper rail height per code and putting in vertical spindles.  At that time, we knew the two corners posts were firmly attached, but the center post was not tall enough to support the raised upper rail.  We only use it to air out a quilt or comforter from time to time, or just open up the door to let fresh air in upstairs.


Two months ago, our son Dan and soninlaw Waylen moved a king sized mattress over the railing of the back shaker porch ---and we noticed that the railing was a tiny bit loose. Last weekend I had the grandkids out on the porch for a look-see... (they had never been out on it before) and I noticed that center post was top not only loose, but also rotten! That can be dangerous!  

Time for Steveio and I to do a little "Our Old House Task" ----   we happened to have ONE extra 4x4 post leftover from doing our big backyard fencing project.  It was already stained white and ready to be used.

First Steve had to measure and cut away a notch from the other post... the base and bottom portion was still good, only the top was rotting.  He drew lines and got out his tools. I held the post. 


He made a notch part way up and then took measurements to make corresponding notch on the new post.  This would be better than trying to remove the whole post, which is mounted and sealed to the rubber roof material, and enclosed with an aluminum surround.  Who wants to make leaks on the flat rooftop to the porch ceiling below?  He could use what is there and make the repair. What a smart guy!


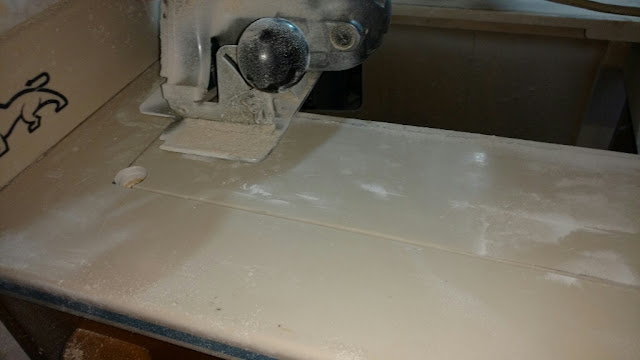
He started with the skil saw, 
but had to swap over to the sawzall to get through the post.


Here are the two cuts off the post. Yup.. that is some rotting wood.  But for 104 years old, it's not so bad afterall.


Before we attached the new section, I coated it liberally with a solution called Wood Hardener from Minwax.  It makes a firm solid surface of soft wood, and hardens up to a resin like texture.  We used this on a doorway tread and also on the subfloor boards when we replaced the bathroom flooring in our motorhome.


It dried up while we were having lunch... and Steve prepared the post to go on the new base.  Measure three times, cut once.  It worked out and he brought up the piece to put into place.


I held the top while he drilled a big hole right through both pieces. I didn't have a lot to do so far except hold things and take pictures.  LOL   But my part comes next after he runs a big thick bolt through the whole thing....


I got out some spackle to cover the cracks while he drilled the top section to the horizontal board.  Then I filled those holes too with some spackle.  Now I got out my brush and some white solid color stain to cover the repair areas.  I touched up a bit here and there.....


(now I just have to sweep off the sawdust) 


There ya have it (as Steve is prone to say)  Now the railing is not only safe, but also looks good again.  Another project completed around Our Old House!


~~~~~~~

On a fiber note: 
Here is my quilt I made. 

It is now worth $2,759.00 !!!!  


I sold this quilt to a lady who donated it to a raffle fundraiser for her local dog rescue in Nevada.
And it has a week to go yet and will most likely go higher!!!!


I am so thrilled to be inadvertently connected to this, by selling her my quilt. I am so pleased that people are finding it pretty enough to donate to their cause.


~~~~~~~~

On a family note:

HAPPY ANNIVERSARY 
to our oldest daughter Erin and husband Waylen! 


Two years ago, Waylen joined our family
and we so happy to have new addition of new baby Claire
to join sister Chelsea and brother Clayton.


Well, Steveio is chomping at the bit here to get things done. Time to get some stuff done before it rains! 


Monday, July 24, 2017

MOTORHOME MODIFICATION - Finishing Up Propane Stove Installation

Steve has a dentist appointment later this afternoon, so this morning he decided we should get going with the stove installation.

He removed the braces between all three drawers. It was pretty easy with a hint from fellow Safari owner Wille whom also removed his drawers. Behind each cross piece it was held into place with two screws so they were pretty easy to remove and pop out of the way along with the drawer slides.


He left the topmost cross piece of wood in place to help support the countertop as he makes his cuts. That piece will come out last.

Next, Steve turned off the propane at the tank and totally drained out the propane line by running the burners until it burned off all the existing fumes.


He carefully untethered the cooktop from the copper propane line and also unplugged it from the 120v outlet for the electric igniters. From underneath, he removed two brackets and was able to lift the cooktop right out. We are saving it for a fellow Safari owner who would like to get it after his vacation is over. So it can stow away in the garage for now.


Steve carefully measured two or three times and then made support brackets for the underneath side of the oven so it's not just suspended from the top edge on the counter, but also is firmly supported at it's base.


We tossed around the idea of the bottom drawer---- whether we should leave it as a big one, or use a suggestion by fellow Safari owner Wille to substitute two of the narrower drawers in it's place. We decided we could change that later if we want, but we will keep the one big drawer for now. Remember, I said that's for dog food and my extra wine bottle storage!

Steve suggested we put up some type of a barricade to help keep the sawn dust particles from spreading all over the motorhome. Fortunately, I had these wonderful fabric pieces that are made for draping around a banquet table for craft shows. The edges of the pieces are already stitched with strips of velcro --- we were able to easily stick them up to the carpeted ceiling in the motorhome. It made him the perfect dust capture enclosure. Up above he had the Fantastic Fan to help suck up the heat and the dust.


Donning our face masks and safety goggles, he went to work on carefully drilling the two pilot holes in the two corners. For this he used a Fostner bit on the drill. It easily drills out a larger hole without putting as much stress on the surrounding material as a normal drill bit does. It's also easier to control and more exact.


I held the end of the shop vac hose right near where he was drilling to help take away any of the excess material as the Fostner bit pulled it up out of the hole.
Once each corner was drilled, now it was time to get out the skil saw. A suggestion by fellow Safari owner Brian Harmon, who is also a Corian counter installer, was to get a special 60 tooth blade specifically for laminate and formica as well as Corian. Starting any technical precision job with a brand new blade is a good idea.


He very carefully lined up his skil saw and worked slowly as the blade slid through the Corian material. The instructions said do not push it too fast or you will smell a burning odor. Slow and easy took care of it. 


Next he made the two crosswise cuts on the back section. There is an extra space that remains from the cut out from the old cooktop. We are covering that with a piece of steel painted to match the oven. I want it to cover that space so things won't fall down behind the oven or into the drawer below.


Am I ever glad we put up the little fabric dust catching booth. That stuff sure made a mess. It's like a fine powder all over the place.


Now Steve had to make the two precise cuts for the very corner edges of the stove where it sets against the front of the counter. He carefully measured three times and then cut once. Because if you cut off too much, you can never put it back on again!!!


Now it was time to remove that last cross piece of wood. He left it in place to help support the countertop material during cutting.


The next step was to carefully sand all the edges so nothing was sharp and nothing was more susceptible to cracking. Rounded corners with Corian help make it last longer than a sharp 90 degree right angle cut.


When we removed the old cooktop there was a special heat tape stuck around the opening. The YouTube we watched suggested that we use this type of tape when installing the stove. Fortunately this tape was the exact same size to fit in the new opening. Recycle! Reuse! Repurpose!


While Steve went to the dentist (ouch a $1,300 crown~) I took down all of the fabric draping and started vacuuming and cleaning and wiping everything up. Boy oh boy what a mess it made. I am so glad we hung that fabric around, otherwise I would be cleaning dust from the entire motorhome for weeks.


Once Steve got back from the dentist, he felt fine. So we could keep on going. Okay, here is the time we were waiting for. This is the dry fitting stage. It fits like a glove! Yay Steveio!!!


Our next step was to reconnect the propane line. Steve got the proper fittings all arranged and hooked it up carefully. We tested for leaks with a bubble solution (kids blow bubbles work great!) Good to go.


 YAY!!!
WE GOT FLAMAGE! 

Not too bad for a $10 used stove
a can of $4 hi heat paint
and a $30 saw blade!  


We had one more thing to address, and that was this gap on the back side after removing the old 2 burner cooktop.  It was not too noticeable, but I didn't want anything falling down behind there. 


Steve got a piece of steel and painted it to match.
He attached it with some Power Grab adhesive.
Looks like part of the stove!


 I think it looks pretty danged good....


but... ONE MORE TEST
Yes!!!
My most favorite roaster pan from my friend Lisa
fits in the oven perfectly with the lid on!


I have not been able to use this roaster in the motorhome until now.
I have only been using it outside on the campfire.

I ordered an additional oven rack,
so I can do two pizzas
or two trays of cookies
 or two pans of muffins etc.
It should be here by Wednesday.


 I kinda think this looks like it belongs there all the while.....

Great job, Steveio... you are my hero! 

~~~~~~~~~~
On a family note:


YAPPY BARKDAY FINNEGAN!!!! 

Today our little guy is FOUR years old! 


He was born after his poor bedraggled mommy Daisy was rescued from a horrible hoarder in Michigan. She was only 8 months old and gave birth to five puppies! (one didn't make it) The pups had horrible health issues and were not adoptable at 8 weeks ... he had to wait in foster rescue until he was five months old. Thank you to Michigan Foster Robin Mathews for taking such good care of him and Ceora Powers for delivering him to us in Wisconsin and to Lisa Martin for setting it up! We didn't get Finnegan until Dec. 2013


All ears! 


This is Christmas--- He is so small!!!


He became Duke's bestest buddy!


He found all sorts of places to hang out,
happy to have a home of his own!


Silly little boy would watch everything I did


He looks so tiny next to Duke
like a little FOX !


The morning after we adopted him,
 he woke up,
blinked,
and asked:
"Are you for real? I wasn't dreaming??"


Did I mention that Finnegan is also very intelligent?


 HAPPY BIRTHDAY, FINNEY!!!