Our Wonderful Followers who come back again and again to read about us...

Showing posts with label enclosing garage stall to make she shed. Show all posts

Tuesday, November 19, 2019

Snowflakes, Rugs, and Just a Few More Tiles

No more catch up blogs. I am here now in real time.

I woke up this morning and I was thinking about painting those snowflakes that I made with the grandkids... (See yesterday's blog for instructions)

But then I got a better idea.  Instead --- I GLAMMED them up with GEMS!


I got out my little glue gun and a container of silvery multi-size gems that I had bought a long time ago. Glad I had saved them. I'd considered tossing them when I was purging, during packing to move. Sometimes it's good to have a stash of supplies waiting around, even if you don't know quite what you are saving them for.


I put little dabs of glue at various intervals and added different assorted sized gems. I had to do both sides of each of the snowflakes because these will rotate. It was a soothing fun project to do. Then I got a wisp of nostalgia rolling in. I wished my mom was sitting there next to me, gluing them on with me. This is just the type of project she would enjoy doing. But, she is far away in Florida. I'm going to have to think up some other projects to work on with her, the next time we see each other.  We chat back and forth on the internet every day. But sometimes it's nice to be sitting here in person. Mom and my sister Linda and I were ALWAYS working on craft projects of one kind or another. Sigh.


Once the snowflakes were done I brought them outside and hung them back up on the porch. Our neighbors all up and down the street had begun decorating with lights. It was strangely warm enough outside, over 40 degrees.  I guess it was a good idea to get it done before the cold sets in.  So I broke my own rule about waiting until after Thanksgiving...

Out came some garland and lights. I had to move the red bows over into new positions for this house. They had all been pre-wired onto the scallops to be perfectly spaced out for the last house.  Now they will be prewired for this house. Easier to put them up next year. 

There was just enough garland to go across the front railings on each side.


My 2 little handsome snowmen wanted to come out to play. Even though the little bit of snow we got last week has melted. I nestled them in among the dried flowers in the front flower bed and plugged them in.


I also found this cute little red tinsel tree at the ReStore last week. For $3 that silly thing had to come home with me. I set that up in the corner between the two levels of front porch.


My three pretty snowflakes don't really show up at night time. I do have some extra lights and garland and I think I will do a row around the top of the porch. Maybe then the lights will shine down on my snowflakes?


Steve is still under the weather, I will wait a day or two until he can help me dig around and find the correct Xmas tote with that extra garland and lights in it.  He put them all up really high after he reorganized the garage storage area.  I can't even reach unless I haul out a ladder, to even get up there to read the tags on the totes. 

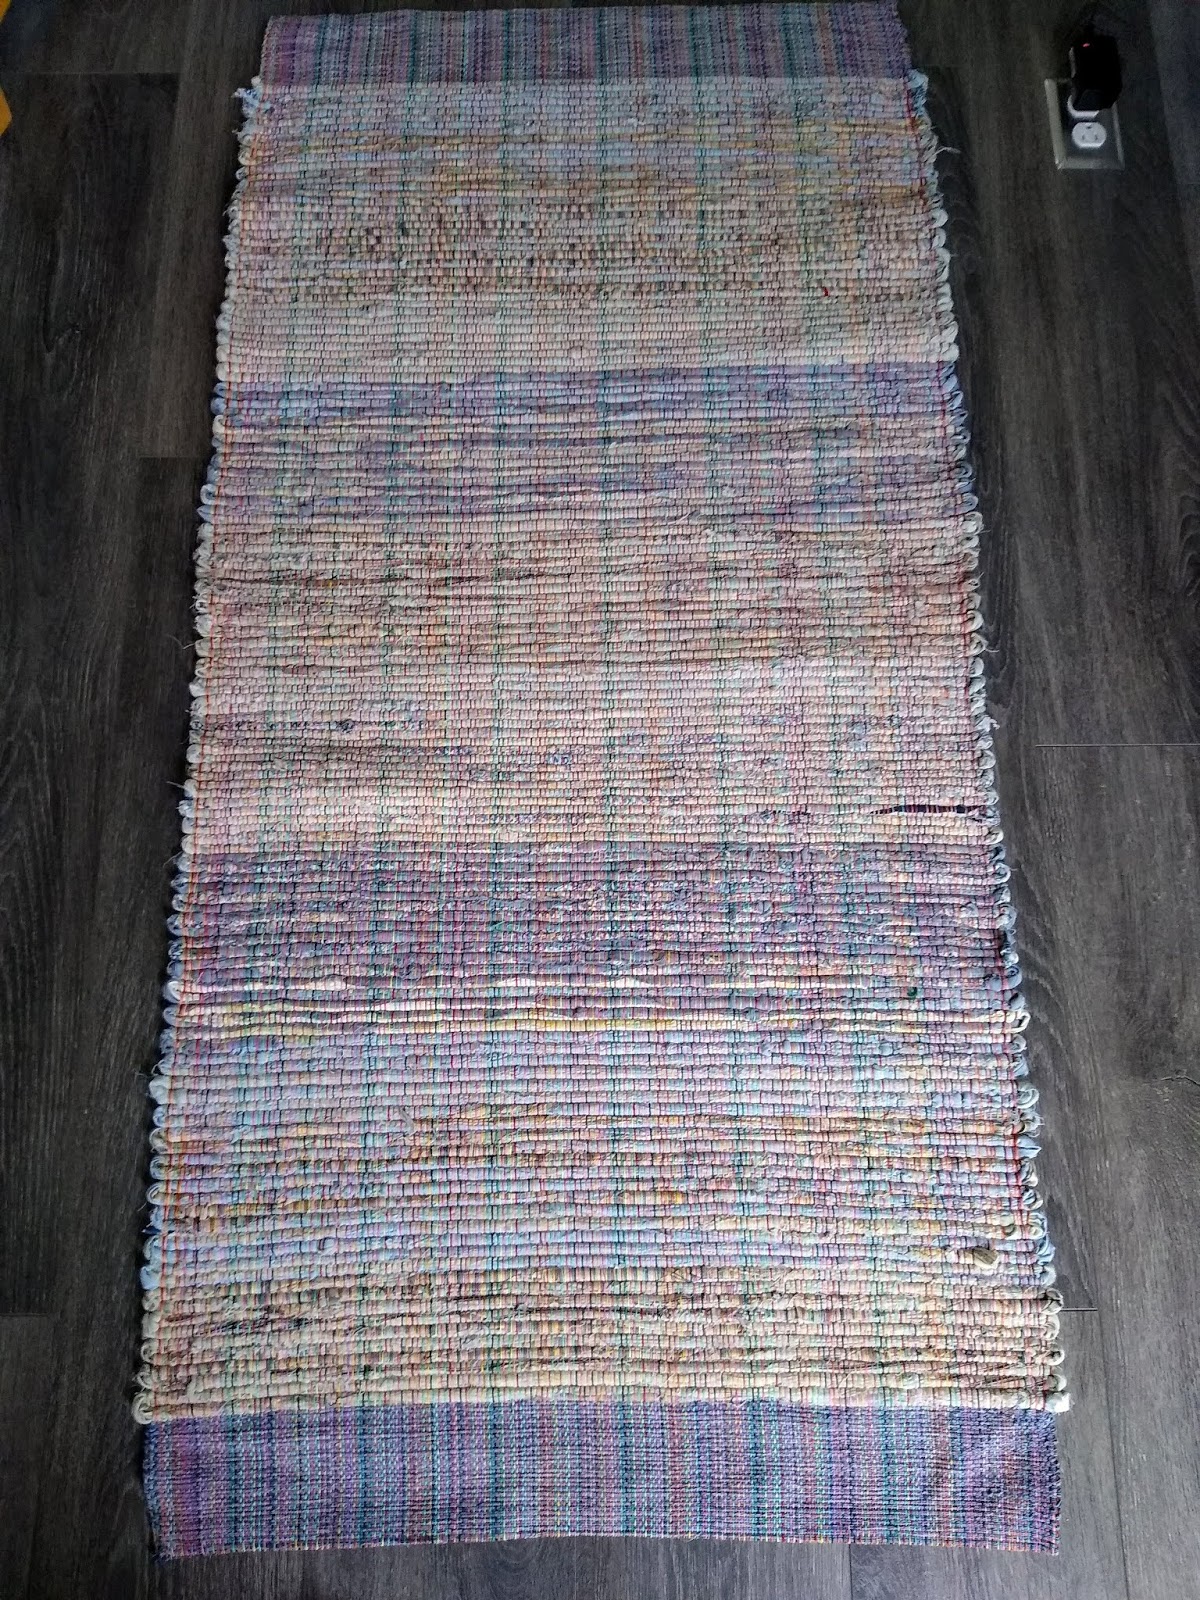
While he is still down and out with this sinus thing, I decided to finish weaving up this 10 ft runner and get this batch of rugs off of the loom.  


Some of the grandkids had helped me weave these rugs, and they asked if they could watch them get unrolled. They are at school today so I decided to make a little YouTube video of how I unrolled the rugs. Now they could watch the video and maybe next time they can be here for the big rug unrolling after the next batch is done.


Here are the rugs that I finished: 2 four foot ones and a 10-foot one. I still have to complete the hems by folding over the the beginning and ending header sections. I use my Grandmother's old Singer machine to stitch them down securely for a nice flat hem and add my personalized tags.


Steve has been moping around most of the day feeling totally miserable. Moaning and groaning and feeling like crap. We have a doctor appointment on Friday for a general check-up so if it hasn't cleared up by then we will see what they can do. I told him to stay in bed. I've been dosing him with homemade chicken soup, juice, and other comfort foods--- like chocolate chip mint ice cream sandwich bars!

It's hard to keep him down. He did disobey me for a little while and finished laying these last six squares of ceramic tile. (on the far right). The only thing left is to take two of them somewhere to have them cut in half so he can put the last four half pieces into place.


I told him he is not leaving the house!  He wants to go rent the tile cutter at the hardware store, bring it out in the parking lot, cut the two tiles, and bring it back in again.  I said tomorrow is another day.

Once he is finished with the last four half pieces, then I can do the grouting in all of the cracks. He said that is my job. Kinda like painting, he hates grouting. When that is dry, then we will be able to finish up the wooden trim around the window and the baseboard.

The final project will be building a triangular closet in that corner. We got a couple ideas. Nothing for sure yet. But it's in the works.


Honestly, this has been about 4 months of a lot of work to complete this room, but it's also been a lot of fun. I did a lot of envisioning and thinking and trying hard to create what was in my head.  Steve was able to make these things come about with hard work and ingenuity.


Often I find that I am needing to pinch myself 
just to make sure I am not dreaming!


I put on the soft music,

I work on my projects,

and having Steve nearby in the room
 as I work on things
 makes me really content and happy.

I am glad we are sharing this space.


(as I type this, I am up on my laptop in the livingroom to add the pics from my files, and he is down in the She Shed watching Hogan's Heros on tv, huddled in the chair in front of the fireplace.  He would rather be in the She Shed than up in the livingroom! More comfy, he says!)

.

Monday, November 18, 2019

Back to Real Time - Ceramic Tile and Snowflakes

Guess what? No more catch up blogs of the she shed work!

We are finally back in real time. Now by the end of this blog, we have caught up all of the work that we have been doing on the she shed.

The last project left to finish is the tiling of the entryway floor.  It's a 4x12 space leading into the main area which has the gray plank flooring all finished.  We wanted this entrance in something more waterproof, so we decided on ceramic tile.

A previous trip to the ReStore had netted us this wonderful bargain of some beautiful ceramic tile. The tiles are very compatible with the gray plank flooring we put in. We needed 48 twelve inch tiles to do the foyer area. We were able to buy 5 boxes of 11 tiles ....  which was 55 tiles for $.30 each. The tiles have been patiently waiting in the garage until we were ready to start the entryway floor.


The first step that Steve had to do was 
to prep the old garage floor cement.


The cement floor is slightly sloped so we need to use a product to level the floor. We bought three 50 lb bags of TEC EZ level premium self-leveling underlayment.

First there is a special primer product that you brush onto the cement area so the floor leveling compound will bond to it. He rolled that onto the old cement with a thick roller.

Then he added a thick piece of subfloor to one portion of the floor on the right side. This is the portion that slopes down hill the most. He was just trying to take up space so we would use less floor leveling compound in that area.  He doused that subfloor good with the primer. That he had to let it dry before he could move on to the next step.


With a special mixing wand on the end of his drill, he was able to mix up this floor leveling compound to a thick gloppy watery mud. Bucket by bucket, he mixed it up and poured it into the recessed area of the entryway floor.


The leveling compound mud seeks its own level. Bucket after bucket, he would pour it on and each time it would ooze out a little more to fill in the next area.


He helped spread a little bit 
over the wood to get it even.


A few more buckets over the top of this and soon it would be level and set to dry overnight. That is the hardest part, having to wait overnight for it to dry.


The next morning 
everything was dry 
and ready for 
the next layer of subfloor.


Steve had it all figured out.

The next layer was going to be OSB subfloor board which was 7/16" thick. The subflooring would bring it right up to the level we needed. The remaining depth would be taken up by the thickness of the mortar and ceramic tile. Then it would be even and straight and level across from our gray plank flooring.

He glued and  screwed down the subfloor tightly through the newly leveled area. This was done to avoid any shifting or movement that could dislodge any of the tiles or grout.


It was finally time to start laying the tiles. Steve mixed up the mortar a small batch at a time. He worked it and worked it by hand with the trowel until it was perfectly smooth. He needed it to be a thick consistency similar to frosting for a cake.


This is kind of a one-man operation from now here on in, because of the narrow work space area. I ran back and forth with rinsing out rags or bringing more water or helping with the cleanup. But this is mainly now "one guy only" in the four foot wide area.

He spread the mortar out enough to do the first eight tiles. Then on the back of each tile he did what is called "back buttering". That means he smears more of the mortar on the back of the tile and then dragging the notched trowel across it to make the little ridges.

In the pic below, he is carefully setting the first tile into place. He has to make sure it is lined up with the gray planks and square to the door. This is the most important piece. It sets the rest of the gridwork of tiles to line up with the plank flooring on one side, the french window on the other, and the threshold straight ahead.


Each additional piece gets back buttered and laid into place. He has little white plastic spacers to make sure the 1/16" gap is evenly spaced between every tile.  Later we will grout it with a darker unsanded grout to go in the gaps and seal the tiles.


Working on his knees like this is pretty tough on Steve. Over the years he has had torn the meniscus in both of his knees and has had each one surgically scoped to clean up the damage. He was using some contractor quality kneeling pads. He also has a double layer of foam gardening cushions to use if he wants. But his knees still hurt doing this much moving around on them.

He worked a section at a time and then quit for the day. Here are the first 12 tiles, neat as a pin, and once they dry, he will go on to the next section.


If you have been reading this blog at all for any length of time, you would know that he just couldn't sit and look at those tiles drying and not get up and do another section!!  I thought he was going to take a break and wait a day. Nope, not him.

24 tiles done ---
this is the halfway point!!!


This time he finally decided to take a break and let that much dry overnight. His knees were killing him!!!  And believe it or not, he went a WHOLE DAY without doing any more tiles!  He was suffering from some nasal congestion and feeling punky and under the weather. I doused him with chicken soup, made him take a steamy shower, take a long nap, and then go to bed early.

~~~~~~~~

Now we are done catching up the blog. 
We are to TODAY!!!!

~~~~~~~~

Today, even though he was still feeling really crappy with some sinus stuff going on, he decided to mix up another batch of mortar and work some more tiles. He got this far, and he is going to take a break and said he will rest for the remainder of the day. We will be needing to go rent a tile cutter for the last four tiles anyhow.


Surprisingly, took a break and rested for the afternoon. I was leaving to go to my Homemakers meeting so it was good for him to rest. Although, I was almost worried that when I got home he would have finished up the last few tiles... He didn't.  

He is learning that now he is retired, some things can wait till tomorrow. 

~~~~~~~~

Now on to something I was working on
while he was busy with the tiles.

Here is a project that I worked on with some of the grandkids last week. I saw this on Facebook and somebody posted the link to YouTube.  I was intrigued and wanted to try to make one. 


I trotted off to the Dollartree store and bought some packs of hangers. You need 16 hangers, but they come 7 to a pack. So you need three packs.  I already had the wire ties.

That is all you need for this project.

Well, not quite. You need a couple grandkids. Because they were really helpful. So I guess three grandkids were needed to complete this project...


The littlest one, Claire, who is 3, went right to work. After watching the YouTube, she totally understood the concept and was very eager to put this snowflake together!


The two older kids, Chelsea and Clayton, understood the concept of the wire ties, figuring which end you needed to push through which side of the little square box to make it "zip" and not slip free.

As the lady suggested on the YouTube video, we left the star as loose as possible while we were assembling it. That's a good hint, do not tighten the wire ties up snug until you are sure you have everything assembled correctly.


Tah Dah!!!!

Three little munchkins and one big snowflake. Quite the accomplishment. It probably took them 20 minutes to half an hour to make it.


The lady on the YouTube video said you can spray paint them various colors. You can also dab them with thick modge podge and sprinkle large flake glitter on them too. She also suggested putting a little store-bought flat snowflake ornament in the center by using a glue gun.

I think I like them white. I am not sure. Maybe I will do them with red glitter later?

For now, I hung the first one  out on the front porch.  I liked it so much I went back and bought some more hangers to make two more.


The only problem with the Dollartree hangers is that there's excess plastic at the far ends of the hangers. Through trial and error, I found that if we drilled a hole through the plastic end of the hanger, we could thread extra wire ties back and forth through them around the center of the snowflake. It held it more sturdy and firm. I think other styles or brands of hangers wouldn't have this problem because they don't have that excess solid plastic area.


My friend Linda Baldwin had also made some out of children's clothes hangers that makes a smaller snowflake. These full size hanger snowflakes are pretty big in diameter. These came out to be three feet across from point to point. I have three hanging on the front porch now, maybe I will glitter them up, maybe make some more?  


Tomorrow I will talk a little bit more about 
Christmas decorating outside of the house...


Sunday, November 17, 2019

Stairway To Heaven

We are almost to the end of the blog posts on the transformation from the attached garage and mud room into my she shed.

This post has to do with the stairs. The original stairs were quite rugged and worn. They were not spaced correctly for the the riser height or for tread length to correctly fill the span. The top step and the bottom step had huge unexpected drops (and were dangerous).

Steve re-measured, recalculated and made new stringers and built new stairs. The stairs have been in place for a couple weeks but we knew we needed to get railings up to comply with code, as well as to be safe when the little ones were over.


After scribbling a few ideas on paper, we decided we would put not only one railing along the outside of the staircase, but we would also add another railing along the white wall side. Not only is it a bit safer, but it may encourage the grubby handprints of children to stay on the railing instead of being dragged up and down on the white plaster wall! Lol...

We bought some nice heavy duty silver railing mounts and a 12 ft length of unfinished handrail.

I gave the railing a couple good coats of grey oil enamel paint, to match the stair treads. We cut it in half so we would have two 6 foot long pieces. Steve mounted the one on the wall first.  It came out perfect.  Then he worked with mounting the big 4x4 end post, securely attaching it to the stairs.


Then he made up side slats that could make a good sturdily constructed railing.  Getting the angles cut to meet with the walls was a bit tricky, but we figured it out together.

He added a middle slat for little kids hands to grab onto. We informed Whitney and Claire that that middle railing was made "just for them" by Grandpa.


Underneath the stairs is the cutest little Cubby Hole. 

I mentioned in yesterday's blog that when I was a child growing up, we had a cubby hole under our stairs. It was a great place to hide and play. My mom also stored her sewing machine in there. Plus we hung up our snowmobile suits and had a big box of mittens and hats near the entrance. It was larger than this cubby hole, I still have fond memories of crawling in there to hide behind all of the things. Like a secret getaway hideout.

While we were working on the stairs, the dogs thought the Cubby Hole was a cool spot to hang out.


I put an extra doggy bed to put under there and thought it would become their own cute little hangout spot.

But once we moved the comfy porch furniture into the she shed, they gave up the cubby hole and decided that they would prefer to spend their time in comfort on the cushions.


The grandkids, 
on the other hand, 
think it's just the greatest place ever!

We put down an old southwestern saddle blanket and a couple big hunks of comfy sheepskins. Toss in a few pillows and they are all set. We gave the grandkids a couple of flashlights and let them go in there and read books, giggle and play!


Who? Us? 


We need cookies PLEASE! 


Reading Stories 


Even some time on Grandma's Tablets


So the stairs are complete, and they are truly my Stairway To Heaven each time I walk down them into my wonderful She Shed!


~~~~~~~

One of the other projects we did this last month that really wasn't in the she shed, but it did involve the ReStore. So I thought I'd write about it here:


Early in the summer I bought a cute little light fixture for the front porch while we were shopping at the ReStore. I gave it a fresh coat of red paint so it matched the shutters. Grandson Jameson helped to mount it up on the front porch. It was so cute and adorable and I just loved it.


Fast forward 2 months later and we go walking into the ReStore. We've gotten friendly with the lady who is usually there and she said "Look what I have for you!"  There were THREE more light fixtures that matched that original one we bought for the one on the front porch!! These three were larger in size, but they matched the exact same style and make as the first one we bought 2 months before.

Someone donated them at two different times, and we were fortunate to be there both times on the very day they came into the store!


Wow, they were absolutely perfect! We had just been talking about wanting to add some exterior lights to the garage. The garage was newly built last year by the sellers, but they never got around to installing any exterior lights.

We snatched up all three lights and took them home. I gave them all a fresh coat of paint because they were a funny dusty rose mauve color.


TicTacToe  3 in a row! 


Steve wired up the lights so the two front ones would go on simultaneously with a 180 ° motion detector if anyone comes in the front or from either side.


Aww those are just so stinkin cute! 


At the same time, the ReStore also had this decorative vent piece to go up on the gable of the garage. That was faded out hunter green. So again, with my handy little red paint brush, I made that match too.


The third light fixture was put on the side of the garage by the passageway door. In that one we put a screw in motion detector light bulb that would go on any time we opened either door. The detector is built right into the bulb!  So when coming from the garage or from the she shed, it turns on to  automatically illuminate the walkway between the two buildings.


Now the garage has a little more stylish pizzaz that matches the house, and new usable lights that make our yard safer to maneuver after dark.


This is just about it for the She Shed posts...

We are just laying the ceramic tiles in the entryway and are about 2/3 of the way done.  Steve is suffering from a sinus thing today, and I am not quite up to snuff either. So we laid low, watched football and I did some weaving and made some cool snowflakes from dollar store hangers.  Will post more about those tomorrow. Stay tuned!
