Our Wonderful Followers who come back again and again to read about us...

Saturday, July 30, 2016

Changing of the Guard - Rainbarrels - and the Cutest Little Barn

Last night we hit the local Kohl's store while getting some birthday presents for the grand kids.  While there,  I suggested we just "look" at what kettles might be on sale?

In December, we did buy a pretty set of ceramic lined copper colored kettles for Christmas as a present for each other. But they are thinner aluminum metal and the bottoms flex when heated.  Not bad if you have a gas stove with iron rack type burners.  But on our smooth glass top stove they dome upwards and spin around on a center bump when you try to stir.  Also they do not make full contact with the glass top then, and don't heat evenly.

We need some flatter thicker kettles with ceramic coating.  We are trying to get away from teflon or silverstone linings.

Mind you, I am not a shopper person. I don't hang out in malls or pass time browsing the sales catalogs or website shopping deals.  Soooo if I happen to see something at a good price at a store, I will check it out quick online on my phone and maybe decide to buy it.

Which is what we did!  LOL

We found some nice ceramic lined Cuisinart kettles that had all the sizes we wanted.  They have thicker metal sides and bottoms that lay flat for glass top stoves like ours,  or even for using on induction stoves in case we update at a later time down the road.

This set has a taller stock pot instead of the dutch oven. A deeper fry/saute pan with a lid.  Larger saucepans of 1.5 and 2.5 qt instead of 1 and 2.  10 pcs set means ten actual pieces of kettles, fry pans and lids..... and not extra flippers or spoons called "pieces"... haha   What was really nice is that all the lids fit on the fry pans too so it was more versatile.


Okay, I liked them.  But now the price.  They originally were $299.00 on sale for $229.00, (everything at Kohl's always seems to be on sale)  then another $100 off weekend sale brought them down to $129.00.  Next, my handy dandy cellphone coupon got us another 20% off so that brought them down to $103.00.  

Although I didn't go shopping for kettles, we came home with them.  LOL  This morning Mr. Steveio Chef Man washed them all up and cooked us breakfast !!!  They met his approval and do not flex or dome, they heat evenly and nothing sticks. Winner!


I moved the other coppper colored ones out to the motorhome.  
They are so pretty and I like them a lot,
and they will cook just fine
even if they do flex a bit
on the cast iron grid of the propane stove. 


After breakfast, I started on my next project.  I have a few folks who want rainbarrels made up for them after seeing the ones I made for the Critter Sitters Dog Grooming and Daycare  and the other for the Wisconsin Sheltie Rescue auction in June.


We got ahold of two food grade quality barrels last week. 

Steve cut the tops off and I started to clean them up today. 
A good scrubbing with degreaser and a stiff brush.
The labels have to come off too. 


This product is the BEST stuff for removing stickers. It's called UnDu.  Works so much better than acetone, Goo Gone or lighter fluid etc. We used to use it at the hardware store to remove price tags. It doesn't damage the surface underneath like other harsher chemicals do, but the sticky stuff comes right off with ease. 


Once the barrels were cleaned up (and I broke the garden hose sprayer nozzle today too)  I was able to start painting.  This customer wanted something prettier and lacier designs like my own barrels instead of the dog bones and puppy paws.  These colors will match her house.


Then it's Steve's part to do the next task... he uses a hole saw and drills out a hole up high enough to fit a watering can under, but low enough to get most of the water from the barrel.   I recommend putting the barrels up on a couple cement blocks, or a stand, to hold the barrel up higher to the downspout, This will get clearance for filling watering cans underneath the spigot.


We buy the next two parts at the local hardware store. 
A plastic spigot type faucet so it don't get rusty or corrode.
Then a three part grommet set with a rubber gasket to 
attach both inside and outside of the barrel. 
We screw the spigot to the grommet with a round or two of plumbers tape.


If one wishes, they can add a top pipe elbow and fitting and hunk of garden hose to channel overflow water away from the barrel.  One of my barrels has one of these, but I really don't see a need for it, because I use up so much of the water it rarely gets to the top.  I don't even have one on my other barrel.  I do see in the this pic my water is getting a bit green.  Just a little dollop of chlorine bleach takes care of that.


I am waiting for the other lady to let me know what colors she wants painted on hers... and hopefully I can get it done tomorrow.  My price is $50 and they sure look better than a big old blue barrel in the yard.

On edit:   Mary Jane asked for multicolored bones and puppy paws for her barrel. here they are all finished last night.  Tonight Steve will drill the holes to put in the rubber washer, grommet and tap the spigot.


Now my friend Lisa said she has located another 
TEN barrels for me to paint!  Whee heeee!!!!


This evening we took a ride out to an elderly gentleman's farm.  He was selling some table saw parts on Craigslist that Steve wanted to look at.   So while they were jaw jacking in his neat as a pin shop.... I was admiring this wonderful barn! 


Look at these glass block windows... 
just shining and gleaming in the evening light.


These dormer windows are so unique! 


The shape and patterning of the shingles is like none I have ever seen! 


 The rest of his yard and gardens were neat as a pin. 
PS he is also selling the donkey and little mexican boy statues


He chatted with us about apples (he sells at the farmer's markets) 
and his barn, which was built when he was only 16 years old. 
What a beautiful piece of Wisconsin Heritage,
 built back in the day of craftsmanship 
and pride of a job well done. 


Thursday, July 28, 2016

Our Son Mike --- and a Dog Gone Nice Day

It's hard to believe that it's been ten years already since our son Mike has passed away.  Sometimes it seems like yesterday, or last week, or last month.  There will always be a gaping hole where there should be one more family, one more pile of grandkids, one more person to keep track of.  We have to hang onto the good memories and smile at the stuff we recall.  His humor, his willingness to work, his love of sports, and most of all his wonderful unique character.   We miss you Mike.


~~~~~~~~


My oh my, after having the house closed up for these last two weeks... with horrible heat and humidity.... it was SO nice to open all the windows and let in the fresh air today!  

Imagine our surprise when we looked out in the front yard... our neighbor's house had been FLOCKED!!! Pink Flamingos everywhere!


It's a cute fundraiser for the 
church youth group. 


I also harvested the first ripe tomatoes from my row of 'mater plants.  I put in 6 different varieties this year. Some are early some are late.  I ate two of these just as a snack!  Yummmmmmm


Today I was energized to get things done, with the fresh air coming in. We were supposed to get some rain storms, but they passed over and out to Lake Winnebago.  I happily sat up in my sewing room for a while this afternoon, working on a quilt. Fresh air breezing in the open windows, and listening to birds and the wind chimes. It was such a pleasant day.  I sewed and ironed and cut and pieced.  I have 30 of these star blocks done now in blues and yellows.


I have all the blocks now bordered with "sashing" and "cornerstones"  and making them soon into a full quilt.  So far they are all sewn into strips. Maybe tomorrow I can get them into one solid piece. (called a quilt top)   Here the strips are just draped over a rod in order of how they will get sewn together.


With my new Handi Quilter frame, I can make the entire quilt process myself with the batting and backing and swirly quilting stitches.  That is the fun creative part!  The sewing machine gets pushed around the frame where the quilt is held taunt.  As I move it around, it makes stitches wherever I go! LOL   (I wish it were that easy....) 


Later in the day, BOTH of those danged doggers decided it was time for a NAP!  It's funny how they can beg and whine to be pulled by us up onto the bed in the morning for a little cuddle time.  But when it's the middle of the day, they can both easily JUMP up on the bed themselves and wait for me to come and take a nap! 


It's a pretty high bed! 

If they insist that it's naptime
I must comply, right? 


It was so pleasant this evening after Steve got home. He took care of a few things in the garage and then I cooked a nice hot meal for a change.  We actually had spaghetti, garlic bread and salads for dinner.  The temps dipped down in the 60's and we even put on sweatshirts to take a walk!  What a change from high 80's and humidity in the 70% range for the last two weeks.  


Yup, those dog gone good doggers wanted to take a W-A-L-K.... off we went for the evening with two swishy butts leading the way.  All in all, it was a dog gone good day. 


Tuesday, July 26, 2016

Meeting Fellow RV Bloggers Cheri and Dean - Warping up a Sectional Loom

We spent a delightful evening with fellow RV bloggers Cheri and Dean of Travels With Bentley blog.  They came for a few nights at High Cliff State Park on their way to Door County, and then on to the U.P. of Michigan.... after that they are heading east to New York.  They have been reading my blog for quite some time.  I was so glad she reached out to us and we got to meet up face to face!


They are not quite fulltimers, 
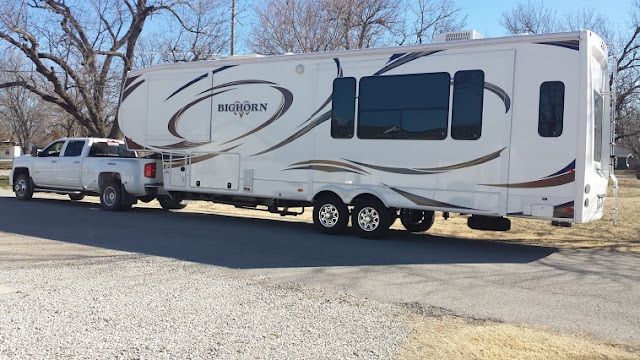
but they travel in a big rig fifth wheel
and have a home in Kansas. 


After Steve came home from work, showered, ate supper, then we hopped back in the car and drove right back to High Cliff to visit with Cheri and Dean. We brought out our lawn chairs to sit in around the campfire.  PS... my chair is now done too!  Please see last week's blog about fixing our chairs:


We sat around a campfire and enjoyed the evening... filled with stories of travels, camping, families and fun.  The evening went so fast, and before we knew it, the clock said it was almost midnight by the time we said our goodbyes and headed home!!!  

Safe travels to Cheri and Dean.  
See ya down the road somewhere! 


~~~~~~~~


One of my Newcomb Studio Looms has been "naked" for a while and needed to get warped up.  That means getting 360 threads... can you imagine handling 360 individual cotton threads, each 150 feet long, all wound on evenly and neatly, no criss crosses, no snarls, and perfect tension????  

With the right tools and preparation and practice, it CAN be done!   

PAUSE FOR A MOMENT FOR A COMMERCIAL..... 

I have a self-produced and self-marketed DVD of how to do the entire process, complete with hints and tricks learned over the years.  If interested in buying it, it can be ordered from: 
or 
 my Etsy Store
or 
my Ebay link of


First Step--- is to gather all the materials.  I have 24 tubes of rug warp (cotton string) to wind on.  Each tube is 800 yards.  I have a rack to slide all the tubes on so they can unwind freely without tangling. I have a tension box that lets all 24 threads slide under even tension through little slits in metal combs and onto the loom in each section. I have scissors and blue painter's tape. 

And most of all, I have PATIENCE! 
This is not a job to be rushed. 


The back of my loom has a special beam with little pegs on it. It guides my 24 threads into each section. It's one yard around, so I am cranking 50 turns, thus 150 feet for each section (approximately because as the threads build up, they gain circumference and take up more space)


I tie each bout of 24 threads with a slip knot onto the back straps of this loom. They are straps with ends similar to the buckles on overalls and work very well. If they can keep up Farmer Jones' pants, they can hold my rug warp threads! LOL


I line up the rack as close as I can get perpendicular to the loom, I am a bit limited on space. Right now I have three rug looms and two table looms in my Loom Room.  Gets a little cramped.  Now I am ready to wind up the warp.


It is very important to keep accurate count.  If one section is lacking even one or two revolutions too short, you end up wasting all the strings in all the other sections at the end of the weaving space. So keeping count is imperative. No interruptions, No tv, No telephone calls, No husbands asking questions.....   

My friend Rosie Dupuy of http://www.applewoodhandwovens.com/  gave me this nifty digital counter.  Each time I turn a full revolution of the back beam, I tap the button of this device that is strapped on my finger.  Neato! 


Look now neat and even those 24 threads are going on!  
This makes a weaver's heart go BOING! 


I wound on the first section and put double pieces of tape to hold the ends in place.  Now moving onto the next section, I double check each part of the process.  As I turn I do five turns and double check everything again. Then I can weave the next 45 turns knowing it's evenly filling each space without any "snowdrifts" to either side.  That would cause uneven tension, thus uneven rugs!


The clear plastic tubing is formed in "arches" that can be moved from peg to peg across the beam as I work.  It helps to guide the threads into the proper space without them jumping a peg and getting inbedded in the next section.  That is a mess you DON'T want to deal with!


See how the threads unwind from the tubes, go through the box with a tension peg, and then down onto the back beam?  This is called "Warping a Loom" or "Dressing a Loom".   I have the excess straps clipped down out of the way with temporary plastic clips while I wind the upcoming section.


And ... HERE IT IS!  
ALL DONE! 

 Be Still My Weaver's Heart! 
Pitter Pat Pitter Pat for an evenly wound warp! 


The project tomorrow is to thread all these sections through to the front of the loom.  The painters tape holds them all in order so I can thread them up a section at a time without messing them up.
The threads need to ride though various heddles (wires) on each of the four harnesses to make patterns. From there, they go through the beater and reed to be tied on the front beam.


Being thrifty with my time, I saved the remaining threading warp threads from last time and tied them off in knots hanging off the back of the loom.  See the old warp threads in various tones of blues?


Tomorrow I will tie 
each and every new white thread 
in a little knot to
 each and every old blue thread.

Yup... all 360 threads! 


Once they are all tied, I will gently pull them through the heddles and the reed up to the front of the loom.  Then Steve will help me slide the loom back into place.  I can tie on the front beam and start weaving!  I have two more rug orders to get done this week. Glad I am inside and cool in the air conditioning to get these done.   

In Conclusion:
150 feet is 50 yards---
 which is enough for about 30 rugs
30" wide and 60" long, approximately


Oh.... I forgot to mention.  

Meet my "Helpers" 

My Loom Room Doggies! 


Thursday, July 21, 2016

Our Old House - Making a Whole House Attic Fan

Whew.... it's hot!  I know that is the story all over the country.  Us folks in Wisconsin are not accustomed to this heat nor the humidity.  No thank you, you can have it in the South.


As for us, we are lucky to have central air conditioning in our 2 story 102 year old home.  But like all two story homes, the main floor stays nice and cool but the cold air really doesn't reach the upper floors as well.  The ductwork goes up that far, but does't blast good cool air into the upstairs rooms.  By bedtime, it's usually quite hot up there even if the main floor is a comfy 70 degrees.  Since the thermostat is on the main floor, it doesn't call for any more coolness throughout the night. That leaves the bedrooms rather warm in the 80 degree range.  With this type of weather we don't open the windows when it's so hot and humid even at night.

We tried to solve the problem by adding a small window air conditioner in the bedroom walk-in closet.  It blows into the master bedroom, but we have to keep the door closed out to the hallway just to keep our room cool. That works for our room, but not the rest of the second floor.

If I want to sew in my sewing room, it's quite hot even during the day. That is not acceptable to be leaning over a hot sewing machine with and extra full spectrum light aiming down on the work too.

If we have company, the guest room, which faces south, is too hot as well.  It shares a register with the bathroom and if you open one all the way the other side of the register is closed.

All in all, often our upstairs can be 10-15 degrees hotter than the downstairs.  Not good.  With my lung damage problems, it's tough to handle the humidity as well as the heat.  So central air is appreciated and comfortable on the main level but we don't want to sleep on the livingroom floor either.  LOL


Well.... one day I saw a PBS episode of This Old House.  They were installing a permanent whole house attic fan and cutting a hole between the ceiling rafters and putting in this really expensive whole house fan unit that ran $600-800 and used a remote control.  Cool!   It sucks the air from down below upwards into the attic and increases the amount of cool air reaching the second floor.  I like that idea, but not the price.

Sooooo Googled and I found this idea on YouTube! 


Wow... that made sense! 
We want to suck up the cool air from the main floor 
and the basement 
and help move it upwards.  
Without cold air returns on the upper floor, 
this hasn't been possible before.


We measured up our existing attic scuttle hole, which happens to be in the middle of our upstairs main hallway. A perfect location for this device----  and we can remove it in the winter months and put the original insulated wooden attic cover back in place.

We found a super duper fan that moves a lot of air ... and best of all it has a remote control!  So we don't have to have a cord hanging down or wire in a switch to the wall.  $39.99 at Walmart.  $10 less if you want the one without a remote. 


Steve cut a circle shape out of a square board. 
We removed part of the fan housing to get it to fit in our scuttle hole.
We have an outlet to plug it into up in the attic.
He set it right down into place in the opening and it works great! 


We just aim the remote upwards and voila--- 
instant air movement!  
What a great idea....

The cool air now comes upstairs, and moves down the hall, into all of the bedrooms, the sewing room, and the bathroom.  In our attic we have ridge vents, and three gable end vents to move the air out.

Keep in mind, this is not running all of the time. This is only for those few days or weeks (like now) during the hot humid streak we are having.  Otherwise, we can manage fine the rest of the season with open windows and fresh air.


Since we installed it, we are now comfy and it's been easier to sleep or sew or even wash up in the bathroom without getting heat stroke!


Sunday, July 17, 2016

Rained Out Camping - A Sheltie Kind of Day

We woke up at 5 am to a weather alert on the cell phone ---  storms a coming!  Downpours, heavy winds, hail and lightening. Not fun!

Sooo we hopped outta bed, tossed on our clothes and started to put away things on the outside of the motorhome.

Patio lights unclipped, 
awning rolled up, 
lawn chairs stowed away, 
grill stowed in the compartment, 
patio mat folded up, etc.  
Soon our campsite was ready to leave....   

We had the John Deere ATV vehicle here on the campsite, because we did some subbing for the camphosts this weekend. Steve also did some electric troubleshooting on a campsite over the weekend.  A maintenance guy's work is never done, even on the weekends!

We were debating about starting the noisy ATV up that early in the morning.  It was about 6 am and we didn't want to wake the neighbors.  We went back inside and gulped down a cup of coffee and decided by 6:30 we should run and put it away.  Others were getting up and about in the campground to fold up tents, take down popup campers, and get ready for the storms.

The rain was just starting to splatter as Steve drove the John Deere up to the shop, and I followed with the car to take him back to the motorhome. It was looking pretty grim in the early dawn hours, and you could feel the electricity in the air.  It was one of those mornings where you hairs stand up on the arm. You know it's coming.

We got back in the rig just as the downpours started! Those pretty new windshields were showing the water pouring down as it was slowly getting lighter outside.


We will wait till it lets up a bit, before the second bank of storms come on through. The news station weathermen are saying about 11 am there should be a break.  It's not too windy, so I think we will be okay for now. We can raise the levelers then and pull out the wooden planks from under the pads so we can roll on home. It's only 14 miles home, but Steve would like to stop and dump the holding tanks too.  Less rain is better for that task! 

~~~~~~~


Yesterday was a lovely SHELTIE DAY!!!!   Yes, our two darling shetland sheepdogs got doggie company!  Mary Kultgen from the Wisconsin Sheltie Rescue Group stopped on by to visit with her three dogs: Lexi, Reese and Jazz.  What a nice surprise!   


Mary also knows Steve's boss here in the park and had visited with her, and asked which campsite we were on to visit with us.  Soon Mary was doling out the treats to a very attentive group of shelties!


While we were sitting there enjoying our dogs, up comes ANOTHER Wisconsin Sheltie Rescue Adopter---- Vicky Kania and her dog Tara stopped by too!  Vicky and I have been trying to coordinate a time to walk the trails at High Cliff together with our dogs.  This worked out great, because now we could invite Mary too and take ALL SIX dogs for a walk!  LOL


We put on a few miles on the trails throughout the park.  At one point, I decided that all of the dogs needed a break so we put them all up on the bench to rest. LOL .... Left to right are:

Tara, Finnegan, Binney, Lexi, Reese and Jazz


What a great day for a walk.  It was not too hot, the breezes were blowing and we enjoyed the paths and nature and greenness of the woods.  We saw a few chipmunks and squirrels, to the dogs' delight.  Every now and then we would have people coming up the path, and we would make all six of our dogs pull to the side, sit and wait.  It worked quite well.  I said we were having a Puppy Parade!  Got a some remarks about six dogs of the same breed out for a walk.

We got down to the bottom of the cliff area, near the beach parking lot.  That was enough.  I wanted a ride back.  Tried to call Steve four or five times back at the motorhome, but he had accidentally set his phone ringer volume down to silent. We had to call a friend to come and pick us all up and take us back up to the campground.  There was no way I wanted to walk back UP that cliff.....


Later than evening, 
Steve and I took a walk with just our dogs
 to catch the sunset over on the cliff.  


 It was soooo pretty!   
 Every thing was calm and quiet
I love the golden sunshine of the setting sun


This is the end of another weekend at 
High Cliff State Park. 

Just waiting for a break in the rain
 to hightail it on home.