My sister and I have woven many of these chairs together as a team. Here are photos of some other chairs we have done over the years. My sister and I usually sit side-by-side to work on them while we are camping. We will call out the pattern back and forth to each other, and each complete a chair at the same time: "2 under, 4 over, 6 under, 2 over, 4 under and loop loop" !!! Then we would stop and take a drink haha!!!


If you would like to learn how to weave the lawn chair,
here is a good link with step by step instructions:
OUCH! The rivet tore right through the frame pipe!


The frames of both of our chairs had broken --- Soooo I want to repair the frames we have. The only problem is I would have to completely tear out the cord and redo it again once the frames are repaired. Ugh!
Of course, we could try to locate new frames. My friend Connie found me two wonderful heavy old chair frames, of the rocker style. I could remove the entire woven sections and move them over to the new frames, but the seats on these other frames are much narrower and the backs are shorter. I don't think I can preserve the original pattern and style and total lettering of our names if I put the woven sections on the smaller frames. Thank you Connie for saving them for me. I think I will use those frames for redoing my father-in-law's and step dad's chairs.... which are also both broken!

I still want to use the larger frames,
and would love to locate some like ours.
We cannot locate any of this original size
in any stores anymore, nor online.
(=== side note === my neighbor Diane
has TWO of those original Fleet Farm chairs,
still in original shape,
and just sayin, someday,
hers might go missing!)
My wonderful Steveio long ago determined that he could repair the frames if I would remove just the side cords where the woven portions are wrapped around the sides of the seat. The rest of the chair can stay intact. After looking closely, I figured out how to remove the woven portion in order to repair the frame!
One of my Top Ten blogs that I have written, with over 3,000 views, is my blog about fixing and re-weaving the broken lawn chairs. I wrote it about five years ago when I had to repair and reweave a lawn chair due to the broken frame:
http://kareninthewoods-kareninthewoods.blogspot.com/2011/08/re-weaving-favorite-lawn-chair.html?m=1
Today, I decided that this time I will write a new blog post about removing a section of the weaving, and repairing a frame.

I carefully unlooped (is that a word?) the side sections of the seat. Besides the crocheted string, I also secured them in bunches of every three loops with little plastic clips.

Now it was Steve's turn to do his magic for me!
Steve drilled out the flimsy aluminum rivets and was able to reinforce the sections of pipe by sliding in some narrower pieces of stronger conduit. Then he used grade 8 heavy duty stainless steel bolts and nuts instead of the rivets.


Look what a great job he did with his repair!

Now it was time to reloop (is that a word too?) and secure the cords back around each of the side bars of the frame seat.
Although I'm slowing down in my old age, my hands take a real beating when I do this part of these chairs.


Getting Started--- first three loops done

Halfway There

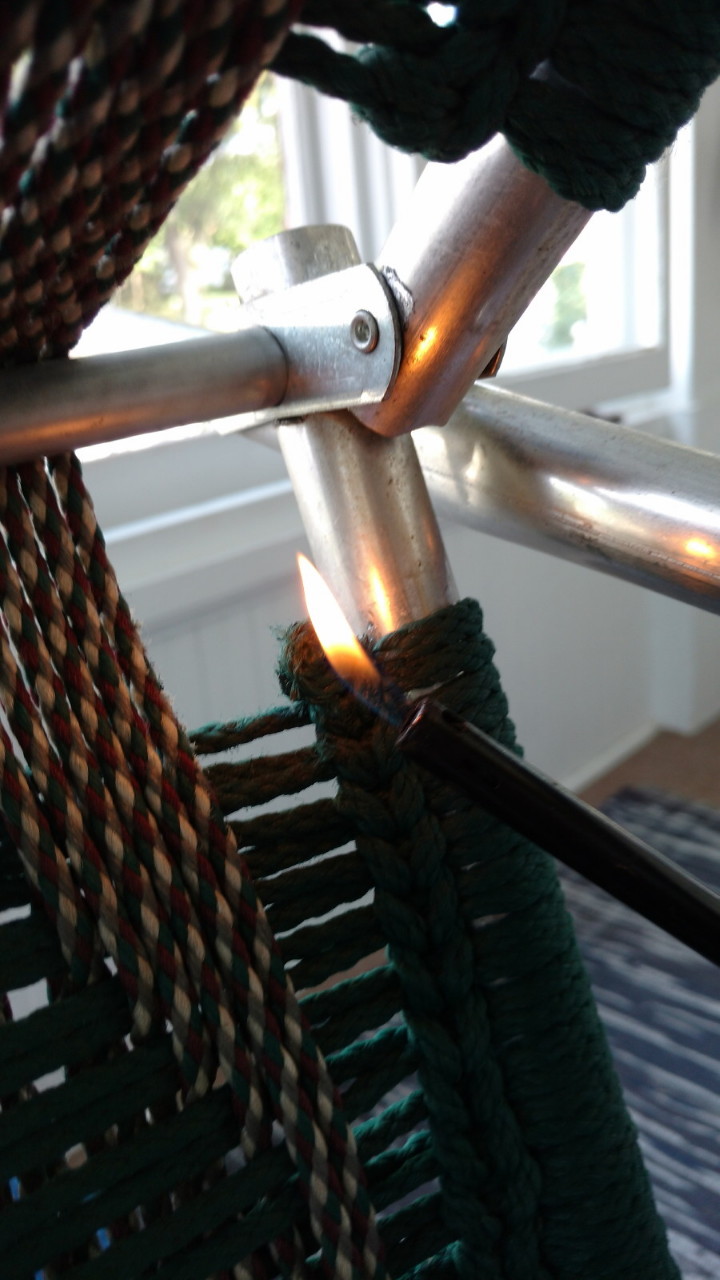
I worked on it on again off again all afternoon and finished it up right before suppertime. When the final portion is tugged and pulled through, then you tighten up the knots and flicker a flame from a lighter over the knot. It melts it just enough to secure it without burning it all the way through.

And there you go, the chair is finished!

~~~~~~~

It's great to camp here, and we are subbing for the current hosts today for a few hours while they attend a birthday party. We are the camphost coordinators for the park. We train and set up one month long stints for hosts for the camping season. Steve has such a short commute back to the campgrounds from the shop. For those readers who do not know, Steve is also the Facilities Maintenance Specialist Advanced state park employee here. But he is known as The Fix-It Guy here at the park! LOL
Campfire is ready for company with our other chairs around it
(we try to save our woven ones for just us....)

We picked up some new patio lights for our motorhome. World Market has them all at 50% off plus a coupon for 15% additional off. It's a nice long string of 30 lights and is longer than our whole awning. Often patio lights are short strands of 10 and you need 2 or 3 strands connected to complete the whole awning.


The dogs are happy to be camping too,
lots of new places to sniff!


It was a pleasant evening, and we didn't get to bed until midnight!

Nicely, our doggers let us sleep in till 8:30 this morning...
what a treat!


Wonderful, Karen. I will save this link, it is quite inspiring!
ReplyDeleteKaren, you are so artistically talented; I am so jealous! LOL. I just love the idea of reweaving lawn chairs. Both mine and Tom's lounge chairs are showing wear along the edges and maybe, just maybe, I will try my hand at this...someday...sigh, I hope. I am saving this so I will have the instructions. Thank you so much for sharing your wonderful talents to us.
ReplyDeleteI wish you could see the frames I've been saving ... not folding chair, but solid. Not sure how or what to do with them ... have you ever worked on stacking chair frames?
ReplyDeleteReally nice looking chairs. You did a great job on them!!!
ReplyDelete