Our Wonderful Followers who come back again and again to read about us...

Showing posts with label bathroom redo. Show all posts

Saturday, December 9, 2017

Partway Through the Bathroom Facelift

PUTTING BEADBOARD WAINSCOTTING IN OUR BATHROOM

We had our plan in mind... 
we took our measurements... 
(checked them twice)... 
and headed out with a cut list of supplies! 


Here is Steveio, loading up the beadboard and trim boards on the cute little trailer he bought last summer. It sure has come in handy for small projects, especially when some of the boards were 10 feet long.  It was just beginning to snow, so we got home and the wood was pretty dry and no road slop on any of it. Whew!


Next up was to gather some tools.  Ahhhh this is a good start!


Steve carried all of the wood down to the basement.  Our basement is divided up into three rooms plus a cistern.  I would need to spread out my work into all three rooms to get all the wood laid out. We brought the sawhorses down as well.  Sooo funny, last spring I "garbage picked" a couple sets of sawhorses and Steve was totally against me taking them.  Well, he said we had a nice metal set of 2, and one wooden set left behind by the sellers.... so why get more?   ha!  We used all four sets last summer while I stained all the spindles and crossboards for our big fence project.  Having four sets lets me get more productive and thus more units can dry at the same time!

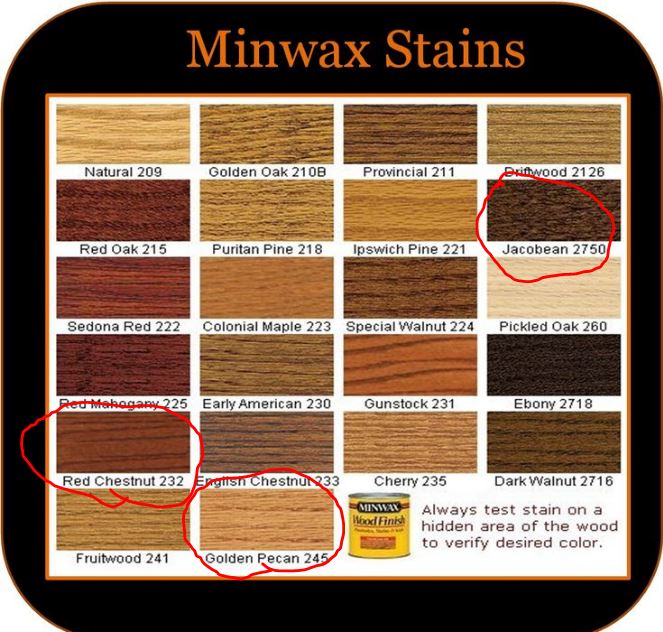
With careful testing, I determined that on our wood, we need 2 coats of Minwax stain. My formula is 4 parts Golden Pecan, 2 parts Red Chestnut and 1/2 part Jacobean to obtain the right orangey-reddish-brown to match the 103 year old woodwork stain in our home.


Here is about 30 sq feet of beadboard with the first coat of stain on it
the 8 foot long boards will be cut into two 48" pieces for our wainscoting
This batch is in my workroom


Here is another 60 sq feet in the root cellar room, 
with a first coat on them


These are the baseboards and top cap trim,
they have 2 coats on them and are the right color now. 


Maybe tomorrow evening I can get the final coat of clear polyurethane on them.  I have some leftover quick drying floor poly from when I redid the hardwood floors 2 years ago. I think that will make a good solid strong seal on the bathroom walls. It's stuff from a gym floor supply poly company.

While I was down in the basement staining, Steve was upstairs working on tearing off the plastic tiles and baseboards.  He also removed the chrome medicine cabinet.  Wow.. look how thick the plaster is in this 103 year old house!  It's a 1/2 inch layer of thick cement onto the lathes.   No wonder we don't have any wall cracks!!  It's really solid and tough stuff.  Not like the thin skim coats they do nowadays of chalky white stuff on gypsum wallboard.


Steve works fast!!!  He had most of this done within an hour!   Of course, the plastic tiles just kinda pop off after being glued on for about 60 years.  He will take down any of the rougher bumps of plaster and glue with a small oscillating tool and I will shop vac up the mess as we go.  Less of dust and junk flying around in the air. 


The three walls, North, East and South were all tiled.... the West wall along the tub we had taken down those tiles five years ago when we redid that part of the bathroom.  Now the new beadboard will go on all of the walls, 48 inches up, with a 5 inch thick baseboard. It will be high enough to cover the old surface and glued messy icky wall underneath.


I bought a quart of white paint to cover the heat register grate as well. These lovely old cast iron grates are so wonderful, and I would like to leave it original... but this was already painted many times before. The rest of the registers in our house are original and untouched .


While I had my brushes and white paint stuff out... I decided to paint the little table for next to the tub. It has been white when I first bought it, and I painted it cream back then. Now it's back to white.  It's perfect for setting my glass of wine on, or an ice water, my MP3 player, and a candle, while taking a relaxing bubble bath. 


I saw an ad on the local buy sell trade Facebook Marketplace site. It was PERFECT! We wanted an old medicine cabinet, but most we have seen are painted. I want to stain one to match the beadboard.  Yes, Steve could make one, but I wanted an "old one".  Sure enough, a lady was selling this one that has already been stripped, for a mere $10, this came home with me! 

Replacing THIS with THIS (after it gets stained)
 

Lucky for us, our son works for a glass cutting plant, and I think I can beg him to make me a nice bevelled edge mirror to go in the door opening!  

~~~~~~~~

Mr Antsy Pantsy wants me to hurry and get all this wood stained and poly'd quick, he wants to start cutting the beadboards in half and attaching them to the walls.

But but but --- we had a few other things to take care of this week...

  • We babysat on Thursday up to Oconto for Jameson and Whitney while their parents went to his company Christmas party.  
  • Today we got up at the crack before dawn to help transport garage items from Steve's dad's old house to his new house. That resulted in 350 miles of a convoy round trip to get a lot of stuff done.  
  • This this evening we snatched up granddaughter Claire to babysit so her parents could go to their company Christmas party! 


Walls can wait a bit,
Dad needs our help and 
Grandkids grow up too fast! 

Wednesday, December 6, 2017

Getting a Facelift for Christmas!!!

Yes, I am getting a facelift for Christmas! And best of all, Steve wants it too...

Not surgery, silly readers, we are going to give a facelift to another room in what we fondly refer to as "Our Old House" which is our 1914 home.

See, most of your readers remember that we bought the house 5 years ago. The bathroom was not in the best of condition. It was the only room in the house that really wasn't original to the house date of construction anymore.


Those are not real tiles,
they are plastic glued on tiles from the 60's....


Keep in mind, the elderly people who had last lived in our home probably made these changes in the forties, fifties and sixties to the bathroom. After they passed away, we bought the home, unchanged, from their 3 daughters.  Nothing else was updated or changed over the years prior to our purchase.

We do cherish the originality of our home with all of the gorgeous woodwork, the hardwood floors, and the overall structure and construction of the house. It was just the out of sync bathroom that needed to be addressed...

In striving to make it more pleasant than original, we also had to deal with the evidence of a leaking toilet over time, and removing a turquoise bathtub and shower enclosure that had seen better days.


The ceiling was in rough shape as well, there was some evidence of a past roof leak (that have been repaired), and over the tub it was falling down due to not having a bathroom vent installed.  There were ugly acoustical square tiles that had been attached to the ceiling. The upper walls were adorned with patterned printed wallpaper and the lower walls are covered in plastic square tiles that are just glued on.  It was a mix-mux of patterns highlighted by the gold metallic and white linoleum flooring that was curved up the walls as faux baseboards?? 

This is how it looked when we bought the house:


Notice in the pic above of the crazy medicine cabinet had those two vertical fluorescent tube lights that drove me nuts. Not only did they flicker on and off to get started, but the plastic housing covers were all yellowed and cracked. We removed those and later added two beautiful wall sconces instead.

After repairing the plumbing and the sub floor boards, we replaced the flooring with something neutral.  With  all of the patterns to the wallpaper and tiles, we didn't need another pattern on the floor.  So we chose a soft creamy neutral ombre sheet vinyl to cover the floors with (after fixing the sub floors and plumbing and then using leveling compound).


We cut down the wall between the tub/shower enclosure and the open space behind it.  We were planning to use this space for a whole new configuration. 


Instead of the crazy outdated bathtub shower enclosure, we pulled that old cast iron tub out which was a HUGE project.  We had to bust it in half with a sledgehammer to haul it out in two pieces.  Steve and I slid each half down the staircase (with three turns!) out the front door and porch, and onto a tarp to drag it to the garage for the metal scrappers to pick up.


We pulled off the wallpaper, yanked down the ceiling tiles and did new sheetrock all over the ceiling and upper walls. We also installed a new bathroom fan/light fixture that had an old fashioned appearance with the fan hidden up under the light shade.

We put in a more simple white plain looking bathtub and a separate stand up shower stall tucked away behind the door. It was the best of both worlds, because I enjoy the baths and Steve enjoys the showers ---- he likes a separate walk-in stall like we had in our last home.


The toilet and the sink had been more recently replaced by the previous owners and those were of good quality. We kept those 5 years ago when we did the other work in our bathroom.

Don't get me wrong, we love our beautiful old house. But we want to restore things back to what it would have been like in 1914 and erase stuff from the forties and the fifties and the sixties if we can.


All of that work you see in the pics above was being completed 5 years ago when we first bought the house. It was all well and good and we liked what we did to improve the bathroom.

FAST FORWARD TO 2017

Those crazy plastic tiles bug me!!!!! They are not attractive to my eyes, and they are really a creamy faded non-white with brown speckles that never seem to be clean. Not to mention, the cracks in between aren't really grouted, the tiles are just glued into place. Of which those tiles keep falling off and we have to keep gluing them back into place. arrgghhh!!!


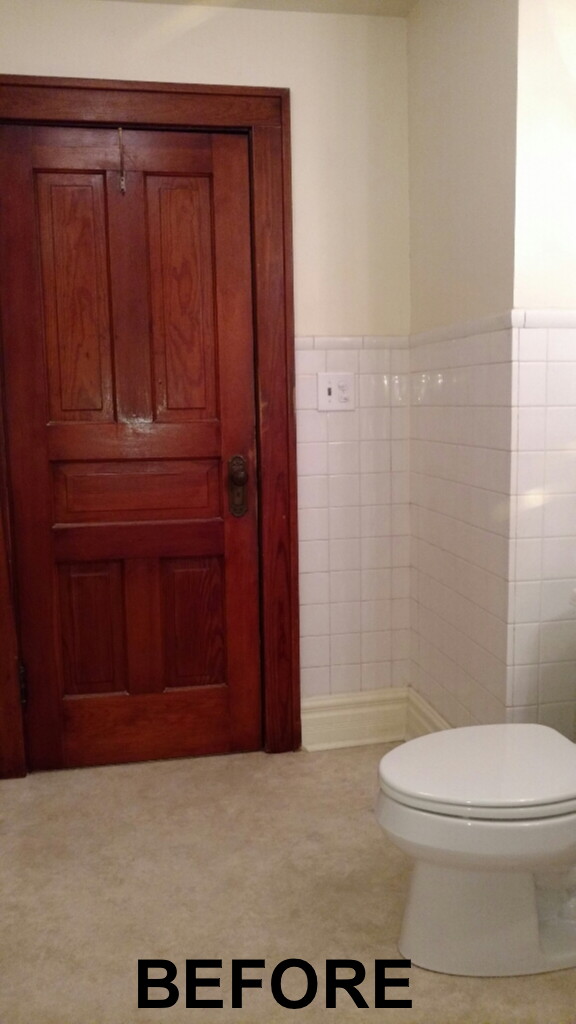
As we undertake this new facelift project, these are our "BEFORE" pics of the bathroom. This is how it presently looks right now.

SOUTH WALL


WEST WALL SHOWER


 WEST WALL TUB
(ps the antique lamp cord is not plugged in, it's just for looks) 


 EAST WALL


NORTH WALL


Steve and I were having a tough time finding ideas of what to get each other for Christmas. So we decided we would jointly work on this bathroom together and pick up all of the materials as our Christmas Presents to each other.  Besides, we like working on projects together, so that makes it extra special fun.

Our first stop last night was to the Restore for Habitat for Humanity, just in case they had what we were looking for.  I used to love going into the Restores, but lately they seem to be so filled up with furniture and not actually leftover building materials. Over half of the display floor in the Appleton and Fond du Lac Restores is covered with discarded couches and chairs and crazy fiberboard cheap bedroom dressers and headboards. I think people are using them as a Dumping Ground of Junk rather than a place for contractors and home fix-it people to donate their leftover or reusable construction materials.

We then drove to three different home improvement stores to get some ideas.

Here is a hint: This is our lovely linen closet in the hallway.


Steve removed a door to set in the bathroom to get an idea....

I guess now you'll have to come back here to see what we are up to.

 Check back as my face lift goes under the knife ----- errrrrr saw?


Thursday, January 28, 2016

REDUX - Motorhome Modification - Replacing The Bathroom Floor in our Rig

Since it's the boring winter months, and we are not travelling yet, I thought I would do some repeats of my most-read blog posts on RV repairs.  This one had over 3,000 views when I first posted it. We installed our new bathroom flooring six years ago and it's still working out great!


In October of 2009, we noticed some softening  to our bathroom floor, along the  edge of the cabinetry on the passenger side.  


So we pulled back the vinyl flooring, only to find our subfloor was rotting !  Upon further inspection, we had three sources of water intrusion. 

  • 1. It turns out that the wheel well area  had a leak from the outside and was exposed and it seems it was kicking up water when driving in the rain.  
  • 2. Our washing machine had never been winterized properly by the previous owners.  We found out it had a cracked pump, and replace it, but not before the damage was done with with leakage over a year or so? When winterizing, you have to not only get antifreeze IN the hoses going in, but also IN the pump for the water that goes OUT. Lots of folks miss that step.  
  • 3. the worst intrusion was along the three horizontal bands of aluminum on the exterior.  The top edge of the band allows water in if the clear caulking has worn away.  We sealed it up again with ProFlex clear silicone, that is UV resistant.  It's a good idea to recheck these three bands of trim around the sides of the Safari motorhomes of our vintage.  We now inspect it and fill in any gaps YEARLY ! 


As we started to tear up the floor, we never realized the damage was this severe.   


Our friends Sam and Donna at :   http://samdonna-5thwheelvagabonds.blogspot.com just went through the same thing, a major floor repair/replacement job! 


This was quite a project! 


First we needed to remove all of the vinyl flooring.  Over the bad part of the floor, it was easy to pull the vinyl flooring off of, but the rest of the flooring was stuck firm with glue!   In the photo above is on the driver’s side of the rig, where it was glued down tight and firm.  So it meant we had to be down on the knees and using a putty knife for a few hours to get it all torn out. 


replacing bathroom floor 5


We did not have to pull out the toilet, we had to just remove the pedestal housing that surrounds the actual base.  That made the job even easier! 


replacing bathroom floor 7  
(did you know RV washer/dryer combos have CEMENT block weights inside to help with counterbalancing the spinning action? So they are MUCH heavier than household washing machines... ack! ) 

replacing bathroom floor 8


Now for the messy part:
replacing bathroom floor 9 replacing bathroom floor 10


We found the wood was more and more rotten, the deeper we dug.  We wore masks and gloves because of the moldy wood we are grabbing and tearing out, piece by piece.  We were finally down to the chassis frame and rigid foam insulation.  From the bottom up, outside, we cleaned and sealed the wheel well with spray-on pickup truck bedliner.  We also resealed the side trim strip on the wall with a new bead of some ProFlex clear silicone, that is UV resistant for outdoor applications.  We will be sure to keep checking it for any future leakage!

After ripping out the rotting wood, we also realized the location in the cabinetry had the washer/dryer combo sitting on just ONE brace of the chassis frame!   That very heavy 150 pound machine plus the weight of water when in use was only centered on one piece of frame?  That meant the four corner legs were not even on any support other than the flooring and vinyl and foam insulation? hmmmmmm


So we beefed that up too with more bracing  on each side before sealing all the bottom up and laying the subfloor and underlayment. 

replacing bathroom floor 11replacing bathroom floor 15
Once we got all the bad wood out, we coated the leading edge of the good wood on the remaining floor with this hardener product, just to be sure no rot would spread any further.  The wood was now dry and ready to lay in the two pieces of wood on top of each other.  The sub floor and underlayment are also both of treated wood.   We coated the two new wood  sections with a waterproof sealer on all sides and edges too. 


replacing bathroom floor 14replacing bathroom floor 13


We worked like a team, (just like when we built our house together)  and it was a fun project, once we got the rotting wood out!  We laid in the two new layers, firmly screwing them down and sealing in between with the layers with construction adhesive.  Now the new boards brought it up to the same height as the old floor, so all was level and ready for the new flooring across it all.  

replacing bathroom floor 16   replacing bathroom floor 17 

Now the fun part starts!  Laying on the new flooring!!  It’s a laminate product similar to the new hardwood floors, but this in a faux ceramic tile design… almost a match for the previous color of vinyl we had in there, and it matches our carpeting very well too. 

replacing bathroom floor 1replacing bathroom floor 18 

   
It was just measure, cut, click…  what fun!  

The angles around the shower/tub and sink were a bit complicated, but we used paper templates and transferred the angles onto the panels.. Easy Peasy! 


But for extra peace of mind, now the whole washing machine  was put in a heavy duty *drip pan* to prevent any future possible damage too.  The rubbery plastic pan was from the local farm supply store called a "Rabbit Droppings Pan"!    It allowed us to slide it in the cabinet easier without damaging the new flooring too. 

replacing bathroom floor 20 replacing bathroom floor 21 

It sure made a huge difference in the stability of the flooring through that whole area.  It must have been rotting away under there for years, each time we drove in rain or snow! 
 
PS....  in 2015 we added two bicycle tire inner tubes, one on each side of the washing machine.  Once in place, we inflated them to help add stability during the spin cycle.  It works WONDERFULLY! 

Steve finish-nailed the trim thresholds back into place on both doorways, and added new quarter-round trim behind the toilet and in front of the cabinets.  We put the base-surround on the tub again, and the pedestal to the toilet back into place. 
It looks as good as new!


And here is ...... 

replacing bathroom floor 22

We will be attending the funeral for my step dad Lowell on Saturday. It will be a tough "good-bye" for our family.  I think some time next week we will be gearing up the motorhome to help Mom get settled back in Florida.  So some travelling will be done in future blogs, I promise.  Until then, I will post more modifications for you wonderful faithful blog readers!