Everything needs a firm foundation in order to be secure and safe and long-lasting. That's probably why this old National Folk Farmhouse has been around a hundred plus years.
It's time to take care of it so it can last another hundred years!!
Our home is actually two homes that were joined together in the late 50s or early 60s. They are both older homes--- it's just that one got moved from somewhere else, and put on a newer foundation. The newer part is to the south.
The original part is probably from the late 1800's or very early 1900's. But because this was township farm country back then, there are no real accurate records like if it were a city plot. We went to look up the origins of the property at the courthouse and City Hall, but there really just isn't a lot of record-keeping. Especially on old farm houses when they were in the township before it got annexed into the city.
I do know in the 1930's, an elderly lady lived here, and she raised chickens in a large shed in the back acreage. She had a fire in the kitchen woodstove, and there was some damage we unearthed to the flooring when we were working on the laundry room. Other than that, we don't have any other records of when the original farmhouse was built.
This original part that is located to the north. It is built on a thick rubble stone foundation that is probably about 2 ft thick at it's base. That's the way they built houses back then with big huge stones that they pulled up out of the field or while they dug the basements.
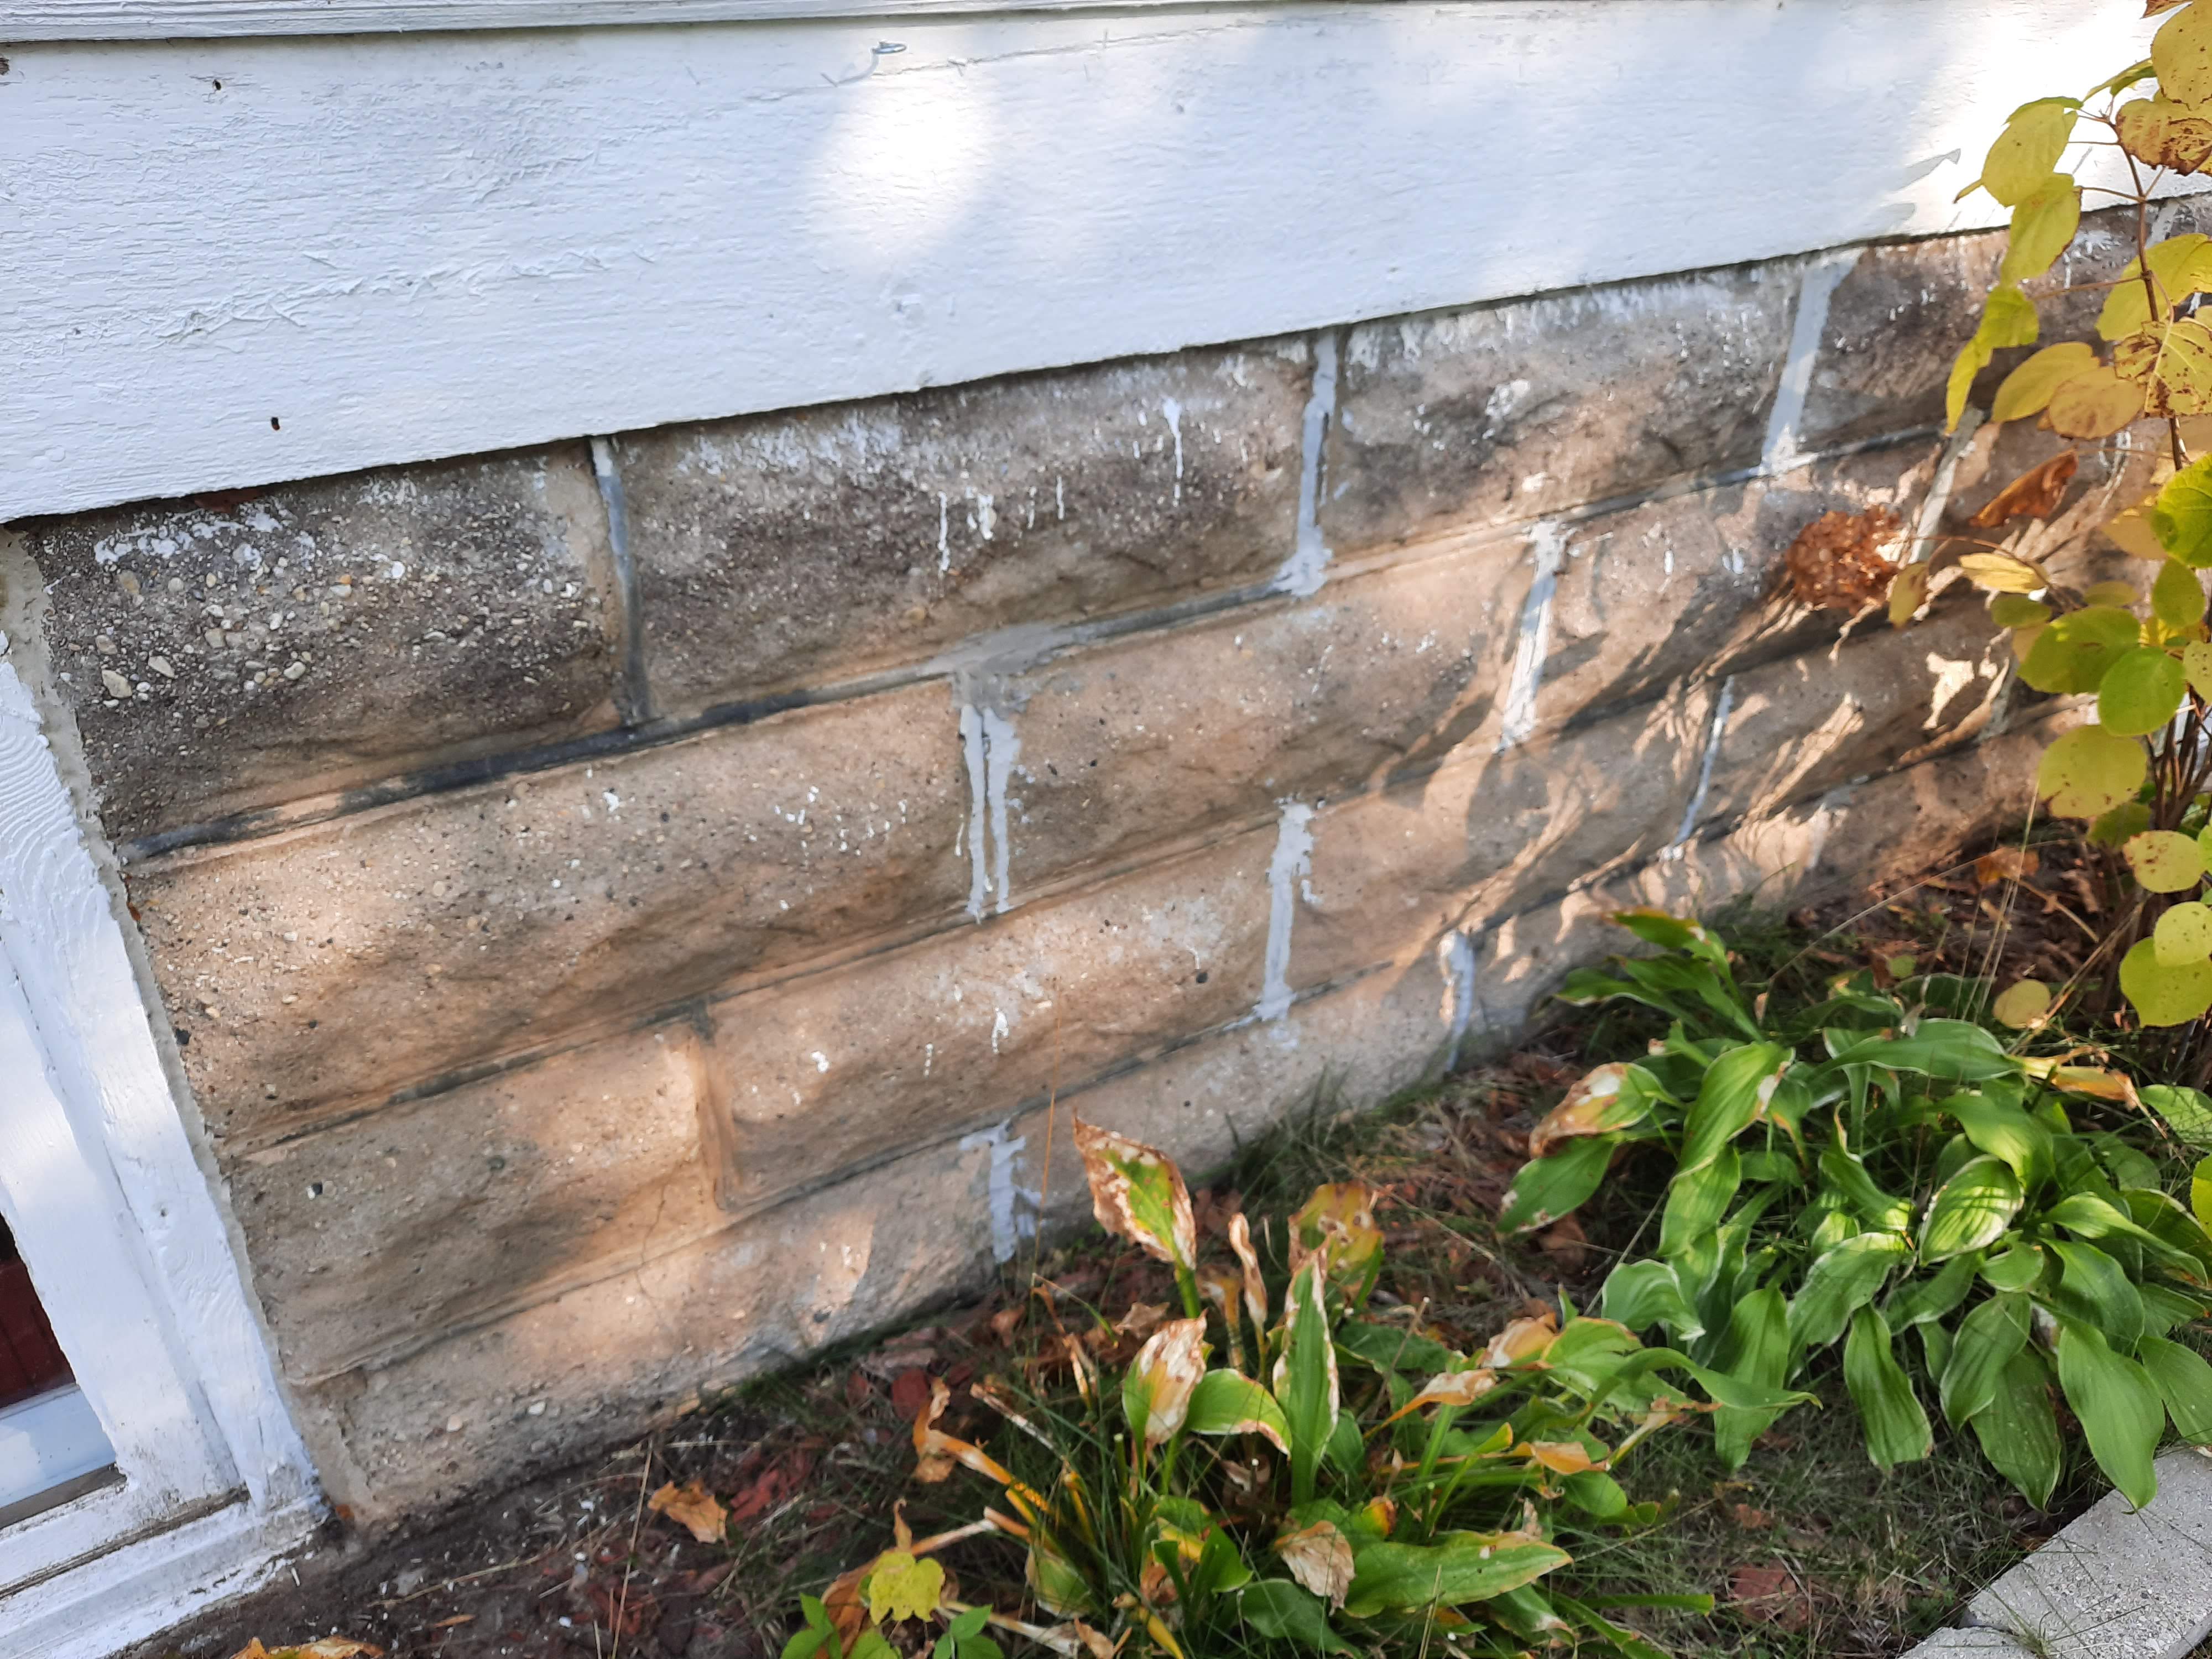
Somewhere along the line, somebody coated the foundation with a layer of cement, and pushed molded forms up against it to give it the appearance of being cement blocks. That layer of cement is probably 60 or 70 years old as well.
It was starting to crumble away and the stones are starting to show. Mostly in a few areas where maybe there had not been proper rain gutters attached to the house. Over many years, the mortar between the stones has eroded away as well. We fixed the rain gutter problem right away.
Now it was time to fix the bad areas and give everything a new update and facelift!
Of course,
his two faithful assistants
needed to get in on the job
and help him out.
He prepped the area by digging out any loose mortar between the stones and wire brushing any loose material out of the way. It always looks worse before it gets better!
Steve filled in around all of the cracks and loose areas with a an epoxy polymer-based foundation caulk made specifically for that purpose. It is kind of a epoxy substance that sticks really well. Once that was good and dry he was able to mix up mortar to the correct consistency and started filling in between the stones. Layer-by-layer and bit by bit he was able to fill in all of the gaps and smooth out the surface while working in a vertical position.
Then it was my turn to add a nice thick layer of acrylic enamel paint, specifically designed to go on concrete or mortar. It sure made a huge improvement. The picture has a little bit of a bluish cast, but actually it is a gray colored foundation paint.
He will backfill the dirt around
the base again today....
Steve had gone around the entire house, even the southern portion of the house foundation, and filled in any gaps or cracks with the remaining polymer caulk material. He had done the inside walls in the basement this past Spring, and now the remaining outside is sealed in as well.
These cement blocks on the newer south section look awfully rugged and battle worn after all the years of people dripping paint on them and the exposure from the sun. Actually at one time they had been painted black! So much had worn off and they were quite unsightly, don't you agree?
It's time for Karen to haul out her bucket of paint, her roller and brush, set up her celtic tunes on the MP3 player, get out the coffee cup, and go to work. We had some unusually warm days in the 70s, so it was a perfect stretch for me to start painting around the entire foundation of the house.
Bit by bit, section by section, I was able to completely cover all of the foundation. The rough surface was kind of difficult to paint. But in a way it was fun. At first I would use a little mini roller and roll as much as I could in every direction trying to get over all the lumps and bumps. Then I would take a brush to get in all of the low areas and fill in any missed spots or crevices.
I spent an entire delightful afternoon doing this south side of the house. It really made a big improvement. I think the longest span with the air conditioner was the most difficult because I had to work around the hoses and power box. What a transformation.
With it being Fall, a lot of the plants had died down, so it was easy to work around the hostas and hydrangeas without doing any damage to the flower beds.
Here's the South side all completed.
Yesterday it was time to attack the East side. Steve took this picture of me just as I was getting started. My hair is so long it gets in the way when I paint, especially when it's breezy. So I had to pile it all up in a knot on top of my head which doesn't look the best. But once I put on my painting clothes and get my hair clipped up out of the way, there's no stopping me.
Paint paint paint and transform the foundation. You can see the old black paint on the undersides of these cement blocks where it hadn't worn away yet. By coating it all with the new gray, it looks so fresh and clean.
I had two helpers that insisted on remaining close to see what I was doing. This is in the fenced-in back area where we just added the new vinyl fence along the south side of their party yard. They are good helpers and they keep me company. Steve was busy doing other projects and cutting the grass, hopefully one last time, before snow falls.
I had my little bucket overturned with some cushions on it for a seat, my MP3 player sitting on the bulkhead doors to the basement, along with my coffee cup. I was all set to spend a delightful morning outside in the sun and the light breeze.
Projects like this are so satisfying. It's like an instant transformation and you can see your progress right away.
By about noon it started turning a little cooler and windier. I was able to finish up this entire section on the East side, as well as the newly repaired bump out of the kitchen nook.
You can see the outline of where we removed the old basement entrance enclosure earlier this summer. The original wood siding underneath is now exposed and doesn't really look as bad as we thought. Maybe next spring we will rip off the rest of that ugly vinyl siding on that section of the house and see how bad it really is?
It was strange, only the East side of the house was covered in vinyl siding, the rest of the house was original wood. We have no idea why? But we don't like vinyl siding at all, and it will come off in the Spring, I am sure.
We do have enough of the new Smart Siding squirreled away in the garage to replace this entire section, as well as the little bump out of the kitchen nook. We are going to replace the windows too, and add one more window to the Master bedroom to the left of that awkward spot. But for now, this part of the house can't be seen from the street so the patched looking siding isn't quite an issue (yet). Soon this side of the house will be as pretty as the street side.
The slanted temporary downspout is where my rain barrel normally goes. We remove it for the winter months. That is a temporary fix just to get the rainwater to drain off away from the foundation.
~~~~~~~
After our work was done, we enjoyed a nice evening sitting out on the front porch. The weather was absolutely beautiful. It was still 70 degrees in the evening, no mosquitos at all, and the soft light of the sunset was so pleasant as the darkness overtook for the evening.
We had a couple of pooped out dogs that joined us on the front porch. They had a very busy day of supervising our painting and projects. It's a "Ruff Life" you know?
Since we had put the big flagpole out in the backyard, with yard lights attached to the top (see one of my previous blogs) I had this nifty flagpole solar light left over from when we used the flagpole in Chilton. I decided to strap it on to one of the spindles on the front porch and illuminate our flag out in the front of the house. It also illuminates our house number which is extra nice.
So we sat out in the pleasant evening air and waited for the darkness to fall. Soon the solar light clicked on and lit up our flag. Success!
We felt good about finishing up another project that needed to be done before winter comes. The entire foundation is now patched, repaired, and painted. One more step towards preserving ~~~ A Firm Foundation~~~
Wonder what our next project is?
Hmmmmmm???
Here is a hint:
"Just relaxxxxxxxx"


Do you two ever really relax? It's wonderful to see the work you've put into your home. It is lovely, and the pride is obvious.
ReplyDeleteTake care and stay well!
We relaxed at the end of the blog... on the front porch! LOL
DeleteI have been following your blog for some time. If you two ever want to take your skills on the road put me down for a couple of weeks worth of jobs. You do great work . If you could give me the name brand of that epoxy polymer caulk you used I would appreciate it as have need to caulk some gaps between some bricks . Thanks Vern in Boise Id.
ReplyDeleteLOL... Steve did this kind of work for the State of Wisconsin for 38 years. Retired now and we have all to do just to do our own. Don't think we will do it for a "job" in the future. The polymer caulk for foundations is this: https://www.menards.com/main/paint/caulks-sealants/silicone-caulk/titebond-reg-weathermaster-trade-gray-concrete-joint-sealant-10-1-oz/10-1oz3191/p-1501655538562-c-7935.htm?tid=-1&ipos=2
ReplyDelete