He quickly put together the rain gutter piece and just needed my assistance to help hold it up while he screwed it into place with the proper slope. Instead of hauling out a second ladder for me to stand on, it was just much easier for me to hold my end up in the air with this telescoping handle on a scrubbing brush. The bristles of the brush kept it from sliding off and the long handle reached up sufficiently high enough to take care of my end of the job.

He attached a downspout and now will add a sloped drain piece to channel the water over into the lilac bush. This should take care of the rest of the rain flow from the porch roof. The hummingbirds kept buzzing him to get out of their way, as they are frequent visitors to the feeder all day long.

~~~~~~~
From time to time, Steve has used the terminology "Prettying Up The Place". I like that idea.
One day last week, I was looking at the railings on the front porch. They are worn and rugged and not too pretty. We are not prepared to totally rip them all down and replace all of the spindles and rails to bring them up to code, etc. Right now they are "grandfathered in" the way they are. As long as we don't take them down, they can stay that way. They are rugged, but they are still pretty and fit the design of the house.
I was looking at the front porch railing cap boards. They are quite gouged up and marked and worn from many, many years of use. It has probably been since 1960 or so when the two sections of house were put together. So that would make these railings close to 60 years old. Just as old as me (almost)!

As I was looking at them I wondered what it would be like to just lay a flat wider cap board over the top, and screw up from underneath to attach it into place? If it went a little wider, it could add a little architectural detail, as well as create a nice smoother wider surface to set a coffee cup or a flower pot etc.

I proposed the idea to Steve and he said "Sure!"
Purchasing four 12 ft long boards would only be about $30 and would make a real improvement to the front porch railing. Cheaper than replacing everything right now.
He did a curbside pickup at the hardware store, and asked them to find the straightest boards with the least amount of knots. They did pretty good. Only one was kinda warped, but he would cut that one in half for the two side railings.

He made a template to carefully cut the boards with a curved end, to custom fit around the shape of each pillar.

Once he tested each board in place, then he took it back to the garage and ran the router up and down each edge. The smoother edge would look much nicer and not be as prone to splintering over the years.

I am so glad Steve has a nice big garage to work on these projects. Having the space to stretch out the saw horses and use the power tools in the shade of the garage, rather than out in the yard. It was hot and miserable, but he set up a big fan to blow on him while he worked.

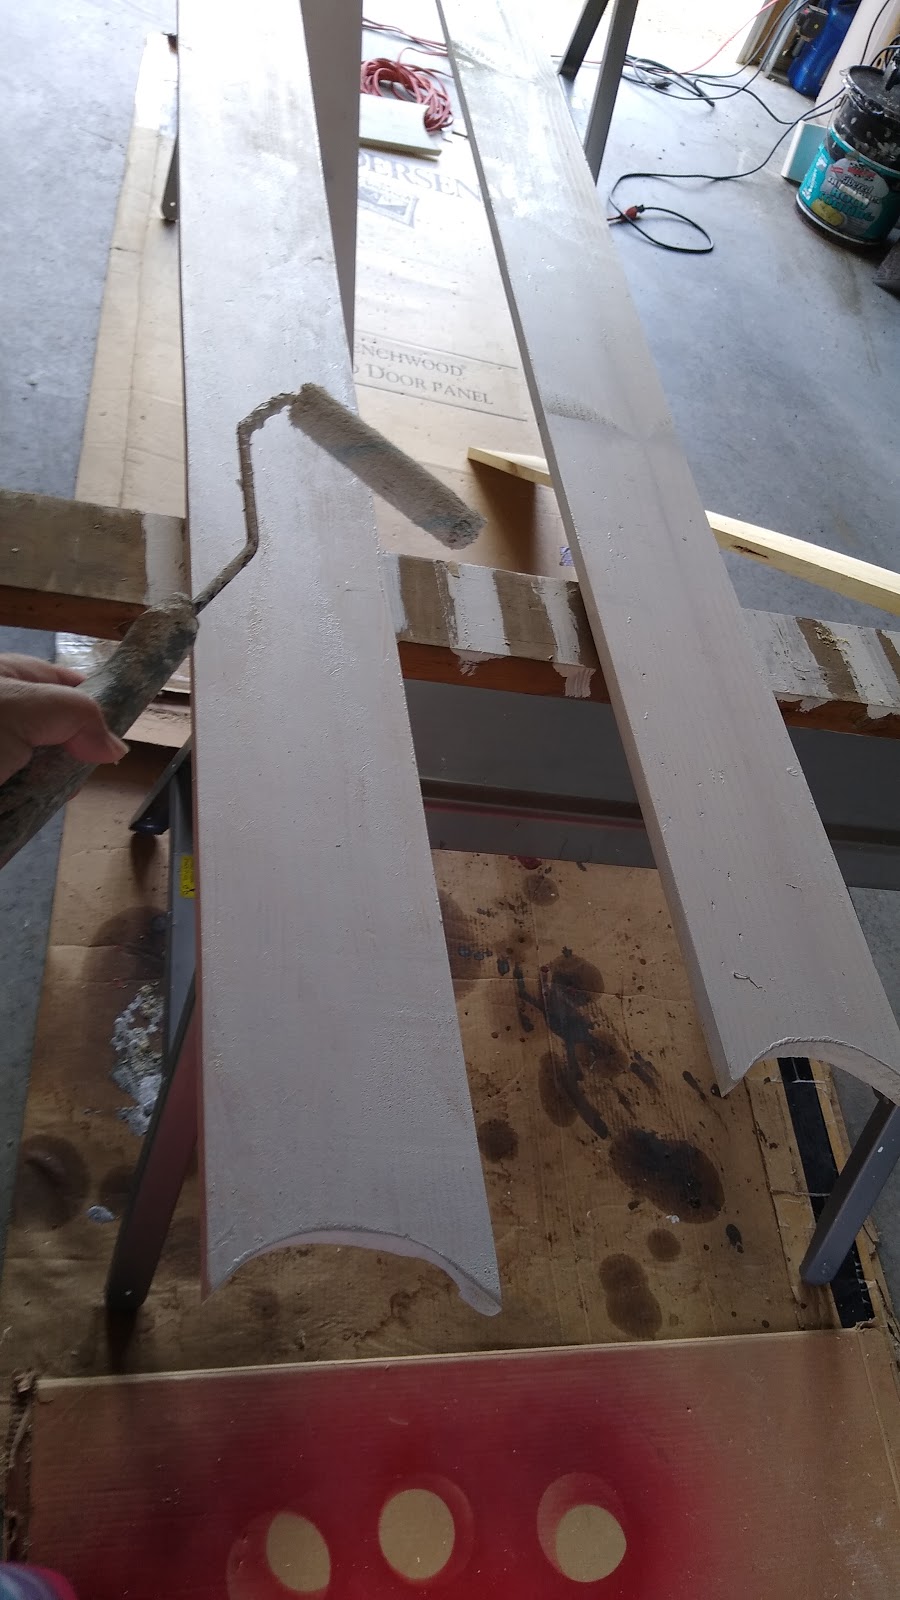
Once he was done with his cutting and routering and sanding, then it was my turn to get out the paint. I painted the boards with double coats on all four sides and the ends. That way it's sealed up to prevent any moisture of the elements.
Once they were dry, it was time to attach them to the porch. Steve added a bead of construction adhesive before screwing the board down into place.

He had the most adorable little Carpenter's Helper to assist him on the job. She carefully doled out one screw at a time from her little bucket. It's from her antique kitchen cooking set we keep here in the playroom.
She would not give him more than one screw at a time and he had to go step-by-step --- waiting for her to gingerly give him the next screw.


And here is the little Carpenter's Assistant, showing off the results of their hard work. She reminds me of the models on The Price is Right or Let's Make a Deal, gracefully displaying the prize.

Yep, I think this is really "Prettying Up The Place"...

That little lip edge to the railing
adds to the lines and makes a nicer
architectural feature.

The next morning, Steve went around with white exterior caulk to seal in the little groove between the pillars and the new railing cap boards. It made a nice neat finish and will prevent water from getting down in the crack and getting into the end pieces of the wood grain.

We hadn't finished the far north end, because if you look at this, you will see that the spindles are not spaced properly.

This part of the railing had been covered with a large amount of growing vines over the years so nobody really noticed or cared that the spindles were not spaced out correctly.
We decided to remove the vines and keep it from growing through the lattice down below as well as on the spindles and railing up above.
This was as good a time as any to re-space the spindles evenly.
With careful measuring, Steve had to create one more spindle. These were not able to be cut out of a two-by-four because they are actually 2 in thick. In the old days, two-by-fours were really 2in by 4in. Nowadays they are not. So he had to rip it down from a thicker board to get one more 2 inch wide spindle. It was from one of the old 2x4's we took from the back basement door enclosure when we ripped that down. Reuse - Repurpose - Recycle!

Once the new spindle was in place, we could put on the last piece of top railing cap board. Again, I got out my handy-dandy little paintbrush and touched it all up. I even put a fresh coat on my little weaving bench. (I set my table loom on this bench for front porch weaving!)

~~~~~~~~
Our American flag had been in a state of disrepair for quite some time. I have sewn it and sewn it again, to take care of the rips--- but we finally decided it was time to retire it. The local grocery store has a box in their foyer to retire flags. Periodically the veterans, along with help from the fire department, take care of them with a dignified disposal ceremony for all of the flags they collect.
Our little Carpenter's Assistant was able to help her grandfather attach the new flag to the pole.

She's very carefully was turning the little screws as far as she could to mount the eyelets on the flag pole. She is learning "Lefty Loosey Righty Tighty!

She was telling us all about the colors in the flag and how the stars go in the sky but only at night time. During the day the stars go where the moon goes. Where that is, I don't know?

She was a little short on one end to be able to put the flag pole up into the holder. So grandfather had to assist her.

Again, here is our little game show model, showing off her hard work and the wonderful project showing American Pride.

The last "Prettying Up The Place" front porch project we did was a little one. But it really made a difference. The chains on our porch swing are uncomfortable if we leaned up against them with a pillow. Also they would pinch little fingers, or catch my long hair if I wasn't wearing it up in a bun.
Taking our cue from a children's playset that I used to own way back when my kids were toddlers, it had plastic tubes that slid down over the chains on the swings. It helped protect those little fingers from getting pinched.
Steve dug around until he came up with a piece of white PVC pipe. He cut it into four lengths and we detached the chains one at a time. Using a piece of string with a little wooden dowel attached, we were able to feed the string through the pipe and then pull the chain up into position.

This wasn't a huge project, but it sure was nice to finish off the chains over the armrests

This was one more thing
to make our front porch swing
even more pleasant.
The dogs agree too!

So that's it for these
"Prettying Up The Place" projects.
Time to RELAX!

Stay tuned the next few projects,
there might be some big ones!!!


The extra cap board on the porch looks great. I agree the extra detail makes it even more pretty than before.
ReplyDeleteYour granddaughter is an absolute doll! Vanna better watch out. :)
The cap board was a great idea.. it looks so nice. What a great helper you have!!
ReplyDeleteI'm beginning to think you folks have no idea how to slow down. You make the Energizer Bunny look like an old rusty Model T! :cD
ReplyDeleteWhat memories you are creating for your granddaughter! She will realized when she gets older how fortunate she was to be with you doing projects.
ReplyDelete