Our Wonderful Followers who come back again and again to read about us...

Showing posts with label prettying up the place. Show all posts

Wednesday, July 15, 2020

Farmhouse Projects - Prettying Up The Place

Last night's blog dealt with the L-shaped piece of rain gutter we put over the front stairs. Steve also decided we needed one eight foot long section for the far south end of the porch. This was needed to handle the load of water that comes off the other half of the pyramidal roof section.

He quickly put together the rain gutter piece and just needed my assistance to help hold it up while he screwed it into place with the proper slope. Instead of hauling out a second ladder for me to stand on, it was just much easier for me to hold my end up in the air with this telescoping handle on a scrubbing brush. The bristles of the brush kept it from sliding off and the long handle reached up sufficiently high enough to take care of my end of the job.


He attached a downspout and now will add a sloped drain piece to channel the water over into the lilac bush.  This should take care of the rest of the rain flow from the porch roof.   The hummingbirds kept buzzing him to get out of their way, as they are frequent visitors to the feeder all day long.


~~~~~~~

From time to time, Steve has used the terminology "Prettying Up The Place". I like that idea.

One day last week, I was looking at the railings on the front porch. They are worn and rugged and not too pretty. We are not prepared to totally rip them all down and replace all of the spindles and rails to bring them up to code, etc. Right now they are "grandfathered in" the way they are. As long as we don't take them down, they can stay that way. They are rugged, but they are still pretty and fit the design of the house.

I was looking at the front porch railing cap boards. They are quite gouged up and marked and worn from many, many years of use. It has probably been since 1960 or so when the two sections of house were put together. So that would make these railings close to 60 years old. Just as old as me (almost)!


As I was looking at them I wondered what it would be like to just lay a flat wider cap board over the top, and screw up from underneath to attach it into place? If it went a little wider, it could add a little architectural detail, as well as create a nice smoother wider surface to set a coffee cup or a flower pot etc.


I proposed the idea to Steve and he said "Sure!"


Purchasing four 12 ft long boards would only be about $30 and would make a real improvement to the front porch railing.  Cheaper than replacing everything right now.

He did a curbside pickup at the hardware store, and asked them to find the straightest boards with the least amount of knots.  They did pretty good. Only one was kinda warped, but he would cut that one in half for the two side railings.


He made a template to carefully cut the boards with a curved end, to custom fit around the shape of each pillar.


Once he tested each board in place, then he took it back to the garage and ran the router up and down each edge. The smoother edge would look much nicer and not be as prone to splintering over the years.


I am so glad Steve has a nice big garage to work on these projects. Having the space to stretch out the saw horses and use the power tools in the shade of the garage, rather than out in the yard.  It was hot and miserable, but he set up a big fan to blow on him while he worked.


Once he was done with his cutting and routering and sanding, then it was my turn to get out the paint. I painted the boards with double coats on all four sides and the ends. That way it's sealed up to prevent any moisture of the elements.
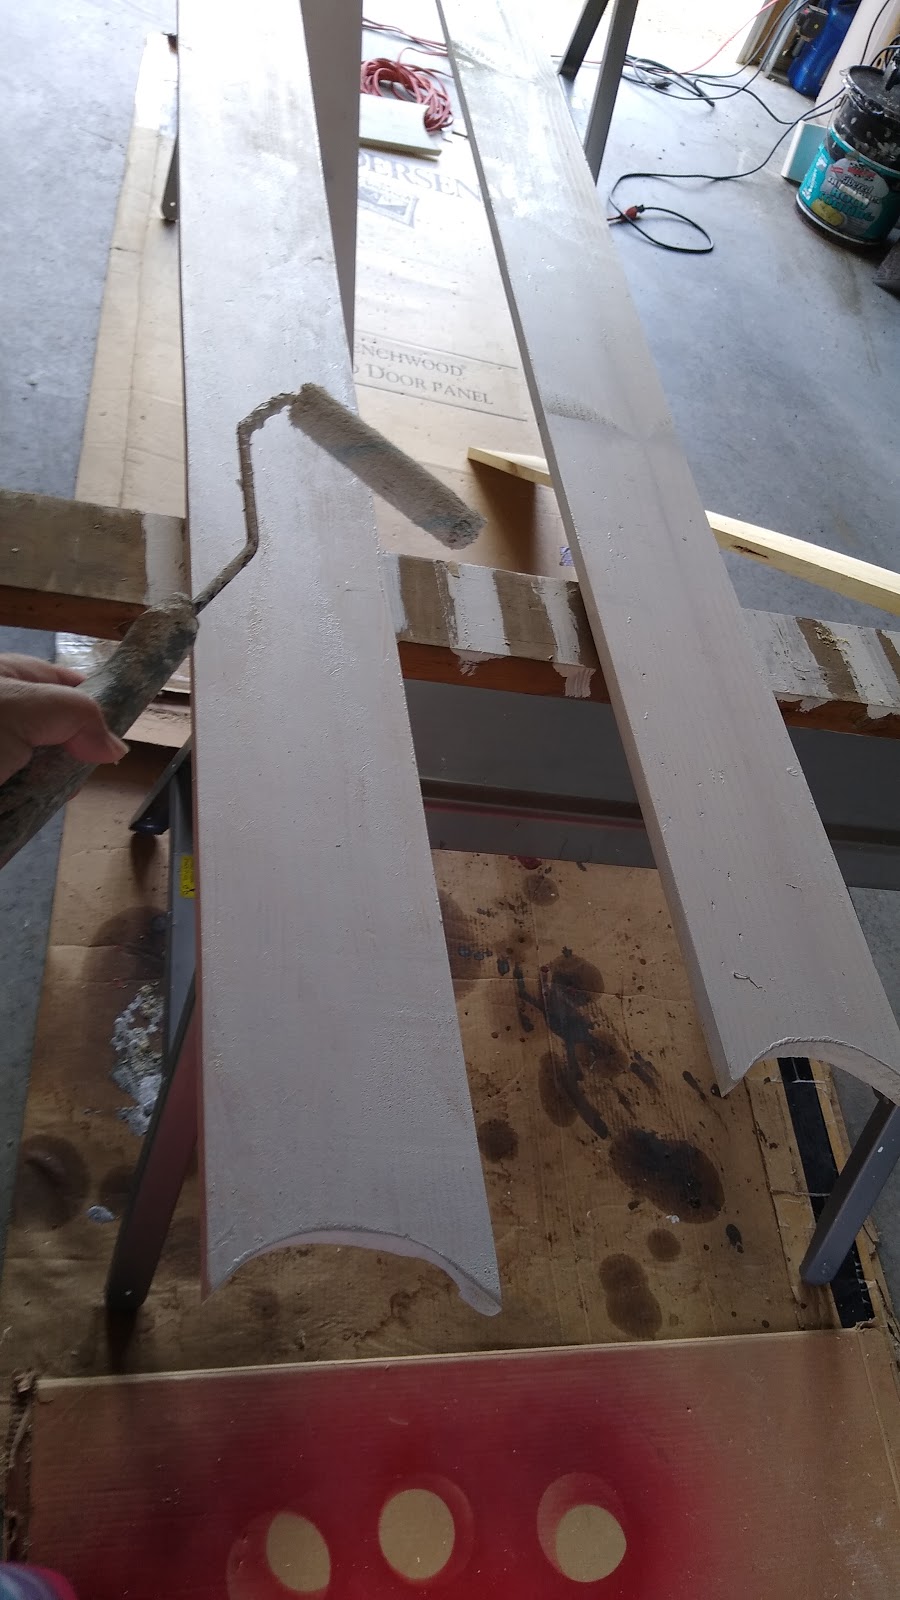


Once they were dry, it was time to attach them to the porch. Steve added a bead of construction adhesive before screwing the board down into place.


He had the most adorable little Carpenter's Helper to assist him on the job. She carefully doled out one screw at a time from her little bucket. It's from her antique kitchen cooking set we keep here in the playroom.

She would not give him more than one screw at a time and he had to go step-by-step --- waiting for her to gingerly give him the next screw.


As you know, most houses are not straight--- neither were some of the boards. He had to use clamps to hold the boards into place as he worked his way down the length of each section. Securely screwing up from underneath, it held the boards down and really conformed them to the proper shape.


And here is the little Carpenter's Assistant, showing off the results of their hard work. She reminds me of the models on The Price is Right or Let's Make a Deal, gracefully displaying the prize.


Yep, I think this is really "Prettying Up The Place"...


That little lip edge to the railing 
adds to the lines and makes a nicer 
architectural feature. 


The next morning, Steve went around with white exterior caulk to seal in the little groove between the pillars and the new railing cap boards. It made a nice neat finish and will prevent water from getting down in the crack and getting into the end pieces of the wood grain.


We hadn't finished the far north end, because if you look at this, you will see that the spindles are not spaced properly.


This part of the railing had been covered with a large amount of growing vines over the years so nobody really noticed or cared that the spindles were not spaced out correctly.

We decided to remove the vines and keep it from growing through the lattice down below as well as on the spindles and railing up above.

This was as good a time as any to re-space the spindles evenly.

With careful measuring, Steve had to create one more spindle. These were not able to be cut out of a two-by-four because they are actually 2 in thick. In the old days, two-by-fours were really 2in by 4in. Nowadays they are not. So he had to rip it down from a thicker board to get one more 2 inch wide spindle.  It was from one of the old 2x4's we took from the back basement door enclosure when we ripped that down.  Reuse - Repurpose - Recycle!


Once the new spindle was in place, we could put on the last piece of top railing cap board. Again, I got out my handy-dandy little paintbrush and touched it all up.  I even put a fresh coat on my little weaving bench.  (I set my table loom on this bench for front porch weaving!)


~~~~~~~~

Our American flag had been in a state of disrepair for quite some time. I have sewn it and sewn it again, to take care of the rips--- but we finally decided it was time to retire it.  The local grocery store has a box in their foyer to retire flags.  Periodically the veterans, along with help from the fire department, take care of them with a dignified disposal ceremony for all of the flags they collect.

Our little Carpenter's Assistant was able to help her grandfather attach the new flag to the pole.


She's very carefully was turning the little screws as far as she could to mount the eyelets on the flag pole.  She is learning "Lefty Loosey Righty Tighty!


She was telling us all about the colors in the flag and how the stars go in the sky but only at night time. During the day the stars go where the moon goes. Where that is, I don't know?


She was a little short on one end to be able to put the flag pole up into the holder. So grandfather had to assist her.


Again, here is our little game show model, showing off her hard work and the wonderful project showing American Pride.


The last "Prettying Up The Place" front porch project we did was a little one. But it really made a difference. The chains on our porch swing are uncomfortable if we leaned up against them with a pillow. Also they would pinch little fingers, or catch my long hair if I wasn't wearing it up in a bun.

Taking our cue from a children's playset that I used to own way back when my kids were toddlers, it had plastic tubes that slid down over the chains on the swings. It helped protect those little fingers from getting pinched.

Steve dug around until he came up with a piece of white PVC pipe. He cut it into four lengths and we detached the chains one at a time. Using a piece of string with a little wooden dowel attached, we were able to feed the string through the pipe and then pull the chain up into position.


This wasn't a huge project, but it sure was nice to finish off the chains over the armrests


This was one more thing 
to make our front porch swing 
even more pleasant. 

The dogs agree too!


So that's it for these 
"Prettying Up The Place" projects.

Time to RELAX! 


Stay tuned the next few projects, 
there might be some big ones!!!

Tuesday, July 14, 2020

Making a Rain Chain from Dollartree Buckets


The past winter was, of course, our first winter in this home.

We quickly realized that there was lack of a rain gutter over the front porch steps. This created a lot of rain water, snow melt runoff, etc and excessive ice ended up on the front steps. It made for a dangerous situation, so we had to liberally sprinkle it with a lot of sidewalk salt for the winter. We use the front steps a lot, not only for visiting company, but also we go up and down them each day to get the mail from the mailbox.

So this summer we decided that it was time to put some kind of a rain gutter on the front porch, after we fixed up the metal roofing and porch edging with new soffit and fascia.  That part was completed two weeks ago.

We really only needed an L-shaped piece of gutter from the corner of where the two porches met, that spanned across the stairs. It really didn't need to go the entire length of the front porch. This area has a deluge of water from half of the large pyramidal shape roof on the south side of the house as well as half of sloped farmhouse roof on the north side of the house.

That is a lot of water to come down in one specific spot.  We figured out what we needed and Steve was able to put together the L shape rain gutter after getting a curbside pickup for the supplies.  Little Claire was eager and willing to help.


My only hesitation about a rain gutter, was that I didn't want an ugly downspout impeding our view as we sit out on the front porch.

So instead of a downspout, I came up with the next best thing...
A RAIN CHAIN!

I had seen some examples of these on a couple different landscaping sites and HGTV type shows. I found them fascinating and wanted to make one of my own.

I Googled and Pinterest'd and searched and looked on Facebook Marketplace and Etsy.  I didn't find anything I liked or could easily afford. Finally I came up with a good idea...

I had seen some cute little metal buckets a long time ago at Dollartree.  They were metal and small and were affordable. Combining that feature, along with some of the ideas that I had seen, I figured I could do something really reasonable and not invest a lot of money into it if it didn't work...

The next day I snuck on into Dollartree where my friend Barb works. I got in there as soon as they opened, I grabbed 14 little buckets and quickly checked out, keeping to myself and wearing my mask. Then I sanitized my hands liberally as soon as I got into the car while the buckets were tossed into the trunk. (I was seriously shaking with anxiety while doing that!)

They didn't have enough of one color so now it was time to take out my trusty can of matching red spray paint. Granddaughter Chelsea helped me with this step.


Easy Peasy!
We gave a few coats both inside and out.
Now they all match.


Next, I dug out a 15 foot a hunk of heavy nylon chain I had bought to hang planters (but never did)  that was about $15, and a variety of S hooks from Steve's tool bench stash.  The chain is solid molded nylon links, no seams or splits.  You could use metal chain, but I was trying to avoid rust.


Now it was time to let Steve give me a hand. He took out his drill with a 1 inch hole saw that is able to drill through metal. He carefully drilled a circular hole, centered in the bottom of each of the little buckets.


For this step, you have to be careful. The metal edges can be sharp. You could use a de-burring tool to take down the sharpness if you wish.


Steve hung the top of the chain with a strong eyelet into the fascia above the downspout opening part of the rain gutter.

Now we could carefully thread the chain through the center of each bucket and hang the S hooks into the appropriate links. It took a few times before we figured out the exact spacing to make the buckets reach evenly from the top down to the ground.


The bottom of the chain is resting in a large black rubber bucket with drainage holes on the bottom. We will later fill that bucket with white landscaping rock on our next curbside pickup at the hardware store.  For now there is just a little bit of sand in it.

None of the rain will go into the basement because it's far enough away from the foundation plus the dirt slopes away from the house. It will just go out into the front yard and absorb into the flowerbed and the lawn. Much better than landing on our steps!

I like how they are lined up with the pillar. 


In this next pic, you can see the portion of roof on the right has a valley that dumps half of that rainfall right onto this section of the porch roof. Then about half of the section of roof on the left also falls in this same area. The L-shaped rain gutter will take care of that problem and run it down the rain chain and out into the flower bed and lawn.  Better than dumping right onto the steps!


Of course, in the winter months we will take this down and we can replace it with just a piece of plain white downspout that will be not too noticeable as it will line up with the pillar behind it.

I was excited to see how it would work once we got it hung into place. Steve volunteered to set up the ladder and crawl up to the end of the rain gutter with a watering can. Here is a little video of our results:


Yaaayyyy!!!!


That project was completed last week and. Today was the first time we had a real rainstorm so I was able to video tape it actually working with a regular rainfall.

This is this is so cool!!!
 Here is a video link from today:


For the initial investment of about $35 which covers the cost of the buckets, the chain, the paint, and the S hooks, I was able to get a really cool rain chain.

I didn't count in the price of the rain gutter because that was something we needed no matter what.  

Steve said it's one more step to "Prettying Up The Place", and it balances out the American flag on the other side of the front steps.


I think he's right!

Monday, April 20, 2020

Day 41 - Some More of "Prettying Up The Place"

Well, it's Day 41 of our self-imposed quarantine. We are getting used to the routine of NOT being able to run out and grab supplies as we work on projects. We have to be a little more creative and figure out what supplies we have here on hand. We dig a bit deeper to find the right screws, or adapt a piece of wood by cutting a larger one into smaller pieces, etc.  We are doing that right now on the pergola grids that we are re-configuring.  So that is on hold for a little bit while we get more creative in using what we have on hand.

But sometimes you just HAVE to have new supplies.... like paint.

The local hardware store will allow us to do curbside pickup. We just call ahead with our order and our credit card, and they assemble our purchase and put it right into the trunk of our car when we pull up by the door. This is the very same hardware store that I used to work at years ago when we lived here in Oconto. It is so nice to be able to support a local business during these trying times. We needed more exterior white paint. I called in to Joey, a very dependable young man, who used to be a schoolmate of our daughter Heather. Joey takes care of the paint mixing and got our new can ready for us. All we had to do was drive up and he put it right in the trunk. Thanks Joey!

Last week, we did the curbside pickup at Home Depot of the wooden screen door. Remember that? My idea was to dress up our modern looking metal screen door with an overlay of an old-fashioned wooden screen door.

See, our house has a nice metal modern screen / storm combination door. During the winter months it's a full expanse of heavy glass and a nice tight fitting seal around all of the edges to create a nice extra insulated layer at the front door.

During the summer months, the glass piece comes out and a full-size expanse of mesh screen is inserted. Again, the tight seal around the edges prevents any mosquitoes or bugs from coming in.  So we really didn't want to change it. But it looks too "modern" for my taste.

The only problem with a full panel of screen is that the screen was always getting pushed against when trying to prop it open to get things through the doorway (like little kids).  It always seems to get bumped up against with elbows or packages --- or even the dogs as they are going in or out because the ram pulls the door shut, then anything in the way ends up pushing out the screen.

Here is the original screen door:


After seeing how much the screen is getting stretched out and sagging and bagging, that is when I got my idea.... so to resolve the sagging, and dress up the style ---- we bought a cheap $29.98 wooden door from Home Depot. We removed the screen that came with it.


We added four little $5 wooden brackets to dress it up.  I actually bought eight brackets in a set from a guy on eBay. The other four are for the wooden screen door down on the she shed. Link to: Ebay seller from Tennessee that I bought the brackets from

After I got more paint from Joey, I painted it all up before assembling it inside the garage yesterday. It was way too windy to work outside. 

Steve helped me attach the brackets,
 as it became a "2 person job" to 
make sure the frame stayed square.


We pre-drilled holes into the metal door after carefully measuring and holding the frame into place.  Had to make sure it wasn't impeding on the track for the original screen or storm door panel on the metal door frame.


This picture above shows Steve drilling the holes from the outside, but we attached the wooden frame through from the inside on the frame of the modern door outward with screws. Then you don't see the screws from the outside on the wood frame.

Here is the wooden frame ready to be screwed into place. We didn't have the right sized screws on hand, and had to look around and dig and finally found some in an old bucket of odds and ends that would work. See why it's good to save every little piece of hardware in a bucket someplace?  Creativity!


Here is a close-up shot of the cute little wooden brackets glued and screwed into place. After they were attached, I also put dabs of white paint over the heads of the screws so you don't see them as much.


Here is how it is attached to the outer surface of the original metal door. In the pic below the top screws are holding it up, and I pulled the wooden frame away a little bit to show where it lines up to attach to the metal frame.  We can still change out the screen or the winter glass storm door from the inside.  The wooden frame is narrower than the metal frame so we can still use the handle. There is just enough clearance for the handle.


Once it was into place, 
Steve tightened up each screw just enough
 to not split the wood.


We have secured the wooden frame to the metal one with three screws across the top, three screws across the bottom, and one on each side.


Now the wooden frame sticks out a little bit further then the original metal frame, but it really doesn't matter. What matters most is that the door still seals firmly for bugs in the summer or cold weather drafts in the winter.

Front porch relaxing in the afternoon.


The curli-ques of the screen door kinda coordinate with the same shapes on the retro old light fixtures we bought from the Habitat for Humanity ReStore.

I really think it dresses up 
the style of the house, 
and looks so cute 
"Country Farmhouse-ish".


In this pic above you can see the location of the pergola to the left between the wall of the she shed and the wall of Steve's garage.

It was pretty windy yesterday and not comfortable to work outside on the rest of the pergola side grids. Today is supposed to be windy and rainy later on, but we might get the grids assembled in the garage and ready to bring out to put on the pergola later today. Here is my idea sketch:


We will see... stay tuned for more projects for "Prettying Up The Place"!


Stay In.
Stay Safe. 
Stay Well.
