Now we moved over to the north side of the home, to change the two storm windows in my sewing room. But first-----
Sash cords! Anyone with an old house knows that the old wooden windows operate with a system of heavy weights that run up and down inside of the window casing. They are held into place with rope, called sash cord. They run over a pulley, going up and down within the window frame and help to raise and lower the heavy wooden windows. Ingenious!
Steve and I have already replaced a couple of the broken sash cords over the last 4 years, so we knew what to do. One of the windows in the sewing room had only one broken cord, but the other one had two. We had been propping it up with a wooden stick any time that we wanted it open. Well, those days are gone, it's time to fix the cords!
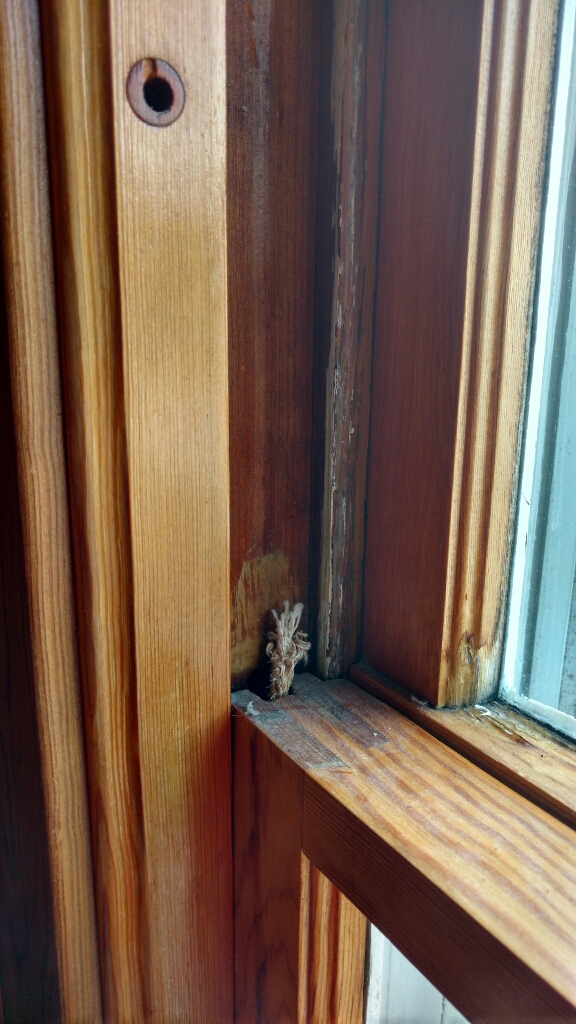
Here are the two broken pieces of cord
at the top edge of the lower window,
on each side.

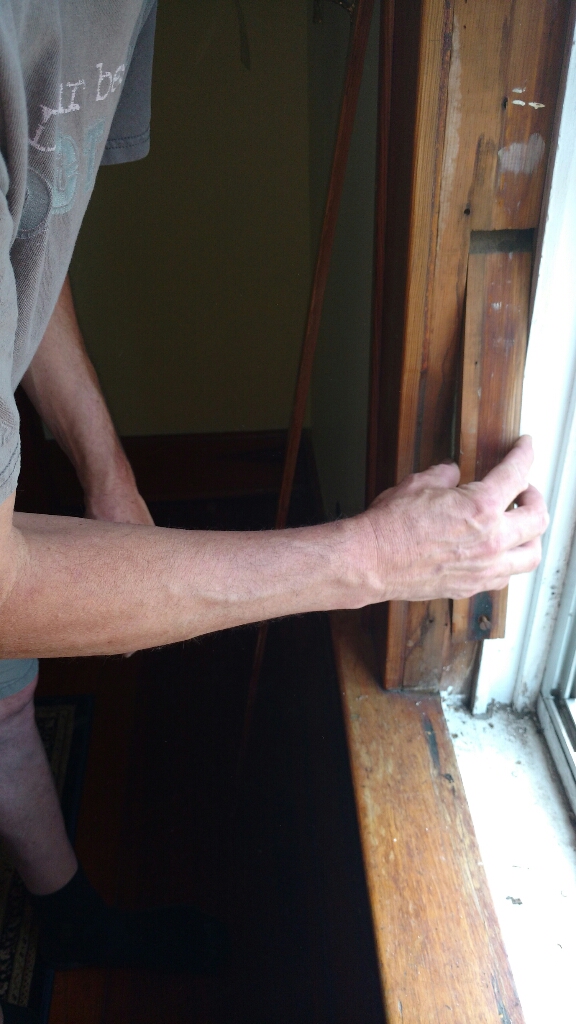
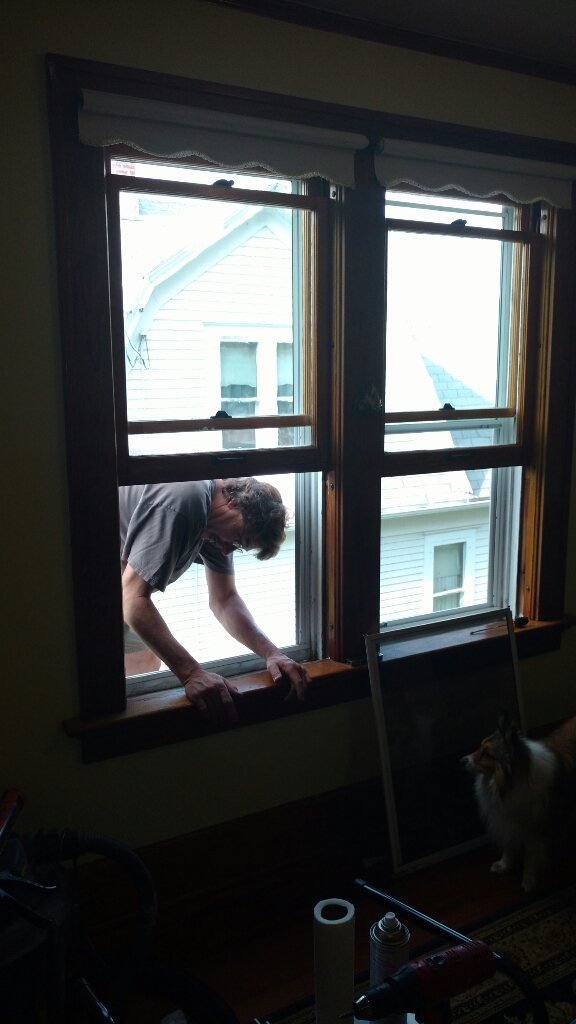
The first step is to remove the lower window. To do that, you need to carefully unscrew these four screws in this wooden strip on each side of the window casing. That holds the window into place. These strips also are adjustable forward and backwards a little bit to keep the window from rattling, or from binding up too tight. By unscrewing them and shifting it a little ways in either direction, you can fine tune the windows to operate properly.

We removed the window
and here are the two broken pieces of sash cord.
Over years, they rot and fray,
necessitating replacement.

While Steve had the window out he replaced some of the loose glazing on the edges. While that dried and firmed up, we were able to replace the sash cord on each side of that window's casing.

Using real sash cord, do not use clothes line because that will stretch. I also use sash cord on my weaving looms for the ropes and pulley systems. It's much more firmly woven than regular clothes line. Measure the new piece to match up to the broken pieces. Tie a firm double knot lump on one end, and feed the free end down over the pulley and into the window casing. Sometimes it helps to hang a little fishing weight on a string to get down first, then tie that string to the cord and pull it from the bottom though the space.


Once the weight and cord is in place, and the rectangle of slanted wood covering the access hole, the window can be put back in. Carefully put each knotted top cord into the edge of the window and run the cord up in the side groove to the top surface. Now the window can be set into place in the casing. This works better with two people, one holding the window and one arranging the cords into place.

SEE? All new cords and ready
to slide back into the window casing.

Carefully holding the window firmly in place, now the wooden strips can be put back on each side. The way the heads of the screws are encased with a ribbed washer spacer, you can shove the board either forward or backwards to allow it to hold the window snuggly without rattling, but not too tight that it binds up.

There, all done!
The window weights and sash cords
are fully operational now on this window.

Now that the window is working properly, it's time for our original project--- replacing the outside storm windows.
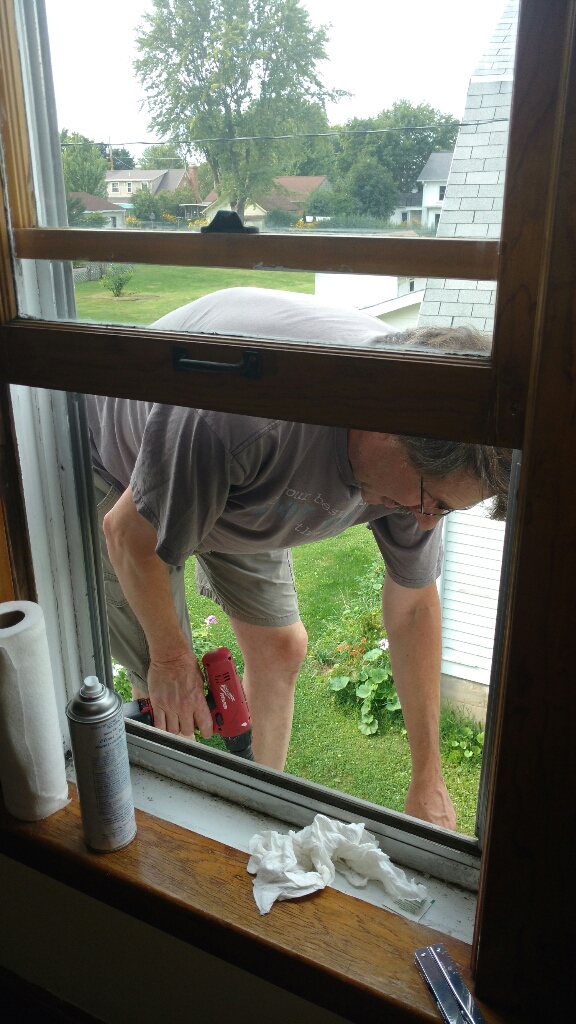
We are fortunate that there is a roof below this pair of windows to stand on. It is the bump out roof of the bay window from our dining room below. Steve is able to just step right out through the window and stand out there on the roof to work.
He first had to remove the ugly old aluminum storm and screen combination from the exterior surface. Many of the screws are stripped or gunked up with paint and don't come out very well. He had to use a pliers to grip the screw heads and snapped them off on many of the windows.
He was being a smart talker while doing this, so I threatened to shut and lock the windows and leave him out there! Sometimes he gets a little big for his britches????

That would be a long jump down
or a prickly one,
landing in the bushes.
The weather has been extremely accommodating each time we have decided to work on the windows. Temps in the mid-seventies, light breeze, and no mosquitoes!

He did drop one tool that I had to go outside and down around into the bushes to find it. See? That's what I get for being the "Gopher"! I think he might have done it on purpose? Heh heh. The previous owners who grew up here in this house suggested she come and teach Steve how to sneak in and out of those bedroom windows. She did it plenty of times when she was a teenager! LOL !!!

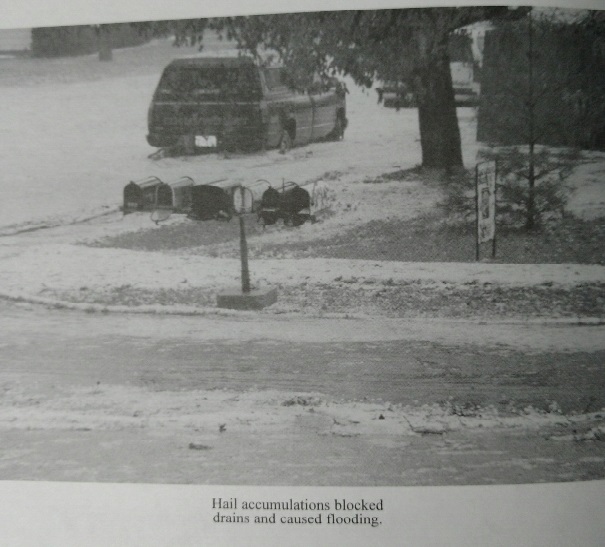
Remember in my last blog when I mentioned about the hail storms? Some really awful storms had passed through Chilton 17 years ago. The storm stalled right over the town for 30-40 minutes and hailed onto everything with disastrous results.
It was reported that the storm produced 120 mph (190 km/h) straight line winds. The National Weather Service reported that at least 75 mph (121 km/h) wind gusts were achieved.[6] Residents who were in St. Nazianz as the storm hit said that it went from noon light to midnight darkness in a matter of seconds.
The storm roughly followed U.S. Route 151, with St. Nazianz and Chilton receiving the worst of the damage, caused largely by wind and hail. The hail ranged from golf ball-size to baseball-size. Many houses were destroyed by the storm, while others sustained major damage. Many cars were totaled or needed hail damage repair. The total damage caused by this storm to St. Nazianz and surrounding areas was estimated at $122 million.[6] It was the state's first storm to exceed $100 million in damage.[7] No casualties were caused by the storm.


Many homes had roofs and siding and most of their windows replaced, and ours were done by the previous owners. Most of the 27 storm windows on our home were replaced. The ones we are doing now are the last 6 so they match.
This window ledge still shows you just how bad the hail hammered down. No wonder the windows broke!

Finnegan offered to help with the windows, but Binney hates the sound of the window cleaner spray can, so she booked it downstairs to keep a safe distance from that can.
Soon the storm windows were all back into place, and I was able to hang up the curtains in my sewing room. I have a collection of little stained glass suncatchers, so those were arranged all around. As I sew in this room I can look outside, but there's not a lot of visual interest other than the neighbor's house next door. By putting all the beautiful little suncatchers on the window, the light filters in with pretty dazzling colors.


~~~~~~~~


Great tutorial! Replacing sash cords seems tricky but your clear steps make it doable. Thanks for sharing your home improvement journey.
ReplyDelete