Our Wonderful Followers who come back again and again to read about us...

Showing posts with label jewel box quilt. Show all posts

Wednesday, April 7, 2021

MOTORHOME MODIFICATION - Replacing Brake Calipers on our Safari Serengeti

It's been a long, long winter of no camping or motorhome repairs or modification posts. Finally I have something to write about!

Yep, it is time to do some of that maintenance that's necessary when you have a rig that is 25 years old. Or really, any RV for that matter.

Steve is very meticulous about keeping things up on our motorhome. Last summer, he had replaced both of the rear brake calipers and brake lines. On our very last outing last fall, the front caliper had been hanging up on the passenger side. We knew that we needed to give the front ones some attention as well.

Any time he does any grubby motorhome repair projects, he puts on his overalls and assembles all of his tools before he begins. I am the main gopher right alongside of him, giving him tools or holding pieces or helping with whatever he needs.

I usually don't need coveralls, but I do get dirty sometimes. I'm also there with the first aid kit in case of a boo-boo, or with the cell phone in case we have to call for parts. On this project, we had to do both!


Earlier in the week, Steve had pre-ordered the calipers from the local Carquest dealer. Generally, they ship reconditioned calipers. But this time the clerk told him they happened to be replaced with new ones, even though the box says remanufactured. Maybe people aren't sending in as many to be remanufactured anymore? Anyhow, we did not have to pay an additional $35 core charge per caliper, because they trust Steve to return the old ones once we are done doing the replacements.


The price for the parts came out to just under $200. That also included two tubes of the special lube product that's used for brake calipers.


Here is the part number for anybody that needs it for the 1996 Safari Serengeti with the Magnum chassis. Our motorhome has the BFGoodrich Velvetride suspension made with Torsilastic wedges. All four wheels use the identical same caliper, whether it's left side, right side, front or rear.


The first step is to remove the really fancy chrome trim rings off of the tire rims. Then Steve gets out his handy dandy little tool. It's called a "Nut Buddy"!  Actually it is called a Stark Nut Torsion Multiplier Tool.


If you have never seen a Nut Buddy work, it is really amazing. It is a way to remove the highly torqued lug nuts on our motorhome. Here, last time I made a video of how it operates:


We are very fortunate to have a long enough level driveway to do the work on this right at our home. The weather was warm and we were able to start this project without any snow on the ground or frost underneath the motorhome, like earlier in the month.


Various neighbors have passed by and asked us what's wrong? What is broken? Are you getting ready for the season? Because it's not too often you see us sitting here with the motorhome up on jacks!


Steve is extremely safety conscious when it comes to putting the motorhome up in the air. Especially when he is the guy underneath it! After he lifts it up securely with the built-in center hydraulic jack, he puts two other jack stands supporting the frame behind the wheels as well as two huge stout pieces of tree trunk up in the front. That gives him five points of contact on the front of the motor home. 

At the rear he has the four wheels chocked, and the emergency brake is on the four wheels in the back so that is four more additional secure points of contact. Being on level ground really helps too.


The Nut Buddy did its job easily, and Steve was able to remove the wheel and rim from the hub. In reverse, when he goes to put them back on, he will tighten them up as tight as he can. Our torque wrench only goes to about 250 lbs. Then he will make an appointment with the local truck repair place a mile away and have them torqued to spec before we go anywhere.


And here is the rusty crusty caliper! This one had been hanging up when we were driving home the last time we used the motorhome. Steve said it had an icky burned odor to it as he took it off.


And look at this beautiful shiny brand new caliper! Fresh out of the box. All shiny silvery clean and neat.


In no time at all Steve had the new caliper into place and secured back with the keepers, the bolts and the retaining wire go on next.


That was enough work for the day!!!  He put the tire back on and snugged up the lug nuts as tight as he could go.

Time to take a little break and relax. Neither of us are really back up to snuff yet after our 9 days of illness. So we work a little at a time and take a break. I am by his side, running for tools as he needs them, fetching things so he doesn't have to crawl out and back in again over and over. Plus, I bring him glasses of water and make him hydrate.


Today it was time to work on the driver's side. The wheel came off easily and he was able to access another rusty old icky cruddy caliper.


Rut Roh! While taking off the rusted up old caliper, one of the little metal devices called a keeper, the very little hook edge of it broke off! Isn't it always like that? The tiniest little piece can mess everything up.

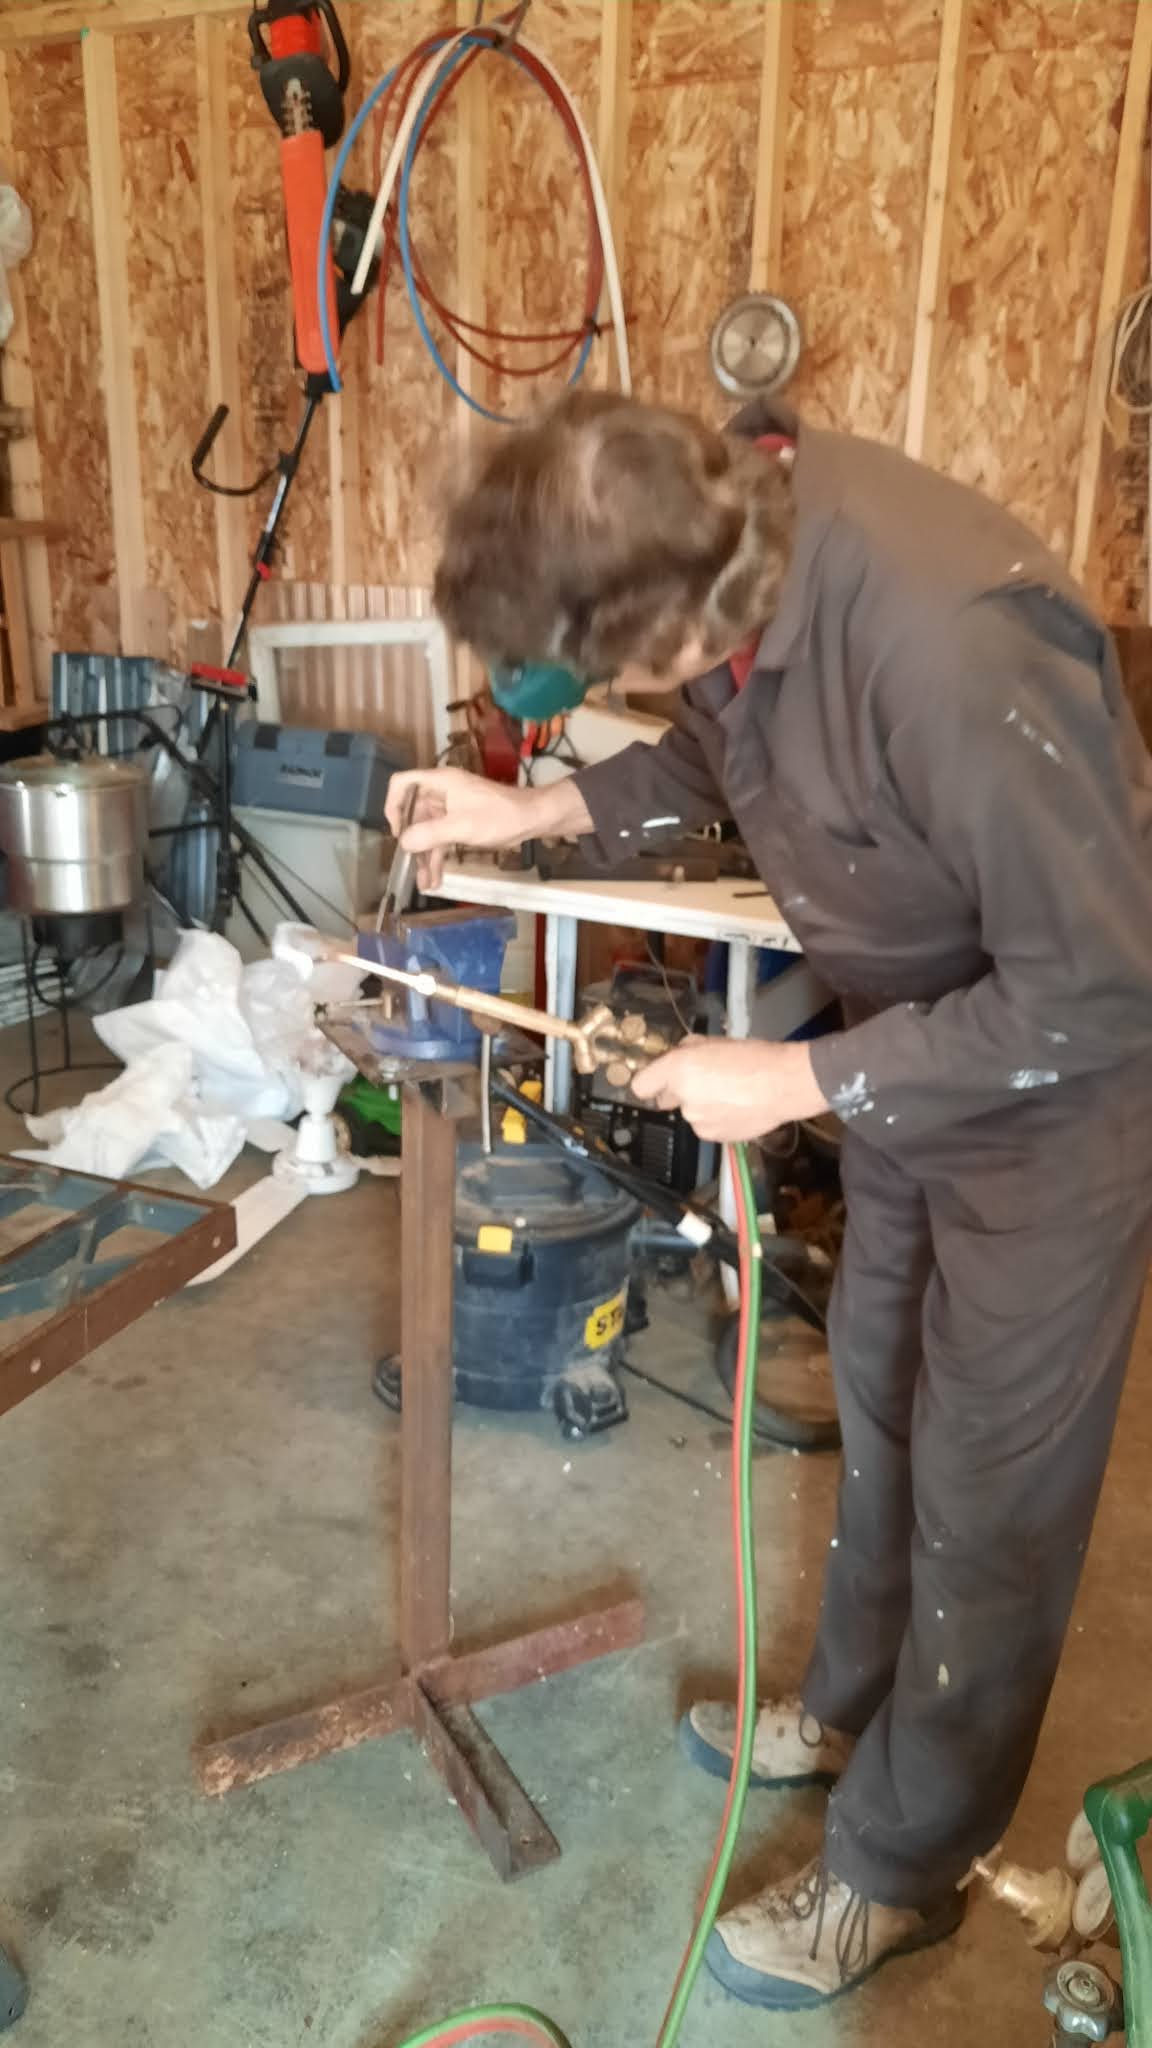
Fortunately, Steve is able to do a little bit of tack welding and could put it back into place.  What a guy! 


It was kind of hard to hold the one piece while he lined it up with the other piece. That's where my helpful hand comes into play. I held it up level and even, holding it where he needed to join the two pieces, which one was in the clamp of the vice. 


I tried to not look at what he was doing and look the other way as he heated the metal with the torch and sparks were flying. Soon he had enough tack welding on it to hold it together.


Next he had to grind it off evenly so the lump of tack weld would not interfere with where it needed to slide into hold the caliper. This piece doesn't take any stress or strain. It's mainly just a guide piece that holds the ridged edge of the caliper into place against the caliper bracket.


Look at that! My hero! For the slight delay of one hour, he was able to repair the piece that was broken. That was a lot easier than trying to locate a new part and have something shipped--- which might take a day - or a week - or a month - who knows??


Now he could finally mount the caliper into place on the bracket. First, he liberally smeared the entire top area with the special caliper brake lube product that he bought with the calipers.


Then he smeared the entire lower part of the bracket. This is where that repaired keeper piece would go. Lubing it up nicely make sure that everything would slide in and work perfectly once it was bolted into place.


With a few little light taps of the hammer, the metal wedge called the keeper is now holding the bottom lip of the caliper against the bracket. Yay!


SCRRITCH  SCCIRTCH   SCCRRIITCH sounds of the ratchet as he tightened up the bolts. I love the sound of a ratchet. I remember as a kid, we used to take Dad's rachets and sockets out of the garage and twirl them in a circle, enjoying the ratcheting sound of tool. I guess that's why we all grew up to be pretty mechanically inclined?


Tada! Second caliper is now done!


With every job, Steve has to add a little bit of his own personal "lube" to the process. A little DNA don't hurt the brakes any, does it? That is why I am handy nearby with the band aids.


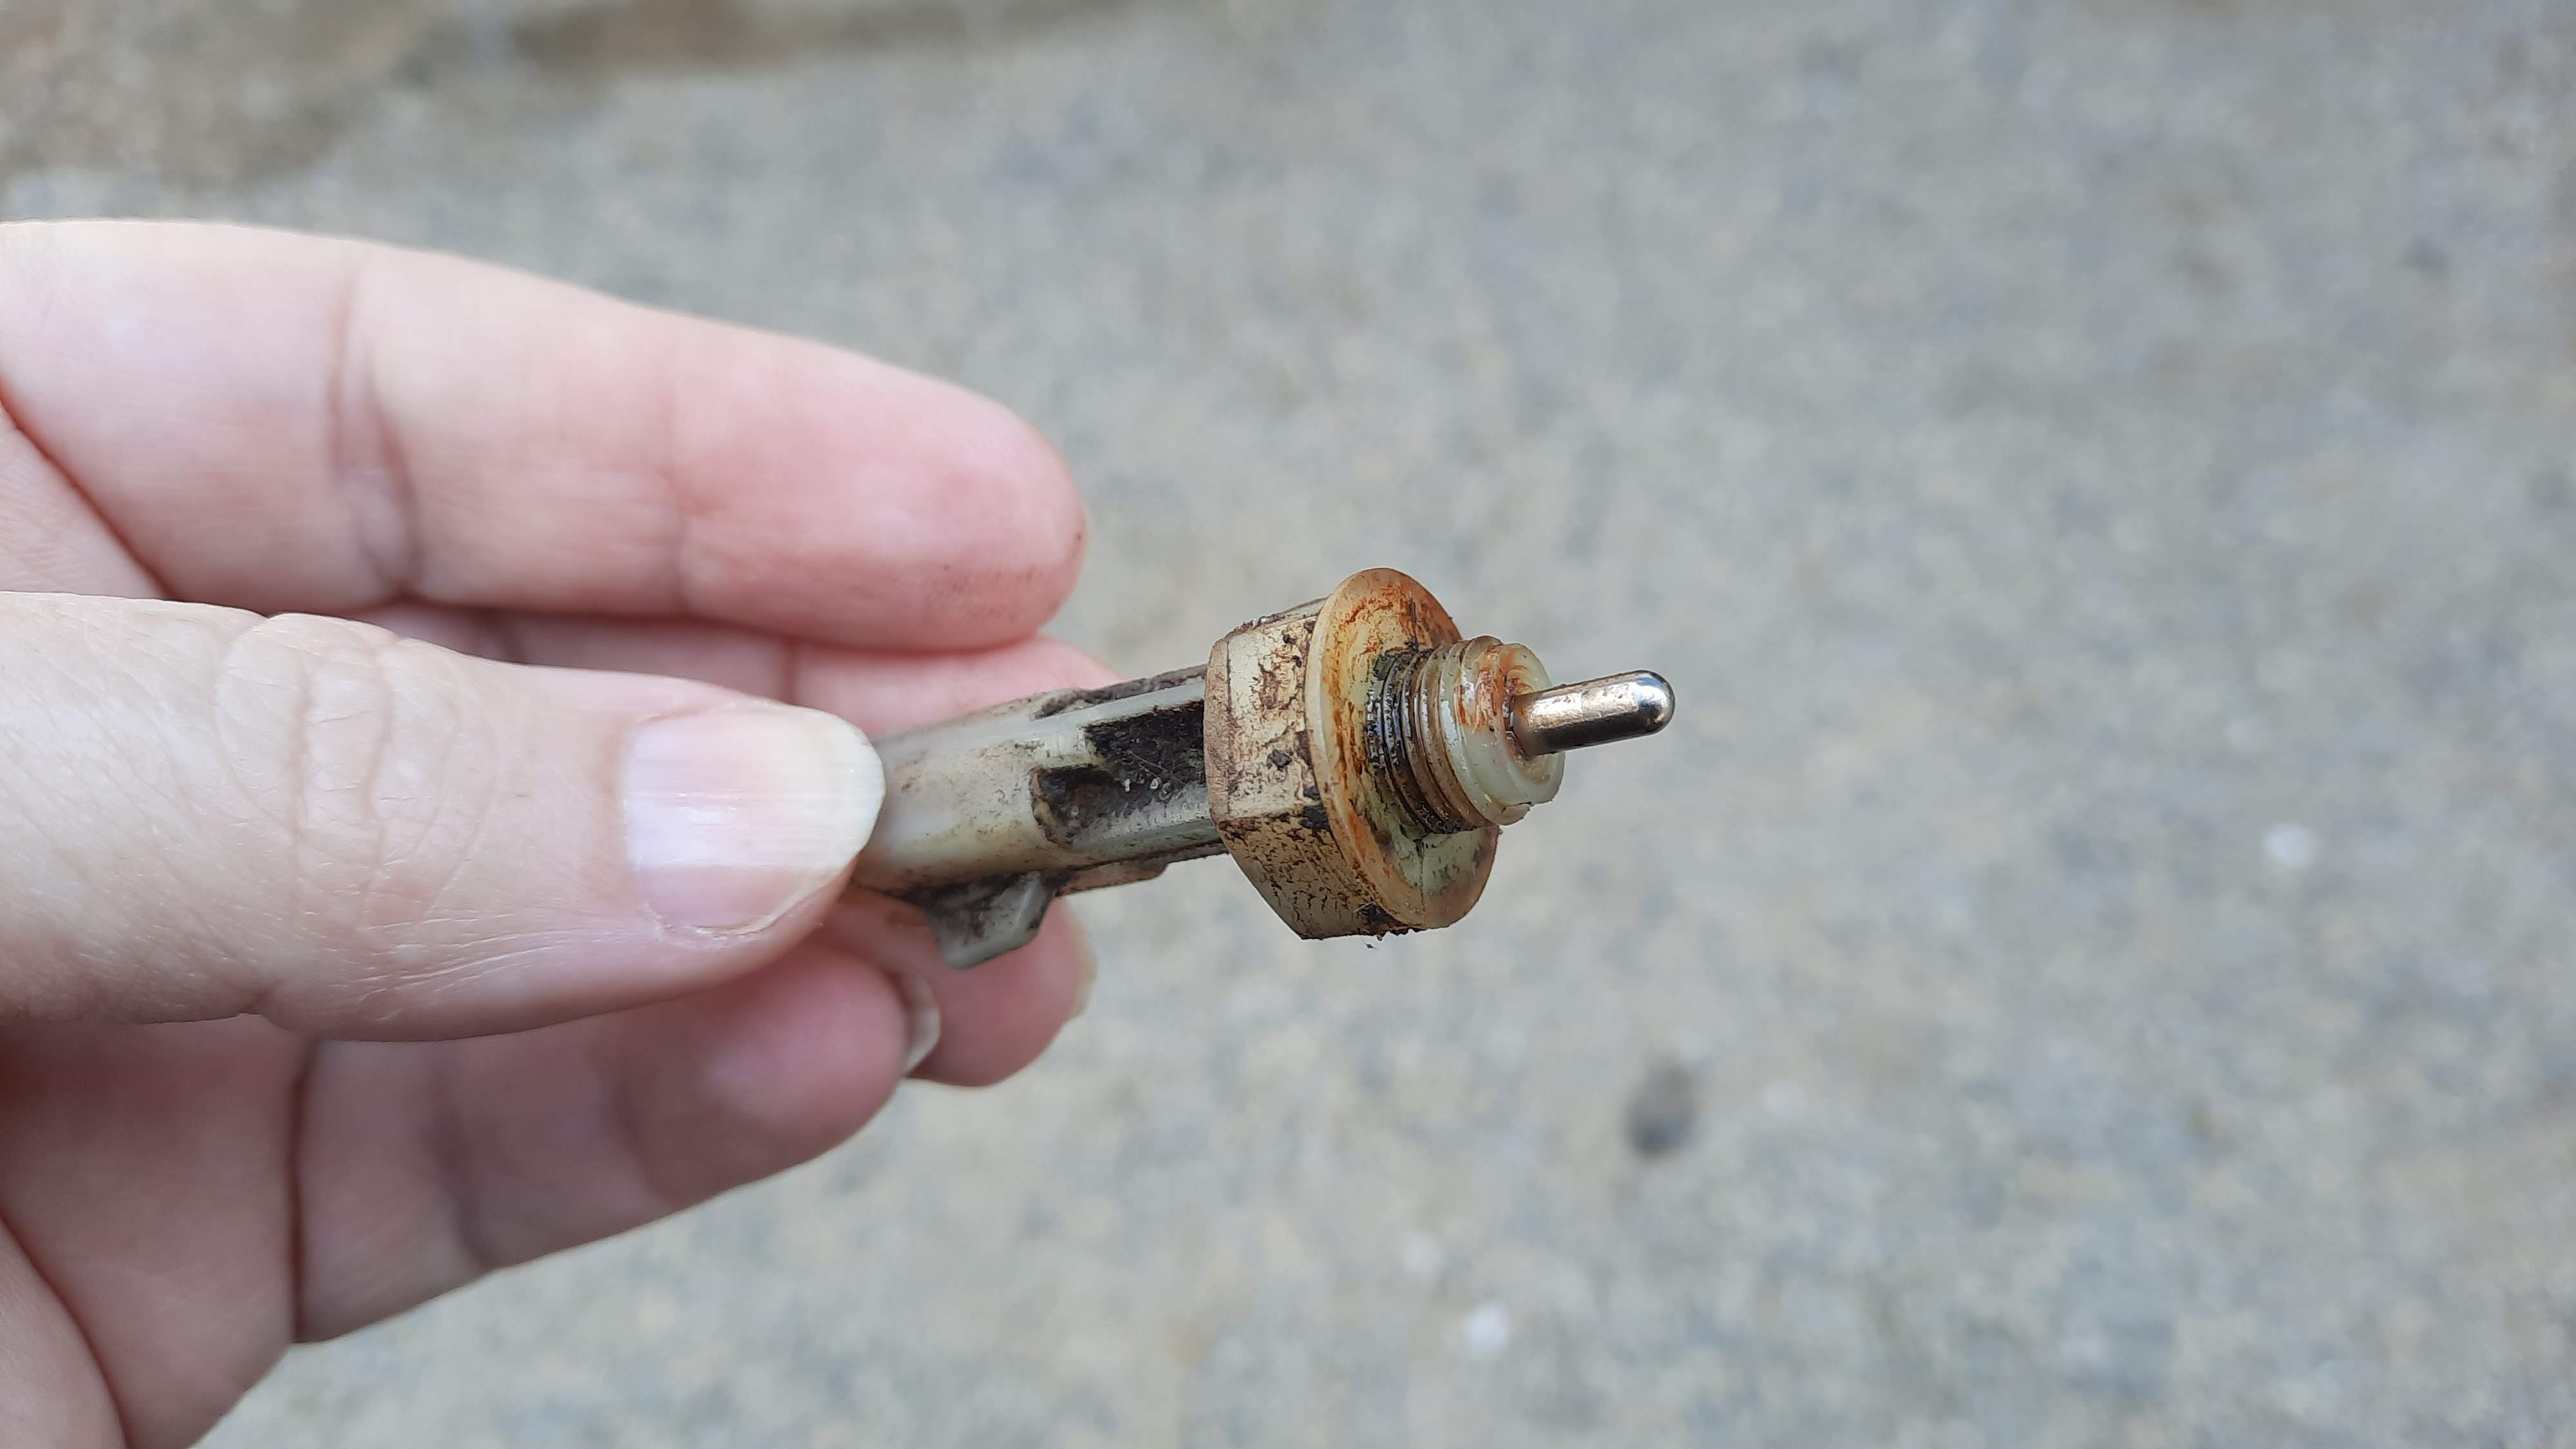
Now we have one other detour to our repair process. Steve had noticed a while back a few little drips of brake fluid which might possibly have been leaking from a little plastic piece on the master cylinder called a low pressure switch. We had replaced this piece once before,  way back in 2008. Maybe it was time to replace it again?

Well, certainly the best time to replace it is when you have the whole wheel off so you can get in there and remove the old one. We matched it up to the paperwork in our records to get the part number. (I keep good records of all of our repairs).  We called the truck parts place to get another one. Luckily they had it in stock! The price has more than doubled from 2008 to 2021. But it wasn't too bad. It went from $8 to $21. Small price to pay for Peace of Mind. 


Might as well replace it now before he gets the tire back on. Well, apparently that was enough work today. Again, we are only doing a little bit each day because we aren't feeling the best yet. So tomorrow we will take care of bleeding the brakes and making sure that there is no leak after the new fluid is installed into the system. 

All good repair jobs take at least THREE trips for parts. The first trip was for the actual calipers and lube. Then Steve needed a second trip to go get an extra piece of brake line. Then the third trip was now to go and get this little low pressure switch.

Once that is all done, he will make an appointment with Nick over at Oconto Truck Power Center and get the lug nuts torqued back up to spec. Then we will be good to go and get out camping! 

~~~~~~

On a fiber front, I finally got the 20 blocks made for this new quilt. It's made from all little fabric pieces called fat quarters that the kids bought me for Christmas. They bought me a subscription to the Fat Quarter of the Month Club! While helping out a little remote quilting store in northern Minnesota during the pandemic, the kids ordered and subscribed me to the club. Every month I get six beautiful Fat Quarter coordinating quilting fabrics. A fat quarter is 1/4 of a yard. 18 inches by 22 inches. 

I cut them up and sewed them with some complementary white fabric with little vines and flowers woven into it. Here are the 20 big blocks laid out so no two colors touch each other. Now I just have to sew all of the big blocks together and maybe add a pretty border around the edges.


In my blog yesterday I spoke about covering one of my chaise lounge cushions for our reclining lounge chairs in the backyard. I got around to doing one more cushion. I have two more to go because we have four chairs total.


After all of his hard work today, he kicked back and relaxed on one of my cushions and cracked open a beer. The Princess Binney figures that's her comfy spot too. 


~~~~~~~~

Now on another topic. My daughter Heather told me about this. She bought me one. I thought she was pulling my leg. But it really really works! It's called stainless steel odor remover. It's made by Norpro. If you have stinky onion or garlic on your hands, you wash with the solid metal bar under water just like a bar of soap. And it works! I am serious.


Here is a link to one on Amazon, but I'm sure you can find it in any large household kitchen gadget area: 

On a final note, I've been on pins and needles all day. My one and only sweet little sister has been undergoing some difficult health challenges in dealing with cancer. She is one of the strongest people I know. As of 7 p.m. tonight she was in the recovery room after her surgery today. Oxygen levels are a problem complicating the recovery. Fortunately, she is also been notified that the cancer has not spread to her lymph nodes! Prayers answered.


Love you little sister!

P.S. I am also OUT of Facebook Jail. 

Sunday, March 21, 2021

Saturday Workday and Sunny Sunday

Spring has arrived in Wisconsin, and the beautiful sunshine and weather on Saturday was perfect for getting things done. We ran a few errands in the morning and took care of some projects around the house in the afternoon.

One of the main projects we wanted to tackle was settling down these newly laid paving stones into a nice level configuration.

The frost is now out of the ground so we were able to score the edge of the turf around the stones, now that we've had them laid out in the pattern that we want. With a square ended shovel, Steve was able to dig straight down about 3 inches around the outer edges of every stone.

The goal is to get the paving stones level with the surface of the lawn, while keeping them evenly spaced and tight together.  Removing the sod and using the level and some hoes and shovels, we were working in the sunshine and it was soooo nice and warm!  Notice Steve isn't even wearing a sweatshirt. 


Once we scored the turf, Steve carefully scraped up the sod off of the compacted dirt below.  We didn't want to disturb the surface any deeper, or make any of the dirt under the stones shift around too much.

Kinda like laying tiles!

Working in pairs of stones, we used the 4 foot level to check, we shifted and adjusted them until they were level with the pair from before it.  The lawn between the garage and the She Shed is pretty level to begin with, so it was not too hard of a task.


Lifting each paving stone into place gets to be tiresome. Each one weighs 32 pounds. I found that using the tip of the hoe and wedging underneath to tilt them upward, kind of like a fulcrum and lever, made it easier to grab them with our gloved hands.

We made it up to the turn and decided to call it quits for the evening by 5 p.m. That was 28 stones. Things were starting to cool off a little bit so it was time to give up and head into the house for supper. I think we will tackle it again this afternoon because it's going to be a beautiful day, although it's supposed to be windy. Situated between the garage and the She Shed we are blocked from a lot of the wind, so I think it will be okay.

Once we get that portion done, then we will move on to this other section. This photo is taken outside of the South side door of the She Shed that leads out to the fenced-in dog yard. At one time there had been a cement patio and these are the remains which are in quite rugged rough shape. We are going to level off over this area with compacted sand and gravel and then lay the new stones into place. It will be about level with the door threshold. This area will be 6 feet by 12 ft and make a wonderful little patio space. 


This is the perfect spot for Steve to put his new grill. This door is located much closer to the kitchen for cooking and dashing back and forth to check on the food as he grills out. He just informed me that his technique is called "sprinting".  Okaaaayyyy.

~~~~~~~

Another upcoming project is an unusual one.... we always find strange stuff in old house construction.  Sometimes there is no explanation.  Sometimes you have to investigate to figure it out. 

In our basement, there was a recessed hole in the corner of the newer cement portion of the basement.  This from about 1945-50 when they moved this portion of the house onto the site. (our original late 1800's house was added onto by another house moved over from a different location) 

In the center of that recessed hole was an old metal cap. Just the other day, it had rusted through and came loose, emitting a constant stream of water into the basement! Similar to a slow flow from a garden house rate, like if you had a 1/4 turn of the faucet turned on. 

It came bubbling up from this recessed hole and flowed into a cement groove in the floor, channeling it towards the sump pump.  The entire basement on that side has a little channel cut into the cement around the perimeter to drain water over to the sump pump. Now the poor sump pump is running every few minutes to dispense this extra water.  

We are not sure if it an old well that has been capped off, or an artesian spring that exists on the corner of the house? The grass there is always lush and green by that part of the house.  There isn't any standing water in the yard, nor is the water table too high right now.  Actually we are flagged in fire danger warnings for being too dry this spring.  

Either way, we need to stop that flow! It's going to burn out our sump pump soon.  It is running every few minutes. Steve ran to the hardware store, and he bought a cheap plastic 4" plug to close it up for now. But that is only a temporary fix.

We knew the device he really needed, a firm "mechanical plug" made of heavy rubber and steel.  We couldn't find one locally,  so I ordered this one from good ole Amazon. It is the larger 4" one with the racheting top nut to expand it into place. It should be here by the end of the week and we can fix the problem properly.  Once he gets it plugged off and dry, he will cement it with hydraulic concrete. 


We do know in the other part of the basement, in the older rubblestone area, from pre-1900's there is another capped off well.  That one is holding after being cemented in many years ago.  This home originally used to be in the country, and as the town grew outwards to include it into the city at a later date.  Then city utilities with water and sewer were supplied up and down our street.... and existing wells were capped off.  I suppose the water bubbling up has to go somewhere, but I want it to stay OUTSIDE of the basement foundation!  LOL.

~~~~~~~~

Yes, we are still babysitting the sassy Grandpuppies, Biscuit and Ewok.  I'm still keeping the quilt on the new loveseat, as you can see, to protect it from their little claws. It has become the favorite perch in the She Shed for them. They love looking out the windows, because there is so much to see outside. At their home, all of the windows are at a much higher level and they don't get so many wonderful outdoor views. They have seen a cat, some deer, and now some turkeys!  This is pretty exciting. Like a doggie theater and they are in the best seats!


Little Biscuit seems to think that anywhere she perches, we should lean over and pet her and scratch her ears. She is quite the little jumping bean and bounces all over the place.  She is the youngest of the bunch. 


Ewok is more sedate and loves to be a couch potato and snuggle buddy. Anytime you sit down, he seems to think your lap is made just for him to perch on.  He grunts at you like a little piggy, until you lean over and lift him up on your lap.  


We've been trying to take them for walks every day to wear off their energy. One person, three leashes, and energetic dogs does not work. They were going Every Which Way Direction. So we have to divide and conquer to get in a walk.


~~~~~~~

On my fiber front, I've been working on my Jewel Box quilt. I have almost all of the blocks done and ready to start putting them together into strips and then complete the top. Here are just 16 of the sections that make up four blocks of the quilt. There will be 20 blocks in all plus a border, and there are 960 little pieces total in this queen sized quilt.


(incidentally, it's the same pattern as the quilt I have covering the love seat)

~~~~~~~

Tomorrow is our youngest daughter Heather's birthday. She will be 36 years old! Hard to believe 36 years ago she came into our world and now she's so grown-up and a mommy of her own. We are having a special little birthday celebration for her tomorrow here at our home.


Why did you grow up so fast? 
It seems like yesterday. 


Your big sister was SO excited to have a new baby... 


And now you have babies of your own to share with us.
What a Fun-Loving Jeeping Mom you are!


HAPPY BIRTHDAY

 HEATHER!!!

Steve is chomping at the bit to get going on the sidewalk again, I better get out there and help. 

Friday, March 19, 2021

One More Day Until Spring?

 Ahhhhhh---- we have one more day until Spring officially arrives. This weekend is going to be chock full of nice beautiful weather again. When considering that during the past week we had some awful snow and cold and wind!

This morning, as I sit here sipping my coffee, looking out of the She Shed windows, I am looking ahead to a day in the 50s with sunshine and blue skies.


Do you know how I always say how Steve finds these wonderful bargains on Marketplace and Craigslist? Well, yesterday it was my turn! 

I was kinda browsing along looking for some end tables or nightstands for in our guest room. Nothing in particular, but I was just looking for a set to put one on each side of the guest bed.

Well, I ran across a listing with two very nice end tables. But added with the listing was a leather mission style loveseat!!!

Oh boy, it was something I didn't even realize I knew that I wanted, but after spending a bunch of days with grandchildren, we realized that there are only two "adult butt sized seats" in the She Shed. Everybody ends up in the She Shed. But we were constantly shagging the kids out of our leather mission recliners and forcing them to go sit on the "kid butt sized" ottomans or the tall stools over by the sewing area fabric cutting bar.

When people stop by, (granted we haven't had any people stop by for a year due to covid-19) this loveseat was the answer. It would give us two more grown-up adult sitting spaces and we can still move the kids over to the ottomans if we have company.

I contacted the seller to get some better photos and see if it was a match to our recliners. Hint: if you want to sell something you need to have good photos or people can't tell exactly what you're selling. In a way, that added to our benefit because nobody else contacted her about the loveseat. 

(here was her photo in the ad)


In contrast, she said she had over 50 inquiries about her other two leather chairs! That was a better photo in a separate ad. Well, once she sent me the better photos, with closeups of the side wooden sections,  I knew that it was the match to the set we have, even from the same manufacturer.

After my dental appointment yesterday, Steve hooked up the trailer and off we went 30 miles to check out my potential Facebook Marketplace deal acquisition.

Sure enough, that's exactly what we wanted. All 3 pieces for only $250. The tables were even nicer and taller than the ones we currently have in our living room. We will put them in there, and rotate our existing tables into the bedroom as bed nightstands for the guest bed.


We were able to just squeeze the loveseat in through the door, working hard between the two of us. We set it into place. The woodwork matches perfectly!


There--- we now have four "grown up butt sitting spaces" in our She Shed! We still have plenty of room for my other things and I have all of my sewing and weaving and knitting and spinning toys around us. This makes a much cozier cluster for sitting and looking out of the back windows into the big backyard.  That is one of our favorite past times in the She Shed, besides working on my fibery stuff.  We also listen to music and play cribbage or yachtzee, and enjoy the space much more than being in our livingroom. 

(it looks tight in the pic, but there is about 4 feet behind the loveseat and the looms)


We are babysitting two sassy Grandpuppies for 5 days while the kids are on spring break. Of course I know that they like to jump all over the place and act more like cats or squirrels than actual dogs. I covered the new loveseat with a big quilt to help protect its surface while they are here visiting.  Binney and her buddies had to try it out. I put the smaller ottomans in front for the dogs to jump onto and hang out when I sat down in their places.


Little Biscuit, the white Bichon Frise dog, seems to think she's a cat and jumps up and sleeps on the back of the loveseat in the sunshine.  Totally spoiled rotten! 


Sassy little Ewok, the cairn terrier mix, seems to think he belongs anywhere he darn well pleases. Here he is hopped up in the recliner chair and I had to shag him off right after I took the picture.  They make themselves at home here, and it's much nicer for them than a boarding kennel. 


By clustering the furniture together in a group around one of the sets of windows, it creates a nice little space for visiting and still allows plenty of other room for my she shed toys.  Our view outside this morning... the grass is not greening up yet, but the sunshine is sure nice.


~~~~~~~~~

Over the last two weeks, we have spent some special time with each of the local grandkids. We're trying to give them all some one-on-one time and also some grouped family time. We make up list of projects to do or things we'd like to get accomplished. When they come, they get to pick out things they want to do and we cross them off the list. 

This picture below happened to be that they decided it was time to make rice krispie bars! It is a favorite project because each one gets different steps to do and eventually by the time we reach the end, we have a nice big pan of Rice Krispie bars, and three spatulas that needs to be licked off. Of course, this grandma keeps more than enough left over stuff in the bowl after filling the pan. Then they can all scrape away till their hearts' content with their spatulas. Got to make sure there's enough for everyone.


The oldest grandson, Jameson, loves cooking. Here he helped make dinner, which consisted of a roasted turkey breast, mashed potatoes, veggies, tater tots, and our favorite garlic knots.


The two smallest girl cousins Whitney and Claire, spent an evening making apple pies. They love making the apples go round and round on this apple peeler corer slicer unit. It doesn't take long and soon we had enough apples to bake three pies! One for each of them to bring home, and one to leave here with Grandma and Grandpa.  Look at the delight on Whitney's face, while Claire is busy eating as many of the string peelings as she can cram in at once. LOL


Spending some one-on-one time with each child, as well as in groups, gives us a chance to really get involved with them with projects. We get a chance to know each one, and enjoy our time together, and hopefully build some memories for them to carry on down the line.

~~~~~~

On the fiber front, I started a new quilt. These are some special pieces of fabric that I got in the mail, through a Christmas Gift Subscription from the kids. Every month I get a new batch of six different pieces of fabric that all coordinate. They are shipped out by a little tiny rural quilting shop up in the Northwoods of Minnesota. What a great way to help out little shops during the pandemic! Now by the third month, I had enough to actually put together into a quilt. So I started piecing together all of the little squares and triangles to get started on a new quilt. 


It is based on a pattern by Eleanor Burns called Jewel Box Quilt. 
 It says you can make it in one day, but I will take my time. LOL


On another evening, Steve needed to buzz up to Marinette to Menards to get our last window order for replacing in the kitchen breakfast area. Of course, right nearby is a Jo-Ann store. Chelsea and I decided with being that late in the evening, we could reasonably go up there and not have too many other shoppers to deal with.


We were right, we were the only people in the store except the two clerks working. We roamed around till our hearts content and picked out a few things that we absolutely had to have. Chelsea picked out enough fabric to start her very own full-sized quilt for her bed.


She chose sea turtle fabric because that is her favorite animal. We found some really cute little prints and enough coordinating fabric to work into a quilt for her.


We set to work cutting up the fabric and in one evening she sewed together a lot of the cut pieces into large four patch blocks. Although she got her own sewing machine for Christmas, she spent the evening sewing on mine while spending the night. She sewed right up until 9:30 p.m.


The next day she was ready to start laying out her blocks. She meticulously arranged and rearranged them to make sure that no two matching pieces would be touching each other. She sure is a little Mini-Me, wanting to create and make something with her own sense of style and learn along the way. Soon the younger girls will want to be doing it too.


Well, enough of this blog stuff this morning, the sun is shining and I think I need to get some things done. Steve already cooked us a delicious breakfast and all three dogs got little nibbles of leftovers as treats. Now the two sassy Grandpuppies are dozing in the sunshine on the big ottoman.


Binney has taken up her place of honor as the princess on the new loveseat. She's keeping a close eye on Steve while he is on his computer.


I wonder if he is looking for more of his own
 Facebook Marketplace Bargains
 and Craigslist deals?

You never know.