Our Wonderful Followers who come back again and again to read about us...

Monday, April 24, 2023

First "REAL" Camping and Modifications

Oh my---- what a perfect 65th birthday present from the grandkids!! 

(They ordered it when we still had the bigger Class A a few weeks ago, but it still has the right sentiment) 


Now I have an interesting question. Why would Winnebago go to all that trouble to install a DC 12 volt TV in the motorhome as original equipment.... but then route the DC cord through an adapter to plug into 120v AC wall outlets? And of course, the next step of the question is when you're boondocking, then that means you have to turn on the inverter to change the existing DC power over to AC to run the tv??? 

WHY NOT JUST LEAVE THE DC 12 VOLT POWER RUN ALL THE WAY THROUGH?

Why change it from DC to AC back to DC?

Side note, the TV in the back bedroom area is DC all the way. DC directly into DC with no adapters and not changing it back to an AC wall outlet. Why didn't they do that to the front TV in the living area? Who knows?


Since we bought this Winnebago View, we joined a Facebook group of other Winnebago View owners. They all said the same thing. Unless you only go to campgrounds all the time with AC 120v hookups, I suppose it doesn't matter. So upon reading all their comments, a number of them remarked that Winnebago thoughtfully included an original power cord from DC that can be wired in directly to a DC power source somewhere on the motorhome! Sure enough, in the very back of our bag with a bundle of booklets and pamphlets about the rig, here is a little plastic bag with exactly the connector we needed!


See that big black adapter plug up there in the top right corner? That is the power cord line that is DC12 volt running into that adapter box that then changes it to AC and allows it to be plugged into that AC outlet. 


Steve did a quick glance into the compartment behind the TV, and saw a place that he could easily route over and tap into a 12 volt DC power source and ground. 

In no time at all, Steve gathered the materials needed and decided to also attach an extra toggle switch at the same time. That way he could turn off all power to the TV and our Roku device in case we are boondocking and not watching any TV at all.  The back bedroom TV already has such a toggle switch installed from Winnebago. The phantom loads from things like tvs, radios, and the inverter itself can drain down the batteries down over a couple days time. When we are stored at home in the driveway, or when boondocking, we watch our battery drainage and power draw things carefully.


And there you have it, a DC TV that goes straight to DC... Good job Steveio!  Note the big adapter plug is unplugged and we will coil that up and store it away in case we ever really want it in the future. 


Soon we will be upgrading and installing some solar. We are debating if we are going to put panels on the roof like we did last time, or just get portable panels that we can move around on a campsite. That is how my sister does hers. Then we can be parked in shady tree covered campsites and just move the panels around where there's available sunlight throughout the day. That decision is still up in the air. 

One of our next little projects is the outdoor patio light. It is a bar with about 8 LED diodes from Optronics. When we were looking at the rig with the sellers, he told us that a few of the diodes had burned out. He knocked $100 off the price even after we made the deal and said we should be able to find a replacement for under $100. That was fine with us.  Since then a few more diodes burned out. There's only one left. 

But after joining the Winnebago View list on facebook, the other owners with similar problems said that the light is still under a lifetime warranty! All you have to do is send in a photo showing the missing diode illuminations and they will send you a whole new fixture for FREE!


So I sent off the required information and we will see what happens... 

Oh, remember in my last blog I mentioned about trying to find a good spot for our fishing poles? We discovered that we really didn't have anything in the cabinets over our bed in the back bedroom slide. Besides another set of sheets. So Steve was able to collapse down our fishing poles and the tackle box and stowed them away neatly in that compartment. It's not every day you keep fishing poles in your bedroom? But it's a good place where they won't get bumped or banged around compared to in one of the bottom storage compartments.


~~~~~~~~~~~~

It was a lazy Sunday afternoon and I was chomping at the bit to get out and do some camping. The weather wasn't really cooperating, but the snow is gone. We knew it was going to get cold but we decided to throw a crock pot of beef stew into the motorhome and a few other groceries, the dog, and some warm clothes. We drove a whole 8 miles to the county campground just north of our house. It's actually the only 6 miles as the crow flies.

It's called North Bayshore County Park part of the Oconto County Park system. Here is a link:


You can pay for your campsites on their website, or over the phone with a credit card during courthouse office hours, or you can use the kiosk over near the boat landing at the harbor. Also with a credit card. There are no longer pay posts or envelopes to put cash or checks in.

There's absolutely nobody else in the campground, and we had our choice of campsites. We picked site number five so we have a beautiful view out the front windshield as well as all of the side windows over to the bay waters of Green Bay and into the harbor where the fisherman launched their boats. This bay then opens out into Lake Michigan if you go far enough. 


Electricity is included and the water has already been turned on in this campground. We filled our holding tanks at home though before we left. There is a dump station nearby and the bathroom/shower building is open already too.


It sure is different backing up a little 25-ft rig instead of our 40 foot that would take up this whole campsite pad. It sure is kind of cute. We were totally level so we were able then to put out our slides out the back and out the living room. Done! 


We had our delicious beef stew for supper and enjoyed a nice walk around the empty campground with the dog. She found many many places to sniff, because it was her first camping of the year. Just about every tree and rock needed to be stopped and smelled. She was very happy.

Towards evening we turned on the TV and tuned into some old TV shows rather than run the Roku off of our hotspot of our telephones. Steve hauled out the old vintage popcorn popper from his father's house to make us a snack. 


The motorhome smelled great with the scent of fresh popped popcorn and we had some accompanying beverages too. Talk about being spoiled. Here we were all curled up in our jammies in a nice warm camper only 8 miles from home. LOL


We know it was going to get cold overnight so we flipped on the water tank heaters. Everything is above the floor and stays warm with the furnace and the accompanying electric heating pads. They run off 12 volt, so you have to be careful if you're boondocking if you're going to use these. They're kind of like an electric heating pad you'd use on a sore muscle that are glued right to the tanks. 

We can heat our motorhome with either the propane furnace, or the electric heat strips up in the roof air conditioner.  Our electric heat strips in the air conditioner on the ceiling are only supposed to work only in outside temperatures down to about 35 or 40°. But we found we were able to run them all the way down to about 29° before we switched over to the propane furnace for the night. We didn't want them to cut out and wake up to a cold motorhome. 

It sure got chilly overnight and here was the temperature when I woke up in the morning!!! Brrrrrrr!!! 


But we were cozy and warm inside with the propane furnace, plus we have an electric mattress pad heater on our bed. Is extremely comfortable and we didn't even know how cold it was getting until I looked at the phone this morning. But then I had to put on my slippers and Steve's heavy winter jacket to go outside with Binney on a leash to do her "thing".  The sun was coming up in the East and breaking through the clouds. It is supposed to be sunny for the rest of the morning? 


We could hear the fisherman unloading their boats over at the ramp across the way of the campground. One by one they would slip out into the bay, hoping to catch their fill of fish on an early Monday morning. 


In no time we had the coffee perking on the stove and some leftover cinnamon coffee cake from Steve's birthday Saturday. Life is good and we are cozy. Who can ask for more?


Before we head home today, we will probably buzz a little bit further up the highway and top off our propane tank. We're down to about a quarter tank and we don't want to let it get too low. That way if we're boondocking next time the refrigerator and the furnace can run without worry. 

This was our first official real camping in the motorhome overnight. Last weekend was more of just a working weekend and a place to sleep. This time we're officially in a campground and camping! I wonder where we will go next?


Saturday, April 22, 2023

Touring Our Outside Storage Compartments - 2016 Winnebago View 24G

 Happy happy happy birthday to my wonderful darling husband Steve. This little cartoon depicts him perfectly and catches his personality.


See what I mean? That's my guy!


He woke up early at 6:00 a.m. but I beat him to the punch. I had the oven going and baked him up his absolute most favorite coffee cake. The cinnamon swirl is so delicious, but it takes 45 minutes to bake. In the meantime the house is so full of wonderful smells that he is drooling by the time it is ready to come out. We each enjoyed a piece with our coffee this morning and there's plenty left over for the next few mornings. 


He kicked back with his coffee cake and his mug of coffee while he was still in his Superman jammy pants. Today he turns 65 years old. He is now officially on Medicare! I'm a few years behind him yet. 


Of course his very special birthday present (it's actually for both of us) is our new to us 2016 Winnebago View. Our last few blog posts dealt with how we arranged things on the inside. Now here is a blog post about the outside compartment storage bins.

There are three compartments down the passenger side, and one big huge compartment on the back, underneath the slide out for the queen bed.


Down the driver's side underneath the living room slide there are two more compartments, and one more on the far back corner. 


I MADE A CUTE LITTLE 
YOUTUBE VIDEO 
ALL OF THE WAY AROUND 
TO SHOW WHAT'S IN 
EACH COMPARTMENT. 


THE PHOTOS BELOW
GO INTO MORE DETAIL
OF WHAT IS IN EACH ONE.

I will start on the passenger side right next to the entry doorway. This is the most used compartment right next to the steps because it's on the patio side of the rig.

For now we have our most commonly used things there like Thermacell for mosquitoes, a little battery operated LED lantern, and the folded up patio mat. Behind that is a tote bin with our patio lights and a picnic tablecloth and a couple geegaws we hang from the awning. The little packages down front are some extra tie-down straps, some bungee cords, some little packets of campfire color powder. You throw a packet in the campfire and it makes beautiful pretty flames. A real hit with the grandkids!


We are trying to not put too much in this compartment because we may expand our battery bank in the future. Right now there are two 12 volt batteries in a compartment underneath the steps. But we may add on two more and connect them through the wall of this compartment so they are all together. We will monitor our battery usage and see where we are at before we decide to expand anything.

In the next compartment running down the passenger side is the Onan 3600 watt LP generator. It runs perfectly and has been routinely maintained and taken care of. There are only 300 hours on it. We don't plan to use it very often, but it does need to be exercised under load at least once a month for a period of time to make sure it stays operational. 


In the final compartment down the passenger side is called the wet bay compartment. It is not carpeted and has a sloped bottom.  It is a bay that you can put wet or muddy things and not worry about making such a mess. Right now we have a variety of things just kind of tossed in there. It still needs organization. But there are some kneeling pads and some leveler blocks in there as well as the dog tie out rope and pooper scooper. Can't forget that! There's an extra black 30 amp extension cord as well as a windshield squeegee on a telescoping pole. This compartment will get reorganized later. We even bought some nice velcro carry strap handles to put around the electric cords to help keep them neat and tidy. Then it will get put over in the other electrical bay. 


Now to the back side of the motorhome. We have a queen size bed in the back bedroom with a slide that comes out about 3 ft. The rest of the space under the bed is accessible through this very wide compartment door. We have put in two zero gravity recliners, two folding sit-up lawn chairs, and a big stiff rugged doormat.  This matt is the first thing set out in front of our stairs when we stop for the night. It helps to keep the dirt and pine needles from being tracked in.

I also have a wooden folding chair that I use if I am spinning on my spinning wheel because it helps me sit upright better than a lawn chair. I also use it with a folding table for my sewing machine if I am sewing outside. At this time my regular portable sewing table is too large for this compartment, so I am hunting around now and shopping for one that's a little smaller. There's also a little fold up wooden TV tray table we use between our lawn chairs. Not sure if we're going to keep that in there or not yet. There's also an emergency container of orange triangles that could be set up in the case of a problem alongside the road. So that's about it for that compartment. It looks quite full but it's really a lot of space taken up by bulky lawn chairs. 


The last compartment on the driver's side serves two purposes. One is that it has the water manifold which is the control center for all the water going into the rig. There's also an external shower that could be used to hose off sandy feet or a muddy dog or just to rinse off something before it's put back into another compartment. There are low point drains here as well as the gray water pull lever for draining and a pump that pushes it over to the outlet near the black tank. 

The other part of this compartment is the electrical bay. In here we have various adapters and the surge protector, as well as the main shore power cord. There is a little cutout area that the cord runs down through so the door can be shut and locked tight. The cord is still out and plugged into a post. The other extension cord will get rolled up and stored in here too. The far back portion of this area are the coaxial outlets if you wanted to hook up to an external satellite dish or hook to park cable. Why they are way in there at the back of this compartment is beyond me? I can't imagine them being easy to reach in and screw on and off with a cable fitting?


The middle compartment on the driver side actually exposes the black tank and the dumping valve. This is the area to fill the propane tank and an emergency shut off switch. I am very glad that Winnebago located the drain valve up to the middle of the rig, rather than hanging out the back end like some other brands. My brother has the personal experience of ripping off his entire drain system on a rutted area of a campground and losing the entire contents of his gray and black tank all over the ground! Talk about a fiasco!!!!  What a horrifying mess in the middle of a hot Sunday afternoon in a crowded county campground!  Ewwwwwww


The foremost compartment on the driver's side is "Steve's Area". Here he keeps his Blackstone flat top griddle and all of his grilling tools in a white metal tote. He carries along a couple 1 lb propane cylinders as well as a 5 lb refillable propane tank. Behind that he has a tote bag of tools and a small Coleman lantern. Last but not least, are the marshmallow roasters!


We're going to find a way to transport our two fishing rods and fishing tackle ---- maybe in a fold down type case. Otherwise they may have to ride up in the top bunk inside. We do enjoy dropping in a line every now and then, so we would like to take along fishing rods. 

So that's about it for our compartments. Once we have everything loaded up and a full tank of water on board, then we will go through the weigh scales again. If you read a couple blogs back, we went through the weigh scales when everything was empty when we first bought the rig last week. Now we will be able to know what our cargo weighs and can adjust accordingly once we do a new weighing. 

~~~~~~~~~~

It's kind of a rainy icky weekend here and there's snow forecast just north of us. The temps might be down below freezing so we didn't go anywhere camping this weekend. Instead we will stay home and work on a couple modifications in the driveway. I will do more on those in an upcoming post. 


Thursday, April 20, 2023

Some Motorhome Maintenance on our Winnebago View

Steve is happiest when he has something to putter around with.

Motorhome maintenance is always at the top of his list. He has done all of our maintenance on any of our rvs, vehicles, lawn equipment etc and rarely does he ever rely on a repair shop.

For those of you who don't know him, Steve's career before retirement was handling all of the maintenance on the large equipment used for groundskeeping at the University of Wisconsin - Green Bay. He took part in their interior construction and repair projects as well. He also went to school to be an electrician. From there, for his last 5 years with the state of Wisconsin he handled all of the maintenance of the equipment and grounds and services at High Cliff State Park.

Now that he's retired, he is able to put more time and attention on his OWN things he says!

One of the first projects he wanted to get done on the new-to-us Winnebago View was to lube all of the slides and then condition all of the rubber seals. Even though it was slightly drizzly yesterday, he was looking for something to do. 


It's very important to only use products that are intended to maintain the slides and the rubber seals. Using the wrong product can cause gunking up of slide motor gears or deterioration of the rubber seals. 


He said the best way is to spray it first onto a rag and then wipe it on, rather than just spraying willy-nilly all over the place and making a mess. Both of our slides are in perfect adjustment, so there are no repairs needed. There's one small piece of rubber missing on one corner of one of the seals. We may find a way to patch it, or he may just order a whole new seal and replace that section. But for now, he is watching it for any signs of leakage during the rain. So far so good.

While he was outside doing that, that's when I was inside stowing away some more items and photographing my storage solutions I mentioned in yesterday's blog. 

I had kicked on the heat to warm it up, and tried out the electric heat strips up in the air conditioning system. They worked great. But then Steve wanted me to also kick on the propane furnace which blows through the bottom vents near the floor. He could hear something in there buzzing around making a funny noise in one of the vents. Sure enough, there's a big chunk of styrofoam! 

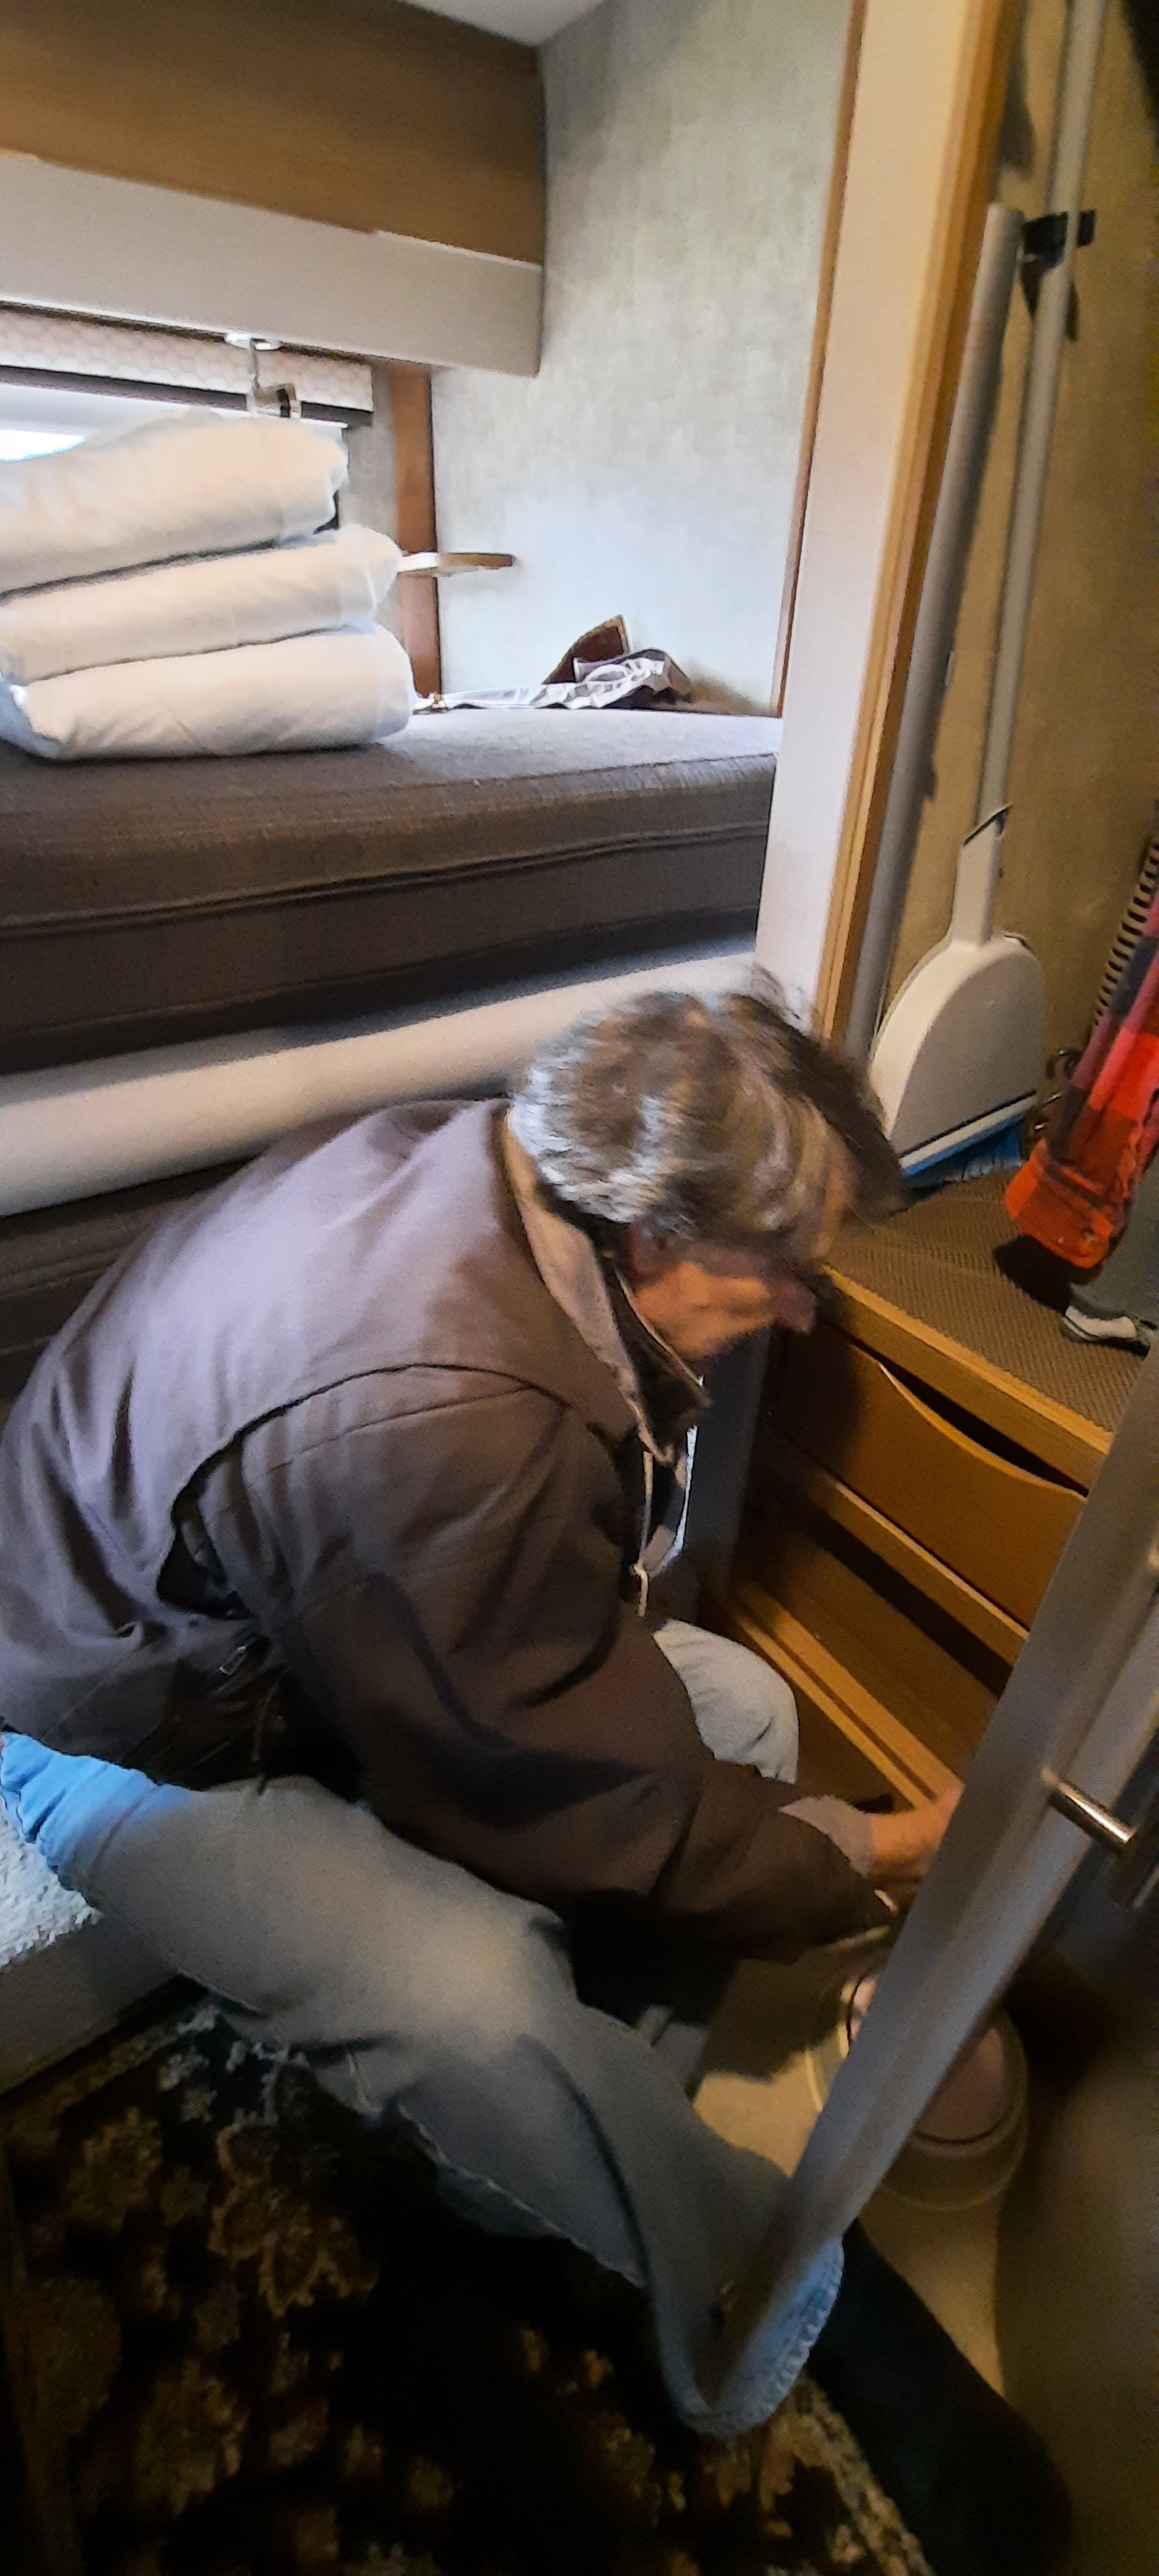
So here he was on the floor, unscrewing the vent grid with his Leatherman tool that he always carries in his pocket, and removed the hunk of styrofoam. Just think, that stupid piece must have been in there ever since the rig was built in 2016. Now it's in the trash.


Although this isn't technically maintenance, it's a project that we're going to do. Previously, we had wired in a 50 amp outlet on the side of our garage to plug in our last motorhome. Now, this motorhome is only 30 amp. In the meantime Steve used the portable surge protector and a dog bone adapter to change from 50 amp down to 30. He said he will pick up the materials to swap a new box over to 30 amp so we can hook it up directly. Maybe we can sell the 50 amp box on marketplace. 


Another electrical project is on the horizon, this time inside of the rig. We really don't have any USB ports within the rig other than one adapter in a cigarette lighter up on the front dash. We like to camp a lot just using 12 volt DC and not be plugged in at a park to shore power. We need to have some other ways to charge our phones rather than with 120 volt AC wall outlets. We had added three extra 12 volt DC cigarette type outlets to our last motorhome. Then we still have to pop in the little adapters to plug in the cords for charging.

This time Steve decided to buy the surface mount USB charging units, rather than cutting big holes into the cabinetry to recess the 12 volt outlets like last time. This will work well with our Samsung phones because they have the fast charging option. Also with the "C" type connections. They only need a very small hole through the woodwork or the wall to run the two wires. The rest is all surface mounted. That way, if technology changes in the future, or types of charging needed, we can easily change out to a new wall mount unit rather than having big holes from recessed ones. 

We ordered up two of these from Amazon 

and they will be here next week:


The link is:  https://a.co/d/28KGsUP


The next upcoming project on our list: we want to have Borg solid stems attached to our tires rather than the flexible braided kind. We want to add our Tire Minder TPMS, (tire pressure monitoring system). 


The Borg stems are said to be the best alternative to the braided ones. The braided ones can be sheared off or leak. The solid stems seem to be much more reliable. We had them on our last two motorhomes. The inner dually wheels need to have a valve stem that extends out in this manner shown below from someone else's picture. 


So once we order the Borg stems we need to find a tire place that's willing to put them on. It seems that they need to be bent in a certain manner from the inner dually wheel to be able to come out the middle of the access opening on the outer dually wheel. Some tire shops will do it, others won't. I guess at the Borg company there is a person named Kelli who will supply the exact information for the tire installer to follow regarding the bending as well as the right torque for installing them to the rim.

I guess they need to be bent like the one on the left, not the one on the right. 

So that will be one of our upcoming projects.


Also the simulators, or commonly known as hubcaps, can actually pivot or spin on the rim and shear off those braided stems, especially on the rear wheels. So we removed the simulator caps for now. 

We have joined the online groups for View/Navion owners of these particular years. It seems to be a problem that the simulator caps go flying off. Some have even resorted to buying thin metal wire ties and attaching them to the rims so they don't pivot. Our previous owner actually attached metal tabs right to the hub bolts to try to prevent it from spinning. But then it makes it harder to remove the simulators in case of a tire change. 

So we think we might go without them for a while. The rims are pretty good looking just as silver painted rims. We will see.


The very last item on his agenda is to do an oil change and replace the cab filter. He was careful to get the proper ESP oil rated specifically for the Mercedes-Benz Sprinter engine and the proper Mann filter. 


If the weather gets a little nicer from this wet cold sleety icy snowy icky stuff, he will get that done possibly by the weekend. I hope he can do it on Saturday. 

It is his birthday on Saturday, and he turns 65! He is going to totally enjoy being able to spend the day working on his new birthday present toy --- the Winnebago View!!! 


Wednesday, April 19, 2023

Storage Ideas in Our Winnebago View

I've been collecting these pictures in a file called "storage solutions". Actually, it's kind of how we started loading all of our gear out into the motorhome and where we decided the best places to put things.

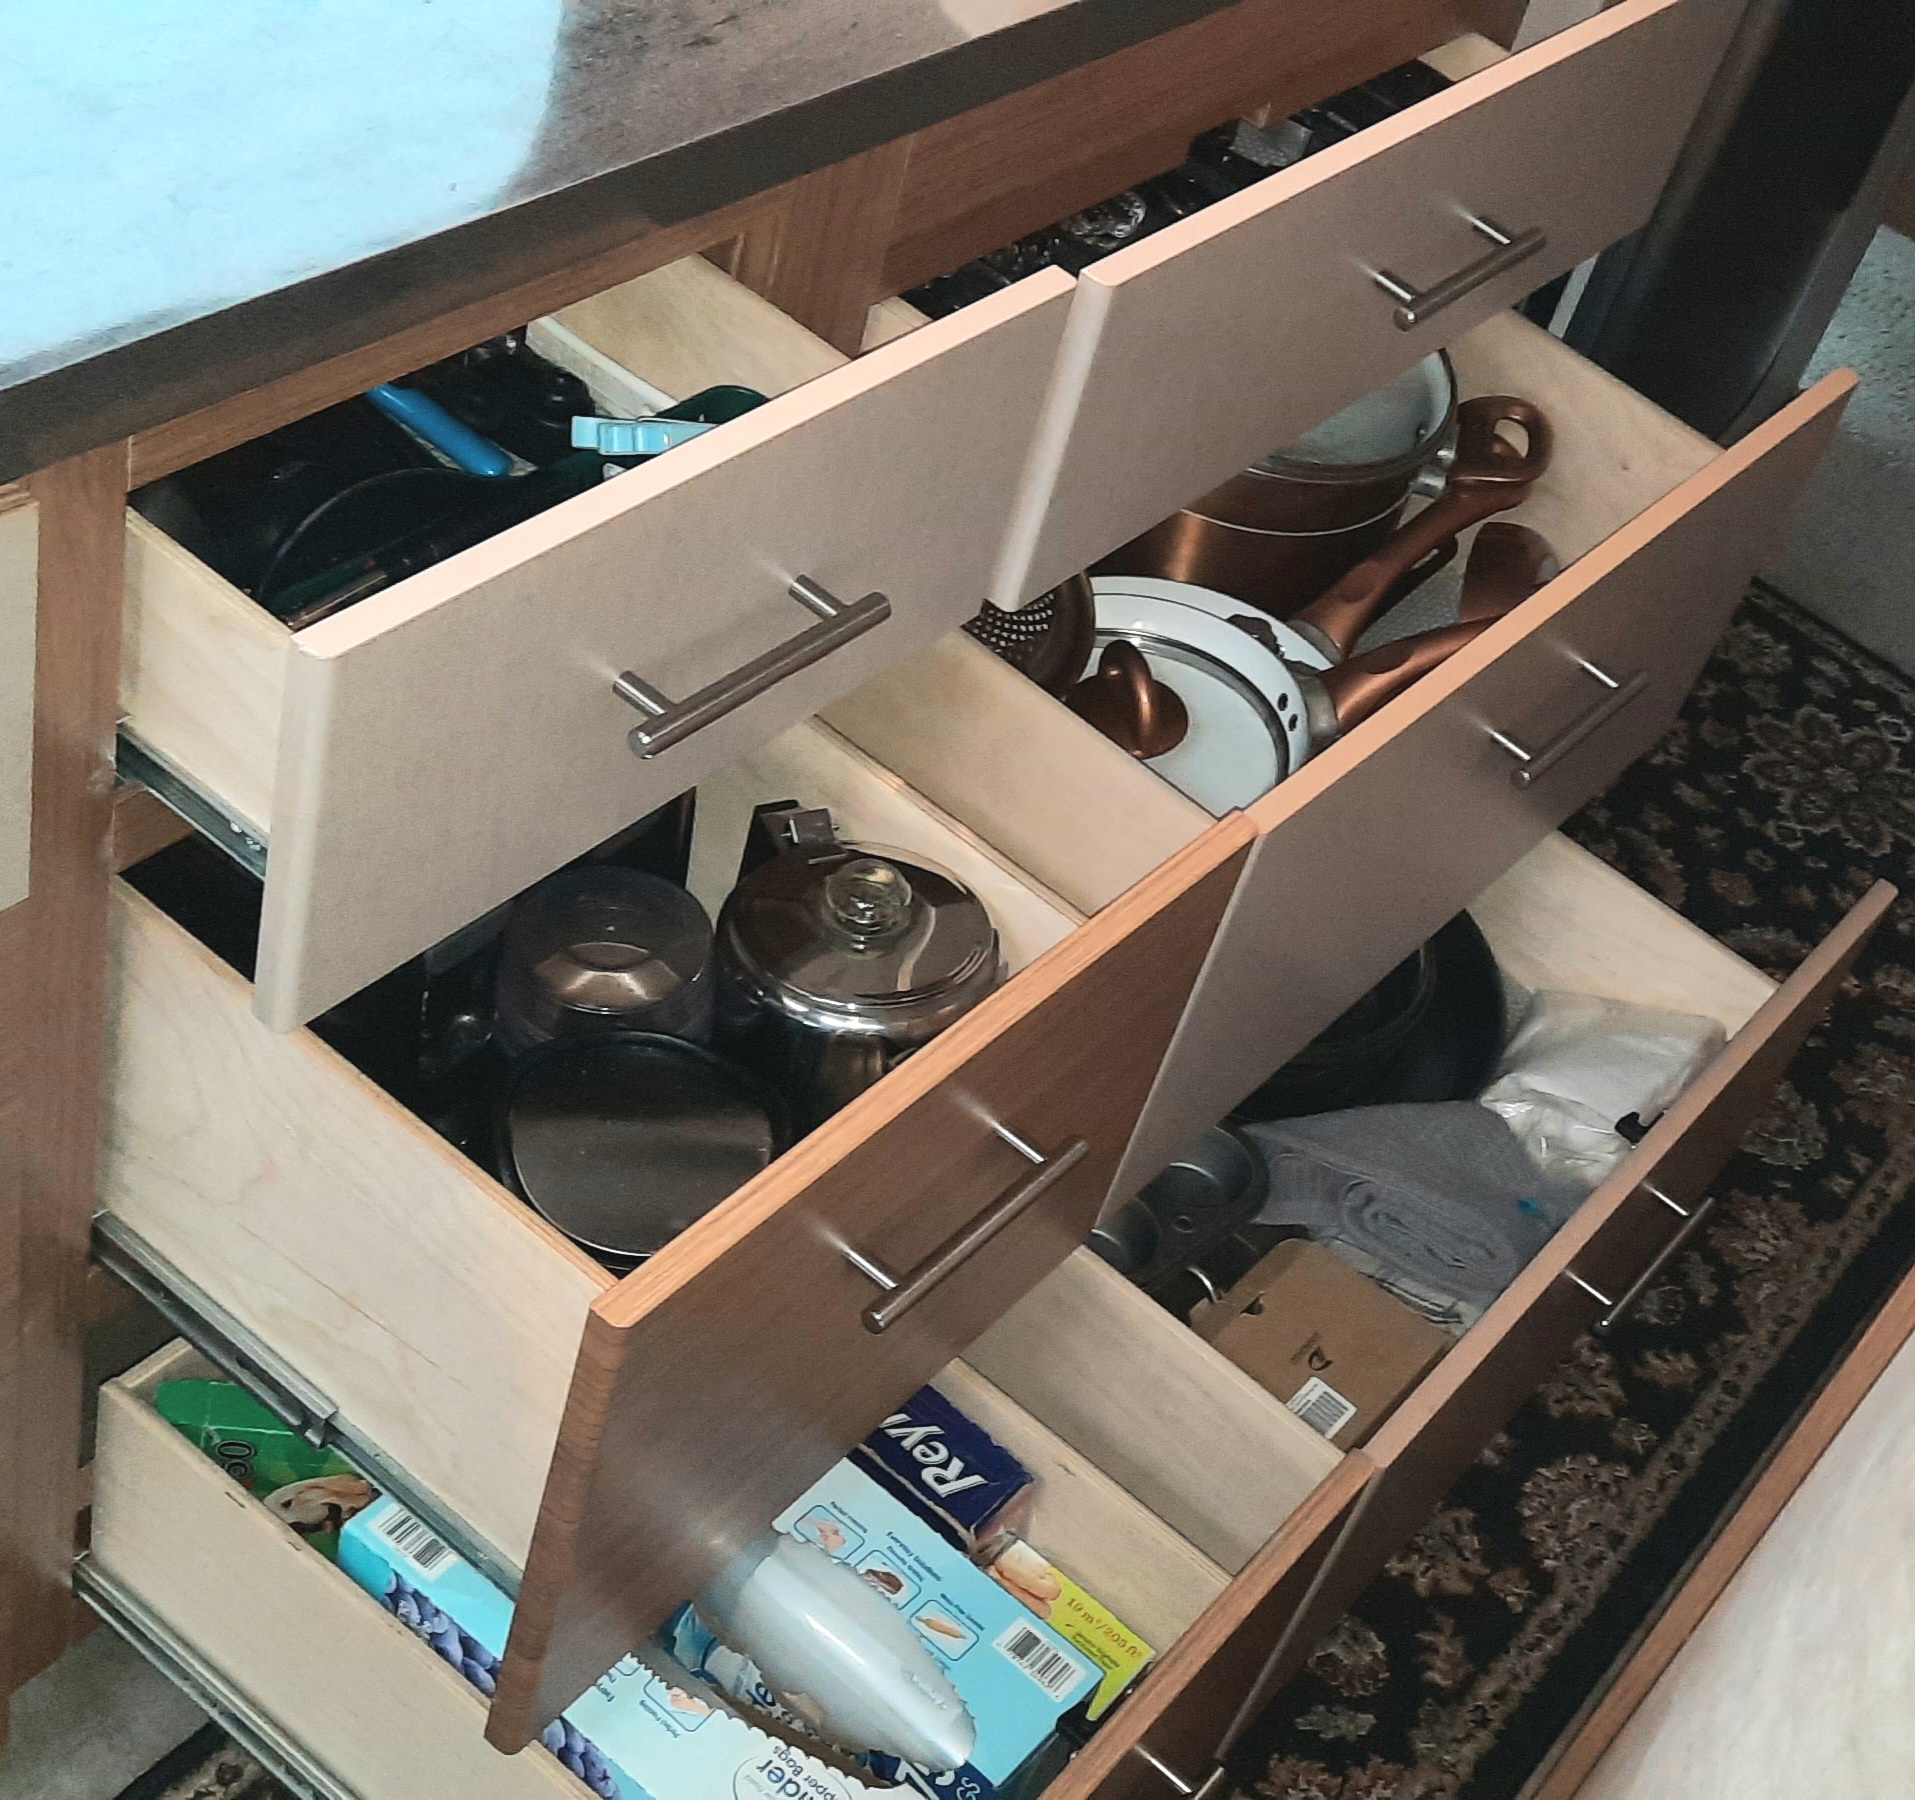
Of course, we started in the kitchen. I was amazed at all of the big deep drawers as well as the full extension slides. They seem to be very sturdy well made fully wooden drawers. No cheap particle board here!


In the second drawer underneath the kitchen stove it was actually big enough to contain all of my pots and pans! We put little pieces of shelf liner or hot pads in between them so they don't rattle or make noise or destroy the ceramic interior of the pots. 


This very deep drawer underneath the sink side of the cabinetry conveniently holds our big four slice toaster, our chrome coffee pot and coffee bean grinder. It's also a perfect spot to put this little metal wastebasket that I got from my friend Dee a long time ago. It holds little waste bags and sits right on the counter. Perfect for when prepping food. It's the nicest place to put the little pieces of trash instead of having to reach down underneath the cabinet every time for the big garbage can. Stowing it away in this drawer keeps it from sliding off the counter when driving.


The one shallow drawer under the stove top is perfect for flat ware and knives.  BUT... most of the silverware trays in the stores are too thick to fit. It needed to be 1 3/4 " or less.  I found a foamy one on Amazon that keeps the stuff from rattling around too!  https://a.co/d/8YYEoUW


These are the rest of the drawers that contain things like cooking utensils, tin foil and zip lock bags, and all of our baking supplies. 


It is so nice to have all of these drawers. That is one of the things that attracted us to this model, as well as the longer stretch of countertop than most 25 ft motorhomes. 


Next up on the organizing process---  I bought four of these heavy duty stackable shelving units from our local Menards, similar to a Home Depot store. I think they were $6 or $7 each?  We measured in advance, so we knew which sizes to get.


We added one to the compartment over the fridge. 2 bins on top will have commonly used tools and office supplies like scissors and tape. Underneath space is for the big black case from Winnebago with the manuals and books for our rig. 


These shelves are great. Doubled the space in the over head cabinet in the kitchen! Little plastic pullout bin with the handle has spices in it.  One grab and it's down on the counter while cooking, then put it all back in one fell swoop.


I am so excited that I was able to get my Instant Pot and the Insta Pot Air Fryer Lid for it both underneath the sink!  Everything fits. The garbage can is a little tall but it easily tips out on an angle to get out from around that drain pipe. I think I will look for one about 4 inches shorter. 


This wire rack spans over the Air Fryer Lid for my Instapot and my husband's disassembled hand-crank popcorn popper that goes on the stove top. The lid for that popper is tucked in behind. On the top of the rack is my collapsible dish strainer rack, along with two white dish pans and my Instapot! I love the Instapot because it can be a pressure cooker, slow cooker type crockpot, or an air fryer with that additional lid attachment.


Alongside of the garbage can is a large wooden tray that also doubles as a big cutting board or I use it to carry items out to the picnic table. My brother-in-law Fuzz made that for me from scrap hardwood flooring. Often we use it to cut things up on the picnic table if we are cooking outside. Tucked in between the tray and the garbage can are the two sink lids. I find with all the counter space in the motorhome, I can keep the lids underneath more than up on the sink.


Our local Mennonite craftsman takes odd leftover pieces of Corian and smooths off the edges. Underneath he puts four little rubber bumpers to keep it up off the surface of the countertop. These make excellent cutting boards and also a hotspot for setting pans or kettles off to the side while cooking. I found a nice speckled grey one.


I found a papertowel holder that fits into the very small corner by stove trim. The bottom has three little metal ball feet that allows it to span over the corner of the metal trim. Otherwise a regular flat base does not fit in that corner. Of course, I move the paper towel holder while cooking.


Yesterday, I got this collapsible dish pan for $16.99 from Amazon.  https://a.co/d/4bLNq80  This is when it's fully set up on the side of the sink with the spout aiming into the sink. It also fits perfectly in the sink too.

The inside of the pan is completely enclosed, but the little white plug can be pulled up to allow water to come out into the sink through that spout. Otherwise it can be used for soaking fruit or vegetables before rinsing them off.  It easily collapses down nice and flat for storage. The spout rotates and hides underneath the rack.  It stows away in the space between the dish pans to the left in the kitchen cabinet.


Now to some real "modifications" ----
We removed these two clamps that held the ladder into place against the header that surrounds the cab portion.


In their place we put two of these stainless steel coat hooks. We used the original hole and didn't drill a second hole on there. Instead we put a tab of double stick tape behind the coat hook to help keep it from swiveling. That way we can put the brackets back if we ever decide that that was a dumb move!!


We took the ladder and laid it up on the bunk mattress with the center section flipped back over it. We are only going to use the bunk every once in awhile, if a grandkid or two comes along.


In the meantime, we used one of the brackets to carefully attach to the wall in the closet. Perfect spot to snap a broom. All the brooms we saw in the store were too tall. This was a Mr Clean broom that we could remove the top handle and cut the length of pipe down and put the handle back on.


We decided to flip around the mattress on the bed and put the larger piece to the back where it rests in the slide, and the shorter piece down towards the end. Otherwise in the original configuration my hip was landing right in that groove!  


Now we just flip the bottom half up like a taco onto the larger piece. (with bedding intact). By flipping it up this allows the bedroom slide to come back in during travel. 


We bought a nice 2-inch memory foam mattress on sale for $40 to add to the top of the bed.  It came all squooshed up. We carefully cut it apart with a scissors.  We let it rise for a couple hours and it was the perfect size. We didn't even have to trim it.


I think it really it more comfortable for sleeping. I covered it with new sheets and one of my handmade quilts. The quilt pattern is called "log cabin". I think it picks up the golds of the woodwork and the creams as well as the rich deep tones on the exterior of our View.  We ordered a new mattress pad heater that came over the weekend. Today we will go out and put that on the bed and remake it again. 


In the bathroom... 

I am sorry, but that little plastic RV toilet seat just wasn't going to cut it. It had a strange overlapping lid that you have to reach underneath with your fingertips to pull it up, just to get the lid up and not raise the seat at the same time. 

Thankfully, a traditional household round toilet seat also fits the porcelain base of the toilet. 


Steve swapped it out in no time flat. So for a mere $7.98 we have a new toilet seat!


The bathroom has a lot of great storage. But we decided that on the very top of the tall linen cabinet would be a perfect place to store our shampoos and conditioners. These normally are kept in the shower stall but they will fall all over during travel. I found these really nice clear plastic bins at Big lots. We put a piece of double-sided command strip Velcro on the bottom of the container. That way I can take it off if I want to wash it, if there's ever any leaks or spills. From the shower stall it's an easy reach to grab our choice of shampoo, conditioner or Steve's body wash. 


Another thing that we found really amazing was that Walmart carries the Oxygenics line of shower heads! We thought we would have to go through an RV dealer or on Amazon to get one. They had the traditional Oxygenics head like we had put in our previous motorhomes. But they also had their new improved "Oxygenics Fury" model. For just a few dollars more than the traditional one, we decided to try it out. We used it over the weekend and it works wonderfully! Oxygenics blends air with water to make it feel like you're getting more of a volume of a spray. That way you can use less water and still feel like you're getting a good full spray. Enough to rinse shampoo or conditioner out of long hair.


We also grabbed a couple of these very sturdy Command hooks. They are made out of metal and have a nice brushed stainless look to them like the rest of the hardware in the motorhome. We managed to find four of these large ones for $4 each at Walmart. The bronze or the brass ones were $12 and some cents? But these were $4 and there were only four left on the shelf. So we grabbed all four. They had kind of Christmas wreaths on the package, maybe they were leftover from Christmas stock? They do say they're good for outdoors... 


I put two on my side in the bedroom to hang up my pajamas or maybe a pair of shorts I might wear a second day in a row. Steve hung up one on his side. We are going to put the fourth one maybe in the bathroom. We don't know. But at that price will hang on to it.


A couple blogs back, while we were clearing out the Safari motorhome, I had a dilemma. I really really wanted to keep these wooden hearts. Steve had made them for me when we were first dating. 26 years ago, they didn't have such a thing as Command strips. So I had stuck them up with double-sided sticky tape. I was so worried about ruining the wood underneath when I tried to remove them. I was even willing to let them go to the new buyers. They suggested I try a long piece of dental floss, sawing it back and forth back and forth to work my way through the foamy portion of the middle of the tape. It worked! Then using a little bit of Oops Remover I was able to get off the remaining residue without harming the wood finish.

Steve and I decided we would like to put these back into this camper. They've been in every camper we've owned since we've been together. This time though, we use the wonderful Command strips with the velcro. It will be very easy to remove them if we ever decide to move on to another motor home somewhere down the line.


We looked around and decided 
the very best place to put them 
would be on each corner 
of the slide over our bed. 


~~~~~~~

Steve started the de-winterizing.  Instead of pulling out the drawer from above to access the valves on the water heater, he removed the wooden false panel in front of the heater instead. It made it easier to reach in and see inside.  


Once he had it off, he proceeded to de-winterize so we could use the water over the weekend.  Then he adjusted the panel with a little cutout to make it easier to remove in the future. His FIRST modification on this motorhome! 


Our next few projects will be:

1. Lubing all of the slides and seals. 

2. replacing the Fold and Tumble Flexsteel loveseat with a nice reclining loveseat

3. replacing a few exterior compartment door struts  to stay open better

4. thermostatic mixing valve in the shower

5. install 12 volt USB ports scattered around the rig

6. replacing the 2 bowl kitchen sink to a single large sink


and so it goes.... 


(WHEN IT STOPS RAINING, I WILL DO A TOUR OF THE OUTSIDE BINS) 


That's enough blogging for today.

It's a rainy icky sleety icy day today,

So Binney and I are going to take a nap

 out in the motor home in the driveway.