Our Wonderful Followers who come back again and again to read about us...

Showing posts with label staining. Show all posts

Wednesday, May 23, 2018

Our Old House Project- Going from Green To Blue

Ahhhh  --- we are home for a week and getting a few things done on the house.  For my newest blog readers, we fondly refer to our 104 year old home as "Our Old House".  We decided this summer to spruce up the outside.

Long ago our house looked like this: 


When we bought it in 2012 it looked like this:
(vinyl siding was added in the 70's) 


We removed the heavy overgrown cedars to show 
the delicate custom fretwork lattice under the porch.
Some of the cedars broke in the first winter's snowstorm anyhow.


Then I painted up some of the trim GREEN in 2013 like this:


When the previous owners had the house resided with vinyl, they also did  the soffits and eaves.  The soffit material has a pattern of two smooth sections and then two textured sections.  For some reason, they put a piece of the vinyl soffit material along the front of the house as trim???  In 2013, I had painted the textured sections of this material with green just to cover up the dirty looking parts that trapped dirt. 


Next project in mind: Steve is going to tear it off and see what is going on underneath it.  We are thinking of adding some curly cue stuff or trim strips of color or whatever.  Still messing with photoshop on ideas.


Yesterday, I got out my gallon of Cabots Solid Colored Acrylic Stain.... it works so much better than paint on things like concrete or treated wood (or even aluminum like this trim)  It doesn't flake off like paint does. You really can't use it over paint, but you can use it over stain, which is what I used the first time when I did the green back in 2013.  (I did a gazebo with it back in 1987 and it still looks great, as well as the shutters on our log house in 1997)  It lasts a lot longer than paint.

Mind you, Steve HATES painting... whereas I love it.  So this is "my thing" and I only ask him to assist with the difficult or up high stuff.

I went to work on the front steps, which are concrete and then some of the trim along the edge of the porch flooring and three columns from when the house was originally an open porch. 


I didn't get up high on the ladder yet for the top three blocks, but I will do that when Steve gets home and can help me.  He will need to put up the ladder to remove that soffit material with the green squares anyhow. Going from Green To Blue!


Whoooo hoooooo am I blue??? I did wear a bit of the color here and there on my hands and arms.  Hahahah I had fun... I even did the little house numbers as well.  It was a nice cool day in the low 70's and I got double coats on everything.  I think it looks great, and we will be adding to the trim around the windows, perhaps with shutters or some bric a brac or maybe even some corbels around the diningroom bumpout.


I even painted the birdbath (WITH water in it!) 
and I joked to neighbors passing by:

"Since I bought this cute little Dutch Boy and Girl, 
now I have to paint the house to match!"


Next up on my list of ideas was to stain up a bunch of new strips of wood, some quarter round and some half round pieces.  I convinced Steve to get out the air compressor and nail gun to put some up on the front of the house along the bottom edge of the fretwork lattice.  Ahhhh  I think that looks good!   (It's a "test piece" for some of the trim I might want nailed up around the windows and in the gables....)


That was it for Tuesday... 
not too bad for one day's work, don't ya think?   

~~~~~~~~~~

Now it was Wednesday!  The weatherman said that it would be nice in the 70's today, but the rest of the week will be muggy and higher 80's.  So if I want to get ANY more done, I better do it today!!!!


I had the paint department mix up a quart of matching paint to the same color of the solid colored stain.  Because this adorable little round picnic table and benches had been painted before, I was more confident using paint on this for a new color.  The table was red, and I bought it for a donation to the Wisconsin Sheltie Rescue Group a few years ago. I like it better than a rectangular picnic table with attached benches.  This one fits better in the corner by the back porch and the benches are positionable for comfortable seating while eating.


I had Steve spread out a tarp in the shade, but the sun was moving fast so I had better hop to it!   I set out an MP3 player with my soft celtic music and spent the whole morning changing my table from red to blue!  I did all of the legs first one coat, and then a second coat in that order.  Once the legs were all done, then I could do the edges and tops of each piece.


Ahhhhh I got them done before 11 a.m. and just in time because I was losing my shade! It looks a little lighter blue in the pic because of the sunshine, but it's the same colonial type blue color as on the front.


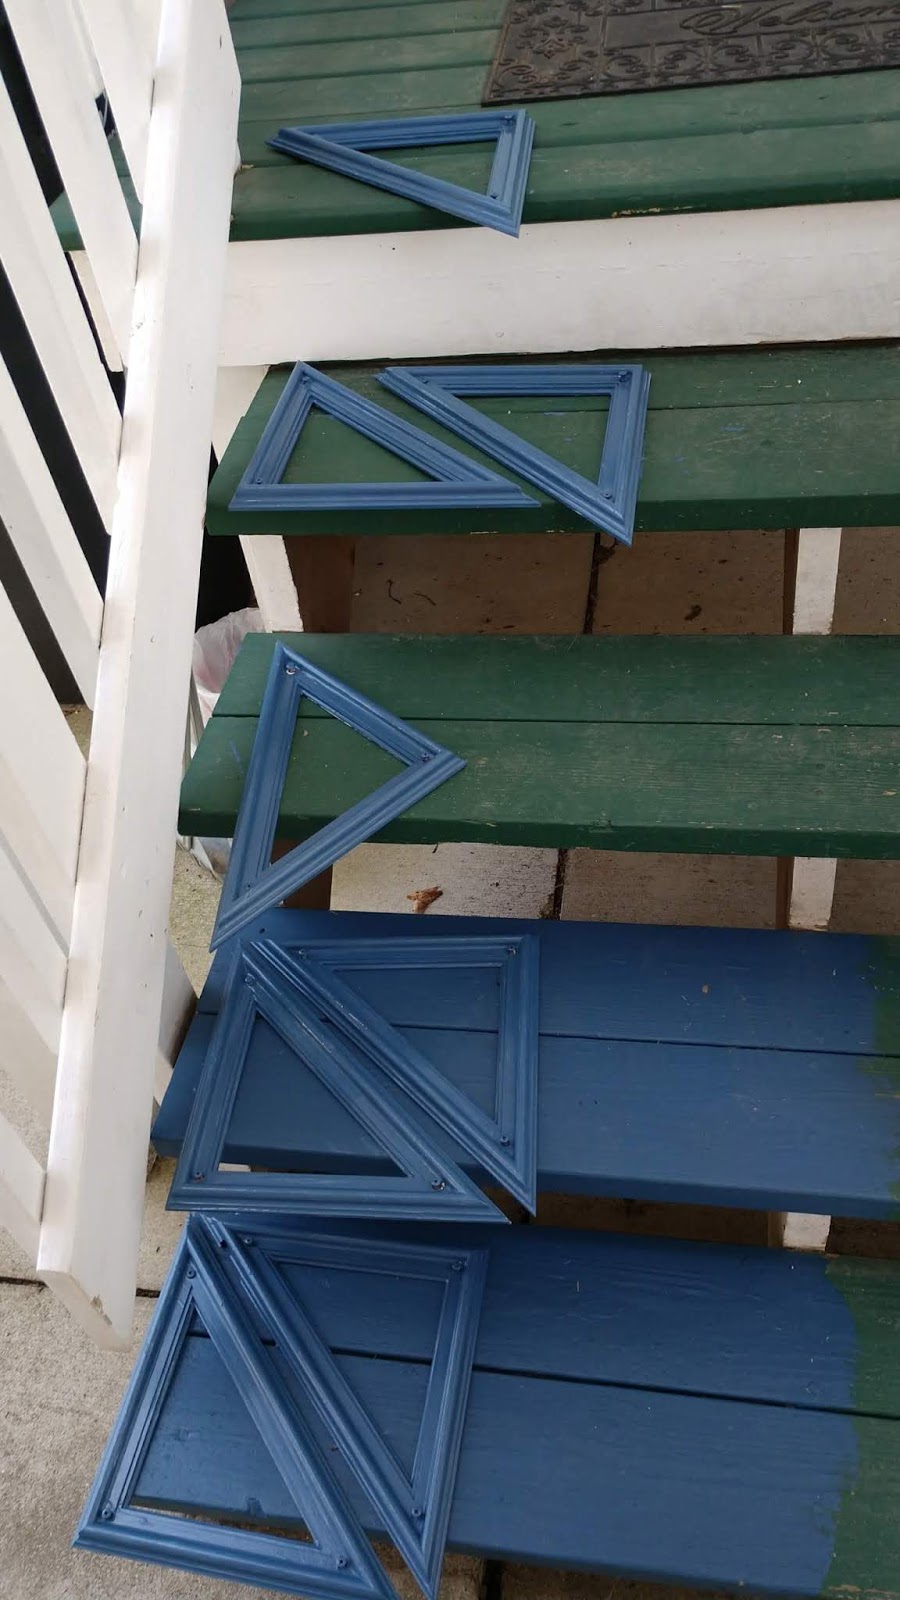
Once that was done, I still have paint on my brush.... I asked Steve to remove the triangles from the cross buck design from the two storm doors on the back of the house.  They are not my "favorite" feature, more of a ranch house design.  I would love to find two old fashioned wooden screen doors with some character and bric a brac to replace them with.  But then we would still need winter storm doors....   Steve said we could in the future keep that in mind.


I finished up the triangles and set them to dry... 
After that I painted the stairs to the back kitchen door as well. 
This is using the stain again, because that is what I used before 
on the bare treated wood that was here when we bought the house. 

Steve put the triangles on the doors while I took a shower 
(and a nap!) 


He also moved the picnic table back into place and set the benches around it. On top in the center goes my funky big coffee cup planter that I garbage picked last summer.  My jade plant wintered well indoors, and we have been bringing it out daily to acclimate it to outdoor temps again.  I even painted the filigree holder for the garden hose next to the back door to the basement.  Hey.. when I get a paint brush in my hand, there is no stopping me!  LOL


Ahhhh 
now that part of the house is done!  

except maybe some strips of color trim
or shutters around the windows? 

I am anxious to see what we are going to do next ????


Tuesday, February 7, 2012

Onwards with the Home Improvements!

Yes folks, here we go with more stuff getting done over the weekend.   I know I have been lax in blogging.  We are working working working on projects to get the house ready for the market.

The carpeting is finished on the main floor- (livingroom, stairs/landing, and changing room)  They did a great job and we are very happy with results.   In reply to my last blog,  a comment by Avril Copperfield:  yes, we did the tear out and prep work and moved the furniture out... but the local carpet store did the actual installation.   Then we have to move all the furniture back again.


We did do all of the original carpet and ceramic tile installation 15 years ago ourselves.  But for only a $550 fee, the local guy and his worker are taking care of installing all this carpet for us this time.  Steve said he needs to save his knees for retirement.  LOL


Here is Steve relaxing in his chair near the tv, and Duchess thinks the carpeting is just fine too.   Over by my side, I have the fireplace by my chair.  I took the wreath down over the fireplace, and re-stained the wall to cover up the light spot from where a special print hung for the last 15 years.  The pine wood all around the print had darkened and mellowed with age and UV exposure, but not underneath the framed print.  We had the frame rebuilt and hung it in our motorhome instead.  Here is the blog post of that project: Robert Duncan print


On to the next step... the loft!

Steve and I cleared out everything from the loft and stacked it down in the livingroom.  It was kinda disappointing to pile all that stuff up in my nice neat livingroom. ARGGHH   We even horsed down the bulky awkward huge king sized mattress and box springs by ourselves....   now THAT was a job!


Keep in mind that our loft is HUGE... it's 24 feet wide by 19 feet long!  That is even bigger than our livingroom.  The carpet will be seamed down the middle of two 12 foot wide rolls.  That is what we had before too.  My brother took one side of the old carpet out already, but they had four guys to haul that piece out.   Steve and I rolled up the other half last night and got it down the steps ourselves.   Here we stopped halfway for a break.  That is a 19 ft long roll hanging there like a limp sausage over the railing. 


From that spot, we hauled it out the door on the right... around through the yard, under the pine tree, down the slope to the lower level patio doors... and brought it into the lower level.  IN THE DARK!   It's laying in the middle of my loom room studio.  Later this week or maybe into the weekend, we will lay that piece in the extra bedroom by ourselves.  It's the easy cheaper carpet with the foam backing, not the good stuff to be tacked and stretched.  

So here is our loft with BARE NAKED FLOORS!!!!


They should be here tomorrow to finish the loft installation.  I said we were flexible and he could fit it into his schedule this week any time.  We have the extra bedroom to sleep in downstairs, which is fine with us.

Altogether we are having 92 new square yards installed.  We are re-installing 25 yards in the bedroom downstairs from the leftover piece from the loft.

I snapped this shot from below in the livingroom with all the glowing gleaming pine woodwork.  I am gathering the good shots for our data sheet when we start to market the house.  My new camera makes "glare" circles, so I will have to a little photoshopping on them before adding to a data sheet.


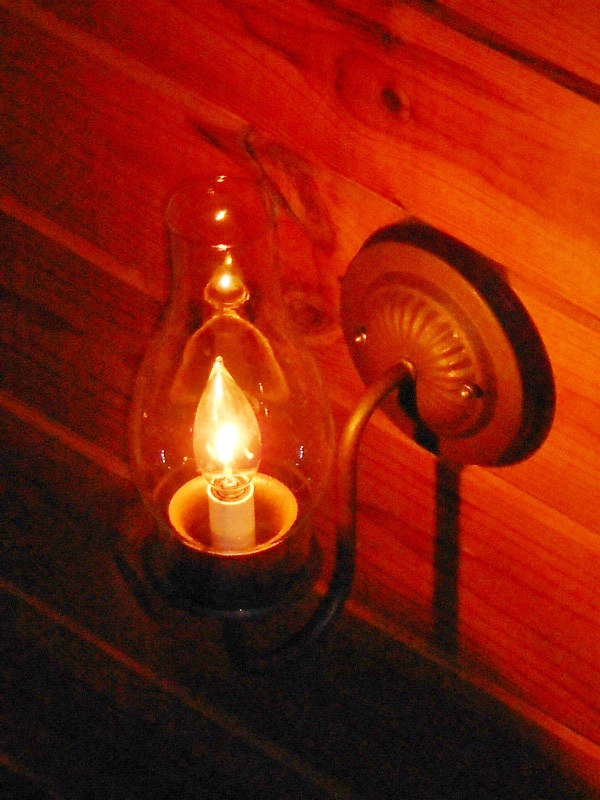
Another project I did this weekend was to paint over our 15 year old pitted brass icky looking wall sconces with some textured brown speckled paint in two tones.  I had to do 3 coats, and one can of spray was just enough.  Came out pretty nice!   We had first looked at replacing all four of the lights, but at about $25-35 a fixture, times four fixtures....  ahhh this works out just as nice and keeps the rustic feeling. $6.99 a can. 


Over each of the windows, I have these cool vines with tiny deep burgundy berries.  Passing years has the dust collecting on them and it won't vacuum off.  (top vine)   
So I took them outside and dragged them through some of the last remaining snow, which scrubbed them free of the dust and cobwebs!  (bottom vine)  I hung them back up over the windows and patio doors.


We got a lot of other smaller projects done too.  We put up a handrail to the basement (after I stained it in the garage)  The house has to meet code on all aspects before we put it on the market, and the handrail is something we just never did before.  Now it's done.    We will also get the well water test and septic/mound system inspections done on our own dime, so they are on record.  That is one less step for a buyer to wait for during a closing process (I sold real estate for 9 years, so I know how this stuff works) 

Another project I did this weekend was a favorite of mine.  I love staining new wood!  We bought some new bifold wooden closet doors for the lower level bedroom.   I did the staining out in the garage.  It has been unseasonably warm this week in Wisconsin, so the doors dried nicely in the fresh air of the garage.  

There had been sliding mirrored doors in that room, which cracked over time from teenagers banging them open and shut  (and too thick carpeting underneath them).  So when we go down to put in the new carpet, we will haul out the old doors and install these at the same time.  


Also, we distributed some heirlooms to the kids... 

Erin is the recipient of my "fine china"  heh heh   I was collecting my china dishes as a new bride.  I bought one little stamp at a time for 99cents to collect each piece if you spent $25 on groceries back in the early 1990's from Super Ron's grocery store.  I collected 8 place settings over the year long promotion and had them proudly displayed in a china hutch in our house in Green Bay.  Since we moved up to the woods, they have been sitting in a cupboard, unused.   Now Erin can have them when her illuminated china nook gets finished in her dining room in the future.   


Erin, being the oldest daughter, also gets my grandmother's cedar chest.  It was bought for my Grandma Kafehl (Beatrice)  by my grandfather (Harvey) in the 1920's. We even have the card from when he gave it to her, along with a card from some roses he gave her on their wedding day.

Also there is a little pink slip of paper which says: "cedar chest key".  There is a story to that key.  See, when we were clearing out Grandma's little apartment after she passed away, and I was getting the chest.  But we could not find the key. Anywhere.  Later as we went through one of the last dresser drawers, we found a jar of pennies, buttons and paperclips.  Inside, tucked on top was this little pink piece of paper with a bread twistie tie around it, attached to the key! It said: "cedar chest key" in Grandma's handwriting.  I cried.  Oh Gram!   


The cedar chest was made in Sheboygan, WI at the famous Lakeside Craft Shops and was done as a quality piece.  I am pleased to pass it along to my oldest daughter... as she knew and loved her GREAT grandmother as a child.  She was 13 when Great Gram Kafehl died.  And someday Chelsea will get it...  it will be from her GREAT GREAT Grandmother.  Hope it keeps being passed on for years and years and years...  We hauled it over to Erin's house and we carried it in for the very pregnant Erin on Saturday.

Speaking of chests....  here is the steamer trunk I mentioned in my other blog post.  I found this trunk on the side of the road, destined for garbage pickup.  I snatched it up (along with a wooden wine rack) and took it home to refurbish it.   Inside, I have been carefully putting all kinds of treasured items that will be stored away for us in our son's attic.   Each item will be double sealed in zip lock bags, and will have a few space bags double layered too for some textiles I am going to store.  (wedding dress and woven coverlets)


Once it is filled, I will seal the edge of the opening preventing an intrusion of dampness or bugs, 
and hope the items will last safely inside until we are tired of travelling 
and want to settle down into one last house. 


Each step is one step closer to getting this house sold 
and us getting on the road! 

Anyone wanna buy a house? 


.