Our Wonderful Followers who come back again and again to read about us...

Showing posts with label memory foam mattress. Show all posts

Friday, March 2, 2018

MOTORHOME MODIFICATIONS - *M* is Mural, Mattress, MP3 and my Chair Cushions are Done.

I am going to start off the new year with posting some of our motorhome modifications, a few at a time. I will post repairs, modifications, or neato things we have found for RVing.  I have lots of pics in my files so I will do them in alphabetical order.

Underneath that stuff, I will post my regular daily stuff..... kinda sorta fun, eh?

So here it goes, we are up to the letter M now!

MOTORHOME MODIFICATIONS 
STARTING WITH THE LETTER M


Mural on the back of the motorhome:
I have mentioned it before, but the Safari murals are hand painted and airbrushed on individually each personally by the Dame family out in Oregon.  And each one is different and interesting.   Here is a website with more information: 


I am not a tiger fanatic, but it came that way to us, and it's kinda cool. Often they hide a small animal somewhere on the mural, here is out little mouse.  It makes a great conversation starter with folks, and little kids love to try to find ours.  Here, I will help you find it on ours with a big red circle. 

96 safari serengeti pfundtner  with mouse


Memory Foam Mattress:
We upgraded our house mattress to a memory foam last year.  We really like sleeping on the gel filled memory foam, and Steve (who always insisted he needed rock hard for a bad back)  sleeps better than ever, and snores less too! 

Last month, we found a good clearance deal on another memory foam mattress the same as our first one, and we splurged on it.   We were able to haul it home on the trailer fully wrapped in the plastic plus a tarp to keep any road slush or snow off it.  Luckily, it was a nice day with dry pavement! 


Steve and I managed to move the old innerspring off the bed in the motorhome, through the doors of the bathroom and out into the living area of the motorhome.  

(this is the innerspring one going out and to our kids' house) 


We managed to get the memory foam one out into the rig....  we stood it on end and slid it back into the bedroom area. A king sized mattress is just about the height of our ceilings inside, so it barely fit under the bathroom pocket doorway ledges along the top of the ceiling. It was very floppy and awkward! 

See Steve back in there pulling it? 
 

We had to be careful along the sharp corner of the bed pedestal box (which contains our diesel engine) and had to bend the mattress around the corner to get it into the room.  Realizing the corner was sharp and could tear the mattress, I put a big plastic bowl on the corner to slide the mattress past it. Just as we were almost past that point, I heard a *CRACK* sound.  hahahha look what happened to our bowl! 

Glad we didn't wreck the mattress----


We got the mattress safely past that point and we flopped it into place!!! 
SUCCESS!!!

WHEW!!!!


MP3 player:
Okay, now the last one is pretty minor... but still I thought it was worth a mention.   A long time ago, I bought this little cord to be able to plug in a portable Walkman CD player to my home stereo to play through it's speakers.  It has a plug for headphone jack on one end and two RCA stereo plugs on the other side.  We have had the cord laying in a drawer now for years....    And I got to thinking.....


In our motorhome, we have a huge stereo home theater system that we never use.  It's hooked up to the TV with the DVD player. There is also the dash stereo with a 10 disc CD player. We never use that either. 

Because we never use that stuff, well, we never use the built in motorhome speakers.  There are FOURTEEN of them, I am not kidding!  They are mounted on the ceiling, in the cabinets, down on the floor in front (sub woofer stuff)  and we have not really ever used them at all.  If we do have the tv on, it plays through it's own speakers, and it's just for news in the background.  Not to listen to some heart-stopping thriller movie with great sound effects!  Not our style.   Too noisy in the campgrounds too. We had contemplated in the past to take the speakers down, but they would leave marks and holes and wires all over the ceilings.  So they just sit there, looking impressive.

But we do like this little tiny MP3 player I have.  It's a mere $20 gadget that plugs right into the USB port on my computer to load it up.  I know it's old school.  Often I plug it into some tiny speakers that are powered right from MP3 player and take it outside to set by my lawnchair.    


Many people use the music on their cell phone, but that wears down your phone battery.  If we are boondocking, we don't want to do that.

If we do use the MP3 player inside, we let it set by the table in the photo below.  I like to set it on "random" and let it play whatever it wants.  It's all good to me. 


Soooo back to that little cord.  If it could be hooked up between that little MP3 player and our speakers, it could use them for music playing through the speakers in the rig!   Sure 'nuff!!!!   Looking up in our front cabinet, on the big Hot Shotz amp unit, there is a pair of left and right RCA jacks!   Hook it up, flick the switch and it works~!


I know it will use some battery power to run, but we checked it out on the Trimetric gauge and it is very little.  The MP3 unit runs off one AAA battery, so no recharging is needed for that to run.   NOW WE WILL USE OUR BUILT IN MOTORHOME SPEAKERS! 

~~~~~~

This morning I cut into my prewashed fabric for the front porch chairs.  I was so happy to find this material, and it's just what I had in my mind's eye when I decided to cover the cushions. 


I sewed the cushion covers this morning, and by noon I had all four done for the chairs! I didn't do the ottoman cushion yet, I am waiting to make sure I have enough fabric for redoing the couch cushions as well. 


The people we bought the chairs from said they got them from some friends.  It was a couple who came from Taiwan, and the expensive bamboo chairs were brought over with they moved to the USA.  When I was done with the "makeover" I sent her pics and thanked her again.  She was happy to hear they would remain in our retirement home, probably for the rest of our lives. She was going to share that with the people whom they bought the chairs from in the first place. 

Steve got home from his trasnport,
in time to have some lunch out on the front porch! 
Our temps were in the 40's and 
the sun shining in warmed up the space. 


So here is the south end of our front porch, all spiffied up with the new chairs and I hung my summer quilted wall hanging on the wall by the door.  The chairs fit in well, and the front door still clears the edge of the chair to get in and out.  It seems to be a really relaxing spot, and we are looking forward to sipping coffee together there in the morning.


I can't wait until summer!  In the summer months, my clematis vines grow up all over those three windows and create a shade of green thick shady leaves..... and spray a bouquet of velvety purple flowers all across the windows!

 This is what the windows behind the chairs will look like about mid-summer! 


Next, I will be working on the cushions for the couch. I laid some of the fabric across, just to test it out.  YESSSSSS  I think it will look nice.  I want to wait till the other 2 yards gets here that is being shipped from the other fabric store.  Then I will start in on the couch.


 The weekend is here, and it's going to be warm and sunny.  We did get a little snow yesterday, but it's mostly melted again.  This has been the strangest winter!   Tonight it's down to 30, but we have a fire going in the fireplace, and I don't think the furnace has kicked in even once all day or night.


Sunday, January 28, 2018

MOTORHOME MODIFICATIONS *C* CCC at Cat Scale, Camping Signs, Carpeting and Memory Foam Mattress

Ok, I am going to interrupt my regularly scheduled letter C Motorhome Modifications Posts with a NEW modification we did yesterday! 

Back in April we invested in a Serta Memory Foam Mattress for our king sized bed in the house.  We really, really love it. It has three layers, of which the top layer is a cooling layer comprised of some material that keeps you from overheating and sweating like some memory foam mattresses.  We gave it a try and sure enough,  we get better sleep, less pressure points, and more comfort than our traditional innerspring mattress.  

So with our grown kids' help, back in April, we put the innerspring mattress into the motorhome, replacing the dated one in there.  After all, it was only 4 years old and in great shape.  Fine and dandy. 

But..... this week we found a good deal on another memory foam mattress the same as our first one and we splurged on it.  We hauled it home on Thursday evening and stored it in the garage overnight.  While the weather was so nice on Friday afternoon, Steve and I managed to move the innerspring off the bed, through the doors of the bathroom and into the living area of the motorhome.  

(this is the innerspring one) 


Then we dragged the memory foam one out to the motorhome on a tarp, and sadly got a bit of wet moisture on the bottom.  We hoisted it into the motorhome.  Whew!  It was awkward and floppy.  We didn't dare plop it into place until the bottom dried off. We let it dry overnight with a fan aiming at the back side to take care of the wet spot. It was only about 10-12" across.

Saturday morning we went back out to the rig and decided to get it moved into place if it was dry.  We sure didn't want mold or something growing underneath it.  Yayyy it was completely dry! 

We stood it on end and slid it back into the bedroom area. A king sized mattress is just the height of our ceilings inside, so it barely fit under the bathroom pocket doorway ledges along the top of the ceiling. It was very floppy and awkward! 


See Steve in there pulling it? 

I know I have been weak from being under the weather for three weeks... and this took it's toll.  But I have to help along because Steve was trying to do it himself, of course!  

We had to be careful along the sharp corner of the bed pedestal box (which contains our diesel engine) and had to bend the mattress around the corner to get it into the room.  Realizing the corner was sharp and could tear the mattress, I put a big plastic bowl on it to slide the mattress past it. Just as we were almost past that point, I heard a *CRACK* sound.  hahahha look what happened to our bowl! 
Glad we didn't wreck the mattress----


We got the mattress safely past that point and we flopped it into place!!! 
SUCCESS!!!


Last summer, on the wall behind the bed, we removed the full size mirror and didn't get all of the adhesive circles off yet.  I have been removing them one at a time with a heat gun, and need to finish that up.  In an small area down low, I tried all kinds of adhesive removers that will destroy the wood stain behind it. So through trial and error, I found that the heat gun aimed at it for 12 seconds to soften it and then it peels up in chunks.  It is slow going and I need to get back out there and remove the rest of it. 


Here is the blog post about when we removed the mirror last year: 


We have a lovely print to hang up once we are done... and it blends well with the quilt and window treatments I had made.  It is by a Wisconsin Photographer by the name of Nick Bristol.  


I loved this print from the moment I bought it. 
 It looked so familiar to me??? 

After contacting the artist, 
I found out that this particular image IS from 
a campground called Council Lake 
in the U.P. of Michigan,  just south of Munising. 

 Yup! Been there! 


Steve helped me make up the new bed with the quilt and pillows... see how they match the fabric I covered over the lambrequins and valances?  


I call this my Copper Log Cabin Batik Quilt. 

If the adhesive circles don't come off right, or if the new stain doesn't cover them well, I have enough fabric left from the quilt, I may make some quilted panels as a headboard to cover the wall? 

Now the next step was to get the innerspring out of the motorhome living area, onto a tarp on the wet muddy grass alongside of the motorhome!   I have no idea how our son and soninlaw got it in there last April.  We had to really flex it and push hard to get it out.  Whew! We did it!  


See how we don't have ANY snow left in our yard anymore?


We wrapped it in the tarp 
and strapped it to our little trailer behind the Tracker. 


Yesterday afternoon we took a little journey 70 miles north with the mattress.  We delivered it our daughter and soninlaw who will get some use out of it.  They have our old king sized mattress from our old house in Oconto and are due for a new one. It's a nice mattress, pillow top, and only five years old with five more years left on it's warranty as well. 


Okay... now back to our regularly scheduled program of 3 Motorhome Modifications with the letter *C*:


I am going to start off the new year with posting three of our motorhome modifications at a time. I will post repairs, modifications, or neato things we have found for RVing.  I have lots of pics in my files so I will do them in alphabetical order.

Underneath that stuff, I will post my regular daily stuff..... kinda sorta fun, eh?

So here it goes, we are up to the letter C now!

MOTORHOME MODIFICATIONS 
STARTING WITH THE LETTER C


Cat Scale and CCC Cargo Carrying Capacity:
This pic is kinda sorta funny.  12 years ago, right after we bought our Safari, we went to a Cat Scale to weigh our rig. Steve told me to go inside and find out how to use the Cat Scale.  I went inside and she said just hit the button.  So, I went to find the button.  Well.... the button is situated up high for semi drivers to reach!  What did I know, it was the first time we were ever weighing our rig!    And Steve just happened to snap a pic of me trying to figure it out! 


Our UVH rating is 18,600 (Unloaded Vehicle Weight)
Our GVWR rating is 28,000 (Gross Vehicle Weight Rating)
Our GCWR-32,000 (Gross Combined Weight Rating)


And...
We weigh in with full water, fuel, and propane tanks and 2 people at 22,000 pounds without our gear when we first bought the rig.

We have about 8,500 pound capacity available from empty. Even with all our tanks full, (propane, fuel, fresh water and waste water) we still have around 6,000 pounds of CCC cargo carrying capacity above that.  It is very important to never overload your rig. Your chassis, handling, tire inflation and most of all, the brakes depend on you not overloading your rig.

Once we loaded up all of our belongings, when we were ready to live full time in our rig in 2012, we weighed our rig again. This time it was only at 25,650 so we are well below our gross, and our little Tracker is only 2,600 lbs so we well below our combined. 

Carpet Cleaning:
I know many folks do not like carpeting in their RV.

I do.  I like taking my shoes off at the door and walking in stockings or bare feet. I like warm comfortable floors when it is damp and icky and cold outside.  I like getting out of bed and walking around in my jammies and bare feet and not have to put on slippers. That is just me.

And I try really really hard to keep our 22 year old carpeting in good condition in our motorhome. Yup, 22 years old.  It is a grey and blue and cream berber and has held up really well, with people, dogs, and grandkids.  And cleaning.


Twice a year I use our big steam cleaner on it. It is a big round extractor canister type, with a good amount of suction to not leave a lot of moisture behind.  Besides a bit of carpet shampoo, I also I use a couple glug-glugs of a cleaning product called Nature's Miracle Stain Remover and a packet of Oxyclean.  Nature's Miracle is available at our local Piggly Wiggly grocery store in the pet aisle or also at the Petco chain stores.       http://www.naturemakesitwork.com/home/index.php


Although we didn't have any pet stains, I find it to be a great all around cleaner and stain remover. It took out a big coffee/creamer stain from a spilled cup that I did not see until it was all soaked in. It works great on clothes too so I keep a bottle with a sprayer by the washing machine and use it as a pretreatment. Takes out old stains that normal detergent or Shout won't even touch.

With such light colored carpeting in our rig, we try hard to keep it nice and never wear shoes inside.  Even for Steve when he is driving, he removes his shoes as he comes in the door and puts on soft soled moccasins that are never worn outside, especially at fuel stations etc.  Otherwise spilled diesel fuel in the truckers lanes at stations get tracked in on carpeting and will never come off.  He also wears leather gloves when fueling up, so he never has stinky oily diesel fuel on his hands when coming back in or touching the steering wheel.

Here is a pic from the kitchen facing to the front of the rig....


I lift up the dining chairs and end table and coffee table to put them 
on the loveseat out of the way 
until everything is dry the next day. 


I think it will hold up for a few more years. If Steve had his way, it would all be ripped out and new laminate or vinyl planks would be put all the way through.  Nope... no thanks. 


Just this last year I put this oriental runner rug in here. It does help with trapping the dog hair and some of the dirt catches in it until it is vacced up.  Mainly I put it in here because I bought a different pattern for the house and this rug had nowhere else to go. hahaha


Camping Signs:
Many people like to put out camping signs when at a campground.  We do too.  I know some folks say that perhaps that opens up an invitation for someone to go to your house and rob it, knowing you are gone.  Oh well, that is what our alarm system is for I guess and we live 2 blocks from the police dept. and 4 blocks from the sheriff dept. and we have two wonderful widow neighbor ladies on each side of us who notice every little thing.  

Many years ago, in Steve's first marriage, his parents gave them a custom sign with the name Pfundtner on it.  It was just about the only thing Steve got out of his divorce (besides two wonderful sons!)   Hmmmm  she didn't want the sign as much as she didn't want the guy?  Her loss, my gain!

I touched up the paint, added our first names together, and added new stain and some coats of polyurethane.  I made it OUR SIGN, and cherish it.  I was thinking about adding the state, Wisconsin to ours. Maybe next time it needs new paint?


It usually hangs from the front of our rig over the spare tire cover with two American Flags holding it up to the tire mounting bracket.  Sometimes we hang it from the numbered post in the campground if it is close enough.


Our daughter Erin gave us this one for a present one year. I hang it from our awning and it rotates in the breeze.  Kinda purty, dontcha think?


We like walking around the campground and seeing people's signs and sometimes where they are from.  It is sometimes an ice breaker to chit chat a bit.  People usually like to try to pronounce our name, and usually murder it. haha! 


~~~~~~~~~~~~

Well, it is Sunday morning.  I tried to write this blog last night, but I got too tired and hit the bed early.  So sorry I didn't get it posted last night.  Today is good enough--- I suppose better late than never.

The sun is out a bit this morning, we but we are heading into a cooling trend and perhaps our weather will get back to normal for Wisconsin in January. Not that I am complaining about the wonderful warm spurts we have had, but it just doesn't seem right.  We are not having the heavier winters of years past, and we are lacking in the snow that we had when we were children.  This pic was taken about 80 miles south of where we live now. They barely get any snow any more there.  sigh.

That is our Camper Bus in the background.  See?  I have had camping ingrained into me ever since I was a little child.  My dad converted two school buses into campers, and sold one to pay for the costs of converting both of them!

Wednesday, April 19, 2017

More Our Old House Projects~

Last blog post was about our front porch... we got that done in time for Easter and family and visiting, etc.  It felt good to get it all spruced up and fresh for the season.

Our next project on our wish list is a big one (for us) ...  See, our little rescue sheltie dogs are sometimes very timid.  Often Binney will run in a blind panic if something scares her. She doesn't see or hear or come or seek a comforting master. She just blindly runs.  Fortunately she is ALWAYS while on a rope or a long flexi lead so we can grab her when she reaches the end.  I would hate to ever have her running free, because we may never catch her.

As for Finnegan, we live on a very busy four lane street which is also a state highway right through town.  If he sees someone walking on the sidewalk, I just know he would rush out there (turning instantly deaf to me) to circle them and bark and possibly go on the road.  It is a fear of mine.  So the dogs are always on ropes or leashes when we are outdoors, unless they are in their little fenced in potty yard.

We also have young grandkids who visit, and our front yard is off limits to them, due to the traffic.  Unless we are walking with them and holding their hands, they are not allowed up there.  I lost a little sister who was killed by car when she was on the road. So you can see why I do not want the grandkids up there.  But they can easily sneak around the house, like on Easter Sunday.  I looked out of the front porch windows and there were two of the little buggers, goofing off and racing each other around the front yard, oblivious to the rules. ARGGH!

We had discussed fencing in our backyard.  We had figured out a plan, and contacted the city to find out where our lot lines are. Turns out when the highway was widened up front, the stakes were never put back in the ground between the lots!  The city does not come and point out lot lines. They said we would have to hire a surveyor----  to the tune of $650.00  Ouch!

Even with a metal detector, we could not find the back marker stakes either.  Well, we needed to bite the bullet and hire the surveyor. This way our fence will be legal (it can be built right on the lot line) and nobody in the future would have a claim to our fence or the lot if it were built incorrectly.  We love love love our neighbors behind and on both sides of us. But on each side are both elderly widow ladies, and someday in the future there will be new neighbors in their homes. Knowing the exact lot lines for the fence is an added benefit. The surveyor came and placed metal poles 2 feet deep into the ground to mark our lot.

Next step was the building permit. That was $50 after getting my carefully drawn plans approved by the building inspector. Later we have to call him when it is done to get it okay'd.  Whew! $700 bucks already we haven't even bought a bit of wood.

Third step is calling Diggers Hotline to point out any underground dangers in the areas we wish to dig.  The post holes will only go down about 18 inches, but that can be dangerous if utilities are near the surface. They are not supposed to be that shallow, but over years, earth can move, settle or underground electrical cables can be pushed up towards the surface by ground pressure.  Best to be safe than sorry.

Once they come and mark the yard, then Steve is going to rent a powered post hole auger to dig the holes. 38 of them!

Here is our plan:

264 feet of fencing to enclose the area marked in red

Because our garage is between the house and the yard, we decided to make a 5 foot wide run behind the garage to include the present dog potty area. It runs right along the property line. That way we can still open the back door and let the dogs run out and they can access the back yard by running behind the garage.  We will put a gate to block it off if we want them to only stay in the smaller potty yard closer to the house. 

Soon this will be all closed in, but we are leaving enough lawn alongside the motorhome in case we have RVing visitors who would like to park a motorhome or camper there.


We checked out pre-made fence panels for sale at the home improvement stores. We wanted 4 feet high, not 3 feet that most of them were. We didn't want a tall privacy fence. We wanted white fencing, like pickets or something.  We didn't like the vinyl fencing. We could not afford the heavy steel welded fencing.  We didn't find much for pickets, and what we did find was flimsy rough wood with stapled together pieces.  That didn't look too sturdy nor would it last long, in our opinion.

On to Plan B.... we will make our own fence! 

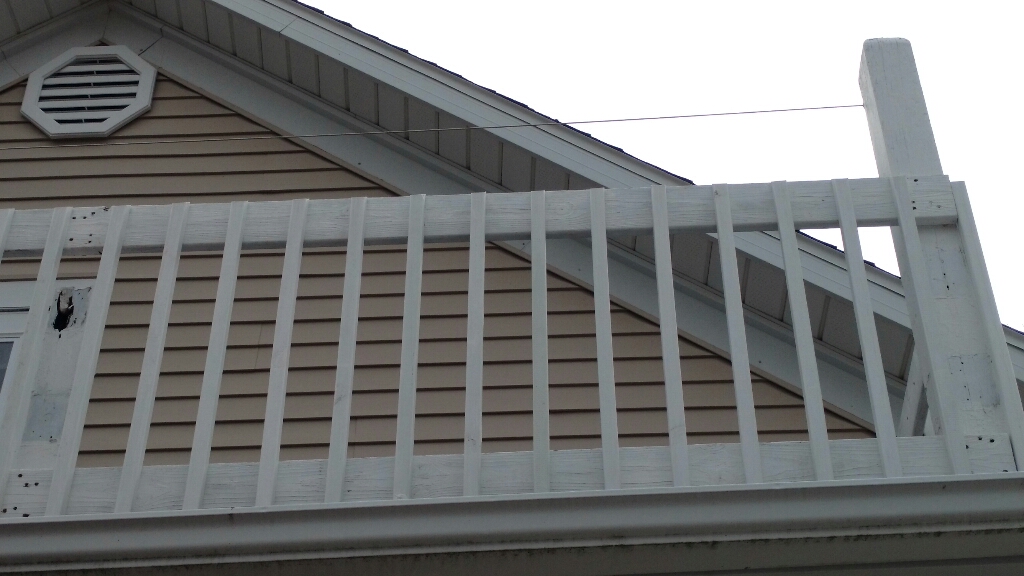
We measured, we planned and we came up with a pretty good idea.  Our back upstairs shaker porch railing and our side gate and fence of the back steps are already made with deck spindles.  I liked the look and said lets go full broke now and make the whole fence from sturdy deck materials! We will use good heavy deck screws and make it secure and not flimsy.  And most of all.. let's make it "match"!  (I like matchy matchy!) 


These are all made with treated deck wood 
stained with Cabot solid colored stain. 


I like the Cabots solid colored stain over paint for a few reasons. First, you can stain the wood right away, because the stain breathes and lets any wet wood still dry in the air and doesn't harm the finish. Second, I like the solid color of the white but with the stain it doesn't flake or peel like paint does.  It just slowly wears away over the years (many years). If you go to restain, you do not have to scrape or sand off loose paint.  Third, I stained a wooden gazebo I made over 30 years ago, and it still looks good to this day and has not needed restaining yet ... I saw it last year and it looks great! 

Steve and I headed off to Menards yesterday to start buying our wood. They are having their great 11% rebate sale, no matter what you buy, you get 11% back in a store rebate credit.  That is fine with us, because we always need something at that store. LOL.  

Our little Tracker can only tow about 1,000 pounds and our little trailer Steve bought can handle 2,000.  We decided to make multiple trips back and forth from Manitowoc Menards, 24 miles away. 

While we were at the store to get our first load... we noticed that the kingsize Serta gel memory foam mattress we had an eye on was on a sale of a sale, plus now discontinued, plus the 11% off.  Okayyyy switch gears here, buy less wood for the first load and now toss on a mattress!  hahahahha


It really seems to be a nice mattress.  Our other one is only 4 years old, but is more firm than I like.  Steve suggested we try a memory foam and if we don't like it, we have 90 days to return it, along with a 10 year warranty from the company.  The covering seems nicer than some we saw in other stores. It's a thicker padded material that seems to be soft and is cotton, not polyester.


Steve and I hoisted it off the trailer, up the front steps and into the house. Together we managed to get it up the stairs which have three turns to get up to the second floor. On Saturday, the kids and grandkids are all coming (for Steve's birthday) and the guys can help carry down the old one and put it in the motorhome.  It's better than than the one we have in there. For now it's on end in the hallway,

Ahhhhhhh  here it is! 
Our last one was 10 inches tall, this one is 12 inches. 
I use a step stool to get into bed! 


It feels really nice and has full body support as you lay on it and sink down. It's called a Plush Firm.  Steve noticed his whole calf and ankle are supported instead of just his heels like on our other mattress.  His back felt fine too.  I noticed the small of my back getting support and when side sleeping, my hip and shoulder sink in nicely and don't hit anything firm like before.

 PLOP! 
WE ARE GONNA SLEEP GOOD TONIGHT!

(on edit now Wednesday morning---we both slept great and woke up feeling fine!) 


Steve had to go drive the Old Fart Party Bus this morning... so I started staining the 4x4 posts.  They are 10 ft now, and will be cut in half into 5 ft pieces.  As soon as Steve borrows his brother's chop saw to get through the whole thickness without having to turn it around with his circular saw.   I will do the second coat of stain this afternoon. 


I have them set up on horses in the garage to stain them at waist high level. Much easier to stain each piece of wood first with 2 coats than leaning over the already installed fence in the ground! 

I cranked up some tunes on the radio, and got to work with my roller and stain.  It is a very pleasant job, and I am looking forward to getting these done.  I had two supervisors on the job to make sure I didn't slack off. 


I think when Steve is back from his Old Fart Party Bus job, we will head on over to Menards for a second load.  Next come the horizontal boards (66 of them to make 33 spans of 8 feet each)   Then all the spindles for the up and down pieces...  522 of them!   We will be making three 4' wide gates, of the same materials. Then Steve can get in and out with the riding lawnmower.  

I cannot wait to have the yard done, set out our chaise lounge furniture around our little backyard fire pit, set out our little red picnic table out there and most of all, let the dogs RUN!!!!   off leash and playing with their ball, frisbee or just wrassling with each other! 

(THESE PICS ARE FROM LAST YEAR, 
BUT WILL BE INSIDE THE FENCE THIS YEAR!)


I am sure these two stinkers are going to
enjoy it as much as us!