Our Wonderful Followers who come back again and again to read about us...

Showing posts with label Newcomb Studio loom. Show all posts

Monday, March 20, 2017

MOTORHOME MODIFICATIONS - *L* Light Fixture Fix, Attic Fan and Loom Wheels!!


I am going to start off the new year with posting some of our motorhome modifications, a few at a time. I will post repairs, modifications, or neato things we have found for RVing.  I have lots of pics in my files so I will do them in alphabetical order.

Underneath that stuff, I will post my regular daily stuff..... kinda sorta fun, eh?

So here it goes, we are up to the letter L now!

MOTORHOME MODIFICATIONS 
STARTING WITH THE LETTER L


Light Fixture Fix:
That danged Steveio always finds more projects to work on in our motorhome. As soon as I think we are completely done with upgrades, he finds something else to do.  Steve decided to take some 12 volt fluorescent lights from in the bedroom area and adapt them into the large 120v AC household type fluorescent light fixture in the kitchen ceiling.

Because we rarely camp with electrical hookups, we don't use that kitchen 120v AC light fixture, so it just sits there, looking pretty.   But it IS in a great location and illuminates a large area if you are cooking or working on something at the table.

There is a lack of a decent 12 volt lighting over the kitchen stove area unless we have the inverter on to power up that fixture or the one under the convection/microwave in the stove hood.  Both of those are 120v AC only.  Seems crazy to start the inverter or generator to just have some light while cooking with propane?   There are only 2 smaller 12v DC fluorescent fixtures under the cabinets, along the sink and countertop by the fridge, but none over the stove.

Sooooo Steveio came up with this bright idea.  And just HAD to try it out------

Our bedroom has tons of light fixtures, both 120v AC and 12v DC.  Thirteen light bulbs in all!   Inside the valances on each of the windows are hidden 12 volt single tube fluorescent lights.  We NEVER use them in the bedroom because we have so many other lights, mainly within reach of the headboard of the bed.  To use the ones in the valances, you have to get up out of bed to turn on and off by the switch on the far end of the valance.   I think they have been used once or twice in the last ten years.

Soooooo Steveio took down the valances and removed the light fixtures.   Easy Peasy.  It was only two dry wall screws to take them down, remove the light, cap off the wires, and put the valance back up.


Next he took down the reflective covering on the large 110 volt household fixture in the kitchen.

At first he tried adding the 12 volt lights to each side of the original fixture, but they didn't seem to reflect downwards as well.  So he changed horses in midrace and removed the 120v AC light buls and ends completely.

He accessed the 12 volt power by removing a speaker from the ceiling and reaching in and over to the wires by the Fantastic Fan nearby....   For the switch that originally controlled the 120v AC fixture, he created a loop using the same wires.  So nothing is changed on the wall, or trying to fish new lines, or any new switches needed.


Steveio respects electricity and double checks all lines with his Fluke meter. 


Plus.. he is tall enough to do the work without having to stand on a ladder!!!!


And here are the two 12v DC fluorescent fixtures mounted in the cavity space left by removing the 120v AC fixture.   They are a little shorter than the old one, but work just as well.

Also a while back, Steveio insulated the top layer of the cavity with pink rigid insulation.  Otherwise it was very cold to the touch in the winter, with nothing between it and the outside roof!   I am sure it helps on the heating and the air conditioning as well.   Just look at that happy man!


 Another Motorhome Modification project, well done by my Steveio! 


~~~~~~~~

I mentioned in my last blog that Steveio has made up a honeydo list of things he wishes to accomplish this summer around Our Old House.  If you had read my blog last year, you might remember us making a whole house fan setup through our scuttle hole into the attic.  Here is that blog post:


The fan idea works very well. It gets our cooler AC air from the main floor to come up to the second story, especially at night.  But after weeks on end of hot humid horrible weather, we realized the ridge vents in our roofline were not enough to dispell that hot air out of the attic.  We noticed by the end of the summer some white specks of mold growing on the rafters and roofline inside of our attic!  Steve sprayed it all down with bleach to rid ourselves of it... but he knew we had to come up with a better solution for this year. 

At first he considered ripping out our chimney and using that open space to make a cold air return from our upper floor all the way back down to the basement.  But that would entail first getting a different water heater (power vent or tankless) because our current one is vented up the chimney. Our furnace is already vented out the side wall.  

But to make this open space for a cold air return, it would mean opening up the walls on two floors to access the space.... and once we ripped out the chimney brick by brick and then adding a ductwork liner ... it was going to be pretty crazy.  Add to that he would redo some of the plumbing at the same time to run in that open space, as well as redo the walls in our bathroom where he would be ripping out the chimney.. and on top of it he wanted to replace the toilet with a taller one!  WHEW! 

We came up with Plan B.....  

How about we just add a power attic fan that is thermostatically controlled to take that attic air and blast it outside through the gable end vent???   YES! 

After a little research, last night we took a drive to Menards to pick up this unit. It is thermostatically controlled and we can mount it in the attic facing out the vent in the gable.  That should take care of our problem. 


 Steve decided our small gable end vent was not large enough,
so he bought one of these and had to make a bigger opening. 


Today he has three separate runs with the Old Fart Party Bus.... and had time in between to come home and work on it (he doesn't take pay for hours in between runs so he is on his own time, just in case you were wondering)


He got out the ladder 
and this part of the house luckily 
has an upstairs shaker porch
to set up on so he is not wayyyyy up high on a two story ladder


He removed the old rectangular vent.... 


A few zips with the saw,
a few hammers and bangs and booms... 
look at that! 


(he just has to trim a bit on the excess siding pieces before putting them back up) 


While at Menards, at the same time, we picked up a few things that I needed for my own repairs on my looms.  

On both of my Newcomb Looms, the take-up lever usually bangs downward when released and swings under the loom (out of reach).   To try to solve that some time back, I put in a little screw to help catch it in a more accessible position.  That works sometimes, but when you bang on the loom, the lever sometimes hops off that little screw and still swings downward out of reach. Argh! 


I thunked and thunked and wanted some kind of a little metal hook that would have a tall end to it, but not stick out too far.  I found hooks that were wide but not tall enough. Steve said get them and he would "operate on them" for me----  hahahahah


He took two of the hooks and went into the garage and rebent them to the shape that I envisioned.  I unscrewed the two screws and installed these new hooks of each rug loom.  My hero!  Now they function exactly as needed. After advancing the rug, the handle drops down into the slot of the hook and does not bounce out during the weaving process. Thanks Steve! Now both of my Newcomb rug looms function better than before!


The other project idea I had in mind were 
taller better casters on this little white bench.
The ones I had put on last year were too small 
and bound up on the carpet at times. 

So my Hero Steveio swapped them out for me 
with the new ones I bought last night. 
(old white ones on the left and new grey ones on the right)

He had them done in no time. They were kinda tricky because the legs slant in on an angle.  But he was able to make them work, even if the new casters I picked out were almost too big on the base plate.  See... I use this bench for a rolling table surface for my Tools of the Trade 8 harness table loom!  I clamp it on with a couple C clamps and then I can roll it out to the front porch, the livingroom, or even out to the motorhome if I want. 

But the main reason is to roll it away into the corner for storage when not in use.  In the past I struggled to lift it and set it down on the carpeted floor by myself. It's kinda heavy and it's a very hard to angle to lift or lower the loom. It is hard to slide across the carpeting because I like to snug it back in this corner.  Soooo work smarter/not harder!  

It makes my work area just that much more organized.
When done, we had to put back the two doggie perches where they 
keep an eye out for the mail lady, the neighborhood dogs 
or the squirrels and rabbits in the side yard!  


Okay... Steve is back from his second run of the day. 
Now he has until 3 pm before he leaves again.
 I better go give him a hand installing that attic vent! 


 DONE!!!

Now to install the inside power fan. That should be pretty easy. He wanted to get this done before it gets too hot to be up in the attic. It is only about 50 degrees today, so that is a perfect time to get this project done. 

Wednesday, April 20, 2016

Mammo Wednesday and Fibery Tuesday

Oooh today is my mammo day.  I approach the day with trepidation, since I had a tumor removed when I was 15. With all of the cancer issues cropping up in our family, this is necessary.  My younger sister deals with cysts and lumps all the time, and had repeated surgeries to keep her healthy and safe and alive!

I go regularly, but always seem to get called back for a second scanning due to the scar tissue.  No matter how many times I tell them of the previous surgery, and they mark the spots with an arrow, there always seems to be some new radiologist reading the scans. Erring on the side of caution, they insist on calling me back for a second imaging. Of course, I go.  I breathe a HUGE sigh of relief when the results come back as okay, just old scar tissue.

So that is my public service announcement for today.  
Go get a mammo! 


Yesterday was cold and damp in Wisconsin.  We had a cloudy day with no sunshine at all. I opted to stay inside and work on weaving some rugs.  I am doing these in a neutral theme of beiges, creams and browns.  I cut up recycled fabric, sew into strips and then weave them up into rugs.  This is one of my favorite patterns, "random stripes" I call it.


I weave my rugs on my Newcomb Studio Rug Loom. I have two of these looms, identical to each other that I love the way they work.  I have had so many looms over the years, but these are my choice for doing rugs.

My Etsy store ( http://kareninthewoods.etsy.com/ ) where I sell my rugs and other things, recently offered a new shadowing program called "Pattern".  This feature will update my own separate standalone www.kareninthewoods.com website with my current inventory.  So anytime I add something, sell something, or change info on the Etsy store, it will change it automatically on my own website. It has a shopping cart too. But the most exciting part is that there is also a spot that I can add a video clip of myself weaving and explaining how I weave rugs.  So ---- my brain is thinking I might do up a video clip one of these days.  

As it is, I have videotaped myself in two different instructional DVD's that I sell online.  One is the complicated process of warping up a sectional loom for weaving.  The other is how to run those frustrating, futzy, finicky antique sockknitting machines!   And it even ends up with a finished sock!

I self-produced and self-duplicate those DVDS and sell those on my etsy site too.  I would think that making a little video clip of myself weaving for the website should be a breeze. Maybe if I have a Good Hair Day and a clean studio, I can set up my video camera and make a clip of my weaving process.


After lunch, I decided to go upstairs to my sewing room and work on my newest quilt.  I don't make quilts to sell, because you can never recover enough financially to cover your basic materials and time per hour put into making a quilt.  This is one that will go out on my front porch.  

It started like this: 


It has now evolved into this so far....

(those are numbered stickers in the centers to keep them in proper order) 

It will be queen sized when completed.

All of the blocks are stitched, 
sandwiched with batting and backing, 
and free-motion quilted.
 I am now joining them with "sashing" 


My last blog talked about the 20 year old bird house which Steve built for me, that came back into our possession in a roundabout way.  I decided to clean it up and coat it with some clear poly.  For now.  

But first I had to vacuum out the "innards"   ---  Steve had never made a clean-out trap door on this birdhouse so I had to stick in the shop vac hose and hope for the best.  I had no idea it was packed that full inside!  It took quite a while of alternating the vac hose nozzle, along with stick-poking and pliers-pulling out the contents.  This birdhouse accumulated a LOT of stuff over the last 20 years!  

Besides the traditional grass used in nest building, I found fishing line, Xmas decor tinsel, birthday balloon ribbons, clumps of dog hair, pieces of plastic bags, and amazingly parts of children's toys like Legos and Barbie shoes and puzzle pieces!  I think those might have been from my own kids back in the 1990's because they were at the bottom of the birdhouse????   

I can just about visualize them playing in the backyard and stuffing small things in the birdhouse hole because it was within reach of the during those years.  Silly kids! 


One other thing I want to clear up was in the last blog, I might have left the impression that Steve had painted the birdhouse prior to giving it to me.  Nope... he hates painting.  He only built it in the shape and form of my home I owned while we were dating. It was up to me to paint it he said.  LOL So I was the one that painted it 20 years ago.  Now that it has a good sealed surface, I might just spruce it up with new paint again.  

One of my readers, Linda Sand, comment was: "It looks well weathered--just like we are. But, I have some newer body parts and new clothes so why shouldn't it get the same treatment? Oh, dear. I don't think I helped, did I?"


I think it is going to remain indoors and protected the rest of it's lifetime.  Perhaps out in my front porch.  Soooo I might just spruce it up with new paint afterall.  It's the structure that is the memory of Steve's thoughtfulness, not the paint job so much... because that was from me.

For now I will look at it and enjoy it.  

And smile.  


Well, off to get ready for the mammo! 


Monday, November 19, 2012

Sanding Cabinets and a NEW LOOM!

Our lives have been concentrated on getting things ready for the "new-to-us" house.

A few blogs back, I mentioned some super duper 1920's cabinets we bought from Fond Du Lac, WI.  The seller had bought them from a mansion that was being dismantled or redone.  He tried to use them in his house, but they would not work without cutting them apart.  So instead he sold them.   To us!

They do come apart into three big pieces to haul, but he would have had to cut them apart into even smaller parts to work them around his configurations in his kitchen to put them on 2 or 3 different walls. He just couldn't do that to them.

For us, they will work all in one row along one wall.  Even our window is where the opening is.  We might cut out the drawer section and slide over the 2 cabinets on the left to put them under the sink area and fit in a dishwasher on the far left.  Will see once we get them into the house if we need to do that or not.  But most of their integrity will remain intact as much as possible. At least all on one wall.

The weather has been amazingly warm here in Wisconsin.  I started to refinish the cabinets over the weekend.  I was prepared tackle the ugly task of stripping them down by buying stripper, gloves and plastic putty knives.  Steve said this was "my job" because he wanted to get NEW cabinets.  But these are more fitting to the house and style and I fell in love with them.  So I was prepared to work and put effort into refinishing them.

But I also bought a cute little electric sander for $14.   I thought I would try that first.   OH MY!  The old varnish just sanded right off with very little effort!    Amazing how the old stuff crumbled right off.
(door in the foreground is original, and one with the dusting brush is in the sanded down state) 

Here are two of the drawer fronts. It only took about 2 or 3 minutes to get that much done per drawer front. I am just tickled pink at how easy this is going to be to get them ready for new stain to match our woodwork in the house, and then poly coat them to last.
In just a few hours of work, I got all of the drawers done, most of the cabinet doors, and one of the cabinet bases completed.  The four largest doors has some kind of Butcher's Wax or newer coating of varnish on them, so they are taking a bit more work and more sanding pads to get them done.

The sun was shining and I had the big door open of the workshop space and did them out in the open air of the parking lot.  I bought two nice new sawhorses to hold each piece up at working height.  I was happy as a lark, buzzing away that old varnish to reveal the lovely woodwork and grain.  From time to time I would just take off my glasses, mask and gloves...   and feel the smooth clean wood.  Ahhhhhhhh  only a woodwork-loving person would understand that!


Well, our warehouse space is getting quite full!   I am going to finish up the dining chair recovering this afternoon as it's kinda damp, hazy and foggy here today.  No big door open today.

In the middle of all this refinishing and redoing, we are gathering more items and holding them here at the workshop space till the big move the end of next month to the house when we close on the deal.  Glad we have enough room in here, plus it's heated, clean and free of dampness or bugs or mice like some storage spaces.


I have my sewing machine set up on the dining table to work on quilting, my sock knitting machine set up, and have a rug loom ready to weave when I come into the workshop space to get things done.  Gotta have something to keep myself busy during the next 6 weeks of waiting.

Speaking of looms.... well.....  Steve was looking on Craigslist again.....

He found a Newcomb Studio Loom for sale nearby!   We had to go look last night after the Packer Game was over.  Although I have my 2 harness Union Rug Loom, and my 8 harness Tools of the Trade table loom, the only looms I really regret selling off last spring were my 2 Newcomb Studio Looms!

(this is the one he found for me)  

These type of looms are too big to take along in the motorhome, so I sold off the two Newcombs that I had.  They both went to friends where I could buy them back if I wanted to.  But I also knew I could get another one pretty easily as they are common around the midwest.   Lo and behold, this one was in great shape at a great price.   Yes, we dismantled it and packed it in the trunk and back seat of the car in no time flat!

The nicest part of the loom-buying evening was meeting the gal who was selling the loom.  She has a fiber farm and woolen mill processing business, only about 15 miles away from Chilton where we are moving to!   She has a cute little shop with yarns, roving, supplies and finished products. Her farm is called http://www.hiddenvalleyfarmwoolenmill.com   and the BEST part?? She invited me to join their fiber guild!  They have a meeting once a month at her shop, and everyone brings a wheel to spin or a loom or whatever to work on.  How great is that?

We got the loom back to the warehouse and unloaded and stacked in pieces behind the big dining table.  I am not going to go through the effort to set it up, just to dismantle it again in 6 weeks.  Although I would love to get it going right away.  I have the Union loom set up and that can be moved easily through doorways with the removal of just one front beam.   So now I have one of each:  2 harness, 4 harness and 8 harness looms!   Should be all set to move them into my new Loom Room.  It's a large room that faces south with big windows on the main floor.   In the upstairs of the new house, there is a small room that was the maid's quarters,  and that is where I am going to store all my totes and supplies.  It will feel good to have my things within hand's reach instead of running to our son's garage attic in Green Bay for totes of fabric, yarn and supplies.

Thanksgiving is coming up this week.  We are trekking down to Milwaukee area to have a celebration with Steve's family.  Sadly, my ill mom-in-law is not going to be able to attend. Cancer has taken it's toll on her now, and she tires easily.  We will go over there on the weekend to meet up with some of the family to spend a little special time with her.  It is breaking our hearts.

Well, the day is getting on here, and I gotta get some things done...  never a quiet moment around here!


Thursday, February 23, 2012

Looms on the move!

After our busy weekend of house projects, this week has focused more into my loom room stuff.  

I am just finishing up this customer order for a Caterpillar Rug ----

It has inlaid sections of knit scraps of socks from factory waste, and on the white rags, they really pop out with vivid colors.  I have also done some of these on black fabric rags, and might try some with blue?

When the rug is done and off the loom, I add more brightly colored yarns to the fringes and twist them with a twisting device to make little rope-like tassels.   How cute is that?
  
My loom sales are moving right along.  The Newcomb Studio loom will be going to Ellen from Illinois, who is due to pick it up sometime soon.  The big Nilart LeClerc blanket fly shuttle loom might be going to a gal from right here in Wisconsin.   She is seriously thinking about it.  She has to check with her husband on Friday, but it might be going on it's way to a new happy home too.  

Then the 4 harness Union is going to be going to a dear friend from Missouri.  She and another dear friend from Tennessee are going to meet up in Illinois and come here together in Mid March....  we are going to have a good girlfriend week and sort and dig through a lot of my stash.   My empty totes that I bragged about in my last blog will be put to good use, because we are going to fill them up with stuff to send them home with each of them!  LOL 

I will be left with my 2 harness Union rug loom and my beloved 8 harness Tools of the Trade table loom.  Those are going with us in the motorhome.  The table loom rides anywhere--- in the livingroom--- in the basement laid on it's side--- or even out in the Tracker as it's towed down the road.   

The bigger Union loom can be broken down to a pile of boards and couple beams in about 20 minutes, and stowed away in the basement compartments.   A blog reader was concerned if I set it up under the awning of the motorhome for a few days/nights and just cover with a tarp.  She was worried about theft.   Reasonably so....  but we have a cable lock from a motorcycle that works out well to lock anything down to the tire or jack on the motorhome when sitting outside.  Plus, this big ole Union rug loom is a rough looking beat up piece of working equipment. It's like an old shovel or rake to a farmer.  It's a tool.   It's not "purdy" like my table loom, which is worth much more $$$.  

This is my Loom Room studio------ It was originally 2 separate bedrooms but we took down the wall and made it into one huge room.   The future owners can either use it this way as a big family room, or make it back into 2 separate rooms if they wish. 


I still have a lot of yarn to sort, sell or knit/weave up, eh?  Oh you can see a caterpillar rug in black on the rack in the right side of the photo.   Soon I will start selling off the "Sheepie Decor" of the Loom Room and put items on Ebay.  I have been selling quite a few items that way and have only run into one "Whacko" buyer.  She got all upset and up in arms about seeing two shipping charges on the invoice.  (she was being given a choice between Priority or Parcel rate shipping) .   She accused me of hidden fees, changing shipping charges or price gouging her????   I tried with 8 messages going back and forth to explain,  but she could not see the light.  So for the first time since 1999 of selling on Ebay, I have gotten my FIRST negative feedback.  Sigh.  At least I got to state a response to her negative feedback, and hope it does not deter any future buyers of my items. 


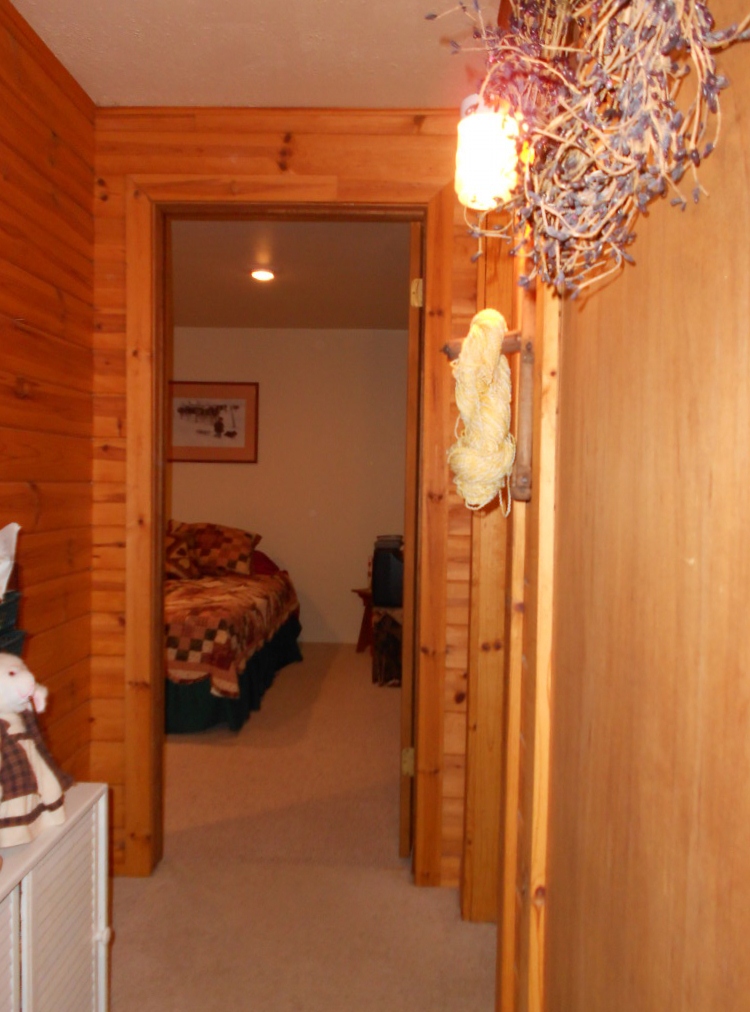
Just behind the wide loom room, I have a hallway that leads to a full bathroom, a long closet under the stairs and into the back guest bedroom. Technically it is not a "bedroom" because there aren't any egress windows, so when we stage the house for the market, we will remove the bed and make this an office/sewing/bonus room.   It is kinda L-shaped and we have been using it as a guest room with the closet chock full of my weaving supplies.  The carpeting is all in now, we laid this piece ourselves as it was leftover from half of the loft.  We got the closet doors up but need to finish replacing the trim along the carpeting where it meets the walls.  Then that part of the house is done.


An egress window could be cut out the side of the house, where it would come up near the side deck.  So it could become another bedroom if someone wanted it to be with a little bit of construction work.  

I am planning to move my sewing machine and cutting table into here during the staging process.  Perhaps it will appeal to some crafting person to have a separate room for their needs, along with a big closet to store items in.  Off to the right is another room of mechanicals (water heater, well tank, sump pump and storage shelves)


Lots of options, 
so tell anyone you know about a great house 
that is gonna be for sale soon!

It never hurts to ask, right?


.