The last time we used our nice and quiet built in Onan Emerald Plus 6300 KW propane generator, it suddenly got very very loud!!
Rut roh!
We feared the worst. We feared that we blew the manifold. That can be a very expensive manifold replacement... in the $500 range plus another hundred or so for adapters and other parts.
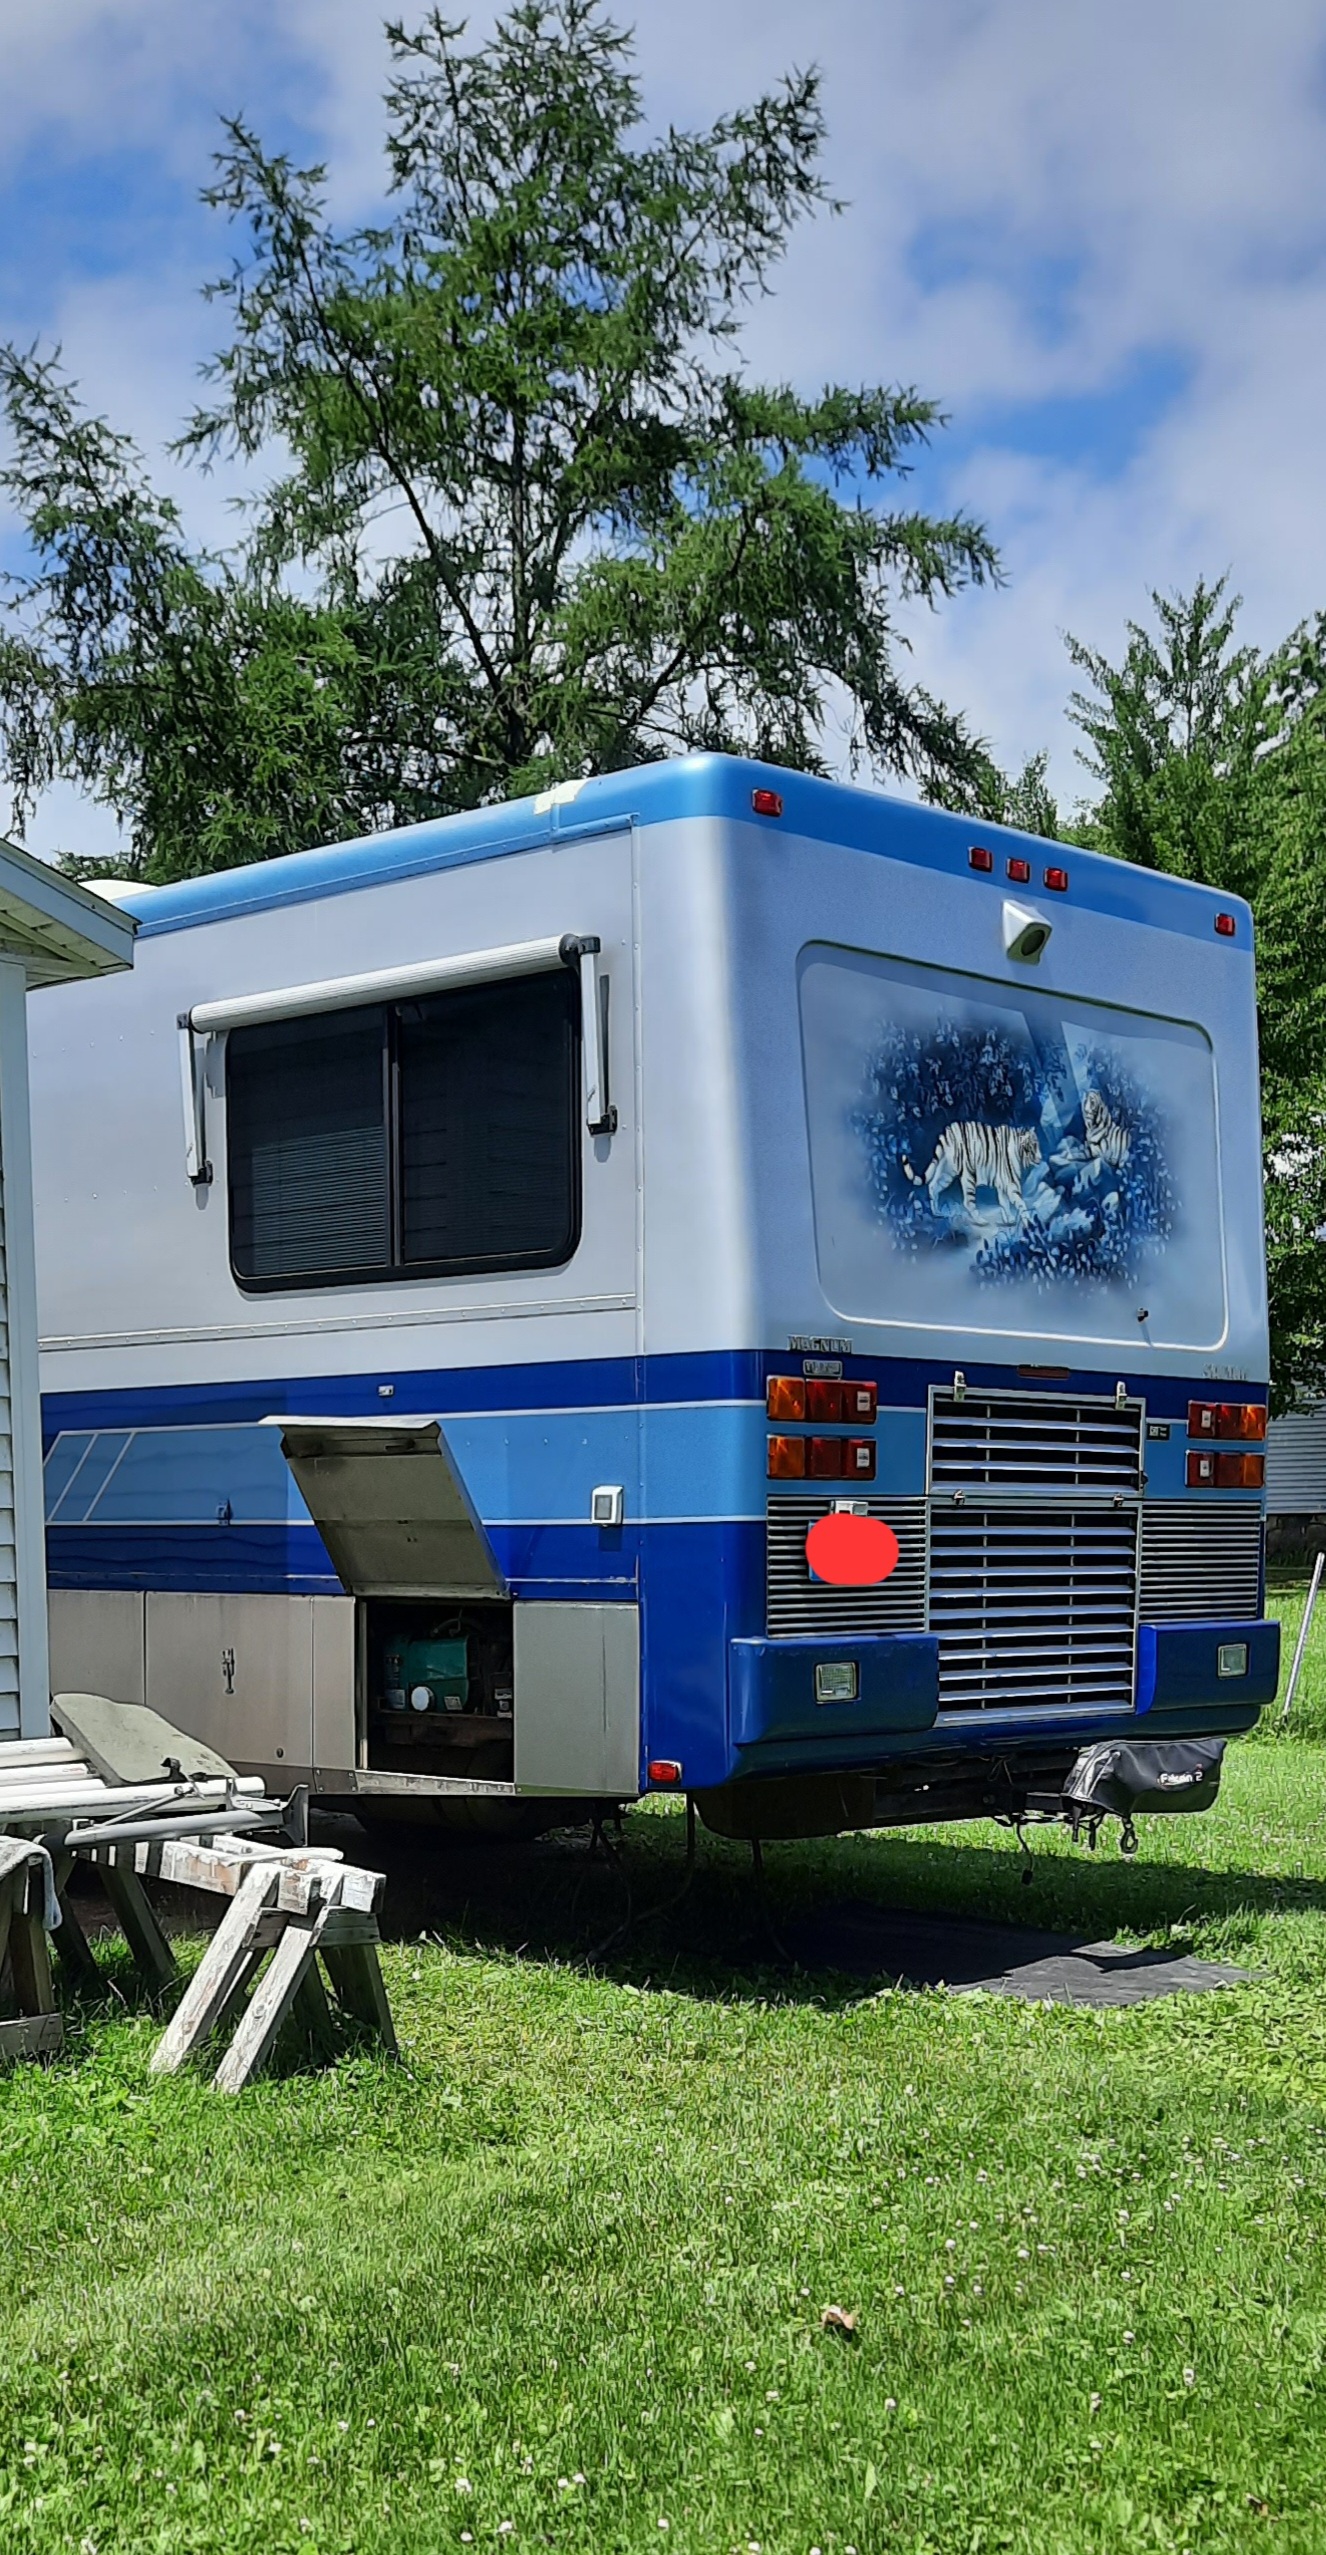
But the only way to know for sure, is to actually remove the entire generator from where it is mounted inside of a motorhome bay near the rear of our Safari. And the only way to remove it is to uhook the wires and propane line, remove 4 bolts, lower it down, take it out the bottom and pull it away, all 290 pounds of it!
So what are we to do?
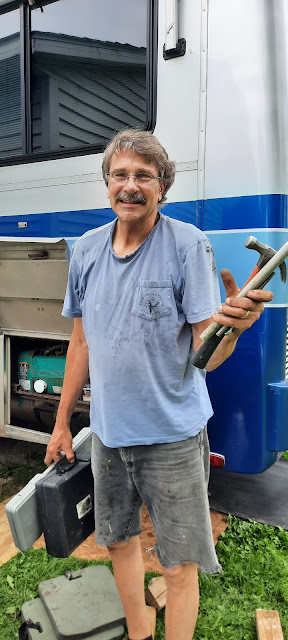
Like any good "husband and wife fix it repair it and maintain it team", we gathered our tools. We work on everything together. I'm not often in the pictures because I'm the person taking the pictures. But it's funny, sometimes when I read the comments on Facebook or in our Safari group, they all assume that it's only Steve doing the work. I'm all for equal rights and woman equality, and sometimes I don't have the strength Steve does. I am right in there working alongside Steve too. Plus I help as much as I can to gather tools and document the process as well as help research and order parts and deal with shipping and tracking. When it gets to the actual work, we both think it through step by step, and gather all the tools needed and do it TOGETHER. So here we go...
We backed the motor home as far back on our parking pad so the rear end area was over a more sloped area of the lawn. We knew we needed a certain amount of clearance to drop the generator down onto an automobile floor jack to pull it free from underneath the motorhome. We did this 10 years ago for another repair, so we knew what we were doing, this far.
We were working so hard to pull the generator out that I didn't stop to take any photos. But once it was out we were very, very pleased to see that it was just the manifold gasket that had blown and part of the flange was slightly warped. That's where all the noise was coming from! What a relief that it wasn't going to be a huge expensive repair!
Half of the job was already done, by getting the dang thing out and hauled into our garage. From there we would be able to take care of the exhaust piping and reassemble things.
It was a little bit dusty after the last few camping trips so it needed a good clean up anyhow. Lol!
Once we got everything figured out and cleaned up and repaired, we also decided at the same time to order a new muffler. The last one was 10 years old and slightly worse for the wear. Since we had everything apart it would be a good idea to complete the job with a new muffler.
We were hoping for a cooler day to work on putting the generator back up into the compartment. The temperature was in the low 70s, but the humidity was in the 80% range. Whew! We laid the plywood boards back down so we could wheel the generator right underneath into place with the floor jack. We worked on it a little bit at a time, took breaks and went back in the house, drank water, and then came back out again to do some more.
Each time we would raise it up a little bit we would add extra blocks on the sides to help support it. We most certainly didn't want 290 pounds worth of generator to go crashing on the ground or tipping on it's side!
We guided it up into place and Steve maneuvered it while reaching from the side of the compartment, as I slowly raised the generator up one pump at a time with the floor jack.
It was slow going and once we reached the maximum amount that the jack could lift, then we had to switch over and add a big block to give us a little more leeway. Crank crank crank one little pump at a time as I raised it up into place. Steve was on his knees at the side compartment helping to guide it into place. Eventually all of the holes lined up where the generator frame could bolt to the chassis of the motorhome.
Once we got it all perfectly lined up and in to place, Steve used the pneumatic impact driver to secure the bolts onto the frame. He got the two inside ones into place easily. He left them loose a bit to get all four into place and then tighten them up once it was done... but ....
When he switched to the outside ones and, of course one went in easily. Then there's always that very last one! It just would not line up!
So it was time to get out Steve's secret weapon! I am so proud of him that he knows all these little tricks of the trade from 38 plus years of working on heavy machinery and maintenance for his career. Out came his secret weapon, a great big huge C-clamp and a drift pin.
While I shuffled around and guided tweaked the end lever of the floor jack, he was able to adjust and line up the hole with the drift pin. Once he got it perfectly lined up he clamped it tight to the frame. Now he could finally get the bolt into place!
And there is the final bolt into place,
along with the grounding strap for the generator.
Now he went back and snugged up all 4 bolts tightly.
Wheeewwwww what a job.
We were both dripping wet and needed a shower!
But we proudly achieved our goal of getting the generator back into place.
The next step will be to wire up the power leads and re-attach the propane line. The last step will be to put on the new muffler when it comes on Friday.
We are sure that we saved many hundreds of dollars of labor costs by doing this ourselves. Who knows? Some unscrupulous shop might have dropped that generator and said what the heck, we thought we were doing a manifold job. And then they'd go ahead and charge us for a new manifold when we didn't even need one? The parts in question are hidden underneath a shroud and you really can't see them unless the generator is out and setting on the ground. We hear a lot of horror stories from other motor home owners at the mercy of repair places. That is why we much rather prefer to do the work ourselves if we can.
While we are waiting for our elusive muffler to arrive in the mail, we worked on a couple other little projects that needed to be done on the motorhome. Maintenance is essentially important to keep things up, especially with the rig this old. It's a 1996, manufactured in 1995. That means this old beast is 25 plus years old!
The original open door latch on this motorhome was made out of a rubbery plastic and was getting tired. UV rays and just being used so much was not allowing it to latch securely in the open position. A good wind would come by and slam our door shut. We decided to put on this nice stainless steel latch, which is similar to the latches we have on the propane compartment and the engine bay control compartment. We found it at Camping World last week when we were camping up in the area and decided to pick it up. Steve got out the rivet gun and made sure that it was being riveted right into a secure solid area and not just into the aluminum skin of our motorhome. It works very well and latches securely so the door won't blow shut anymore.
My little task was something that I do every couple years. I tape off the silver aluminum stair treads. Then we get out the grinder and remove any of the loose flaking paint of the two steps that automatically extend and retract with our door. Once all of the old loose paint is removed, then I put on two fresh coats of Rustoleum flat black. It's best to use flat paint for this rather than gloss so they are not slippery, especially when it's raining. That is why we also added the silver aluminum stair treads.
All it takes is one good slip from wet or iced up metal stairs and you will see why we added the stair treads ourselves.
My little supervisor Binney was making sure I did a good job today... it is one of the rare times that I have a photo of myself working on a project. Steve grabbed the phone and happened to snap a picture of me! Proof positive that I do the maintenance on our motorhome as well.
I know I am behind in a couple Campground Review blog posts. Stay tuned. I will catch up.
One of them has to do with these absolutely horrible photos posted below:
Just wait until I tell that story.


Great team work!
ReplyDeleteThank you so much! I appreciate that
DeleteGlad you were able to work together to fix the Generator.
ReplyDeleteKathy slipped on a wet step and had the bruises for a long time.
Be Safe and Enjoy!
It's about time.
Ouchie ouchie ouchie I can only imagine. I once slipped on them when they were icy and I never want to do that again
DeleteYour drop-the-AC technique is pretty much the same as on our Alfa, and probably other "basement" units. I pay a nice guy down in Louisiana to maintain mine.
ReplyDeleteYep, I kind of imagined those AC units come out the same way. I am sure they are just as heavy if not heavier!
DeleteAwesome working together. I admire all the work the 2 of you do on your motorhome. it is such a nice rig.
ReplyDeleteLooking forward to more of your posts all about your adventures.
Thanks so much! I know I have to get more posts done. I keep thinking of things to write about but I've just been so busy I don't get around to actually putting them on the website
Delete