I guess Steve isn't the only one that can find a bargain on Facebook Marketplace. The other day, I just happened to be glancing through a few of the posts and this one popped up in front of my eyes. It sure was an interesting hunk of cabinetry, and the asking price was right. $100.
It had beadboard interior, but the outside was pretty rough and rugged looking.
Ahhh look at all of that storage room! I could easily see a use for this at our house.
I felt I was in need of a few more cabinets worth of storage and pantry space. We did reduce the original full-size pantry down to just an open pantry bookshelf type unit to make more room in the she shed.
I could use a bit more kitchen storage, especially since I just got a new taller mixmaster and it doesn't fit in any of my cabinets. It's been regulated to the laundry room cabinets, but I would prefer to have it in the kitchen. My biggest crock pot doesn't fit since I got the electric pressure cooker. I really want the option of having both. Sometimes, if we stock up on a good sale of canned or dry goods, the overflow ends up in bins down on the bottom of the open pantry. This just seems to fit the bill?
I figured I could dress this old cabinet up. A while back we dressed up the rest of the cabinets in our kitchen with a fresh coat of paint and some panels of beadboard in strategic places as well as a beadboard backsplash.
We do have a long open wall in our kitchen opposite of the island and cabinet area. Currently we have a set of barrister bookcases that are full of knick knacks and memorabilia.
That bookcase really didn't need to stay in the kitchen at all. Toot sweet, we had it apart and moved into the living room on the wall between the two bedroom doors. It looks much nicer there and was more appropriate to the living room furniture.
We contacted the seller and arranged the time to go down and look at the cabinet with our trailer in tow behind the Saturn.
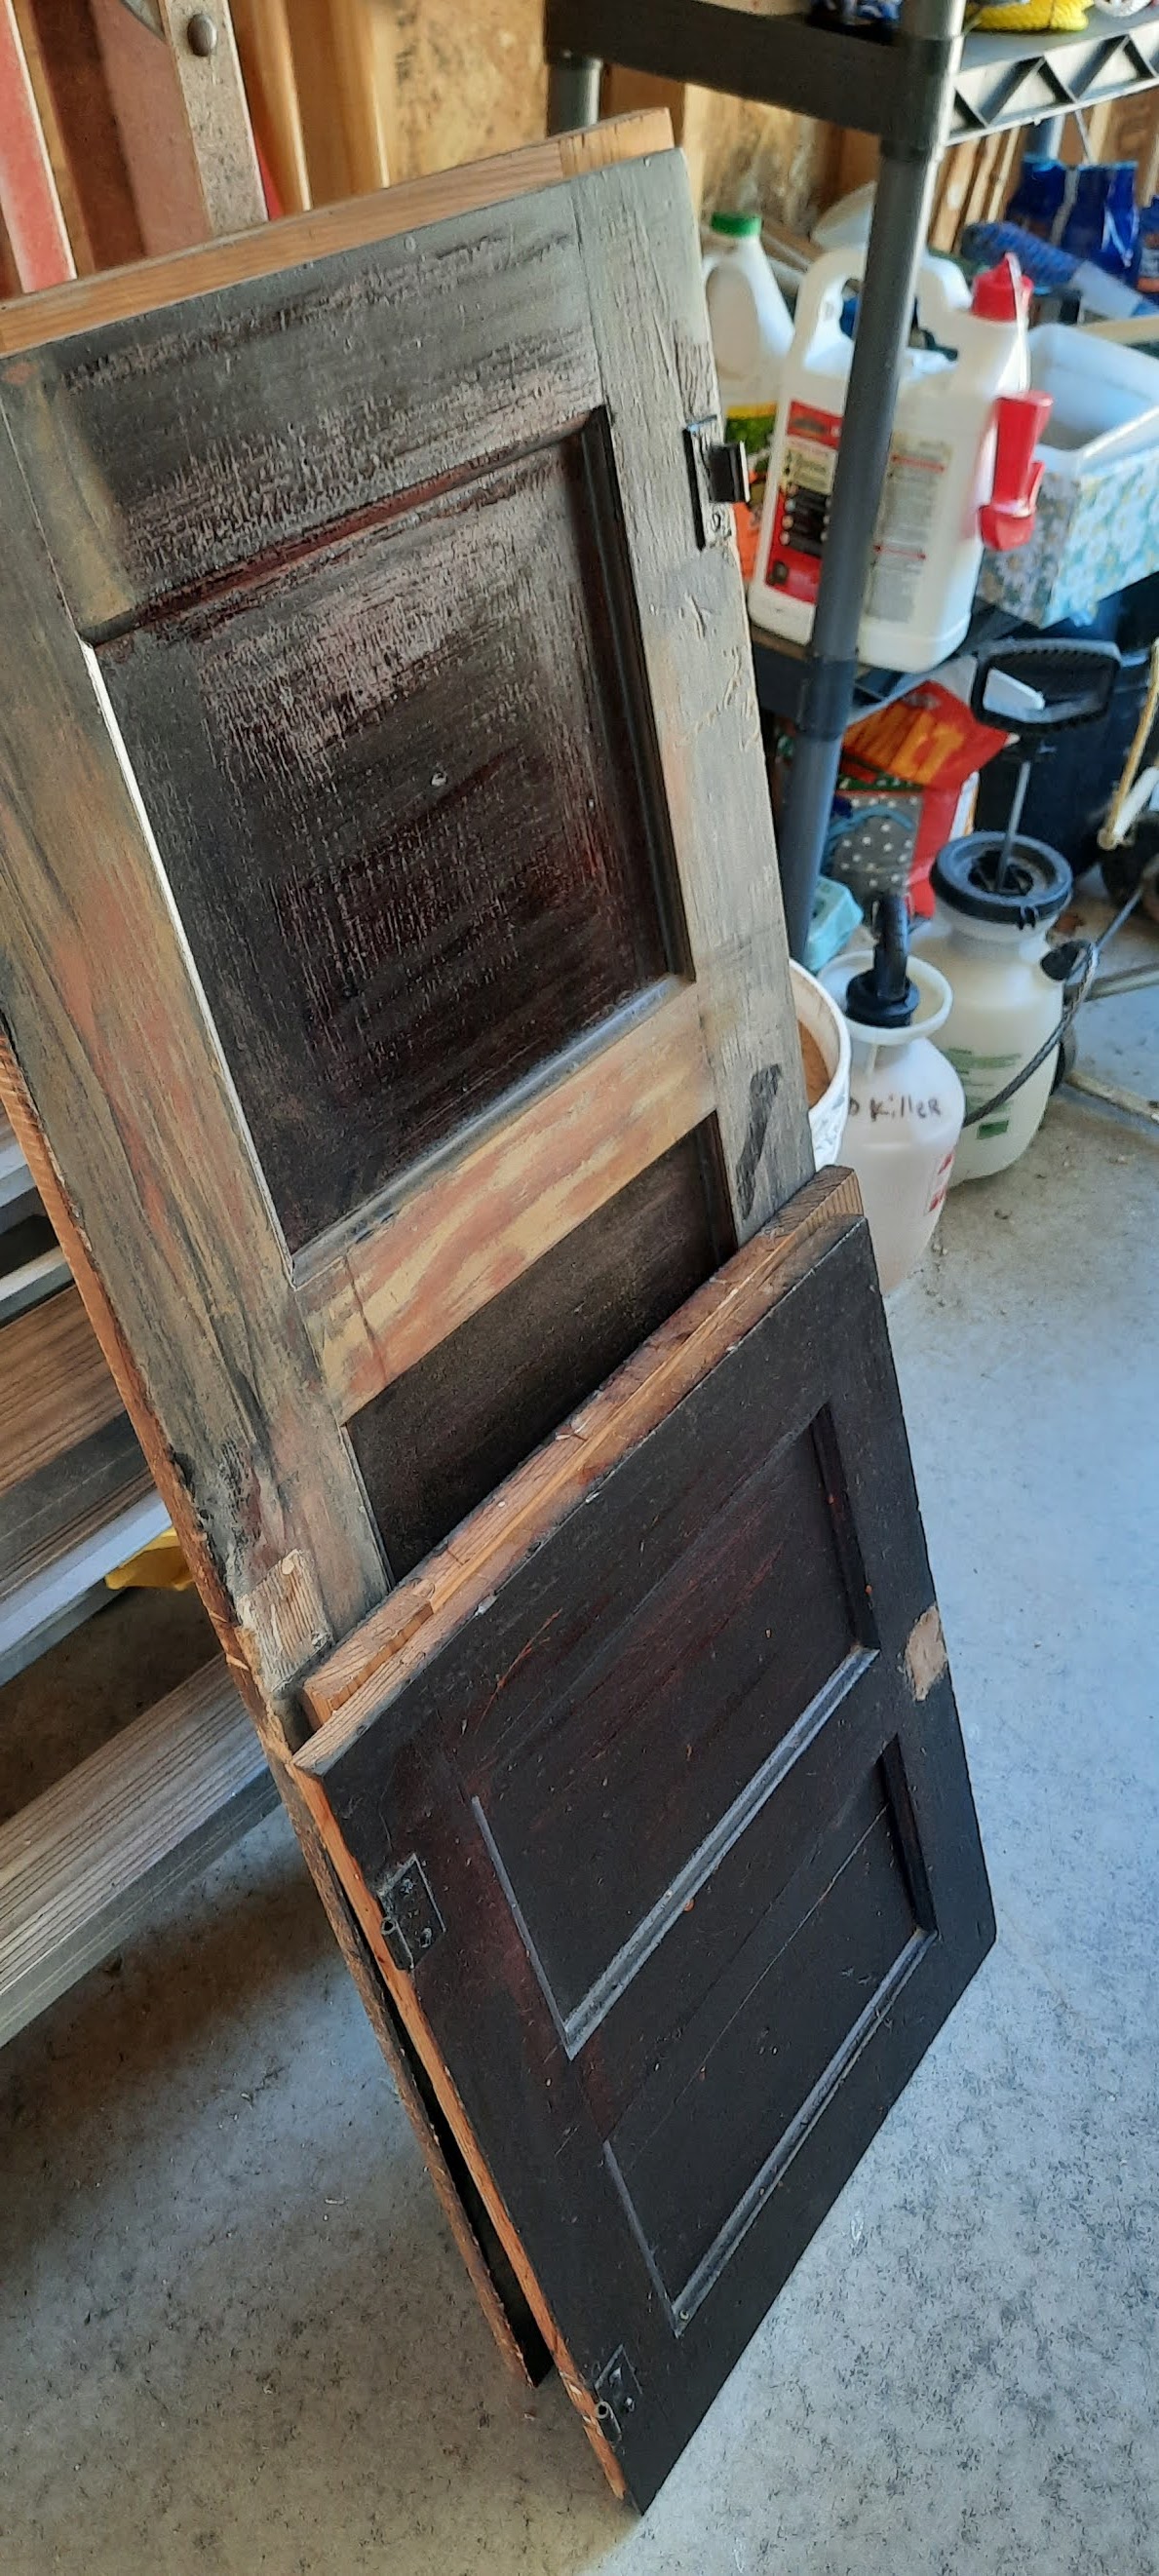
It was exactly what we wanted. It was scarred up and dinged up and it showed it's years of wear. It was just a garage cabinet in a newer house. They didn't know where it came from. So there was no history involved with it. One of the latches was missing and a piece of the corner trim had been knocked off. So she dropped the price to $80. Score! It came home with us.
I love a project like this. I knew I was going to be painting it and Steve would be dressing it up with some beadboard panels. Some purists may be shocked and offended that I was going to paint it. But it was only a pine cabinet it was not beautiful old oak or rich walnut or anything of stellar antique value. It needed to be loved and used, instead of sitting out in a garage. That's what I plan to do with this facelift.
I began with the cabinet doors, sanding them down so the paint would adhere, and filling in the worst of the gouges and nicks and holes with wood putty.
I gave the front face of the cabinet a new look with it's first coat of primer. By filling in all of the holes and gouges made it really appear to be a pretty nice cabinet after all.
It was a beautiful day, so I was working on the cabinet doors outside, with the soft breezes blowing. Soon the putty was dry and I could sand everything down.
The first coat of paint went on well after the primer dried. I didn't need to paint the center panels of the doors because that's where we would be affixing new pieces of beadboard paneling. I also didn't want the paint around the edges of the doors, just the front surface. Otherwise new paint would make it sticky to open and shut because they were recessed doors and not front face cabinets.
I kind of took over some space in Steve's garage to work on this project. But then once the doors would be ready, he gets to take over to do the next step.
We had some big panels of beadboard material that he was able to carefully measure and cut. He had to make sure each panel would be centered with the stripes and match the door pieces above and below it. Using a little bit of math, and a little bit of skill, he was quickly able to make up 10 new panels for me.
Each side of the tall cabinet was going to be dressed up with beadboard as well. We did that same technique to the side panels on the original kitchen cabinets, as well as the sides of the island.
Our son-in-law Waylen stopped by, and was just in time to help carry in the big unit to the kitchen. I think Steve and I could have managed it ourselves, after all, we did load it onto the trailer, and then off the trailer into the garage by just ourselves. Having our son-in-law here though with his extra brawn made it an easy project for me. All I had to do was hold the door open. Thank you Waylen!
Once the unit was in the house, Steve attached the beadboard panels to each side of the cabinet. He used construction adhesive and small tiny finishing nails with the airnailer to hold each panel into place.
He also attached the extra piece of trim that had come loose. I'm glad that she still had it laying on top of the cabinet. It would be really hard to match something that old. Otherwise he would have had to take off all the top trim and put on something new.
He also nailed on some L shaped trim along the rough edges of the beadboard sides to hide that and blend it all together. I gave it a final coat of paint now that it was in the kitchen and on the wall where it belongs. I think that it really made a transformation by adding the beadboard panels to the sides. He trimmed up around the extended lip edge too. Nice and neat.
Out in the garage, I rolled a layer of contact cement on the back of each of the beadboard panels, as well as on the center of each of the recessed panels of the doors. It doesn't take long for this contact cement to dry.
Steve carefully lined up each panel and dropped it into place. Then he caulked around the edges of each one so it would join up with the recessed ridge around each area. There you go, it looks like they were made this way. It's the same thing we did to the island in the kitchen. It really dresses up the plain jane doors.
I just gave them all a fresh coat of paint. The last step is for Steve to attach the matching handles.
Luckily, we were able to grab four more handles from the store that match the rest of our cabinets. They've been discontinued and are being clearanced out. We also grabbed two more handles to keep for the future. You never know, just in case. If they get marked down any lower I might grab a couple more?
After dinner this evening, Steve assembled the handles on to the cabinet doors. With careful measuring he made sure the handles were level and even.
We got them mounted into place with a little bit of struggling. But the cabinet is now finished!
Steve is going to make some new shelves for inside and I am picking up some extra pieces of pretty lacy shelf liner like I have in the rest of the cabinets, if I can find it again!
Once the new shelves and shelf liner is in place, then I can start arranging and figuring out what needs to go in here. I have about 10 choices already of things and I think it will fit.
ON EDIT : this morning I finished loading it up and arranging all of the things that needed to go in the pantry cabinet. They sure made organization a lot better in the rest of our kitchen cabinets as well as where we had overflow things crammed in the laundry room cabinets.
~~~~~~~~
While I had my paintbrush out, I took care of painting up this panel of my ironing and cutting bar in my sewing area of the she shed. We had reversed this bar around in the opposite direction when we did our big She Shed re-arrangement last week. The old screw holes and bracket marks were still on the surface of panel. Steve had filled them in and sanded them down for me.
One quick coat of paint and it was dressed right back up again. This is the main entryway into the she shed and I wanted it to look nice. He put the base trim on the bottom and we were done!
Another little thing that we obtained while we were picking up the cabinet was four big pieces of pegboard panels. The gal had them out in the trash pile ready for pickup. They were perfectly good and in unpainted original condition. I used to have a full wall of pegboard in the garage in Chilton and I really liked arranging all of my gardening tools on it. So we plopped all four pieces flat on the trailer before we had even loaded up the cabinet.
Now it was time to get organzied. Steve pulled everything away from the wall and screwed three of the panels into place.
Now it was my time to organize and let my OCD take over to arrange everything in order of what gets used, how often, excetera and how to space it out. It sure came out pretty nice.
Steve hung the 4th piece of pegboard over in his tool workshop area of the garage. From there, he was able to hang and arrange all of his tools in his preferred manner. So four pieces of discarded pegboard helped us organize our garage and make it easier and more accessible for grabbing something when we are working on a project. And it kept them out of the landfill.
Speaking of projects, my big old Finlander Barn loom (the Sanna Kangas Loom) is up and running. I wove off two more rugs this week. They are both for sale in my Etsy shop: https://kareninthewoods.etsy.com/
I also got a whole packet of information in the mail about Sanna Kangus, the original owner of the loom. I will do a complete blog post about that in a little bit. But for now, I am sure she is happily smiling down from heaven, knowing that her beloved rug loom is being used once again.
The cute little Beetle Bug woke up at 7 am. It's so nice she slept in. She is accustomed to getting up at 5:30 - 6 a.m. I think we wore her out last night so she slept well in the grandkid's bunkbeds in the guest room, all by herself.
She enjoyed a fun time this morning, crawling around on our bed with us, snuggling and tickling, giggling and watching cartoons. Grandpa brought us in each a donut with my cup of coffee. What a wonderful treat! Except now we have to change the flannel sheets on the bed, due to the crumbs all over the place, now crushed into the flannel fabric.
She figured out how to put her boots inside of Grandpa's big shoes. My oh my, what big feet you have?
Her mommy came to get her around 10 a.m. and it was time to send her back home. It's nice that we now live close by and we can babysit for special occasions for all of our grandchildren. Her parents celebrated Valentine's Day early, as their schedules allowed, to spend the entire Saturday day doing couples things--- including manis and pedis, a couples massage, and a nice dinner out.
~~~~~~~~~
We were forecast for some snow today. They first said about 6 to 8 inches. Then the forecast crept up from there to 8 to 10 inches. We went over that by the end of the day.
It started coming down about 9 a.m. it snowed steadily all day. It was so peaceful and pretty. So fresh and white and fluffy.
Honestly, it was very cozy and we were warm and dry, well fed and comfortable. Our power stayed on all of the while, and our gas fireplace in the she shed added to the coziness. The heat from that room goes up into the house and supplements the main part of the house too.
and the snow kept softly falling down
As we sat by the big windows, watching the snow, we were also watching the birds outside at the feeders. They really scavenged our bird feeders down to almost empty levels. A big pileated woodpecker, which is huge, finished off the rest of the suet block.
They are between 22 and 24 inches long and weigh close to a pound. They are very shy birds and don't often come near developed neighborhoods. We are located close to the nature preserve (backs up right to our backyard) so they probably feel safe enough to scavenge over to our feeders.
By 1 pm those feeders were almost empty. I bundled up into my snow gear and high Iceman snow boots and went out to refill the feeders. As soon as I put that fresh new suet block out there, that big old woodpecker came right back to test it out when I went back into the house. I think he was watching me.
I went through three loads of my 2 quart pitcher filling up the big bird feeders with sunflower seeds, and a good chunk of the bag of thistle seed for the little black-capped chickadees. I get flocks of chickadees and some finches at the niger thistle seed feeders. We get such a nice variety of big blue jays, cardinals, and woodpeckers hanging around.
Here are the thistle seed feeders, before I got them filled. There are 12 perches to eat from and they are usually filled up with 12 birds at a time....with others waiting for their turn, perched on top of the rods.
We had the dogs out in the snow for a while, they were plunging around in it but it was up to their bellies and they didn't get too far. It was snowing pretty heavy, so we didn't push them out for a walk. We came back inside and pealed off the layers of winter outerwear. Whew!
~~~~~~~~~
Steve finished putting up some more of our beadboard panels. This time he added them on each side of the window in the kitchen, on the ends of the cabinets. Once he had them nailed securely into place, I gave them two coats of paint throughout the day. I think that they sure came out nice.
LEFT SIDE RIGHT SIDE
These little beadboard panels added a touch of "farmhouse" style to the kitchen. Maybe some day Steve will build some different beadboard doors to go on the fronts of the cabinet boxes. For now, just trimming up the ends is enough. I like the layout of the kitchen as it is, and like the sturdy old wooden cabinets. I can load them up and not worry about them flexing under load like the fiber manmade composite boards of newer cheaper cabinets. What I have is enough to make me happy, and that is what counts.
(still working on the idea of a
new single basin deep stainless steel sink)
He cut the rest of the 5 beadboard panels to insert on the doors of the island, but he realized that he was getting low on construction adhesive. I told him that "tomorrow is another day". It was too snowy to go out and drive just to pick up a tube of adhesive. So instead he heeded my advice, cut off work for the day, and we took a nice nap!!!
~~~~~~~~~
We popped a couple frozen pasties in the oven for supper and the house smells so good this evening. The smell reminds me of when my mom would make rows and rows and rows of pasties. It was like an assembly line on the counter and table to put them all together. Then we would stack them up in long empty plastic bread bags to close up and put them in the freezer. With 6 kids to feed, it made sense to make a bunch of them in advance and freeze them until needed.
For anyone who wants to know what a pasty is, it's what the Cornish miners would use for their meal, taken down into the mine shafts where they worked. It became a staple food of the miners in the Upper Peninsula of Michigan. The miners would heat them up by setting them on there lanterns and they would be ready to eat by lunch time. In the old days you pierce your initial into the crust with a fork.... so you knew that was your pasty and not your brother's or father's or uncle's. Womenfolk would make bunches of them for the entire family of men who were miners going down in the shafts underground. Nobody came to the surface for lunch breaks, they ate underground. They would eat part of it at one meal break and wrap it back up and then eat the rest of it at another meal break. It is definitely a traditional food from the upper peninsula of Michigan. I buy them pre-made frozen in the unbaked form. Then I just have to thaw them a bit in the microwave and toss them in the oven on a piece of parchment paper on a cookie sheet to bake them to their golden brown crust --- the insides are delicious.
This is from a Pasty Website:
To many people in the Upper Peninsula of Michigan, the pasty is much more than food, it is an identifying cultural mark that gives them their own identity. When the Cornish came to the copper mines of the Upper Peninsula, they brought with them a lot of mining knowledge which the other ethnic groups did not have. The pasty was the standard lunch for miners. The pasty became popular with these other ethnic groups because it was small, portable, was very filling, and could stay warm for 8-10 hours. Pasty rivalry occurred between the Finns, Swedes, Irish, Poles, Germans, Scots, Italians, and French with each group contributing something in the way of seasoning and other ingredients. All groups agree that pasties must contain two things, potatoes and onions. The portability of the pasty not only made it easy to carry, but if it should get cold it would be relatively easy to heat up. This was done by putting the pasty on a shovel and holding it over a head-lamp candle. Miners never ate a pasty with a fork, they ate it end to end, and held it upright to keep the juices in. Since entire families worked in mines and each member of the family wanted different ingredients in the pasty, the wife would stamp the bottom corner of each pasty with an initial.
According to the Cornish Recipes, Ancient and Modern, "The true Cornish way to eat a pasty is to hold it in the hand, and begin to bite it from the opposite end to the initial, so that, should any of it be uneaten, it may be consumed later by its rightful owner. And woe betide anyone who take's another person's corner!" There was a superstition among the miners that the initial corner should not be eaten, instead it was dropped on the ground for the mining gremlins (also known as Knockers) to eat. These "gremlins" caused mischief in mines, causing accidents and mine collapses, feeding them supposedly kept them out of trouble.
The pasty is a simple food and can be described as a portable meat pie. It remains relatively unchanged today, a few places have put in healthier vegetable shortening instead of lard, and a couple of other minor changes like the cut of meat used.
(I like the beef and pork sausage meat and rutabaga cubes along with the slices of potatoes and onions)
The snow seemed to let up a little bit around 6 PM. It's still coming down but lighter. The plow finally went through and of course it piled a huge snowbank across the end of the driveway.
Steve decided to get out there and snow blow it out of the way as soon as possible. Otherwise it hardens into a very heavy row of chunks of snow that are difficult to move.
The temperatures are dropping out there, so he put on his gloves that were a Christmas present from our daughter Erin and son-in-law Waylen. They are electric gloves! They are from Global Vasion and are really worth their weight in gold in cold weather. It seems as Steve ages, he said his hands get colder faster. These gloves do the trick.
There are 2 little battery packs that you pre-charge and then plug them into the gloves. There are electric wires within the gloves that go down into the palm and finger areas.
See the blue glow on each of his wrists? Blue is the lowest setting. Then green is the middle setting. And then red is the highest setting.
It looks like we have about a foot of new snow on the ground... And Steve did a great job getting it all snowblowed away. He did the driveway, the walkways, and even around the fire hydrant in front of the house. I didn't go out there tonight but I will help clean up a bit in the morning and do the front porch and steps.
In our little town it's a city ordinance that you need to keep the fire hydrant clear if it's on your property. If not, you get a fine if the city has to come by and clear it out. It's a good thing to do as an added benefit for all of the neighbors in the area. If there ever were a fire at any of our houses, the firemen would waste precious minutes trying to dig out a fire hydrant from the snow. So we will do our part by keeping a nice clear berth around the hydrant, and we avoid any nasty letters and fines from the city.
He turned his gloves up to red HOT!
He is back in the house now and taking a shower to warm up. Now that we are cozy warm inside I think we will snuggle down with the movie for the evening, after I finish this blog.
Now that our kitchen cabinets are finished with their painting... we changed them from brown to white, it was time to dress them up a little bit.
The old sturdy solid cabinets are wonderful in this kitchen. But we decided to dress up the ends of them with the beadboard panels to match the beadboard sides of the island.
We carefully measured the existing beadboard on each side of the island.
We realized the beadboard choices at the store are all different thicknesses and depth of the grooves. Some of it is just white MDF paneling, other panels are sheets of wooden beadboard, and some are thick beadboard planks instead of panels.
We picked up a 4 x 8 sheet of primed wood paneling that matches the island beadboard from Home Depot, for just under $20. We hauled it home the same day we hauled home the roll of bathroom vinyl flooring that we will save for another project day...
Now for the Beetle Bug part...
No, we didn't find any beetle bugs in the woods of the cabinets. LOL. We just found a little three-year-old Beetle Bug named Claire who wanted to come over and help us today.
I grabbed the clipboard and the pencil to take down the measurements. Grandpa had his big tape measure and the Little Beetle Bug had to have her tape measure too.
She measured and measured,
and called out numbers to me
to write down for her.
Of course, Grandpa made his own measurements too and we wrote them down in a separate column. I think when he went with the cut list out to the garage, he had a pretty clear idea of which numbers were his and which numbers were hers.
While Claire and I laid down to take a nap in the afternoon, Grandpa took care of cutting up some of the panels.
Once naptime was over, he brought in the big air compressor into the she shed, and then he ran the air hose up the stairs into the house.
He ran thick beads of construction adhesive around on the back sides of the panels.
He nailed the panels into place with the air nail gun. He added a few trim strips here and there as well, to balance it off and match the other cabinetry.
We really like how this is coming out!
Before supper, I managed to get the first coat of paint on some of the panels. Grandpa kept the wee one entertained while I could get out a paint brush and roller to see how the finished panels were going to look.
I still need to get a second coat of paint on them
He did the side of the cabinet
that meets up against the open pantry,
and a small square alongside the
longer cabinet in the corner.
The side of my coffee bar / wine rack got a new panel too. This is located closest to the island and looks nice now that it matches!
He has a few more pieces to cut yet. He is doing three small panels for each of the doors on the island as well as a panel on each side of the upper cabinets that surround the center window.
It will be nine panels in total. If there's enough left, there are two tall skinny doors on the backside of the island with our trash and recycling pull out bins that I would like to get covered as well ... if he can eek them out of the remaining pieces.
~~~~~~~~~
It's time now to finish up this blog. The Beetle Bug helped me cook supper and now it's time to pop her in the bathtub before popping her into bed. The dogs sure enjoy cuddling with her and watching for any dropped crumbs from her graham cracker snack.
Here she is saying "Goodnight Moon"!
~~~~~~~~~
Continued prayers are appreciated for our family members that are going through a rough time with health issues right now. That is all I can manage to say at this time.