Our Wonderful Followers who come back again and again to read about us...

Friday, July 16, 2021

Beadboard Cabinet Pantry Space


I guess Steve isn't the only one that can find a bargain on Facebook Marketplace. The other day, I just happened to be glancing through a few of the posts and this one popped up in front of my eyes. It sure was an interesting hunk of cabinetry, and the asking price was right. $100. 


It had beadboard interior, but the outside was pretty rough and rugged looking. 


Ahhh look at all of that storage room!  I could easily see a use for this at our house. 


I felt I was in need of a few more cabinets worth of storage and pantry space. We did reduce the original full-size pantry down to just an open pantry bookshelf type unit to make more room in the she shed.

I could use a bit more kitchen storage, especially since I just got a new taller mixmaster and it doesn't fit in any of my cabinets. It's been regulated to the laundry room cabinets, but I would prefer to have it in the kitchen. My biggest crock pot doesn't fit since I got the electric pressure cooker. I really want the option of having both. Sometimes, if we stock up on a good sale of canned or dry goods, the overflow ends up in bins down on the bottom of the open pantry.  This just seems to fit the bill?

I figured I could dress this old cabinet up.  A while back we dressed up the rest of the cabinets in our kitchen with a fresh coat of paint and some panels of beadboard in strategic places as well as a beadboard backsplash. 


We do have a long open wall in our kitchen opposite of the island and cabinet area. Currently we have a set of barrister bookcases that are full of knick knacks and memorabilia.


That bookcase really didn't need to stay in the kitchen at all. Toot sweet, we had it apart and moved into the living room on the wall between the two bedroom doors. It looks much nicer there and was more appropriate to the living room furniture.


We contacted the seller and arranged the time to go down and look at the cabinet with our trailer in tow behind the Saturn. 

It was exactly what we wanted. It was scarred up and dinged up and it showed it's years of wear. It was just a garage cabinet in a newer house. They didn't know where it came from. So there was no history involved with it. One of the latches was missing and a piece of the corner trim had been knocked off. So she dropped the price to $80. Score! It came home with us.

I love a project like this. I knew I was going to be painting it and Steve would be dressing it up with some beadboard panels. Some purists may be shocked and offended that I was going to paint it. But it was only a pine cabinet it was not beautiful old oak or rich walnut or anything of stellar antique value. It needed to be loved and used, instead of sitting out in a garage. That's what I plan to do with this facelift.

I began with the cabinet doors, sanding them down so the paint would adhere, and filling in the worst of the gouges and nicks and holes with wood putty. 


I gave the front face of the cabinet a new look with it's first coat of primer. By filling in all of the holes and gouges made it really appear to be a pretty nice cabinet after all.


It was a beautiful day, so I was working on the cabinet doors outside, with the soft breezes blowing. Soon the putty was dry and I could sand everything down.


The first coat of paint went on well after the primer dried. I didn't need to paint the center panels of the doors because that's where we would be affixing new pieces of beadboard paneling. I also didn't want the paint around the edges of the doors, just the front surface.  Otherwise new paint would make it sticky to open and shut because they were recessed doors and not front face cabinets. 


I kind of took over some space in Steve's garage to work on this project. But then once the doors would be ready, he gets to take over to do the next step.


We had some big panels of beadboard material that he was able to carefully measure and cut. He had to make sure each panel would be centered with the stripes and match the door pieces above and below it. Using a little bit of math, and a little bit of skill, he was quickly able to make up 10 new panels for me.


Each side of the tall cabinet was going to be dressed up with beadboard as well. We did that same technique to the side panels on the original kitchen cabinets, as well as the sides of the island.


Our son-in-law Waylen stopped by, and was just in time to help carry in the big unit to the kitchen. I think Steve and I could have managed it ourselves, after all, we did load it onto the trailer, and then off the trailer into the garage by just ourselves. Having our son-in-law here though with his extra brawn made it an easy project for me. All I had to do was hold the door open. Thank you Waylen!


Once the unit was in the house, Steve attached the beadboard panels to each side of the cabinet. He used construction adhesive and small tiny finishing nails with the airnailer to hold each panel into place.


He also attached the extra piece of trim that had come loose. I'm glad that she still had it laying on top of the cabinet. It would be really hard to match something that old. Otherwise he would have had to take off all the top trim and put on something new.


He also nailed on some L shaped trim along the rough edges of the beadboard sides to hide that and blend it all together. I gave it a final coat of paint now that it was in the kitchen and on the wall where it belongs. I think that it really made a transformation by adding the beadboard panels to the sides.  He trimmed up around the extended lip edge too. Nice and neat.


Out in the garage, I rolled a layer of contact cement on the back of each of the beadboard panels, as well as on the center of each of the recessed panels of the doors. It doesn't take long for this contact cement to dry. 


Steve carefully lined up each panel and dropped it into place. Then he caulked around the edges of each one so it would join up with the recessed ridge around each area. There you go, it looks like they were made this way. It's the same thing we did to the island in the kitchen. It really dresses up the plain jane doors.

I just gave them all a fresh coat of paint. The last step is for Steve to attach the matching handles. 

Luckily, we were able to grab four more handles from the store that match the rest of our cabinets. They've been discontinued and are being clearanced out. We also grabbed two more handles to keep for the future. You never know, just in case. If they get marked down any lower I might grab a couple more?


After dinner this evening, Steve assembled the handles on to the cabinet doors. With careful measuring he made sure the handles were level and even.


We got them mounted into place with a little bit of struggling. But the cabinet is now finished!


Steve is going to make some new shelves for inside and I am picking up some extra pieces of pretty lacy shelf liner like I have in the rest of the cabinets, if I can find it again!


Once the new shelves and shelf liner is in place, then I can start arranging and figuring out what needs to go in here. I have about 10 choices already of things and I think it will fit.


ON EDIT : this morning I finished loading it up and arranging all of the things that needed to go in the pantry cabinet. They sure made organization a lot better in the rest of our kitchen cabinets as well as where we had overflow things crammed in the laundry room cabinets.


~~~~~~~~

While I had my paintbrush out, I took care of painting up this panel of my ironing and cutting bar in my sewing area of the she shed. We had reversed this bar around in the opposite direction when we did our big She Shed re-arrangement last week. The old screw holes and bracket marks were still on the surface of panel. Steve had filled them in and sanded them down for me.


One quick coat of paint and it was dressed right back up again. This is the main entryway into the she shed and I wanted it to look nice.  He put the base trim on the bottom and we were done! 


Another little thing that we obtained while we were picking up the cabinet was four big pieces of pegboard panels. The gal had them out in the trash pile ready for pickup. They were perfectly good and in unpainted original condition. I used to have a full wall of pegboard in the garage in Chilton and I really liked arranging all of my gardening tools on it. So we plopped all four pieces flat on the trailer before we had even loaded up the cabinet.

Now it was time to get organzied.  Steve pulled everything away from the wall and screwed three of the panels into place.


Now it was my time to organize and let my OCD take over to arrange everything in order of what gets used, how often, excetera and how to space it out. It sure came out pretty nice.


Steve hung the 4th piece of pegboard over in his tool workshop area of the garage. From there, he was able to hang and arrange all of his tools in his preferred manner. So four pieces of discarded pegboard helped us organize our garage and make it easier and more accessible for grabbing something when we are working on a project.  And it kept them out of the landfill. 


Speaking of projects, my big old Finlander Barn loom (the Sanna Kangas Loom) is up and running. I wove off two more rugs this week.  They are both for sale in my Etsy shop:  https://kareninthewoods.etsy.com/


I also got a whole packet of information in the mail about Sanna Kangus, the original owner of the loom. I will do a complete blog post about that in a little bit. But for now, I am sure she is happily smiling down from heaven, knowing that her beloved rug loom is being used once again.


Saturday, July 10, 2021

Motorhome Got A Bath and Other Stuff

The weather has finally turned nice. We've lost all of our high heat and humidity. We are back to normal summer weather. Sunshiny days in the 70s. How nice is that?

Steve decided it was time to give his baby a bath. He got up on the roof and scrubbed and scrubbed. It's been a while since the roof was done. I didn't even know he was up there, or I would have been nearby in case he slipped or something.  Stubborn man. He didn't tell me until he was done. I didn't get any pictures of him up there, because I was busy doing some weaving in the she shed. 

When I came out to see what he was up to, he said he was done already and it was time to scrub down the sides.  Because all the dirt from the roof runs down the sides. It really did need a bath now. 

This era of Safari motorhomes have some kind of special paint from the Mercedes company.  Never use any type wax or polish on the finish. Just plain car wash soap. Never any Dawn or any other type of harsh detergent. Just car wash. We wet it down, scrub it with a very soft brush, and then spray it off. 

The same goes for the stainless steel lower compartment doors. They have a special sealer or coating on it. You never use any type of chrome cleaner or stainless steel cleaner or aluminum tire rim cleaner. Nothing.  Other folks with our brand of Safari motorhome had used stuff and always regretted it afterwards as it never looked the same.  They always have to clean it now that the coating is gone. Ours looks just as good as the day they went on, almost 26 years ago!!

 Steve did the scrubbing part


 I got to do the spraying off part


 Beautiful and shiny again,
 just look at that.


On a 25 year old rig, there is always maintenance...

We have these plastic covers that go over the roof vents. They are called MaxxAir. I painted them a number of years ago but that paint has flaked off. That's because I didn't use the proper primer for plastic. 

Now I have the right stuff. Steve took them off and we scraped off any of the paint that was flaking loose. Then I gave them a coat of this really good primer.  I used it last year on a vinyl fence and it works great.  It's stinky but it's a good way to bond paints made for plastic on to a plastic surface.


Once they are dry, I will give it a coat with this blue metal flake paint from rustoleum. It's not an exact match to the motor home but it's close enough.  Who is gonna look close when they are up high on the roof?  LOL


~~~~~~~

It was finally nice enough to get some decent yard work done. As you may know, last Winter we lost our darling little sheltie Finnegan. He was our heart dog, and so important to us. Cancer took him away at only 7 years old. He rallied hard and tried to hang around as long as he could. He is buried in our back yard.

The Mt. Leibe German Shepherd Rescue Club, in Sobieski, makes these beautiful paw print memorial stones. They do it as a fundraiser for their club, and over the years they have come to our Wisconsin Sheltie Rescue Reunion parties to sell the personalized paw stones.

We already had two stones that said Duke and Ducky from our previous collie and sheltie. Even though they are buried in Chilton, we took the stones with us when we moved up to Oconto. Now that it was summertime, the Mt. Liebe Rescue people were able to make new stones for orders that came in over the winter. 

Not only did we order up one for Finnegan, I also ordered one for my first sheltie Akasha. Her cremated ashes were buried along with Finnegan this winter. She deserved a stone too.


We set them out with some planters around Finnegan's grave site.


We've had this little sheltie garden statue for many years. Heather named this little garden statue "Ducky". We first used it as a doorstop in our camping trailer. That was long before we even had a dog named Duchess, AKA Ducky. 

Right now all 4 collars from each of the past 4 dogs are wrapped around it's little neck with their tags dangling down. Now it is the proud guardian over the graves, holding collars in honor of these beautiful dogs that we have shared our lives with.


We can look out the windows
 at the resting space 
of these faithful companions.


~~~~~~~~

Speaking of dogs, Little Miss Priss Binney got a complete brushing and pedicure yesterday. 

My oh my, doesn't she look pretty?


She is a Total Diva... stretched out on the chaise lounge. She demands "More Belly! More Belly!"    If you stop brushing, she reaches down with her paw and nudges your hand or the brush to keep on going.  It could go on for hours as far as she is concerned.


~~~~~~~

On the loom front, I did more weaving on the big Kangas Loom yesterday. I finished up a Finlander Farmhouse Rug. It came out to about 50" long by 33" wide.   After I get it off and hem it up, I will put it for sale in my Etsy store.


The next rug I started is from some beautiful woolen suitweight fabric in in rich darker colors.  


It is coming out nicely
 as it undulates from one color to the next.


I think this will make a good long-lasting rug dark enough that it won't show the dirt. I don't know the length until I'm done weaving it. I guess as long as it will go until the fabric runs out! LOL.... But I do have a tape measure pinned to the beginning so I have a pretty good idea of how long it is while I am in the process of weaving.


I try to weave one rug after another if there is room on the bottom take-up beam.  Less loom waste of the warp string by keeping them joined one after the other, rather than cutting off one at a time and retying them.  So unless it's an order for someone right away, I can keep rolling up one after another as I create. 

~~~~~~~~

Like I said, it's been summery nice weather and today is just as wonderful.  As I type this, I look out and the backyard looks beautiful.  Steve got out the lawn mower and took care of a good grass cutting. With all the rain and humidity that we've had, it sure is growing fast! 


We are still working on the back of the house on the East Side.  Previous blog posts got us up to the corner. Now we are around the corner and working our way across the back side of the house.  Replacing siding, some of the soffit and fascia, rain gutter and trim.  The next step will be to install the large window in the master bedroom. That's where this blank part of the wall is, with the house wrap in place.  We have the header ready, and will start breaking through the wall soon to put in the window. 


My tomato plants are doing well and I have green tomatoes on almost all of the plants. Just waiting for them to grow and ripen. Yummmm I can almost taste them.  

The other night the dog was all excited to see someone at the bird feeders. We looked out and saw this amazing 10 point buck standing there! The picture is a bit blurry because I didn't want to go out the door to snap it. So this is just through the window. He sure is beautiful, regal and majestic.


On edit: I forgot to say that while the deer was here in the yard nibbling under our bird feeders, the fireworks were going off at the city festival a mere half mile away!  He knew where to stay safe!

We didn't go camping this week, so it's pretty nice when nature comes to us right in our own backyard. 

I think my next couple blog posts will be with some campground reviews. We've actually been to 4 campgrounds already this year.  I just never got around to writing about them. So stay tuned, I promise we will have some more camping posts instead of just weaving weaving weaving.

Thursday, July 8, 2021

Weaving Away on "The Kangas Loom"

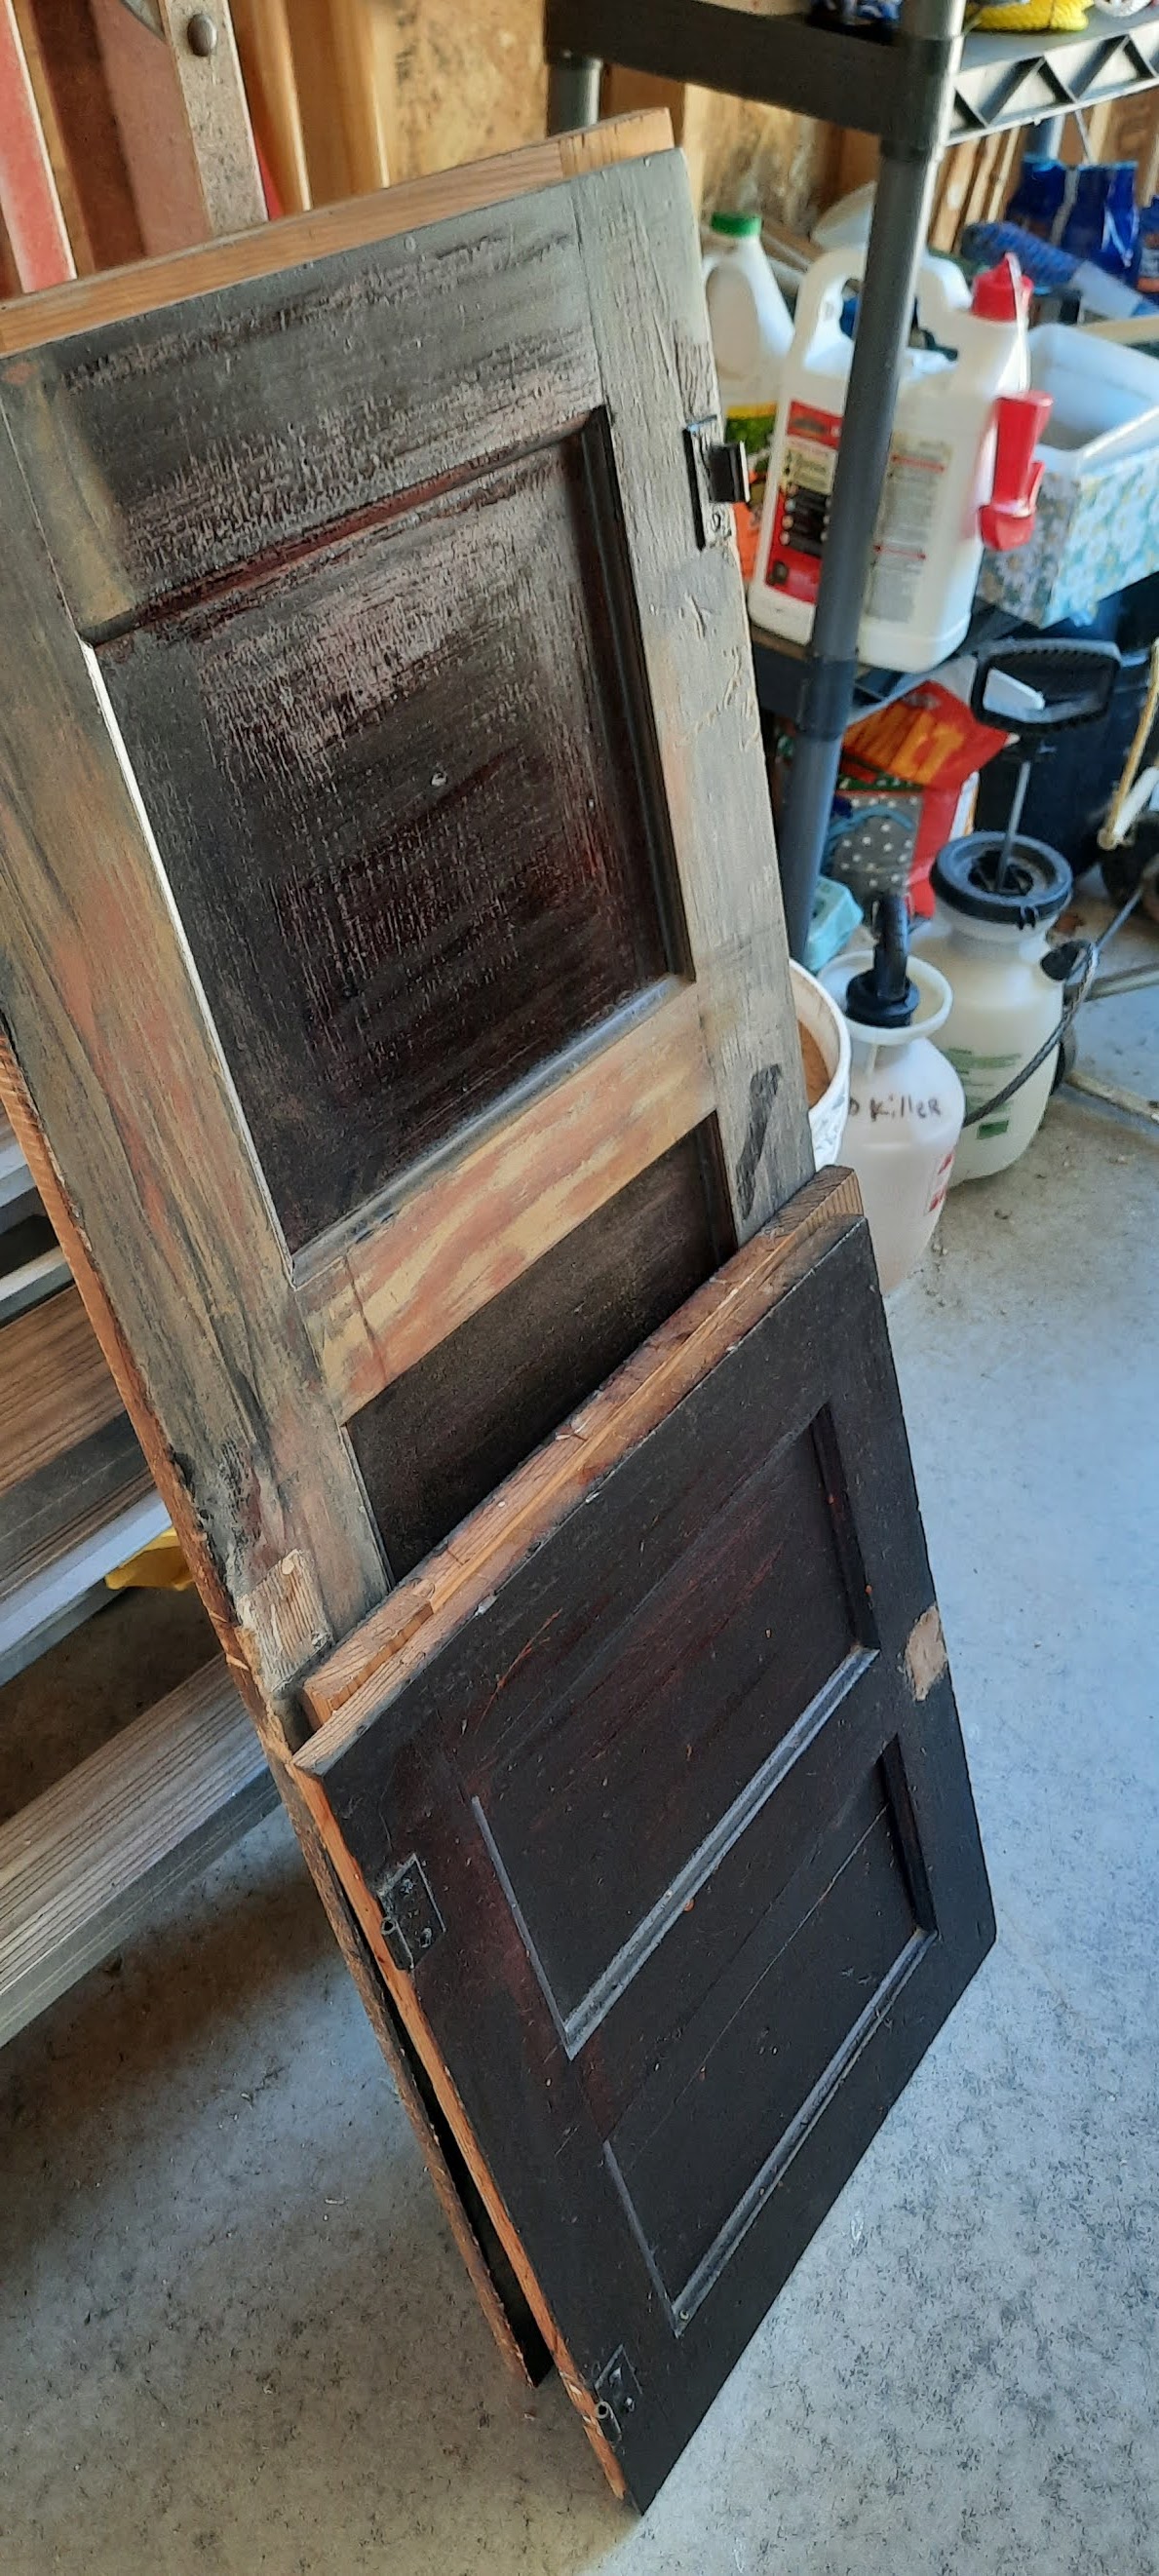
My apologies to my other blog readers who like to read about camping and motorhome stuff.  I promise I will do some posts on that, especially the last three campgrounds we went to.   But for now I am blogging about the barn loom, and adding links to my loom restoration and rug weaving groups on Facebook. I promise, more camping and RVing themed posts will come soon! 

I received some wonderful emails from the gentleman and his wife who donated the old Finlander barn loom to the museum. They were very grateful to receive the rug that I completed from the half woven one left on the loom.  We are not sure who started it.  But I completed it and sent it on to them.   They are going to send me some more information about their grandmother, Sanna, and some photos!  How exciting! 

In their emails, they have dubbed me: "Karen, Owner of The Kangas Loom".  So I guess from herewith forward,  the Finlander Barn Loom will be known as The Kangas Loom.  I like that. 


Last night I wound up 60 turns of warp, equaling about 40 yards.  It's quite a technical process to get it all on evenly and under perfect tension.  The more perfect the warp string is put on, the more perfect the final rug turns out. 

Here is my warping setup:  a rack with 24 spools of warp, a tension box clamped to a sawhorse, and then the actual loom, pushed across the room to access the back side.  Once it all set up, then I can push it back to the windows on the left side of the pic. 


Section by section, I wind on the warp.  Carefully watching the threads, making sure there aren't any knots, and they wind up evenly with no "snow drifts" that hamper the overall circumference of each layer as it winds on. The arches of plastic tubing help guide the threads into each section, without jumping the pegs into the next section.  I "leap frog" the tubes from peg to peg as I move across the beam.


As each section reaches the same 60 turns, using a little digital thumb counting device from my friend Rosie Dupuy, a weaver of Bethel Missouri.  She stores them in these little tins from mints.  How cute! 


I carefully tape the order of the threads down to the beam. I have learned that doubling the tapes works even better.  And recently I have added a third piece of tape right where I cut the threads free.  Then as I remove them one at a time to thread them into the loom, they are all in perfect order. No criss crossing, no tangles. 


Ahhhhh a perfectly wound warp! It really makes my heart go Pitter Pat!  I love to touch it and feel how even and symetrical it is. I know, I am weird, but sometimes the littlest things about weaving give me such enjoyment.  


At this point, it was getting late. I would have to wait until the next morning to start the actual loom threading of the heddles and sleying of the reed.  It's hard to quit and go to bed. Years ago, I would stay up until the middle of the night, working on things like this. And then get up and go work an 8 hour day, take care of 2 teens, sometimes 4 teens on the weekends, keep up a house and meals and laundry and dogs and all those tasks.  Now that we are retired, I learn to pace myself, and get some sleep.  LOL. 

In the morning it was time to start "tying on"!   That is where I take each little thread and tie it in order, onto the corresponding thread coming off the harnesses.  This is the leftover warp from the last rug woven.  By leaving the ends hanging, in order, on these two suspended lease sticks, I can just tie on the threads and not have to rethread each and every one through the harnesses and reed.  A real timesaver. 


Bit by bit, strand by strand, I tie each one one.  Carefully untaping each section. I also count each section of 24 threads to be sure one isn't accidentally wedged down between the pegs.  That can cause a REAL snarly situation, plus the count of threads would be off by 1 thread at the front end. 


Because the last rug was only 24 inches wide, and I wanted the new ones to be wider, I had to tie up 72 more string heddles.  It takes time, and I carefully tied each one on the "heddle tying jig" that came with the loom.  For now we only tied them with warp string, doubled up.  But I think in the future I will order some Swedish Seine Twine and tie ones that will last forever. 


Little granddaughter Claire, 4 years old, was here to help me.  What a great place to sit and tie heddles, right on the loom bench seat.  Together.  Just like the grandson of the original loom owner Sanna did. The grandson Ron, now in his 80's, remembers setting his little butt on the loom bench next to his grandmother.  


Once the 72 heddles were in place, I had to carefully guide the remaining bouts of new warp through them, one at a time.  Alternating the threads between harness one and harness two, the pattern of every other thread is obtained.  Being careful... because if even one thread is mixed up or criss crossed or repeated instead of alternated, it can take some time to correct by pulling them back out till you reach the mistake and start over.  

This morning it was finally time to start weaving an actual rug!  I start with a few rows of scrap to get the warp spread out, evenly tensioned and checked for any errors.  Then I weave in some creamy white "header threads" that later will be folded over and hemmed along the ends of the rug. 


Little Claire hopped right up on the bench, just like 80+ year old Ron told us he did as a boy, by his grandmother Sanna's side.  Carrying on the tradition of teaching and learning and enjoying the creation of something pretty and useful. 


All of my seven grandchildren have learned to weave.
Claire is the youngest, and first to weave on this particular loom.

Just look at that little butt,
next to my big Grandma butt. 


She helps with the rags and tells me what colors are coming next.  She chooses which random shuttle is next for the rug, and helps untangle the rags if they get caught on the rod below.  


She likes the idea of threads going Under Over Under Over. and looks closely at what we are creating.   Steve snapped pics of us so we could weave together.


Before we know it,
another rug is born! 


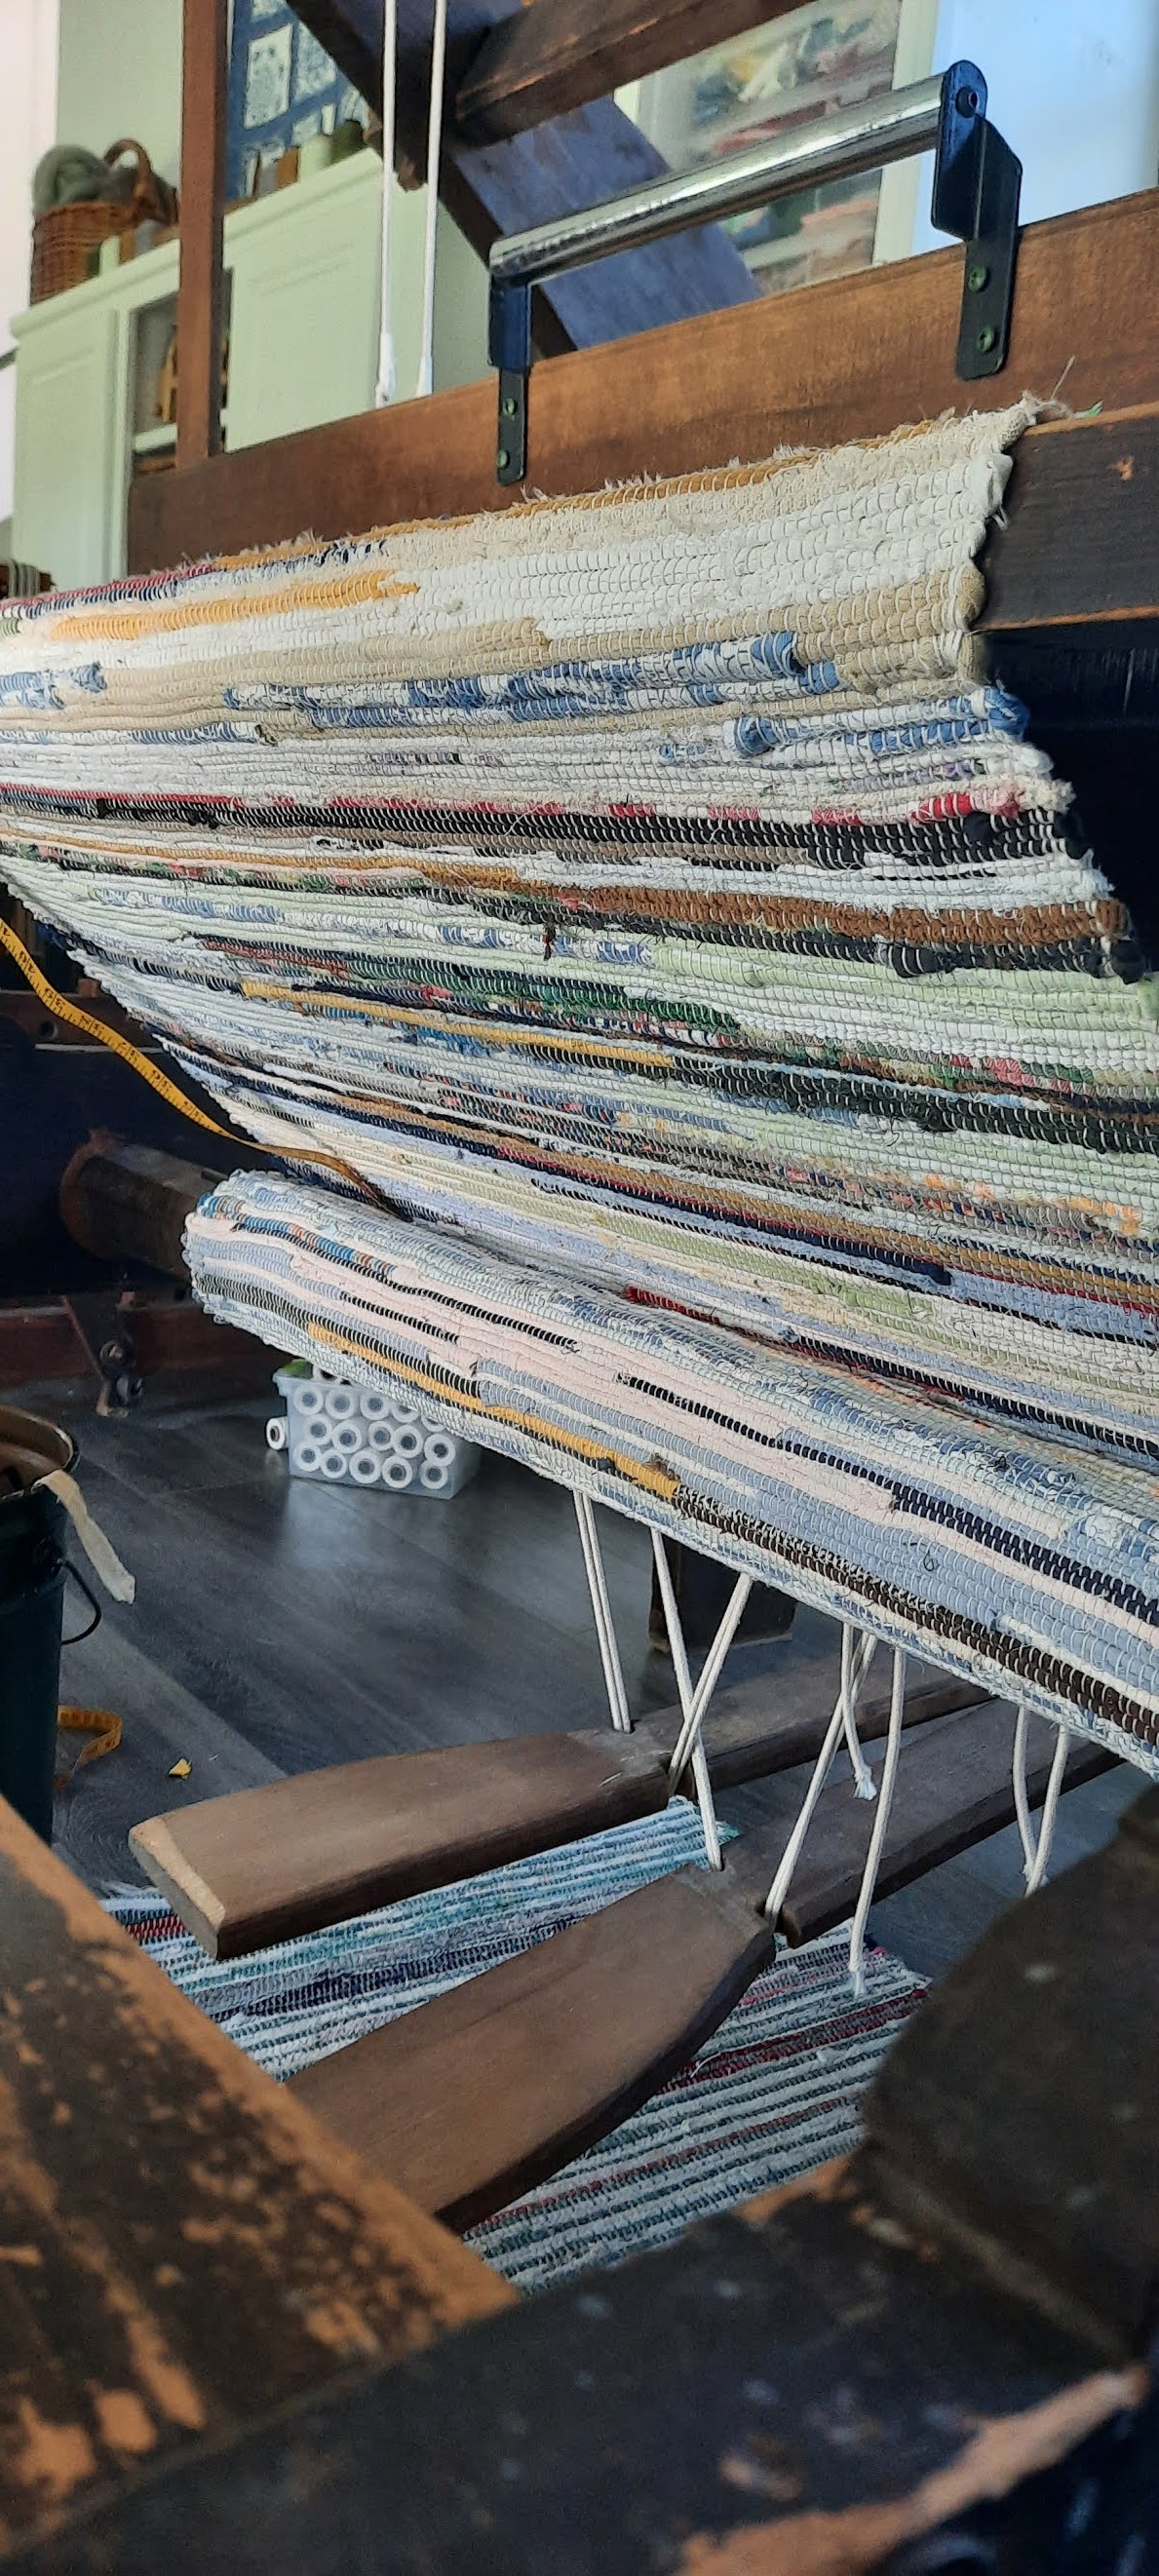
We are weaving this particular rug in the Finnish tradition of thinner rags and in a hit n miss fashion.   Sometimes I weave thicker rugs with doubled rags or a thicker strip to start with.  Sometimes I weave with thick strips of wool blankets. Sometimes with chained up sock loopers of factory waste.  Sometimes I weave with all denim fabric.

Last summer I got boxes and boxes of prepared rag balls of thinner fabrics from a retired weaver, so we have a lot of thin rag balls to use up... and a lot of warp on the loom to use them up on.  

And The Kangas Loom weaves again.