Our Wonderful Followers who come back again and again to read about us...

Friday, December 9, 2022

Back At The Doors!

This guy! 

My oh my, that Steveio is back at it again. He just dismounted the door leading from the bathroom into the dining room. It was in pretty rugged shape. The wood has been gouged up and banged up, and painted over with many layers of paint. This home had been a rental from the 1970s until 2015. It suffered a lot of years of abuse by tenants, especially on these beautiful old wooden doors.


Steve has been taking them off, one by one, and bringing them out in the garage. He removes all of the old layers of paint and varnish with a heat gun. It strips off pretty easily. Then he brings them back in the house to double check their fitting, as he keeps rearranging the doors on our house! Now this one that he removed from the bathroom he is going to put over on the grandkids bedroom. Because he already found a different door for the bathroom and restored that one last week.


Once he gets all the paint off, then it's time for me to put on a coat of our own trim paint that matches our house. It would be nice to leave them as original wood, but nothing else in the house has been left as original wood, so they do need to get painted again. They are still pretty scarred up wood tones and patched and sanded, and wouldn't stain as nice as one would think anyhow.  I know it seems like a shame to paint them again, but this way everything matches throughout the house.


So this is been his project for the last week or so, in and out and in and out with doors. He brings them into his garage and gets to work on them. 

P.S., this is the decorated little pergola walkway 
that goes between the she-shed and his garage. 
It's all dolled up for Christmas,
 just like the front of the house.

Here is one of his finished doors. It is between the dining room and the main bathroom. It looks so nice after we put on our old fashioned crystal door knobs. He is really doing a great job.  (I do the touch ups).


When he rearranges the doors, the little latches in the jambs are not always lined up properly. He has been making little "Dutchman Patches", a woodworking technique that puts a piece of wood into a place where there was an old latch, and nobody can tell when he is done.   He is fixing up the door frames before he brings the doors back in. Of course, in an old house, nothing is straight and square. It takes a lot of measuring and back and forth marking and scribing to get it just right.


As I wrote in my last blog post, he also has been covering up our fake molded plastic-y looking bifold doors on our closets. He's been covering them with panels of beadboard and it sure looks a lot better! It gives it an Old Farmhouse-y look. Even though, back in Old Farmhouse days of the 1800s, people didn't have big closets. They just had a few pegs on the wall to hang up their Sunday Best or their everyday work clothes. Take their choice and grab it off the peg.  We are so spoiled with choices of clothes and big closets to store them in. 


I think these bi-fold doors look nice with the beadboard paneling on it. It kind of matches and harmonizes with the beadboard wainscoting that we put in the master bathroom, seen through the doorway.


So far he only put on two of the crystal door knobs on the two center pulls of the bifold panels. But I think I want them on all four, like we had before. I kind of use one knob to open the doors and the other knob to push them closed again. So we will see. He said that he can add them easily, even though the doors are already mounted into place. 


Now he is working on the ones for the guest room/office. And then we might do something with the ones down in the she shed using v-groove board that matches down there.


It's so cute, each time he's done with one of the plastic-y looking hollow core doors, we set them out by the road with a free sign on them. Then I go on our local buy sell trade Facebook group and post what's called a "curbside alert". I gave the dimensions and said that there's a free door here to pick up and post our address. Within 5 minutes this one got picked up this morning. The guy even wrote back to say "thank you"!


Reuse

Repurpose

Recycle!!!


Oh, here's another project Steve worked on last week. I forgot to post about it. Since we moved our bed in our bedroom on an angle, we no longer have bedside tables within easy reach from the head of the bed. What we miss the most is a spot to put the individual controllers for our heated mattress pad. Also Steve likes to keep his glasses near the bed. That way if he gets up in the middle of the night he can still see without stumbling over stuff. So we needed just a little spot to put those things that didn't take up a lot of room.

I came up with this idea and briefly explained it to Steve. A little shelf for each of us that can screw up from underneath into the window frame. Each of us has a window frame right by the head of our bed, why not attach a type of a shelf? They can be easily detached and unscrewed and nobody would even know they had been there there.

 In a matter of a few minutes out in the garage he put these two little shelves together with a little lip edge so nothing falls off.  His is a little longer to also hold his glasses. I painted them up to match.


See, here is where they go? On each side of the bed. We really like having the bed on an angle this way, it gives a little more room and direct access to walk from the bed to the bathroom at night. As we are older now, we make more trips! When the bed was on the other wall, Steve had to walk around three sides of the bed to get to the bathroom. Now he gets a direct shot! LOL


Remember a few blogs back I mentioned about stopping at the ReStore in Green Bay? I found this pendant light fixture that matched my other lights for only $6. It's normally $39 new in Menards. I grabbed it, not even knowing where I was going to put it. But I wasn't going to leave it sit there on the shelf.


Steve took a look at my beautiful antique lamp that I have in the bathroom. Don't worry, it's far away from the bathtub or the sink. The lamp is beautiful but the old socket housing on the end had been cracked one time when it got tipped over. It had a different shade on it that I really didn't care for. In just a few minutes Steve was able to disassemble the old socket and shade and reattach the new one and change the wiring. Now it's all back together and works perfectly!


~~~~~~

While he is busy in and out and in and out today, I am working on my quilt. I do a couple swaths back and forth of my free motion stitching and then take a break. Like to write this blog! Then I go back to it. It's very pleasant in the she shed today. I have soft Christmas music playing and we are expecting some snow later on.


Here are my little hooks and swirls stitches that I'm doing on the quilt. I just love this pattern and it's so much fun to do. The machine just glides across the fabric, being guided by my hands, with each little loop and swirl and curve created all by myself. There's nothing computerized or automatic here!  The stitches go where I put them, and are spaced evenly by my speed of moving the machine.  Fancier big long-arm quilting machines have a "stitch regulator" that speeds up or slows down the stitching according to your movements. Not this one. It's all "by myself" to make the stitching even.


I have also whipped up some winter hats! I knit when we are traveling, or when we are sitting out on the front porch, or watching a movie. I listed them in my Etsy store, so if anybody's interested in a cute little hat for a Christmas present, there they are. They are only $10 plus shipping, they are a bargain!


In case you think that I defer all of my mechanical stuff over to Steve to take care of, here is what I do. Each time before I start another quilt I give my beautiful antique Singer Featherweight a "spa day". Actually I do all of my sewing machines, so they work right when I need them to. I take it apart and clean out any of the gunk or fuzz or lint. Then I lube all of the gears and then I add oil to all of the moving parts. Everything is cleaned up and freshened up. 


The electric motor has two different grease ports. I clean them out using a little plastic straw that is actually the center part of a plastic type Q-tip. I use it to get the gunk out of the ports and then I refill it with new grease specifically made for these beautiful old Singer sewing machines. I get it at the Featherweight store online.  https://singer-featherweight.com 


After everything is all spiffied up, I put it all back together, attach a new needle, and do a test swatch. Good to go!


Speaking of that, 

it's time for me to go 

and get back to work on my quilt!


 Tomorrow's blog I will talk about the wonderful day I spent with our two youngest granddaughters...


Wednesday, December 7, 2022

Now What Are We Up To???

"Honey,  I need you!" 

These are common words around our house. It usually means that Steve needs an extra set of hands, or a gopher to run and grab some tool while he's in the middle of doing something. Lol. Such is the case again. Steve needed me to hold the other end of some large panels of beadboard paneling coming through our table saw.  This product is different than the beadboard slats we put on the walls in the bathroom.  These are entire 4x8 sheets of paneling that he wanted to cut up. 

I snapped this pic before he started actually running the saw so you can see why he needed an extra set of hands. As he feeds the wide sheet through the saw, he needs someone on the other end to hold it steady and not let them go crooked.  That's my job. 


After he made the first cut - then the second cut -  then third and fourth pieces were a little more manageable.  He has a set of tall red rollers that can help when doing this too. (you can see one in the foreground).  But he likes having me out there on the catching end of the saw.  It feels good to work in a team effort. 


Soon he had four long pieces cut to just under 15 inches wide. So now what do you think this guy is up to? 

He carried them all down to the basement and laid them across the sawhorses. I guess that means that it's my job to start painting them. They will need to be primed first and then get two coats of paint.


If you read my last few blogs you know that Steve is not happy with the modern looking hollow core MDF whatever PVC whatever doors that were put in various places in our house. They were done by the previous owner during remodeling. Steve has been slowly replacing the doors one at a time.  First the Master bedroom, then the bathroom, and next the grandkids guest room.  He has been restoring old vintage doors that he has been collecting on Facebook Marketplace.  Soon all of the doors will be matching with the originals that were left in the house. 

Soooooo  of course, years ago in the late 1800's, they didn't have bi-fold closet doors. Heck, many houses didn't even have closets, just pegs on the wall to hang your Sunday Best clothes. It is impossible to get vintage bi-fold wooden doors to match what he has been doing. 

Because he doesn't like the look of the modern bifold closet doors, he wants to cover them up. Yes, they look nice the way they are. They are nice and neat and white. But they are fake molded hollow core doors in a more modern design than what our house has throughout.

Here is the one on the she shed:


Here are the ones in the office:

I came up with another idea.  Using the same beadboard paneling we used on walls in the grandkids' guest room, and on the pantry cabinet in the kitchen, we had a few sheets leftover to use to cover up these doors! 

I didn't get a pic of the ones in our Master bedroom, because he already had them disassembled and down in the basement, ready to work on. Speedy Gonzales.  He is going to glue down the new pieces of beadboard panels to the surfaces of the bifold doors. After that, he will securely nail them with the finish nailer and putty up the holes. Then he's going to run his electric router around the edges to trim them up a bit. 

Next I will be able to go down and paint them. We are doing it down in the basement where it is warm enough for the paint to dry. Although the garage is pretty comfortable when the temperatures outside in the 30s the inside of the garage remains up in the 40s or low 50s. He fired up the Mr. Buddy heater yesterday in the garage and it was quite comfortable. But not to run it for hours in between coats of drying paint. 

~~~~~~~~

While he was busy working on the closet doors, I was busy working in my she-shed. I made my little antique Singer Featherweight do a heavy duty job with some thick denim twill fabric. It easily sewed through three and four layers of this fabric like a workhorse!


My neighbor across the street had two of these little wire shopping carts. She needed to have some fabric liner bags made with handles. She needed something secure and heavy duty before she gives them as gifts to some other people at Christmas. They are going to use them for shopping at farmer's and flea markets. I used up some of this really cute pinstriped denim fabric that I had in my stash. I took some measurements and did a few creative cuts. I made some nice heavy duty handles and a double layered bottom surface. The entire bag can be lifted out and be carried separately if needed.


The top edges fold over and the little handles hold it into place. It really worked out better than I expected. The fabric is a lighter blue stripe similar to railroad engineer overalls. 


Here are both of the little carts, ready for gift giving to my neighbor's friends. In return we bartered and she is bringing me some of her wonderfully delicious home canned bread and butter pickles! I sure love a good barter.


~~~~~~~~~~

So after our busy day of projects, we curled up in front of the fire last night and watched some HGTV shows. That's where Steve and I get our ideas from you know!  We love Bargain Block, Rehab Addict, Maine Cabin Masters and Home Town.  Ya know, the ones where they REALLY do the work, and restore and reuse as much as they can of the original home. Not those "rip down, make it all new" type shows.  Steve pops a bowl of popcorn and we snuggle in front of the fireplace in the She Shed to watch our shows. 


~~~~~~~

Today, I think I'm going to start doing the quilting the layers of swirling stitching on the frame of my newest quilt. I got it rolled on the big quilting frame two weeks ago, before I got sick. Each layer needs to be carefully rolled on with even tension and no wrinkles. The bottom layer is the backing, then there is the fuzzy cotton batting layer, and lastly, on top, is the carefully pieced quilt block layer. 

Then they need to be pinned evenly to the leader fabric of the back roller before I can start stitching through all three layers.  The big sewing machine glides around the surface, stitching it all together. I guide it with my hands on the downturned handles, held like a bicycle. I move it around, making the stitches as even as possible, not too fast or they are too far spaced apart. Not too slow, or they are crammed together and look ugly.  I do not have a "stitch regulator" like bigger fancier machines.  So it's all just me and my judgement on how and where to guide the stiches, and how fast or slow to go.


Here it is all ready to go. 

Before I start, I service up the machine a little bit give it some fresh oil, take out any lint or fuzz, and put on a brand new needle. It's kind of like taking care of a car, you can't expect it to roll down the highway mile after mile unless you do some service in between at regular intervals.


I just love this pattern --- it's called "Pineapple". I started sewing this one when we were camping this past fall. Once it's finished I will list it for sale in my Etsy store.


I'm finally feeling good enough to get things done, so I'm going to get this one stitched up in the next few days. After it's done getting stitched, then I put the binding around the edges to complete the quilt. It feels so good to do that final process, like completing an artistic creation. I put the tag on the back as a signature and my quilt is done! 

I also have four large quilt blocks that need to be quilted in layers into fabric to make some matching throw pillows. I will finish them up for the previous quilt I finished for on our own bed. 


As I am typing this, I can hear Steve in the basement running his finish nailing gun. Guess that means I better go start painting???

Always a project, and it seems like there's never enough time!  


Sunday, December 4, 2022

Clark Griswold Pfundtner and Getting Ready for Christmas

Three little elves stopped by to give us a hand the other day. It was time to start getting ready for Christmas. We store all of our red and green supply totes stacked up out in the garage. So these little elves started carrying things out of the garage, and around to the front of the house. Some of them are outdoor decorations and some of them are indoor. It was up to me to check each tote and see where it had to go. How wonderful to have these little elves haul everything out for us? The biggest helper elf Chelsea helped commandeer the loads.


Little Clayton elf decided it was better to haul the really heavy things on the red wagon. Since all of our snow melted last week, he was still able to roll the wagon around and down the sidewalk. I suppose if there had been snow on the ground, he would have grabbed a sled. "Work smarter not harder" he says!


Littlest elf Claire was very excited about hauling the snowman. Because they are lightweight, she could handle those on her own. Then oldest elf Chelsea trudged back and forth hauling the heavier items and was really appreciated as being the organizer of the activity.


Little Claire found Rudolph. Even though he was kind of a large for her, she managed to bring him all the way from the garage and up the stairs to the front porch.  This is a newer holiday acquisition, so he needed a special new spot for the outside decoration. She got to decide where he needs to go.


Now came the biggest project! The tree! 

Last year we had seen a Pinterest idea to wrap your entire decorated Christmas tree (lights ornaments and all) with wide pallet strapping plastic. Round and round and round we went. Then we were able to carry it out the door in one complete piece and store it the garage for the entire year. The only problem was that it takes up a lot of valuable space in the garage. Instead of being disassembled in individual totes, and undecorated like normal, we stored it that way all summer long. But it was in the way of Steve's other workshop projects.  I don't think we'll do that again this year. I think we will reduce things back to their original totes and packaging. But it was a good idea and we thought we would try it.

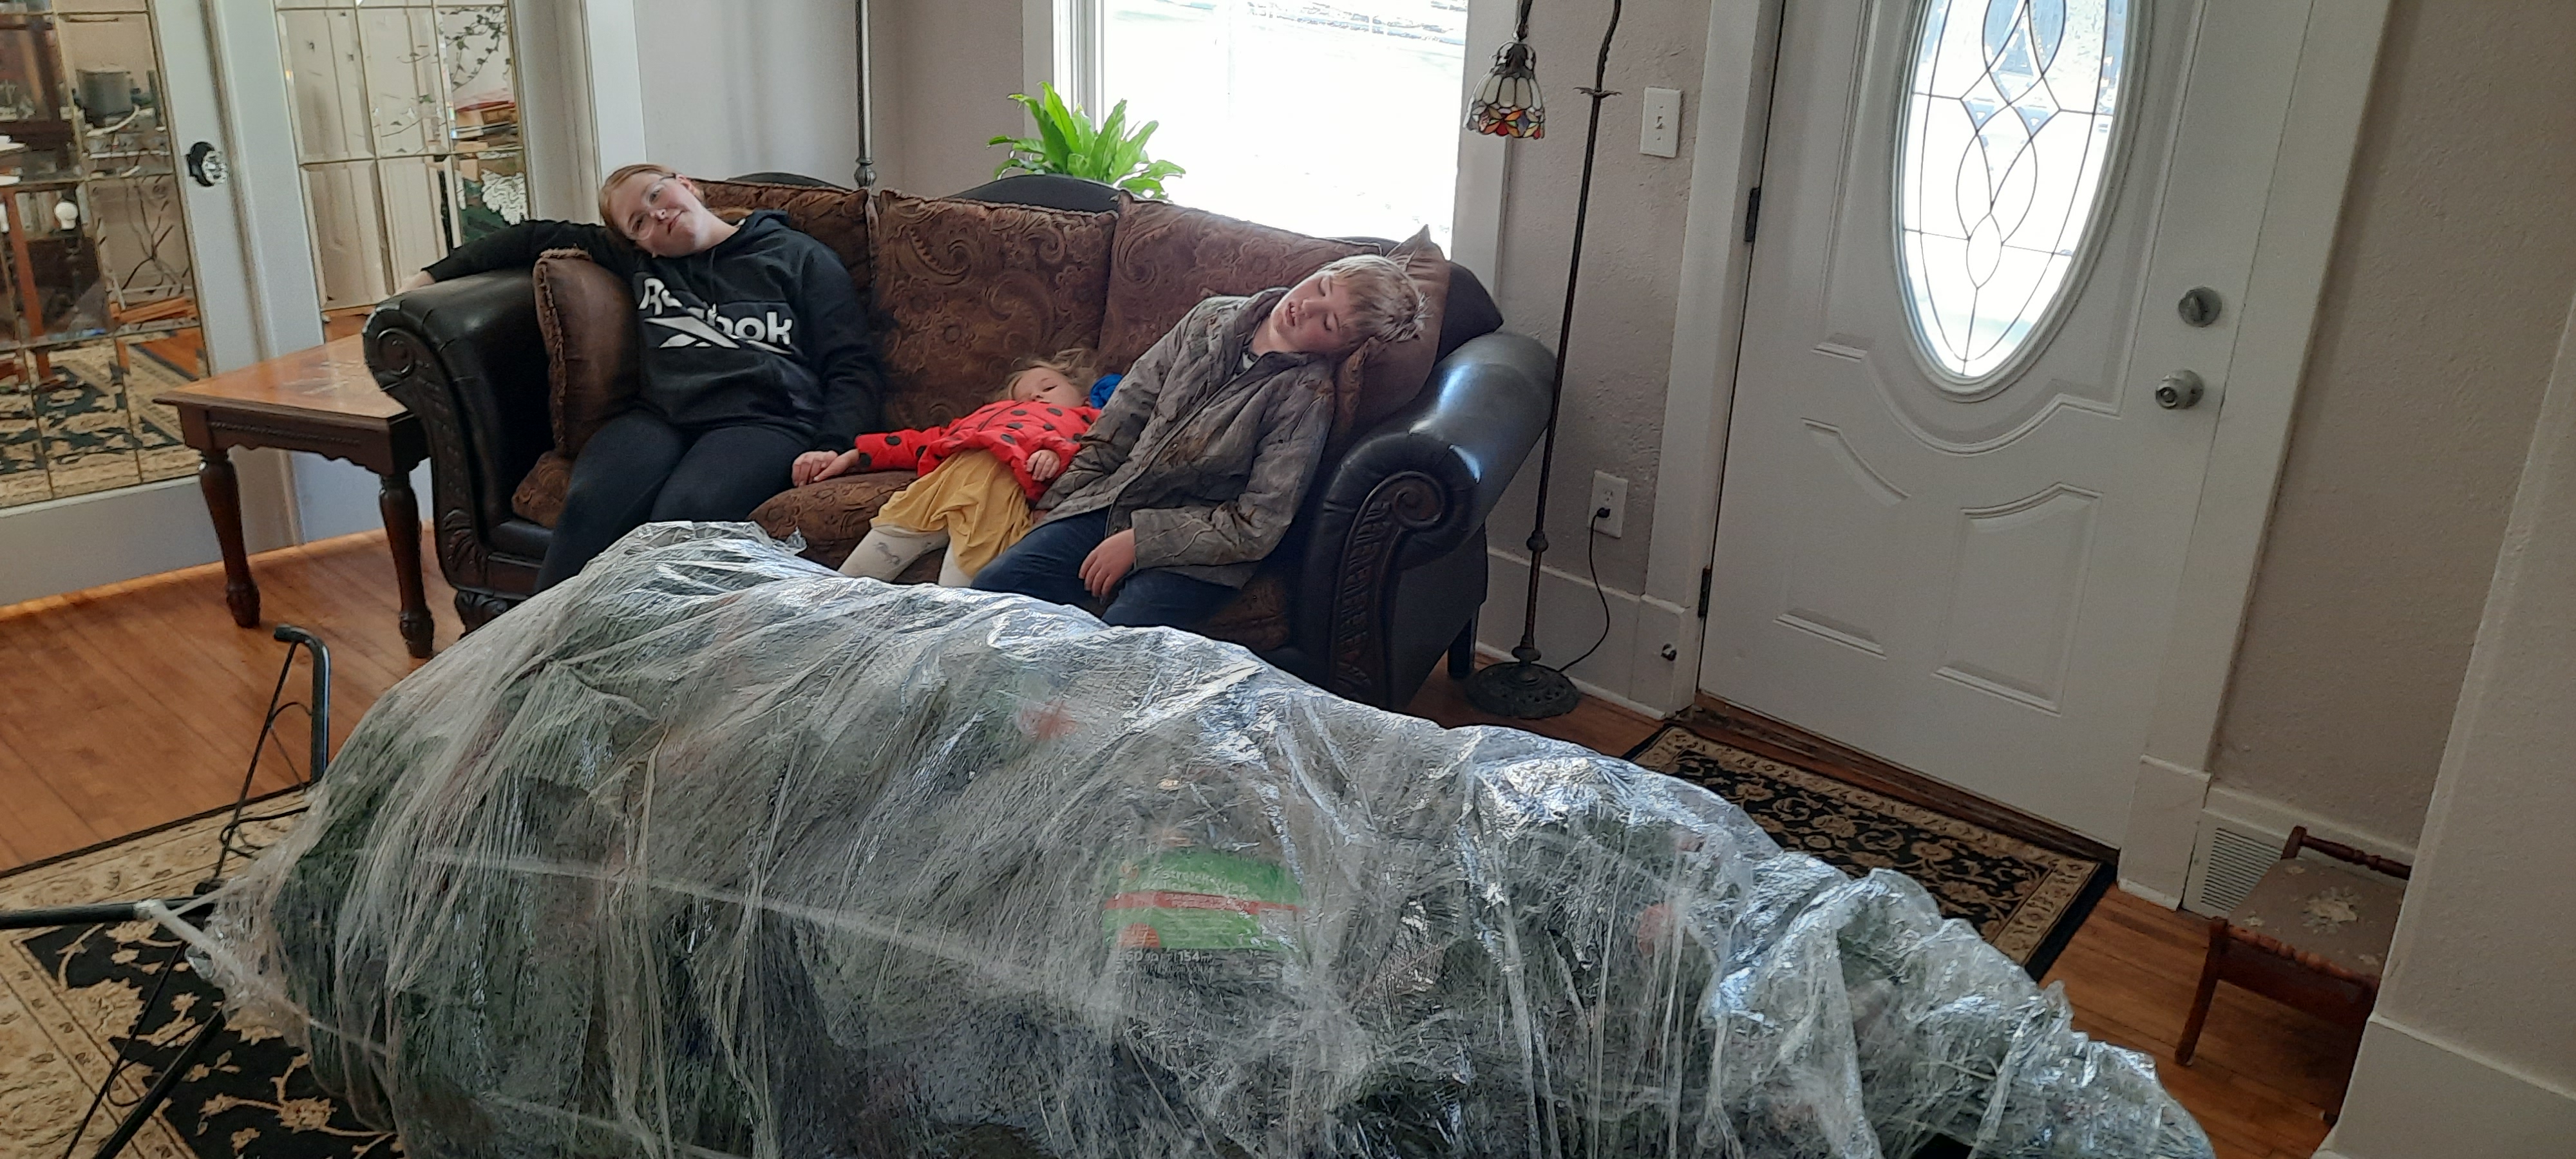
All three of the little elves helped Grandpa carry the bound up tree around from the garage, down the driveway, across the sidewalk, and up the front steps. I held the door open and whoosh, and it came!!!


The grandkids were wondering how the Grinch did it so easily by pushing a full tree up the chimney? This was a really tough job to carry a full tree into the house. They were exhausted!!!


I had to revive them with the promise of hot cocoa. They jumped back into action and started to carefully cut away the plastic from around the tree, without cutting any important lighting wires or ornaments underneath the plastic.


Before the plastic was even completely removed, Clayton got right to work underneath the tree, finding the cord and plugging it in.  Our LED lights are on a remote control with 8 different variations of lights, changing colors, or all white, flashing or not.  They love to play with the remotes and change it from time to time.  So does Steve. It's his "thing". 


The other problem with wrapping up the tree is that all the ends of the branches get bent and curved inwards. It took quite a while to push and pull and rearrange each of the branches to point outwards again. Then of course we had to rearrange the ornaments so they would hang decently. I think it was just as much work to redo the tree as it was to originally decorate it from scratch. So I don't think we will do this method again at the end of this season. 

We also corralled up all of my little horsey ornaments and arranged them across the mantle with some matching lit up garland.  These are some of my favorite and most memorable ornaments. 


So far, the inside of the house is pretty well decorated except for the Christmas village. The grandkids are going to come back and do that because we ran out of time, and plain and simple, it was Grandma and Grandpa who both ran out of energy!


~~~~~~

Even though it was pretty cold and windy out last Sunday, we decided to decorate the front of the house and get up all of our exterior decorations and lights. We figured we might as well get it done before the snow flies. Even though it was the very end of November, we usually wait until December to do this. But we happened to have one good day to "git 'er dun". 

This year we went one step further and permanently installed some nice white rubber coated metal hooks across the entire front porch. Now we can put the same garlands of lights in the same spots every year and not have to mess with staples or nails or wire ties. It will be much easier to decorate in future years. We had done this on the house in Chilton too, and it sure made it easy. Because they are small and white, the hooks are not really noticeable throughout the summer months.

We unpacked the totes and started our outside décor.  


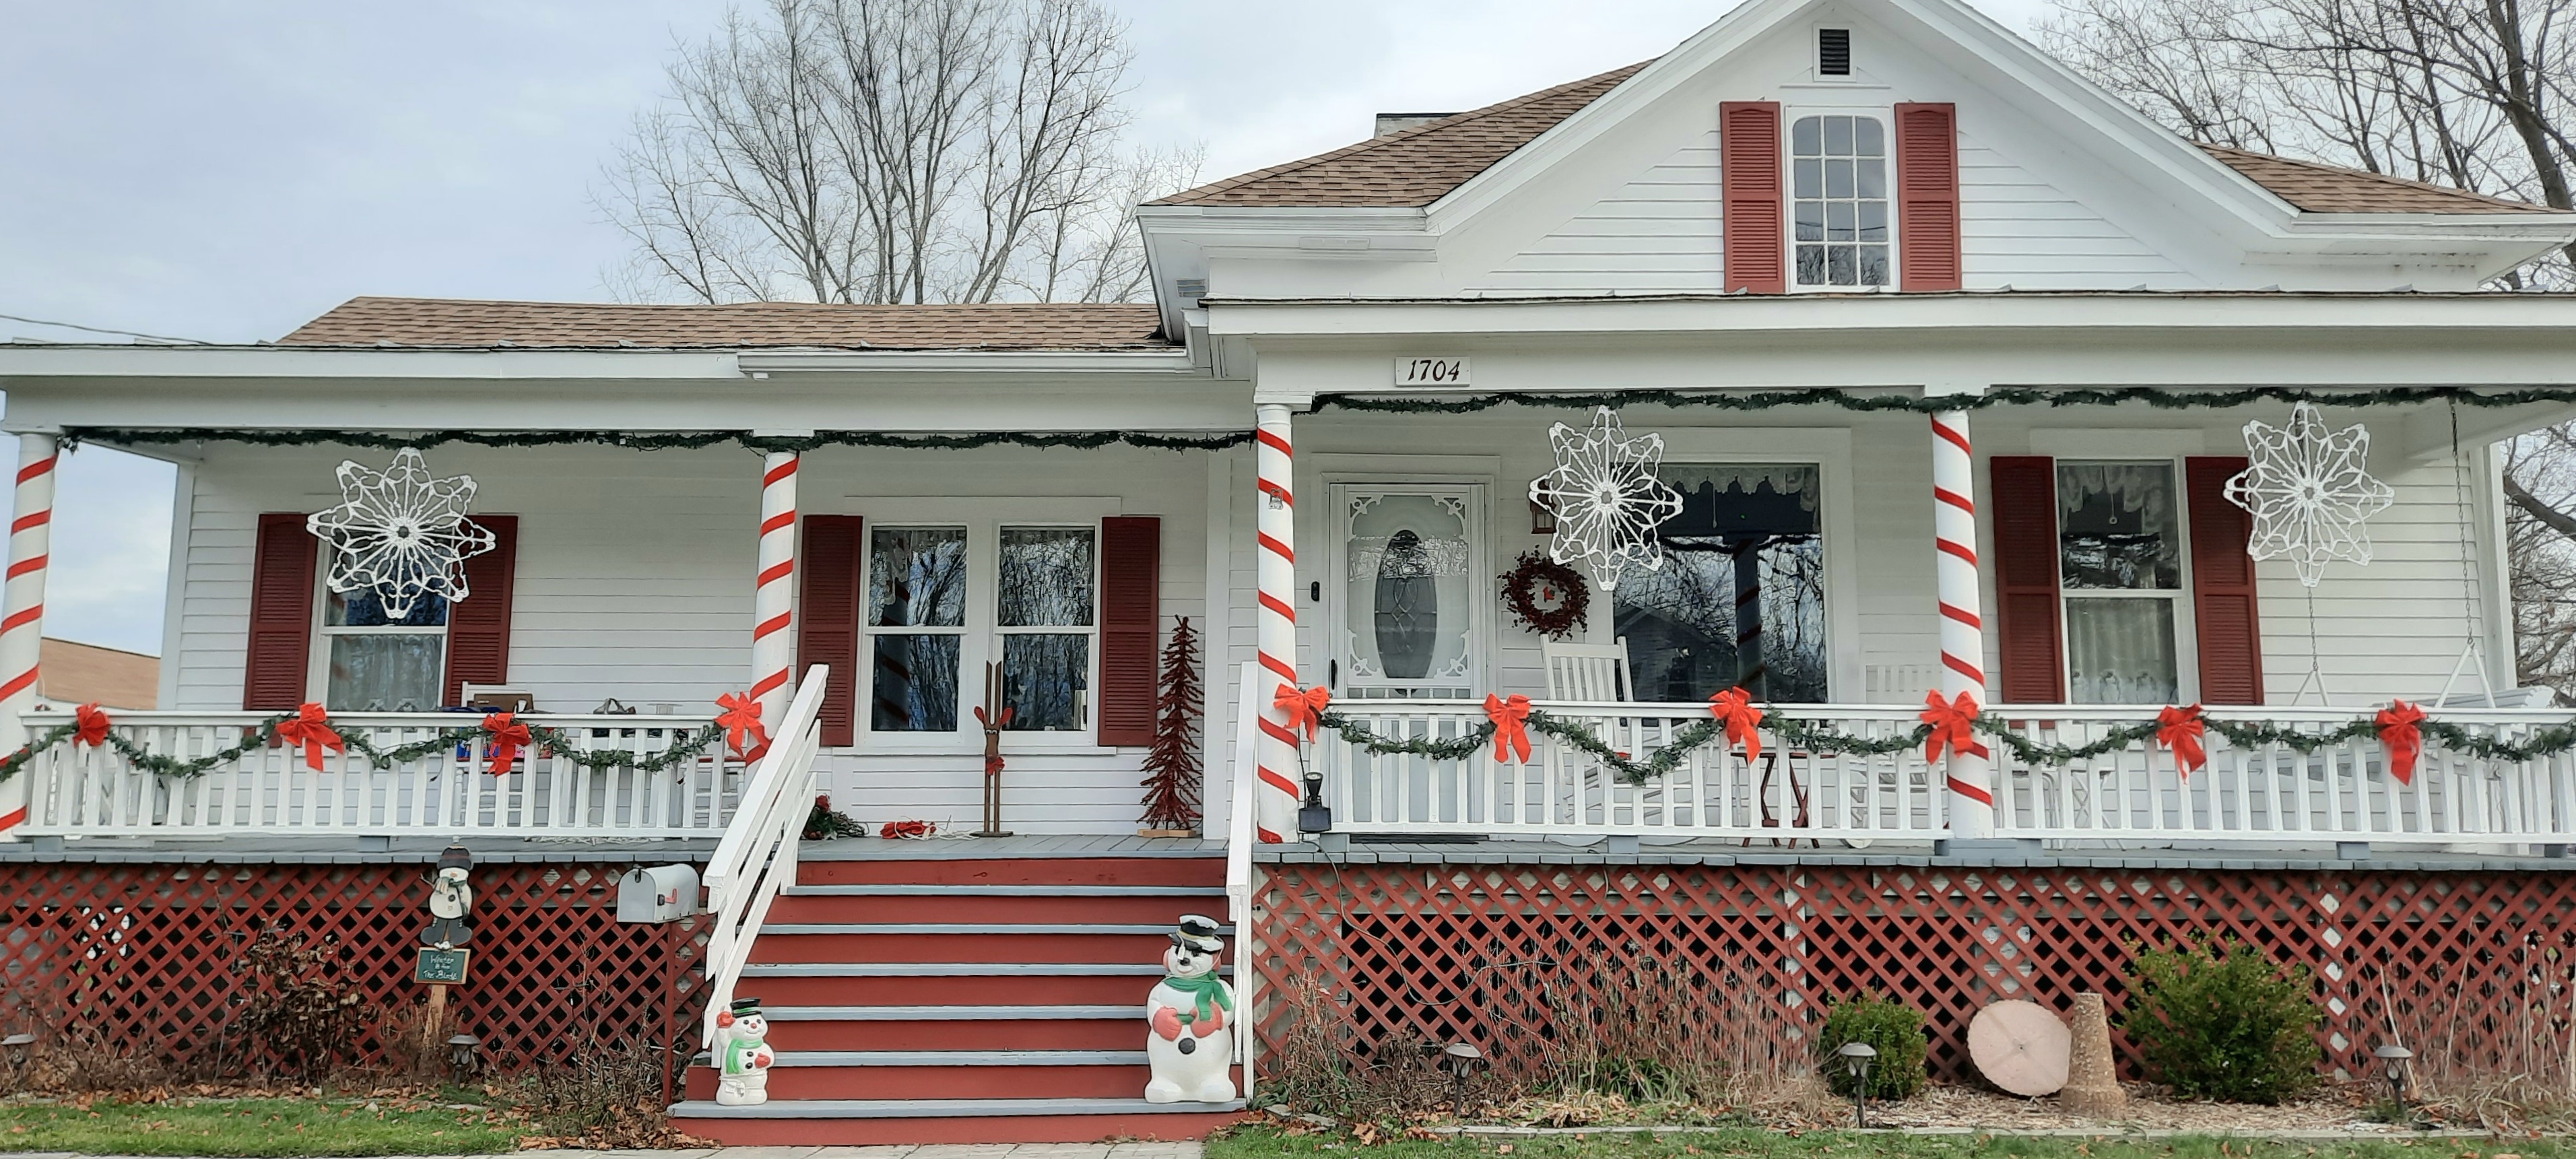
I enjoy wrapping all of the porch columns like great big peppermint sticks! Three years ago the grandkids helped me make these great stars out of cheap plastic Dollar Tree hangers and a hot glue gun with some pretty sparkly sequins. Later on, I also tied them down at the bottom to the railing so they don't blow around too much in the upcoming gusting winter winds.

here is how to make them:

So here's the front of the house pretty well decorated for the winter. It's the same way we've done it the last two christmases. And I kind of like it. I also added more peppermint stripe ribbons to the stair railings and also to the entrance over by the pergola to the she shed, not in this photo.


Now that we got all the decorating done, 
it's time for "Clark Griswold Pfundtner" 
 to take over...


The outdoor garland lights end up being plugged into three different timers so that way we are avoiding having any cords crossing the walking areas to create a tripping hazard. Now it's time for Clark to get all the lights functioning and repair any burnt out sections or fuses, he also needs to get these timers set correctly. It really bugs him if one section of lights goes on or off before the others. At the magic hour of 4:30 p.m. as it is dusk, he wants them all to go on with a flourish... at the same time!

Steve is even wearing the same gloves and hat as Clark! 

With some tweaking and fiddling over the next few days, he finally has them synchronized to go on perfectly and also light up the two little snowmen out in the front by the bird bath. Yes, my Clark Griswold Pfundtner has the Christmas Spirit deep in his heart. Awwwwww.


~~~~~~~~

During this past week, I've added a few other things here and there throughout the house, including the little Family fiber optic tree. It's a Family Tree because there's an ornament on there for every member of our extended family. It's fun when they come to visit to search and hunt around until they find their name.

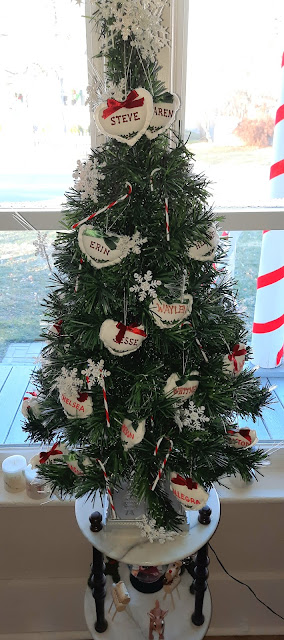
It's pretty cool at night

right in front of the dining room windows. 


My little wooden toy soldier is on guard by the front door. Along with the ring of Jingle Bells on the doorknob. I got this soldier many years ago from a co-worker when I sold real estate in Green Bay. He was also a woodworker and made it for me for a Christmas present in our Holiday Office Exchange. It's one of those precious things that I hang on to year after year. 

The bells give  a familiar festive chiming sound
each time the door is opened.


I line up these adorable old-fashioned jumping jacks on magnets for the grandkids to play with. They are stuck to the side of the refrigerator. That way they can play with them and line them up and rearrange them. One year I tried hanging them on the tree and they couldn't pull on the bottom strings to make them jump without upsetting the tree. It worked out much better for inquisitive little munchkins to play with them in an easily accessible area.

I just love old fashioned type ornaments and silly play things for the kids.


This creative little tree in my kitchen is metal and the ornaments are magnetic. They can be rearranged and it is strung with little tiny LED seed lights that flash and glow in alternating patterns. The grandkids have dubbed this the Grinch Tree because it looks like something right out of Dr Seuss. It's one of those trees that they can play with or rearrange every time they come over to visit. One year, some of the grandkids gave me the cute little sign hanging overhead. That makes sense doesn't it?


We put the silly little Charlie Brown Tree in the middle of the table in the kitchen. It's something that they can rearrange the ornaments and play with. They laugh about it, because it's so spindly and awkward and ugly, but cute in its own way.


After my mom passed away last year, I asked my stepdad to pick out a couple little things that were mom's holiday favorites to send to me that I could keep for year after year. He sent me a whole bunch of her Nutcracker collection. I distributed them among all of the grandchildren so everybody got a large nutcracker. I kept these six little tiny ones for myself. I line them up to stand guard in this window sill. I smile every time I see them and think of my mom.


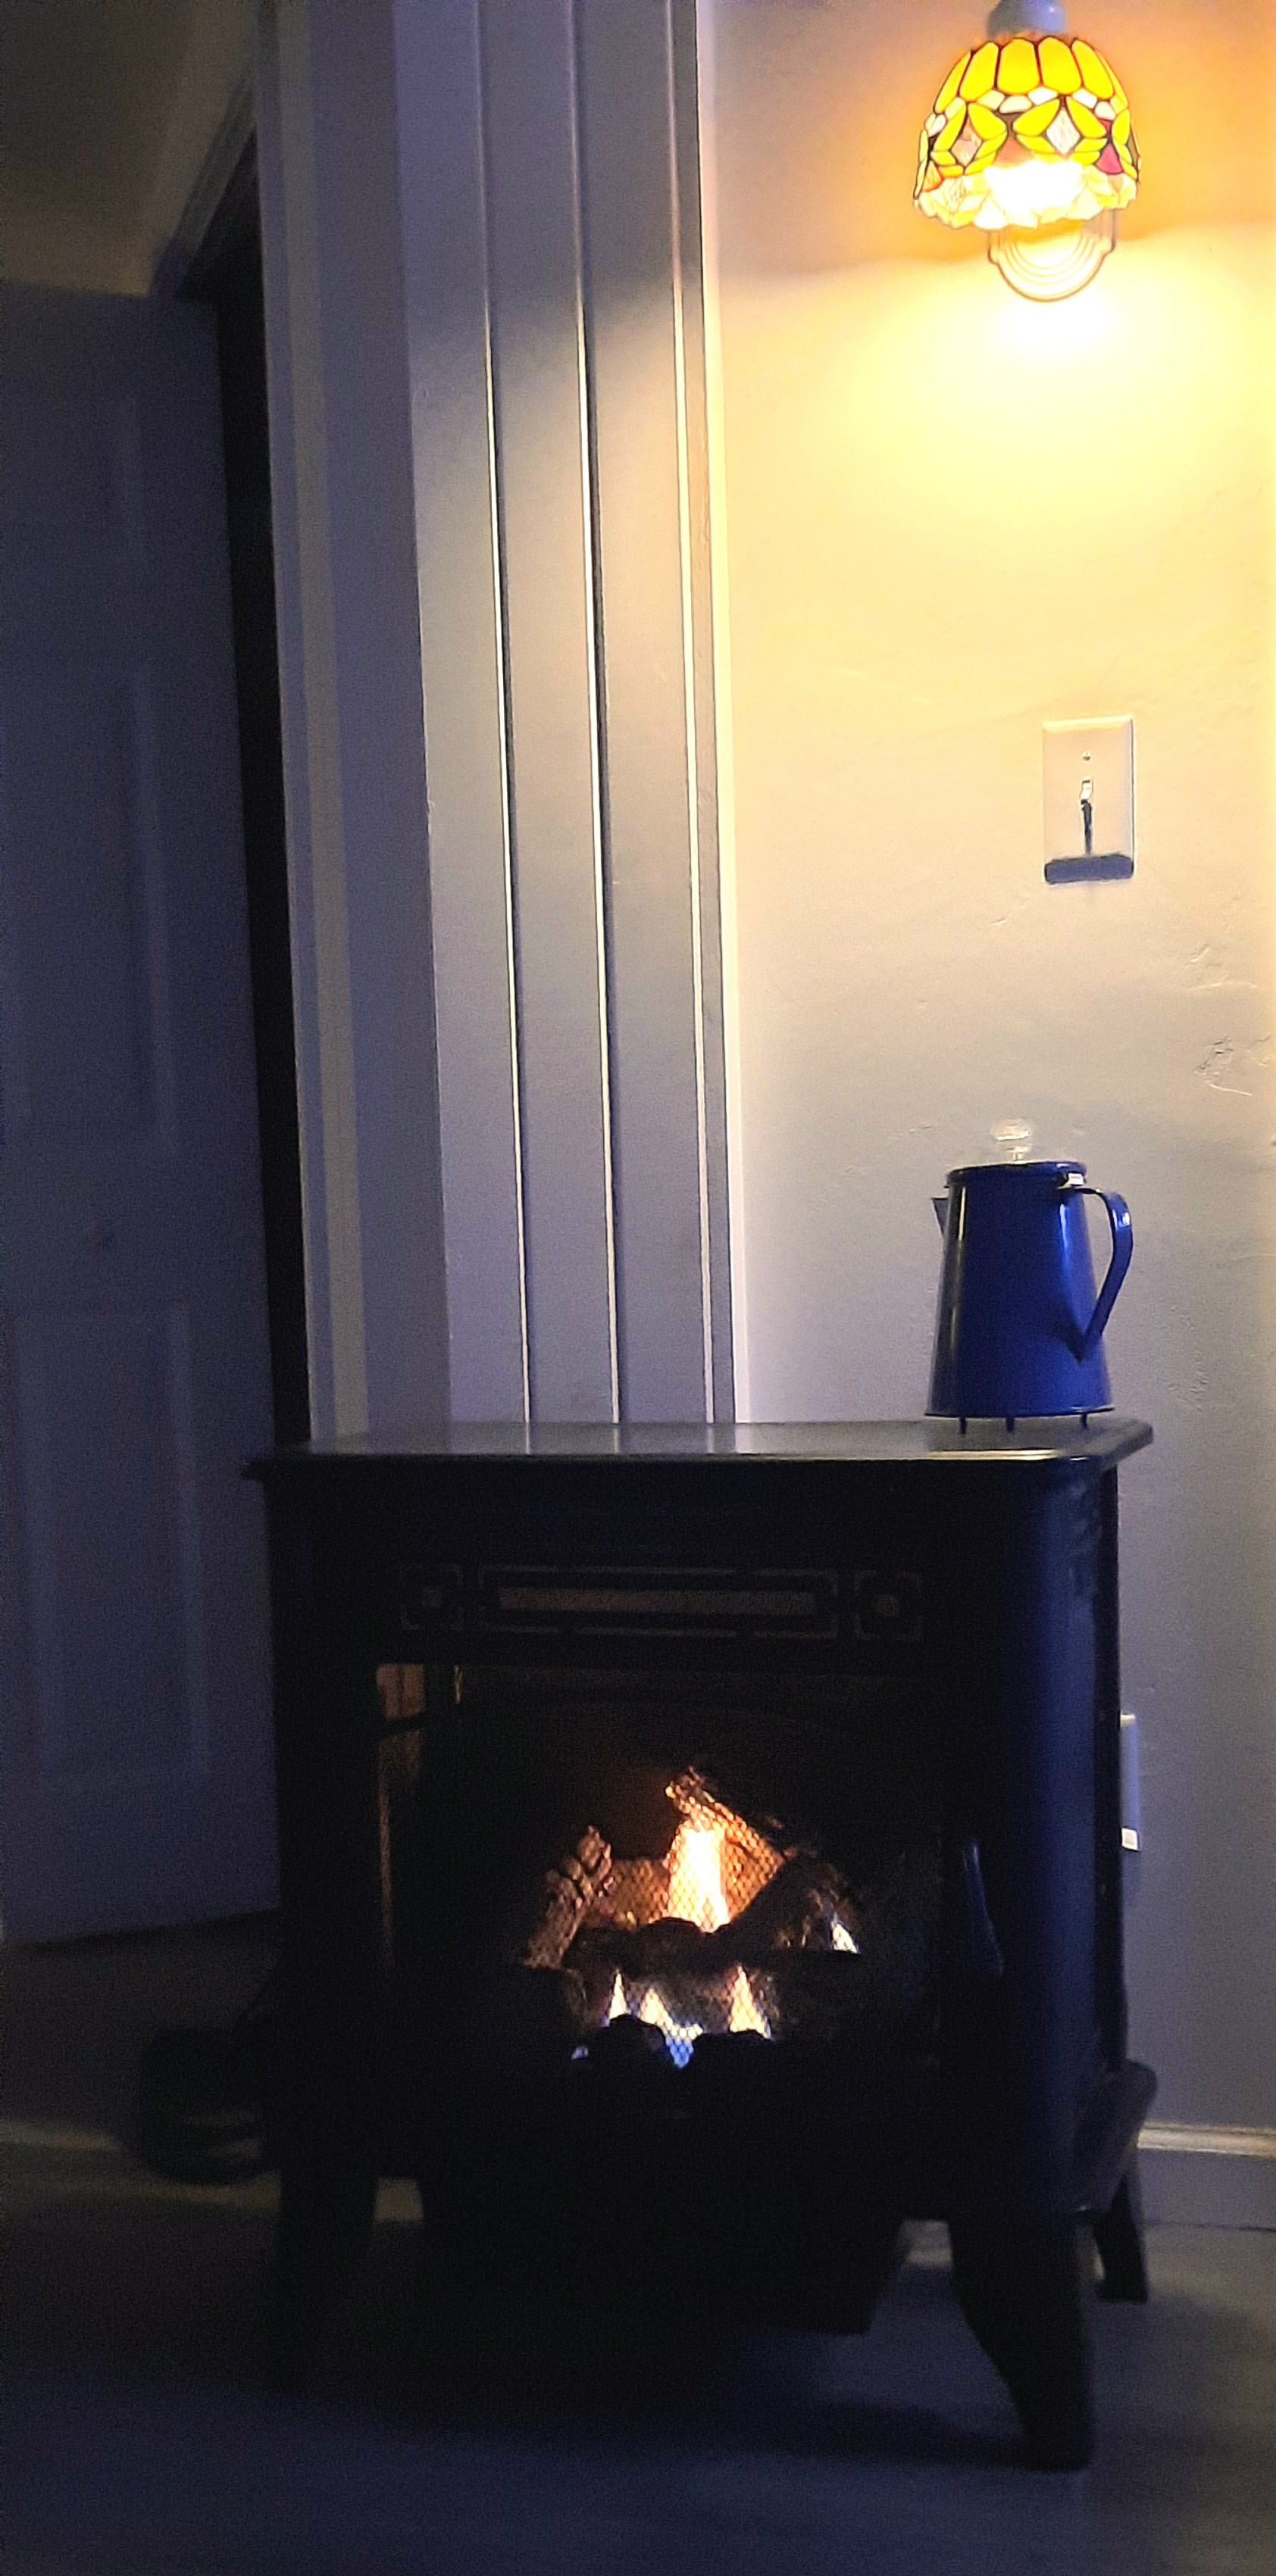
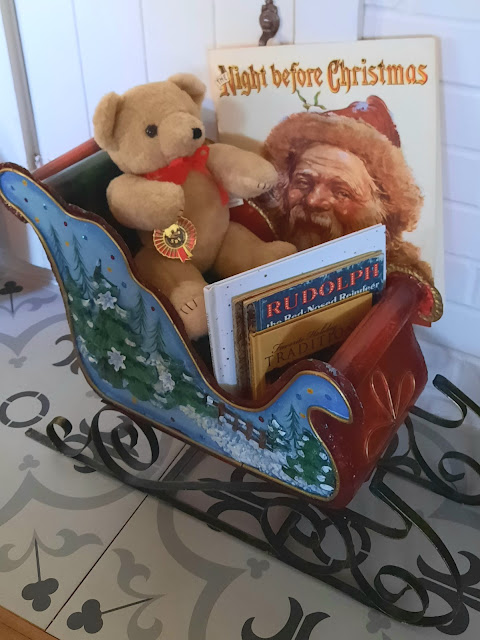
Sitting next to the fireplace is our holiday story bear in his sleigh with all of the Christmas books. It's great to cuddle up with a couple grandkids at a time and read Christmas stories--- especially the vintage ones from Little Golden Books like Rudolph and Jingle Bells. Of course we always read the traditional Night Before Christmas too.


20 plus some years ago a fellow fiber friend in my spinning guild made me this cut out fret work paper tree in the middle of my dining room table. It is of the Twelve Days of Christmas! She made it herself with an exacto blade and cut it out from sturdy cardstock. The top of course is the partridge, the next row down has two turtle doves, three french hens, etc. I carefully fold it up and put it away each year. It's been on the center of my dining table every year since she made it for me. I also found the wonderful peppermint stick striped candles this year when shopping with my friend Vicky. We will burn them during special meals throughout the holiday season, and maybe put them out year after year depending on how far down they get burnt.


Besides needing the kids to assemble the Christmas Village inside of my china hutch, I think I am pretty much done. We have completed most of our Christmas shopping and I just have a little bit more wrapping to do. I'm still not quite feeling up to snuff yet.  I am feeling pretty good so far recovering from whatever this long illness has been.  Next we can work on Christmas cards and making cookies.  But for now, we can sit back and enjoy the season...


And if you are in the area, stop on in! 


I think it's time to crank up the Christmas music,
 sit back with a cup of cocoa and tiny marshmallows 
and take a little break.


~~~Bring on the holidays~~~