Our Wonderful Followers who come back again and again to read about us...

Friday, October 30, 2020

Assistant to the Lumberjack

Steveio was on a roll today.  His goal is to remove seven junky box elder trees from growing around the cement slab foundation in our backyard. He calls them "weed trees". He would like to use the slab in the future to build a cute Little Red Barn for a garden shed. 

He figures that the sooner he gets the trees out of there, the better it will be. It will be easier to remove or burn out the stumps. If any of these half rotten trees were to blow over during the winter, their roots could pull up and damage the cement slab that's already there.

So far he has cut down five of them with the chainsaw and most of them are rotten on the inside.  So he was right in getting them down out of the way. 

Today he had the last two to get rid of. The only problem is, exactly where they would drop is where he has two beautiful trees that are growing up nicely. One is a ornamental crabapple tree and the other one is a nice black walnut tree. So his problem was how to guide them down without harming the nice trees, as they land on the ground. 

So that is why he had called upon his Assistant to the Lumberjack-- (ME).  It was up to me to sit behind the steering wheel of our Saturn SUV with a rope attached to the hitch.  This is why:

See these two angled trees in the picture? The two with the Red Arrows? Those are the two that he wanted to take down.


The two trees with the yellow arrows are the good ones that he wants to preserve and not get damaged during the process.


They are leaning far over to the right and he wants them to drop closer down to the left in a straightforward position. So that's why he needed me to drive to the far left with a rope on the hitch as they were going down...


He got everything ready and got the big thick rope into place. Now it was my turn to help out, while he carefully cut the trees from behind.  The Saturn (and me) would be far far away to the left when this all happened. 


This was my view point from the Saturn in the front driver seat. He would tell me when I should ease the throttle carefully and help pull the tree over, as it slowly was cut away to reach the ground. He uses the hinging technique with wedges instead of a straight drop. Much safer, and a more careful process to land the tree onto the ground.


TIMMMMBBEERRRRRRR~!    

Well, actually  timber   .....It just eased gently to the ground. 

First one down, and the rope technique did the trick! It didn't damage anything and landed exactly where he wanted it to go.  He said he knew it would.   See?  No where near me or the Saturn. 


Soon the second tree was safely down and he was able to take care of cutting it all up into pieces this afternoon. We have two nice piles of wood now for the neighbor, and Steve has removed all seven trees from around the cement slab.


He will probably spend the winter 
drawing up Little Red Barn plans...


~~~~~~~

Our next project today was to permanently make sure that our fireplace is closed off that nobody will ever want to try to attempt to build a fire from inside. Both the building inspector and our insurance company wanted to be assured that it was taken care of. Because we closed off the chimney from the top on the outside on Monday, we needed to make it obvious to anyone in the future that it could no longer be used.  We already knew the fireplace from the inside had been closed off years ago by the previous owners / renters. There was a firm metal structure covering the entire flue as well as a bunch of insulation above that, blocking it off.  We checked that out before we even bought the house.  

We went one step further to add a second metal barrier with words of warning written onto the sheet of aluminum. 


Steve cut it to size, to fit the flue exactly. It was now double layered to prevent any heat losses, as well as warning anyone that it is permanently closed. 

He was able to maneuver around and get the metal up into place and attached to the sides of the brick walls, as well as the other metal flat surface.  Good and secure.  Then he sealed it all around with adhesive and a thick bead of mortar caulk.


I aimed the camera up to take this pic to send to our insurance agent.  There is no doubt that the chimney is closed off, and now sealed around all of the edges.  No more drafts or heat loss. 


We will plan sometime later to add an electric fireplace, or a vent free natural gas one like we had in our home in Chilton.  But that will come later, much later, as the budget allows. For now, we will keep the existing fireplace doors in place.  They aren't too pretty, but they will suffice.


Steve cleaned up his mess, and I told him that to a woman, this is a turn on, to see a man who is washing windows. Well, glass fireplace doors, but who cares... it's glass and he is washing them!  LOL   That's my guy! 


He slid the newly repaired glass fireplace screen back in front of the doors.  I am glad we were able to fix it and keep it as part of our livingroom decor.  Someone looks pretty satisfied that he did a good job. The King of his Castle.


~~~~~~~~~

I started a little project today myself, because I needed to take care of something that has been bothering me. When we put the ceiling up in the she shed entryway, we used new pine V-groove boards. It is also known as "Car-siding". Because it was new wooden boards, the knots were not fully dried out. Even with a coat of primer and two coats of paint, the knots have bled through over the last 12 months.

Here are the unsightly knots that make big tan blotches all over on the ceiling in the entryway of the she shed. I think it looks terrible and it was time to do something about it. 


When I first noticed them, I first thought they were roof leaks, oh my!  But no, they are just bleeding through from the knots as they dry out. 


Good Old Google Research to the rescue. I read where people that have been doing a lot of shiplap wood planks, and lately have noticed the same thing.  Especially when using fresh new wood. They said the best stuff to use is this Zinsser shellac spray primer. Not the water-based stuff, not the brush on stuff, not the Kilz brand, it has to be this one. They said it's the only stuff that really works. So I will give it a try.


It was a warm enough day to open up the doors and windows to have adequate ventilation to use this product. It's very stinky!

Wow, look at this! This is just with the primer on and I haven't even painted yet. What a difference.  Maybe tomorrow I will get out my paint bucket and little roller.


Today I was finishing up weaving the final section of this wool rug. It was a different pattern I was trying out and I really like the way it was coming along.  While Steve was stacking wood outside, I stayed cozy and warm inside weaving in my She Shed. 

(I unrolled it a bit to see the pattern in the pic)


This is a very thick rug of wool fabric from men's suit coats. Recycling at its finest. I just have to add the tag and hem up the ends and it will be ready to list in my Etsy online store for for sale.


~~~~~~~

Finnegan is doing much better. It's been 4 days now since his tooth extraction. I think he's playing us and faking to take advantage of the situation. He has moved on from wanting things like cheap hot dogs and shredded chicken to more expensive things like bratwurst and shaved deli ham. The flakes of grilled salmon was good for two days but he decided that even that wasn't good enough. He's thinking that the raw tenderloin that we used to give him his pills in is more to his liking. No way Jose.

He is talking Binney (in the pink scarf) into begging for the "good stuff" instead of plain ole dog food.  They are conspiring against us, I am sure.  We just took two hamburgers off the grill, and they seem to think that the burgers were for them!!  Look at those faces!!


I think it's time to start weaning him back to soft canned dog food, and then the dry kibble that he is used to, and stop tempting him with all of these treats. He is finally eating better now that his antibiotics are done. I think they were making him nauseous and made the food taste funny?  Either that, or the little stinker is taking advantage of us. And I think he knows it!

Huh? Who? Me?

Somehow, he knows I am typing about him right now, doesn't he? Dogs are pretty smart creatures.

Wednesday, October 28, 2020

National Folk Farmhouse Kitchen - Making A Beadboard Backsplash

Back in February, we dressed up our dark brown painted kitchen cabinets with some nice creamy white paint (called String of Pearls).  We added some beadboard panels to the sides of the cabinets to match the beadboard that was already on each side of the island.  We were very pleased with the results!  It really lightened and brightened up the orginal kitchen in this little old National Folk Farmhouse.  

Here is a blog post of that project:

https://kareninthewoods-kareninthewoods.blogspot.com/2020/02/beadboard-and-beetle-bug.html

The kitchen was very nice, but I really didn't care for the horizontal glass block tiles that were put in as a backsplash.  It was a fad about 10 years ago, and I never cared for that style even back then.  The previous owner said it was his first time laying tile, and the project was a little crooked as well. It kind of kept the kitchen "dark" looking and too many contrasting patterns.

We were watching an HGTV show a few weeks ago, and I saw a cute farmhouse kitchen with beadboard backsplash. It caught my eye.... Yes! That is what I wanted! 

For under $20, we could transform the kitchen backsplash!  

So last week when we were picking up the windows for the motorhome, we called ahead to Home Depot and arranged a curbside pick-up. I brought along an extra scrap piece to be sure the beadboard was the same as what we had before (they had 2 kinds on the website).  Steve brought along a battery operated saw to buzz the 8 foot long piece into two smaller pieces to fit in the back of the Saturn.  Home Depot will also cut your panels to size for free inside of the store if you wish. 


We put the beadboard sheets into the basement on sawhorses with a tarp underneath to catch any drips.  It's too cold now out to paint in the garage anymore this year.  See my 4 little window boxes of coleus plants?  They winter over in the basement, in windows that face the south for sun exposure. I can water them and not worry about runoff from the drainage holes in the bottom of the window boxes.  It just goes on the floor and down the channel to the sump pump.  I painted two coats onto the panels and the trim pieces we would need for the edges.


On Tuesday, Steve said it was a good day to get started.  He gathered the tools and started to measure up to be sure what we were going to get cut out correctly. Of course, with an old house, the walls and cabinets are crooked, so it took careful measuring and scribing to get it just right.

Steve loves this heavy duty adhesive

from Loc-Tite that holds panels tight really well.


We cut the first panel to size, and it takes two of us on the table saw to cut the sheets safely. I found this table saw at a rummage sale one day, on a bargain of a bargain of a bargain, and the guy even delivered it for me! $50.  It was a nice surprise for Steveio, and we have gotten a lot of use out of it. 


Steve dry fit the piece of beadboard, and marked out the sections for notches around the cabinetry, and the opening for the outlet.  He measures three times before he cuts it out, just to be sure. 


For the first piece, he spread the adhesive right onto the clean glass block tiles.  It clung nicely and we were able to press the panel right into place. 


Look at that... 
Now to add the next piece and the trim,
and a bit of caulk along the bottom edge.


A while back I saw these really pretty little beadboard style outlet covers.  They are made from some kind of stone resin, not flexible cheap plastic. They looked kind of old fashioned.  I remembered the old black bakelite ones in our house in Chilton that had ridges like this too.  Soooooo  I splurged, and bought two for the countertop area and two more for the sides of the island.  Sometimes we need a little "luxury".  


The outlet covers helped hold the beadboard into place while the adhesive dried.  I used tiny pushpins on the edges to hold it as well.  Steve carefully ran a bead of caulk along the edges, and in the corner.  Once the white caulk cures and dries, I will touch it up with some paint to match. 


Wow.. it really brightened up in that corner of the kitchen!  I like how clean it looks and less distracting of the other patterned brown/grey/silver glass block tiles.  I think it looks more old fashioned and stylistic to the era. 


So here is the right half of the kitchen backsplash done.  It sure looks different to us. I am glad we are making the changes. 


That was enough for one day...  I am slipping back under the weather again, and I think I needed to soak in the tub and get some hot steamy air into my lungs.  When is this stuff ever going to go away?  This has been hanging on since Sept 15, and seems to keep relapsing every time I feel better? 


We both got a good night's sleep, so this morning, we decided to tackle the other half of the counter backsplash. Right after coffee, Steve started measuring up and scribing a new piece of beadboard. I wasn't even out of my jammies yet!  What a go go go guy! 


This time, he decided to put the Power Grab adhesive on the back of the panels of each piece before sliding them into place.  Either way works fine, but he wanted to try it out to see if there was a difference.  I think the most important part is that the surface you are adhering to must be clean and free from any grease or dampness.  


Now he got the corner pieces set.   I was surprised to learn there was one more strip of undercounter LED lighting that we never knew was there before!!! It was by the microwave, and we never saw it over the last year that we have owned the house! LOL I was also able to stick up the transformer box for the undercounter lighting again.  I know it's hanging down in the pic, because we wanted to find the brand of this style.  We want to buy one more strip to put over on the angled corner on the right side of cabinets too.   

Now we just had to stick on the trim piece. Don't ya know, that tube of Power Grab ran out, so he had to go open up a new tube, for this one last piece of trim. ACK! 


There... all smoothed out and caulked and set into place.  Now the backsplash matches the ends of the upper cabinets, and the sides and drawer fronts on the island.


It really makes the kitchen much brighter and cleaner and cripser.  It's not a glaring white, it's a soft creamy pearl color.  With the stainless steel appliances and hood vent, complemented by the cabinet and drawer pulls, I think it all coordinates together.

I put the microwave back into the corner, and the little things here and there on the countertop. I have a big red nesting chicken I got while shopping at a thrift shop years ago with my friend Vicky.  She talked me into it.  Now I keep treats in there for the grandkids when they visit.  

(see? it needs a bit more light by the chicken)

I have a little red chicken coffee mug, left behind by the sellers that I keep my dish washing vegetable scrubbing brush in.  I have a little ceramic pot and dish from our grandkids in Green Bay for pot scrubbers, sink plug and some odds and ends that seem to accumulate in the kitchen. I like a clear countertop and not any clutter.  Then when I start a baking or cooking project, I don't have to clear things away first.


Steve also made a little addition to my new Sink Of My Dreams... It came with a wooden cutting board. But he said we should also have a nylon/plastic one for cutting meats on.  Never a good idea to cut raw meat on a wooden board, even if it is sealed with mineral oil.  So he took my big white one and cut it down on the saw, sanded the edges smooth and it fits on the sink too! 


"So there you have it" 
as Steve is known to say...  
my Farmhouse Kitchen is now finished!  


Today, we heard the city crews come up to the front corner of our yard. Just Monday afternoon Steve had set out the branches from the hunk of tree that he had Gary cut down for us.  Our city takes note of where branches are on the edges of the streets, and comes back and chips them up with the chipping truck.  Then we can go to the city lot and get free wood chips! 

(oops it was windy and the front porch flag
flipped up and over the pole)


Tonight, I think we are going to curl up and watch tv.

Maybe it will be another HGTV show, 

and we will get more ideas for another project? 


Wait and see. 

Tuesday, October 27, 2020

Up Up and Awaayyyy - Taking Down Our Chimney

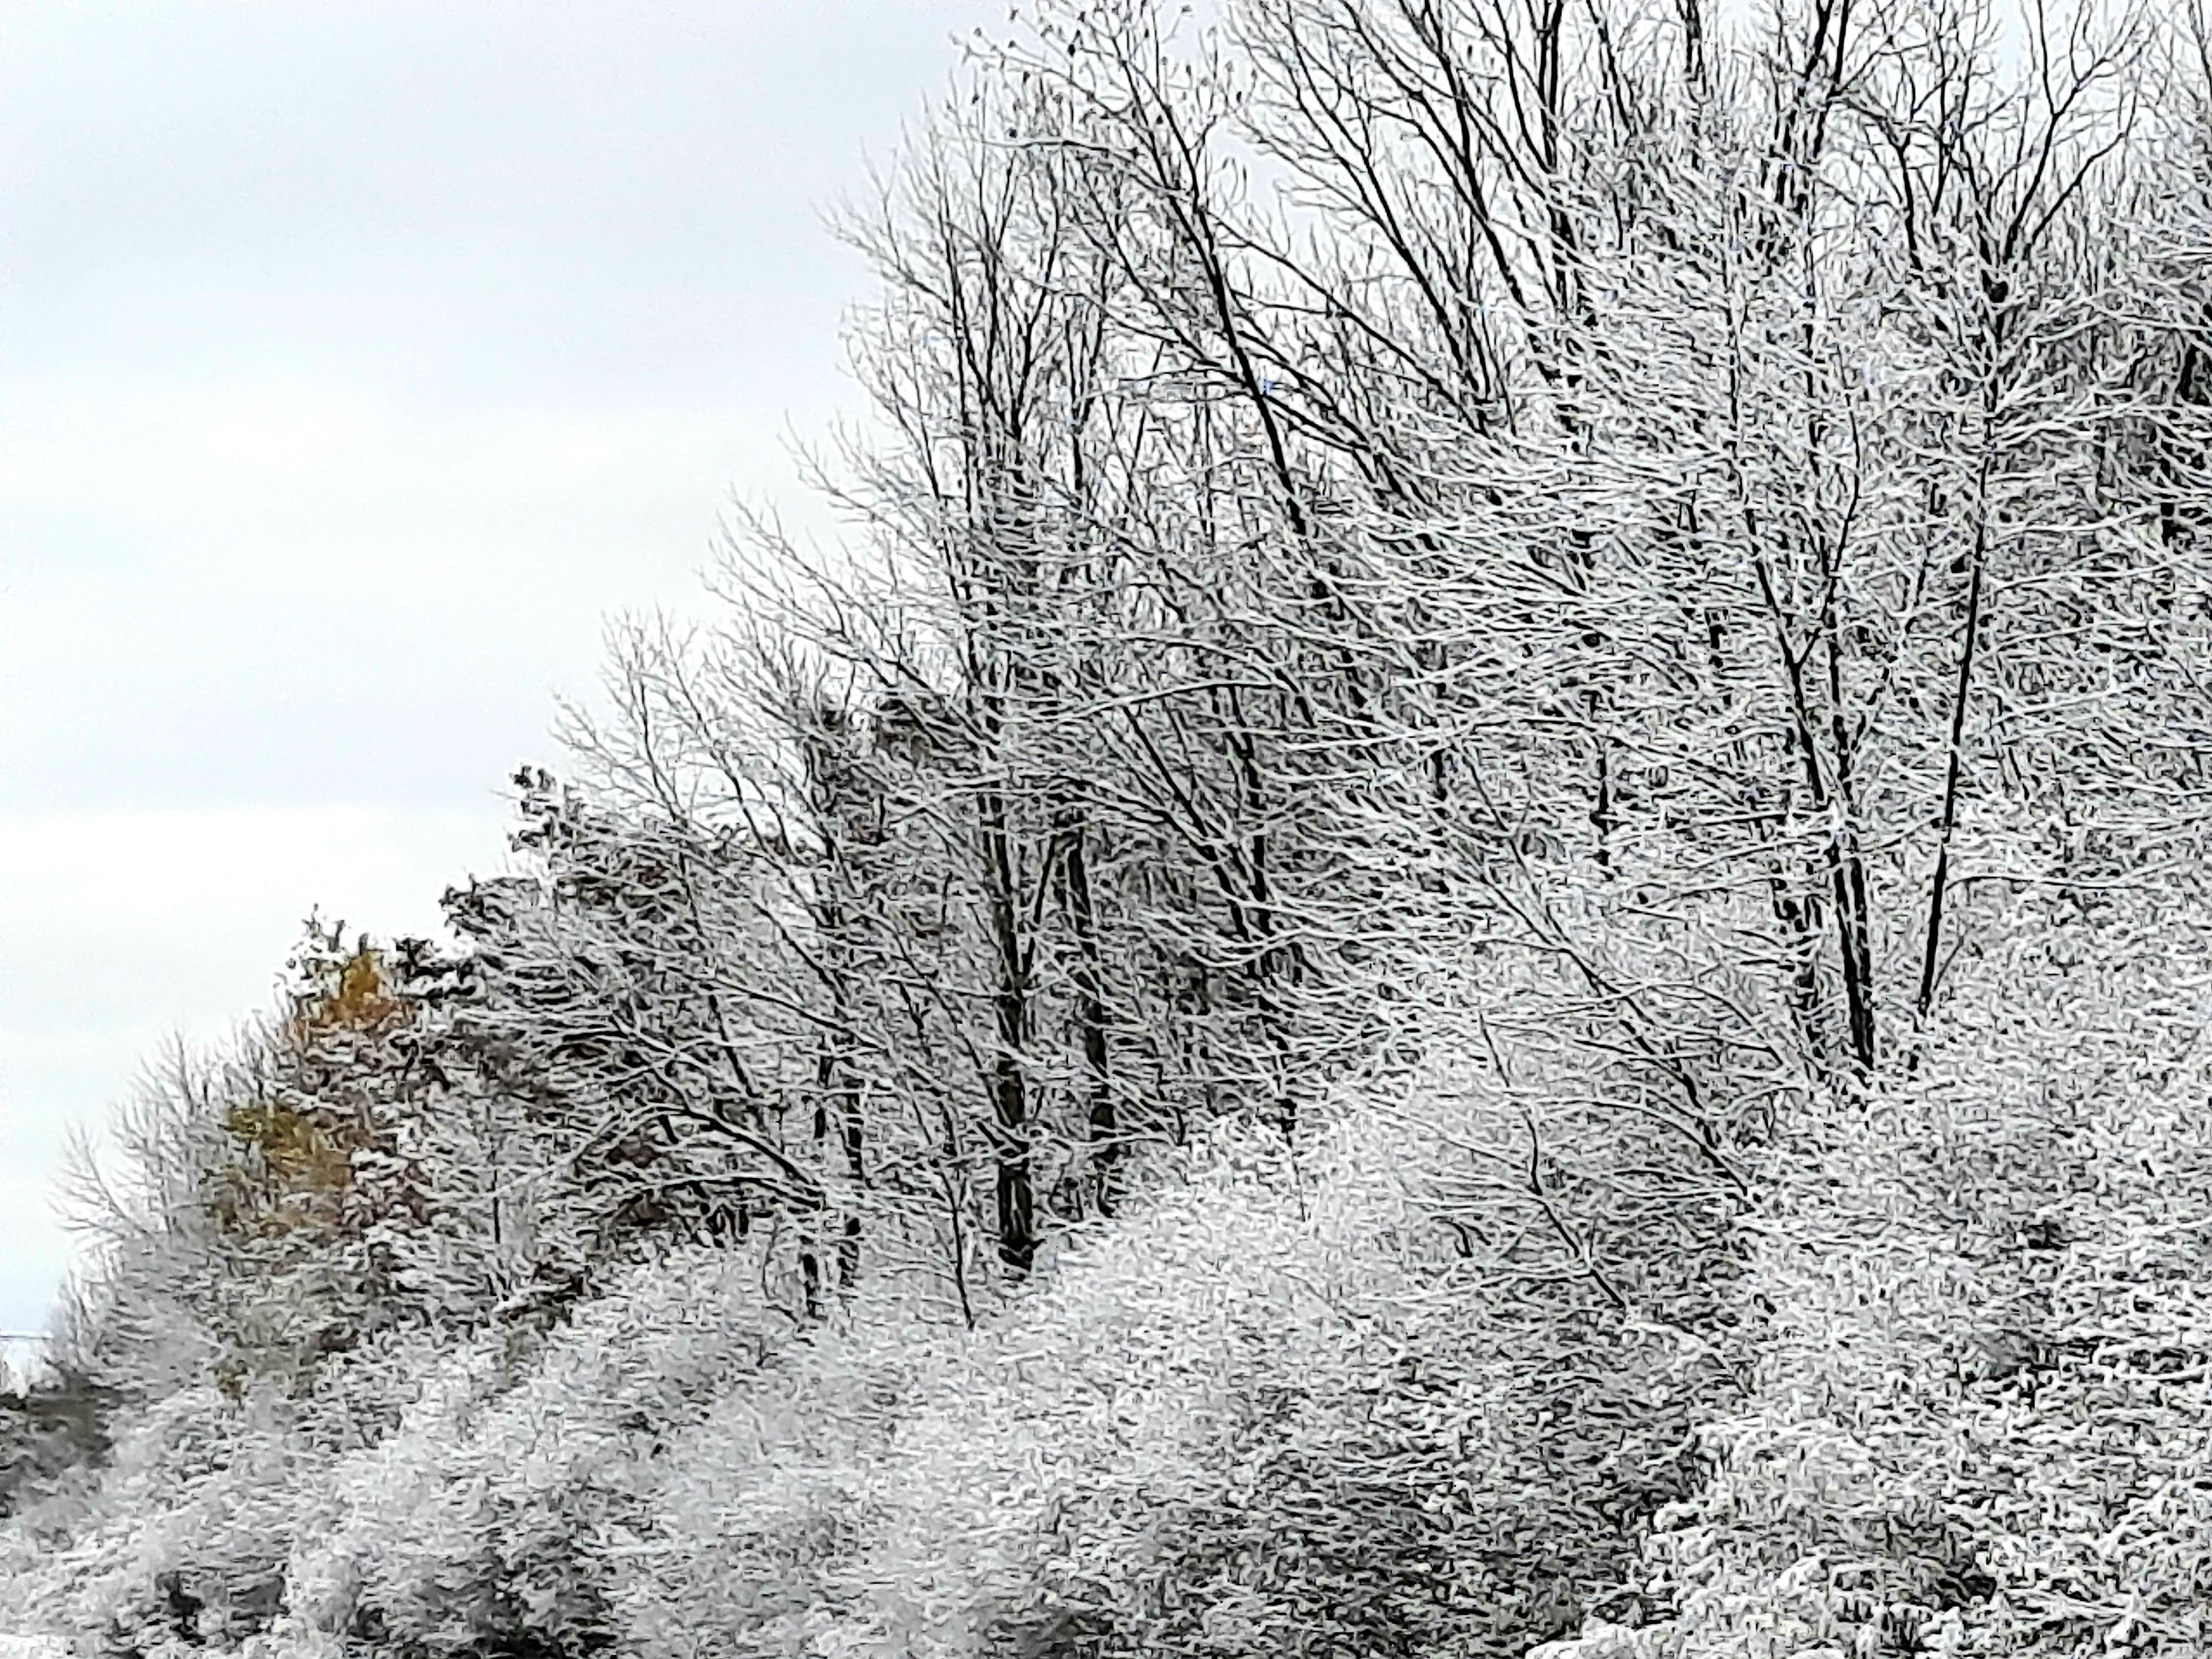
Sunday, we had things coming down from the sky. It was white little things with six sided shapes in a very frosty cold natural composition. Yep. It was snowing in Wisconsin. It was actually really pretty and it started Sunday night. Watching the snowflakes reflected in the new backyard light on the flagpole was almost magical. It was like little glittery crystals coming down into the beams of light.


By Monday morning, we woke up to snow on the ground. It wasn't much, and we knew it was going to melt quickly. But it sure looked nice. It clung to all of the roofs, the tree branches, and the grass.


I was out on the road early because I had to get going up to Peshtigo to the vet's office with my little buddy Finnegan. Everything was frosted over, and it looked like a winter wonderland.


I snapped a few pictures while I pulled over on the side of the road. I don't do this while I'm driving of course!

I figured I would get a few shots before the sun came out and melted it all away. I was a few minutes early for this little guy's appointment, so I was able to pull over to take these pictures.


And if this little guy had his way, he would prefer that I didn't go at all and brought him right back home. Just look at that face! He knew we were going back to the doggy doctor and he was not happy about it.  It's amazing how they know things, and figured it out.


If dogs spoke in swear words 

I'm sure he would have said:

"|₩☆~$(<×$%]¿《~●"


I tearfully dropped him off.  Any time a dog has to go under anesthetic, there is a risk.  I said to be a Good Boy, and let them take him inside. 


I had to get my butt in gear and get back home. Steve was waiting for the next contractor to come. Like I said in my previous blogs, we've had to hire a couple contractors to do some of the heavy duty stuff that we aren't able to do ourselves any more. Like blowing in the new insulation or getting rid of the bats in the attic. This is the third contractor now--- this is the guy that's going to take down our broken chimney to a lower level and cap it off!

He pulled on up in front of the house with his big equipment and we were ready to roll!


His name is Gary Vandenhouten. We met him back when we lived in Chilton.  He was taking down a chimney and cutting some trees for a neighbor down the street. We had him come over and take care of the chimney on our house in Chilton as well. We found him to be a very likeable guy, hardworking, a small business owner, and willing to do a good job for a good day's pay. Hard to find those kind of guys anymore!


Here is the front and back of 
his business card:


Gary has a cottage up this way, another 30 or 40 miles beyond Oconto. He promised us that sometime this fall he would be able to come up and take care of our chimney on this house. He had planned to take his equipment up here to do a couple other jobs plus some things at his own cottage. If we could arrange a couple of our neighbors to have some work done, it would make it more advantageous for him to come and spend a couple days up here.  He arrived with his big powered high lift device, ready to go to work.

Here's what we needed to have done: We have this huge clay brick chimney on our home. We are not using it anymore for either the fireplace in the living room or for a furnace or hot water heater vent. Everything now is vented out the side of the house for the furnace, and the water heater is electric. We are not using the fireplace in the living room, and it had been long ago blocked off by the previous owners. Someday we may put a vent-free natural gas fireplace in it's place, or maybe an electric one, but we will never again be using the dual chimney flues. 

As you can see, we are missing quite a few bricks. We are worried about the chimney falling apart or crashing into the attic. It's best to take care of these things before they ever get any worse. So now was the perfect time to do it!


Our proposed plan with Gary is to take down the chimney about this far to where the good bricks start. Then he will cap it off permanently and seal it to make sure we don't get any water or bats intruding into the old flues. We are not in any position to completely remove the chimney from the entire roof and attic or patch up the roof. So the next best bet is to get it down to where it's structurally sound - and then permanently cap it off.


Gary got all of his equipment together and drove around to our backyard. We took down the four mesh panels of the doggy potty yard fence so he could gain access from the back of the house. It was an easier position for him to work from, compared to the front of the house. This is quite a piece of wonderful equipment and he can move it up, around, and down at will--- with the little controllers located up in the basket with him.  He is a One Man Show.  


There was still a little bit of snow on the roof as he was starting to work. But that's okay, he is safe inside of his fenced-in basket to do the project. Here he is starting on the very first rows of bricks. It was mortared together stronger than we originally thought. We have been thinking that the bricks would just fall apart in his hand. (they did on our house in Chilton!)  But no, he was using an air powered chisel tool to hammer them apart brick-by-brick and stack them on the platform next to him.


Each time he would bring a load down, we transfered them onto our trailer. He was making good progress and Steve was keeping up quite well on the bottom with loading things up.


You can see here the charred area and smell the acrid old smoke from where there had been a chimney fire at one time long ago! There was also a sticky residue that may have been from the fireman's flame retardant foam all down the inside of the flue. Look at the holes that were burned right through the chimney flue liner blocks!


If we had ever tried to light a fire in this fireplace, it would have been extremely damaging and dangerous. I'm glad we never attempted it. Of course we would never do that without a thorough chimney inspection anyhow. Any person buying a home should have the chimney inspected, because you never know what happened in the past. So, the unanimous conclusion is that it's best that we take this down and get rid of the dangerous condition.


The sun came out and melted away all of the snow. Working conditions were really pretty good as he maneuvered this high lift up and down with each load. 


Once the snow was off the roofs,
he got off the lift to pick up any stray pieces that fell down.


Steve and I went over to the city refuse department to unload the bricks each time. This is a free service from our city where we can unload them into specially designated areas. What a great way to dispose of this mess, without having to go out to a landfill somewhere or find somebody who is looking for rubble and fill on a building site to dump it.


I think it turned out to be a pretty nice day for him to work up there. The sun was shining to warm things up and there wasn't much wind. By noon he completed with ripping down all of the bricks.  


He cleaned up the entire roof area, including any surrounding little pieces that may have fallen onto the roof shingles. Gary was very thorough and attentive to his work to make sure he was not leaving any mess behind at all.


Gary had sheet metal along as well as a press break device to create the corners and the edges and custom build us a chimney cap. Some people want chimney caps with screens to be able to still use their fireplace but keep out birds and bats. Other people, like us, want a complete chimney cap to seal the entire top. Using special mortar adhesive in caulk tubes, he sealed the cap down on all sides to make sure nothing could ever intrude in that space again. It sure looks good to us. Job well done!


This is quite the fun 
"Big Boy Sandbox Toy", 
isn't it? 


Now we had a little project for him to help us out with, and then it was time for him to move on to all of our neighbors. We made contact with a couple of other people around the neighborhood for him to do jobs for them as well.

Steve had one angled tree limb on a crazy Box Elder tree that needed to come down. It was growing overhead and blocking the growth of a beautiful black walnut tree and a crabapple tree underneath it. But if Steve had cut it off with just our chainsaw and dropped it, it would have ruined the good trees below. So Gary was able to cut this one branch off into smaller pieces and load them onto his high lift.


From there, he moved on to the other jobs with the neighbors. He was working on their chimneys and trees and had enough lined up for the next day....  he left his equipment here parked safely overnight to come back again today to finish up for our neighbors. We are glad we were able to make it worth his while. We gave him a nice tip as well as his pay for a good job well done. 

After Gary drove away over to our neighbor's house, Steve and I put the four mesh panels and the gate back up on the doggy potty yard. Everything was back together again and we were happy with his job that he did for us.


In the meantime, while all this was going on, a little girl doggie was terrified of all the scary noises going on outside and up on the roof. She was just lost without her support buddy, Finnegan. They are so bonded together and rely on each other.  She was hiding out wherever she could and I was trying to keep her as calm as possible in between our loads to the city refuse dump. You can see her here hiding back in the corner watching as I went in and out of the door.


She was forlorn and heartbroken, 
her buddy was gone 
and she didn't know what was happening.


By 3:30, we got the magical phone call that said we could come and pick up our little Finnegan. His dental surgery went quite well. Not only did they remove the one offending infected tooth, but they had to remove two more as well! His teeth are in very rough shape because of really bad genetics and bad breeding from the hoarding situation he came from. They said there was actually calcium growth between the teeth locking them together that needed to be broken apart. We also opted to pay a little extra for laser healing which would be a lot easier on him with less bleeding and discomfort. During this covid-19 situation, everything at the veterinarian is curbside service.  After we handled all the paperwork and a credit card payment over the phone, they brought out this Groggy Doggy to us! 


He looked quite bewildered and battered and seemed to be very relieved that he was going home again. We got one slight tail wag and that was about it. He crashed on the back seat of the car and was out like a light. Little Binney was so happy to have her buddy back. She sniffed him all over and licked the tip of his nose to let him know that it was all going to be okay now.


When we got home, he wobbled around a little bit like a drunken sailor. He was able to do a little bathroom break in the yard. Then he managed to come back in and plopped down on a sheepskin to lay at our feet. Zonk! 


Binney was his little nurse and sat by, carefully tending over him and seriously wondering what the heck happened to her buddy.


Later on in the evening, he surprised us by barking a little bit at the deer in the backyard. Then he ate a full slice of ham, cut into little pieces, and we hand fed him one tiny square at a time. He drank some water so we knew things were back on track. Then he spent the rest of the evening curled up on a quilt on my lap, totally enjoying the warmth and comfort of being back home again.  I was gently rubbing his cheeks and chin. We watched TV all evening long, and I didn't want to move until it was time to go to bed.


Normally both of our dogs sleep on little doggie beds on the floor, near the base of our bed. But last night, we decided to treat them by letting them both lay up on the bed with us. Of course this is difficult, even in a king-size bed, because they lay on top of the blankets and trap our feet. I think they both got better sleep last night than Steve and I did!


Our little guy seems pretty chipper this morning. 
We are hand feeding him some ham again. 
Hope this doesn't become a "thing"!

~~~~~~~~

Oh, as a PS.in my last blog, the photos left the impression that I removed the entire piece of glass from the fireplace screen and that it was an open space. No it's not. There's actually a clear sheet of a polymer type product still in that space. It's just that it's so clear you cannot see it in the photos.


I have this handy-dandy can of etching spray that I had used on the lacey door window of the front porch down in Chilton. I figured this would be really good to cover that shinier piece and make it more clouded like the rest of the screen.


It worked! 
Now I will touch up the silicone edge 
with a bit of black paint. 


The weatherman is predicting some warmer weather in the 50's later this week, and maybe into next week.  We might get in ONE more camping trip.  We will see.