Our Wonderful Followers who come back again and again to read about us...

Showing posts with label beadboard backsplash. Show all posts

Wednesday, October 28, 2020

National Folk Farmhouse Kitchen - Making A Beadboard Backsplash

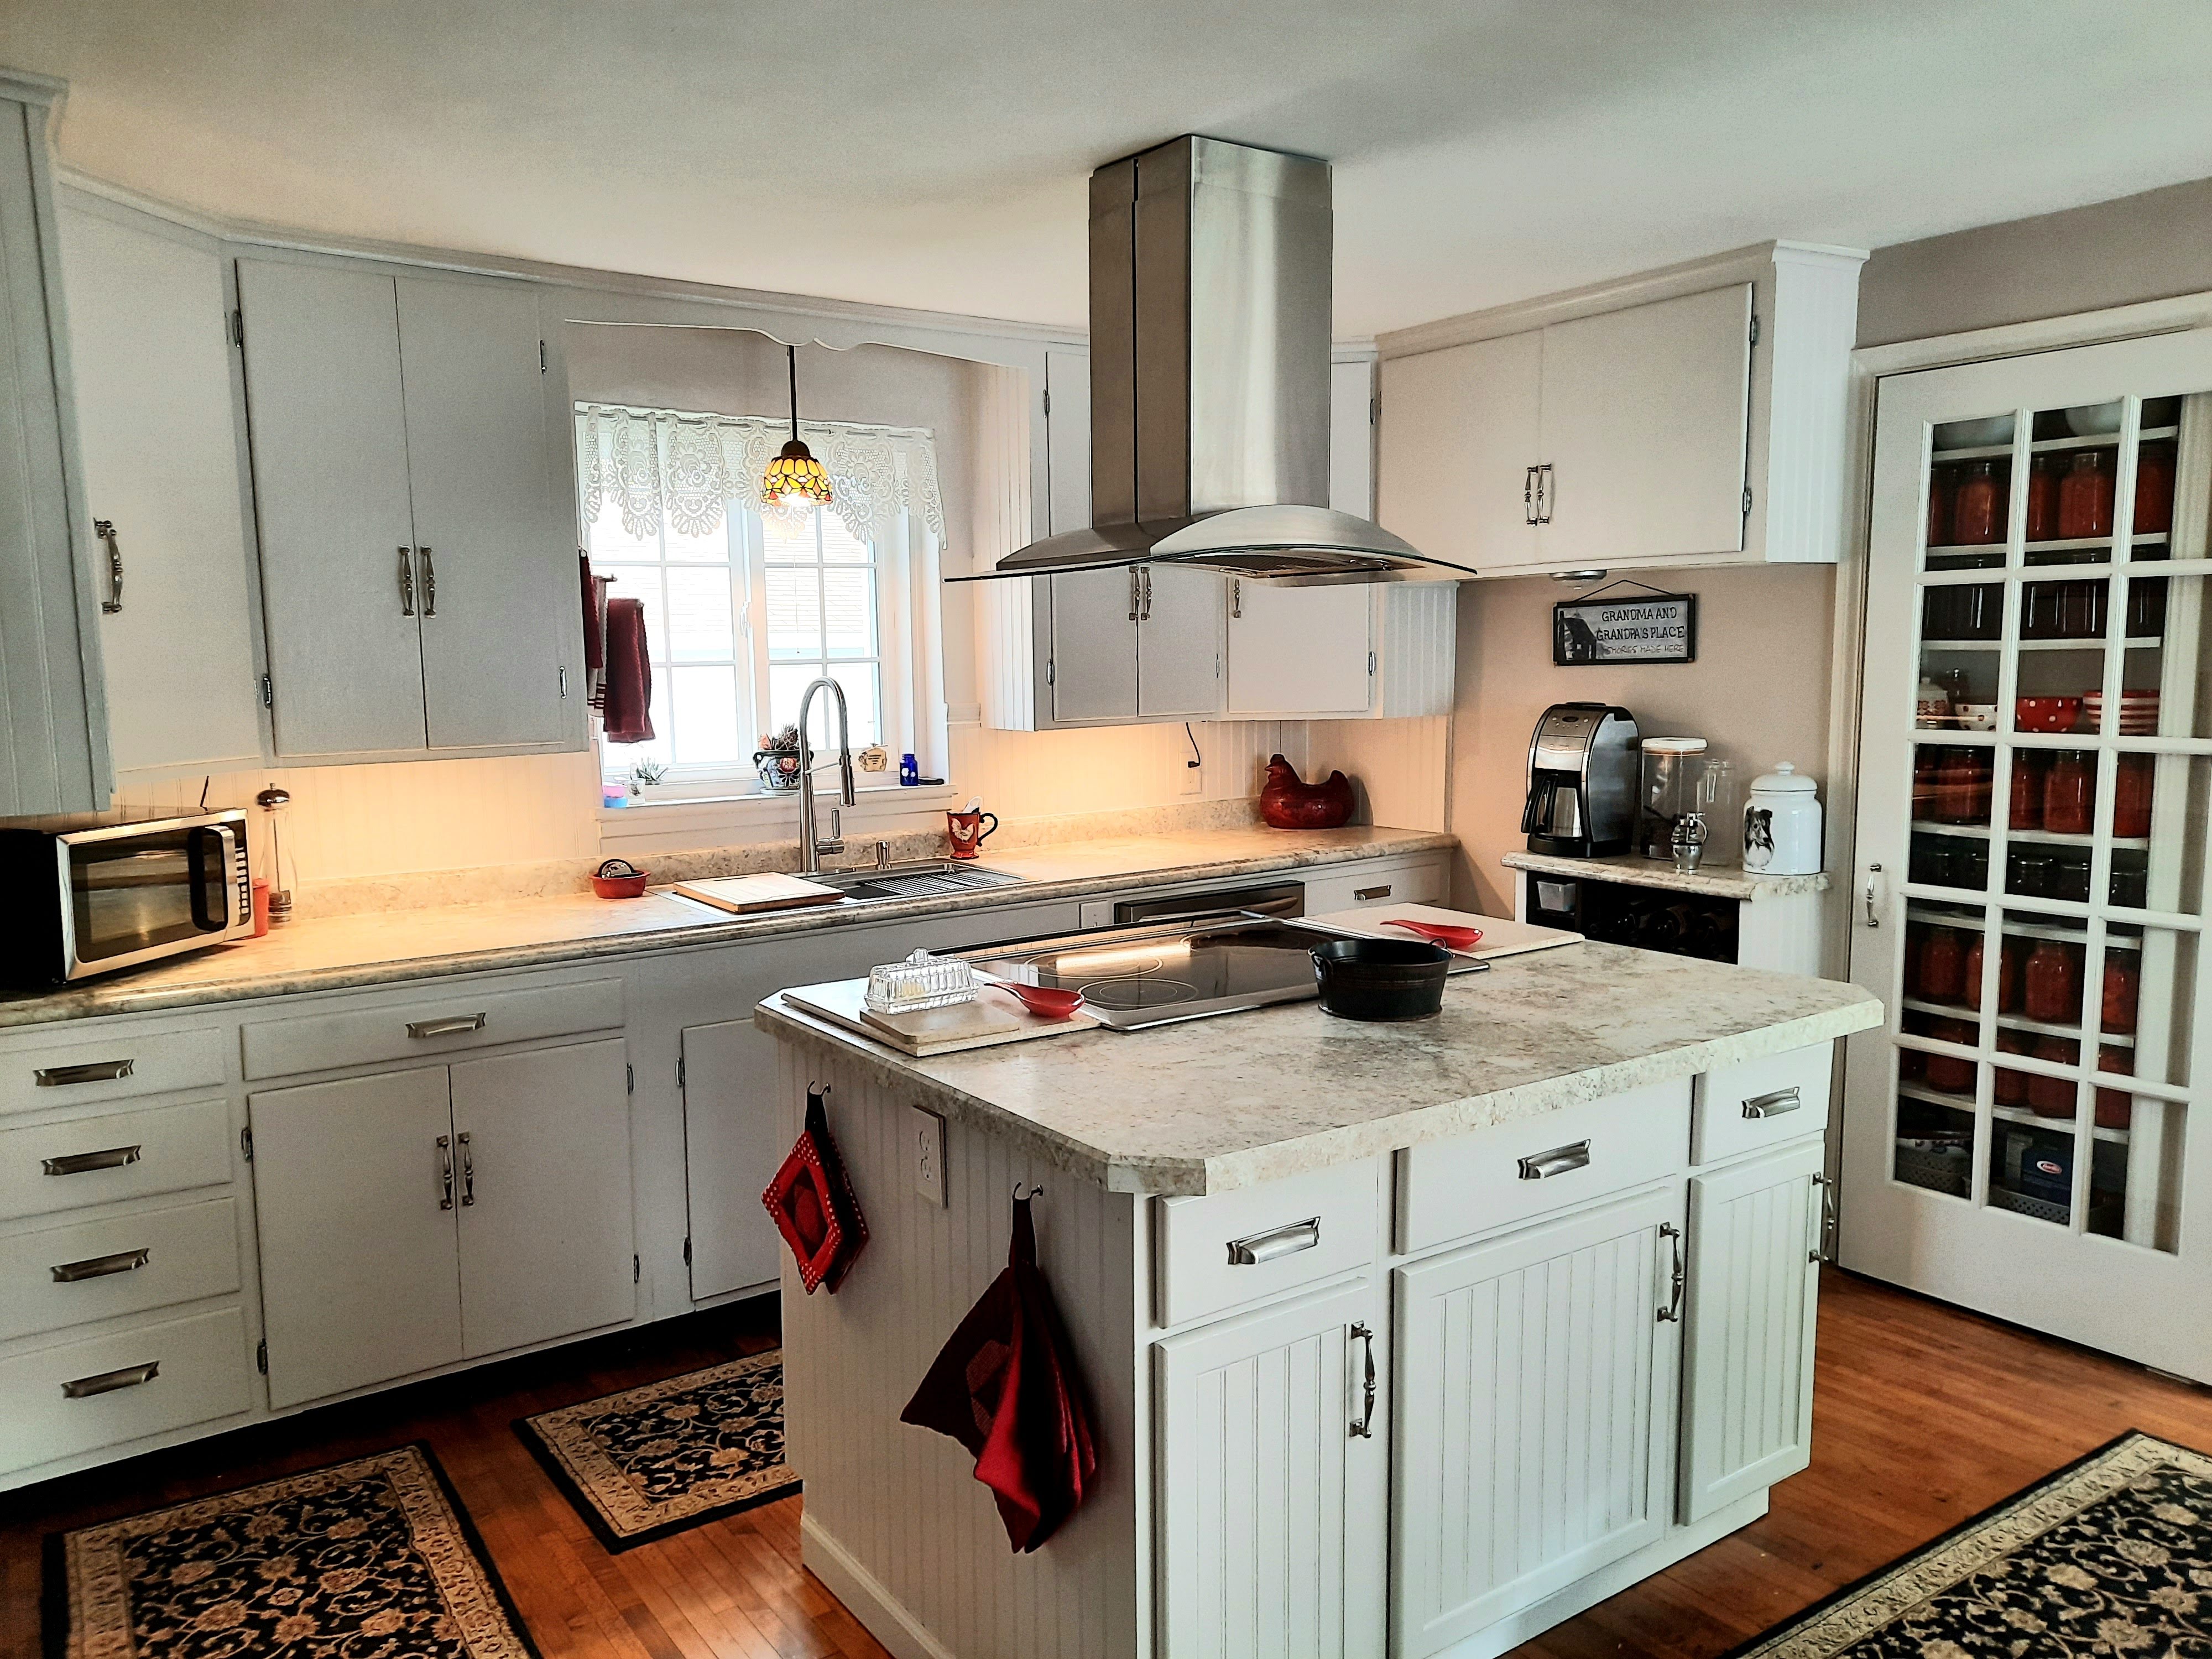
Back in February, we dressed up our dark brown painted kitchen cabinets with some nice creamy white paint (called String of Pearls).  We added some beadboard panels to the sides of the cabinets to match the beadboard that was already on each side of the island.  We were very pleased with the results!  It really lightened and brightened up the orginal kitchen in this little old National Folk Farmhouse.  

Here is a blog post of that project:

https://kareninthewoods-kareninthewoods.blogspot.com/2020/02/beadboard-and-beetle-bug.html

The kitchen was very nice, but I really didn't care for the horizontal glass block tiles that were put in as a backsplash.  It was a fad about 10 years ago, and I never cared for that style even back then.  The previous owner said it was his first time laying tile, and the project was a little crooked as well. It kind of kept the kitchen "dark" looking and too many contrasting patterns.

We were watching an HGTV show a few weeks ago, and I saw a cute farmhouse kitchen with beadboard backsplash. It caught my eye.... Yes! That is what I wanted! 

For under $20, we could transform the kitchen backsplash!  

So last week when we were picking up the windows for the motorhome, we called ahead to Home Depot and arranged a curbside pick-up. I brought along an extra scrap piece to be sure the beadboard was the same as what we had before (they had 2 kinds on the website).  Steve brought along a battery operated saw to buzz the 8 foot long piece into two smaller pieces to fit in the back of the Saturn.  Home Depot will also cut your panels to size for free inside of the store if you wish. 


We put the beadboard sheets into the basement on sawhorses with a tarp underneath to catch any drips.  It's too cold now out to paint in the garage anymore this year.  See my 4 little window boxes of coleus plants?  They winter over in the basement, in windows that face the south for sun exposure. I can water them and not worry about runoff from the drainage holes in the bottom of the window boxes.  It just goes on the floor and down the channel to the sump pump.  I painted two coats onto the panels and the trim pieces we would need for the edges.


On Tuesday, Steve said it was a good day to get started.  He gathered the tools and started to measure up to be sure what we were going to get cut out correctly. Of course, with an old house, the walls and cabinets are crooked, so it took careful measuring and scribing to get it just right.

Steve loves this heavy duty adhesive

from Loc-Tite that holds panels tight really well.


We cut the first panel to size, and it takes two of us on the table saw to cut the sheets safely. I found this table saw at a rummage sale one day, on a bargain of a bargain of a bargain, and the guy even delivered it for me! $50.  It was a nice surprise for Steveio, and we have gotten a lot of use out of it. 


Steve dry fit the piece of beadboard, and marked out the sections for notches around the cabinetry, and the opening for the outlet.  He measures three times before he cuts it out, just to be sure. 


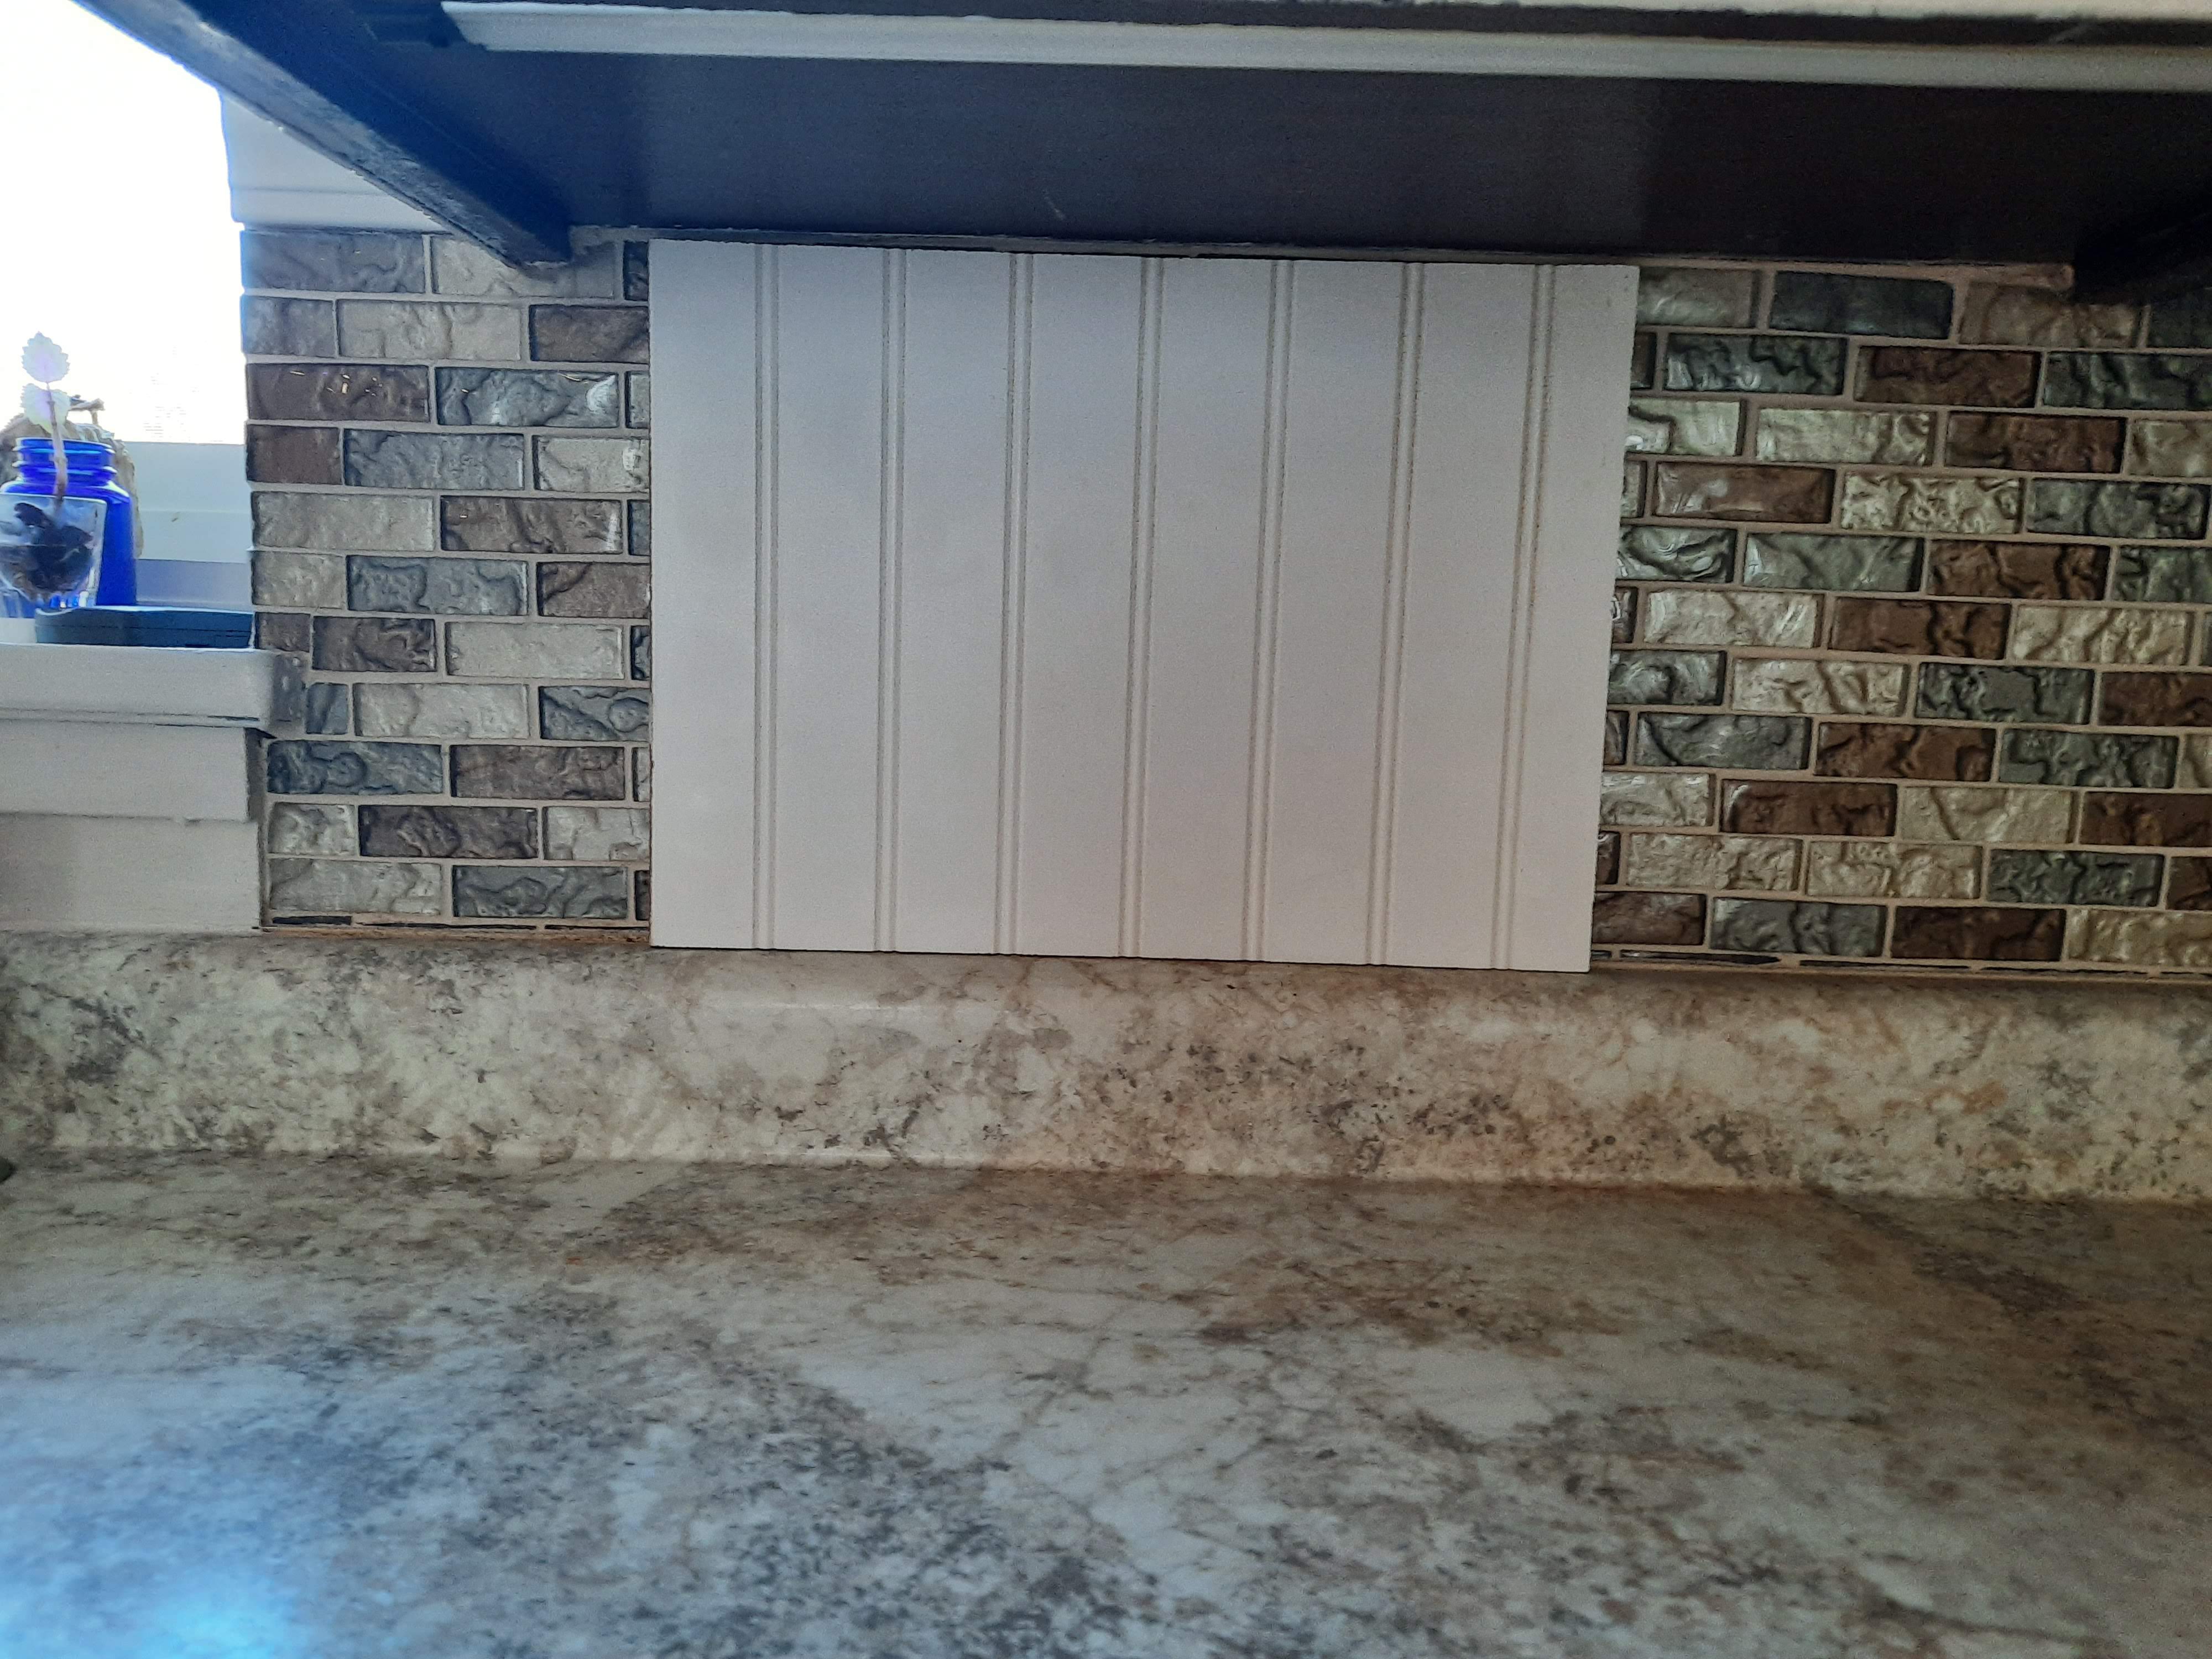
For the first piece, he spread the adhesive right onto the clean glass block tiles.  It clung nicely and we were able to press the panel right into place. 


Look at that... 
Now to add the next piece and the trim,
and a bit of caulk along the bottom edge.


A while back I saw these really pretty little beadboard style outlet covers.  They are made from some kind of stone resin, not flexible cheap plastic. They looked kind of old fashioned.  I remembered the old black bakelite ones in our house in Chilton that had ridges like this too.  Soooooo  I splurged, and bought two for the countertop area and two more for the sides of the island.  Sometimes we need a little "luxury".  


The outlet covers helped hold the beadboard into place while the adhesive dried.  I used tiny pushpins on the edges to hold it as well.  Steve carefully ran a bead of caulk along the edges, and in the corner.  Once the white caulk cures and dries, I will touch it up with some paint to match. 


Wow.. it really brightened up in that corner of the kitchen!  I like how clean it looks and less distracting of the other patterned brown/grey/silver glass block tiles.  I think it looks more old fashioned and stylistic to the era. 


So here is the right half of the kitchen backsplash done.  It sure looks different to us. I am glad we are making the changes. 


That was enough for one day...  I am slipping back under the weather again, and I think I needed to soak in the tub and get some hot steamy air into my lungs.  When is this stuff ever going to go away?  This has been hanging on since Sept 15, and seems to keep relapsing every time I feel better? 


We both got a good night's sleep, so this morning, we decided to tackle the other half of the counter backsplash. Right after coffee, Steve started measuring up and scribing a new piece of beadboard. I wasn't even out of my jammies yet!  What a go go go guy! 


This time, he decided to put the Power Grab adhesive on the back of the panels of each piece before sliding them into place.  Either way works fine, but he wanted to try it out to see if there was a difference.  I think the most important part is that the surface you are adhering to must be clean and free from any grease or dampness.  


Now he got the corner pieces set.   I was surprised to learn there was one more strip of undercounter LED lighting that we never knew was there before!!! It was by the microwave, and we never saw it over the last year that we have owned the house! LOL I was also able to stick up the transformer box for the undercounter lighting again.  I know it's hanging down in the pic, because we wanted to find the brand of this style.  We want to buy one more strip to put over on the angled corner on the right side of cabinets too.   

Now we just had to stick on the trim piece. Don't ya know, that tube of Power Grab ran out, so he had to go open up a new tube, for this one last piece of trim. ACK! 


There... all smoothed out and caulked and set into place.  Now the backsplash matches the ends of the upper cabinets, and the sides and drawer fronts on the island.


It really makes the kitchen much brighter and cleaner and cripser.  It's not a glaring white, it's a soft creamy pearl color.  With the stainless steel appliances and hood vent, complemented by the cabinet and drawer pulls, I think it all coordinates together.

I put the microwave back into the corner, and the little things here and there on the countertop. I have a big red nesting chicken I got while shopping at a thrift shop years ago with my friend Vicky.  She talked me into it.  Now I keep treats in there for the grandkids when they visit.  

(see? it needs a bit more light by the chicken)

I have a little red chicken coffee mug, left behind by the sellers that I keep my dish washing vegetable scrubbing brush in.  I have a little ceramic pot and dish from our grandkids in Green Bay for pot scrubbers, sink plug and some odds and ends that seem to accumulate in the kitchen. I like a clear countertop and not any clutter.  Then when I start a baking or cooking project, I don't have to clear things away first.


Steve also made a little addition to my new Sink Of My Dreams... It came with a wooden cutting board. But he said we should also have a nylon/plastic one for cutting meats on.  Never a good idea to cut raw meat on a wooden board, even if it is sealed with mineral oil.  So he took my big white one and cut it down on the saw, sanded the edges smooth and it fits on the sink too! 


"So there you have it" 
as Steve is known to say...  
my Farmhouse Kitchen is now finished!  


Today, we heard the city crews come up to the front corner of our yard. Just Monday afternoon Steve had set out the branches from the hunk of tree that he had Gary cut down for us.  Our city takes note of where branches are on the edges of the streets, and comes back and chips them up with the chipping truck.  Then we can go to the city lot and get free wood chips! 

(oops it was windy and the front porch flag
flipped up and over the pole)


Tonight, I think we are going to curl up and watch tv.

Maybe it will be another HGTV show, 

and we will get more ideas for another project? 


Wait and see. 

Sunday, October 18, 2020

Winter is Coming - Lining Up Some Indoor House Projects

 Winter is coming!!!

These dogs are sure getting into hibernation mode already. They're slowing down and curling up and taking advantage of the shorter days. When I look at them, all I want to do is curl up in a warm quilt, wool socks, and sip a hot cup of cider. But that doesn't get things done does it?


Instead, we went out and raked up some leaves, threw some sticks in to the woods and admired the piles of wood that Steve cut up from the trees he took down.  


~~~~~~~

We have an exciting day coming tomorrow... the insulation company is coming to remove the rest of that old attic insulation with a big vacuum suction thing into a dumpster, and then blow in all of the new insulation for R50 rating.  Wheeeee I will be sure to take some pics. 

~~~~~~~~~

In my last blog, I left a little hint of how our projects get started. Steve and I work as a team, each contributing what we can to the planning, gathering, bargain shopping and execution of each step. 

Here was a little drawing with some measurements. What I do is I come up with some ideas, or Steve comes up with some ideas, and then we start talking. Once we start talking, we come up with more ideas! Then we do a little research into materials or prices. Then pretty soon we are jumping up and down and getting measurements and drawing things out on clipboards. And that's where we are right here:


The other night, we had been watching an HGTV program, and somebody had nice white beadboard for their backsplash in their kitchen. My eyes caught that and I thought it was really attractive! I then Google'd the words of "beadboard backsplash". I saw a whole bunch of great ideas!

So I mentioned it to Steve and he looked at a few ideas too. Last winter we did an indoor project where we had added panels of beadboard to the sides of our kitchen cabinetry to match the island. 

here are those blog posts:

and 


We had a few scraps left over from that project in the garage. Steve dashed out and got one and brought it in to lay it in place, covering a part of our kitchen backsplash.


Oh I sure like that! 
I think that's what I want
 to do as a project.

Yes, I have a cool glass tile block backsplash that was put in by the previous owners. But, it really wasn't to my liking. The little rectangular horizontal style blocks were kind of a fad about 10 years ago. It really wasn't my taste then and it really isn't my taste now.

But, to top it off, being an old house, things are always crooked or skewed in a way that doesn't lend to good level horizontal construction. You can see where the seller  (he admitted to us it was his FIRST time ever laying tile)  had followed the top of the cabinetry and allowed the bottom line to slope down on an angle. The countertops were installed after the backsplash was mortared to the wall.  So there is no way to pull it off! 

See how it slopes???

This is always bugged me and I tried to cover it up with things on the counter, all the lines are crooked and it just does not appeal to me. I know from a distance the kitchen looks pretty but I really don't care for that pattern nor the horizontal blotchy blocks.  It is distracting from the marble veining on the countertops. Kind of like the same way that I didn't care for the blotchy blocks pattern of bathroom flooring that we changed out last week.  Too many patterns.  Ugh. 


So now that I have all my measurements, I think we are going to be changing this out. We can't remove the old glass block tile because it's in place before the countertop was laid. Instead, we are going to glue it over the top with heavy duty construction adhesive. I'm making my measurements and making my shopping list to get new beadboard pieces to fill it in. For under $20, we can make a big transformation! 

There is something else I would like to do, but it's a LOT more expensive, and I will have to wait patiently.  I know my birthday is coming up in 2 weeks.  Maybe then???   But in the meantime, I will be satisfied with a $20 upgrade. 

 (hint - SOMD .... Sink Of My Dreams?) 

So as I am figuring out the order for a beadboard curbside pickup, Steve brought up the idea that we had installed a beadboard wainscotting about 4 feet up all the way around in the bathroom in our last home in Chilton. He really liked that look. If we were going to order a curbside pickup of a little bit of beadboard for the kitchen, might we want to do the bathroom here at the same time?  It was a fun project and really changed the look of the bathroom.

Here is my blog post from that project:

So, we just might do that in the master bathroom here! That would be a good winter project. 

Nice creamy white beadboard to match all of the trim around the bathroom. So that's what the rest of the measurements are for. We will see what we end up with, we got a couple ideas in mind. We can buy the narrow beadboard in 3.5" wide strips or get the full panels.  Either way, I can paint them in the basement on sawhorses before putting them up into place. 

It's nice to look ahead to some fun things that we can do inside, over the winter, that will be pleasant and fun and not take a lot of money or a hit to our budget

~~~~~~~

Last winter I bought this goofy plant on impulse at Aldi. It didn't grow so well by summertime and it was dropping leaves. So I decided to stick it outside in the flower bed and see if it would grow or die. It grew and flourished! So I brought it back into the house now before the frost came and put it in a flower pot. It's growing again. Let's hope my green thumb can keep it going through the winter??


One more winter project jumped up, or actually more of a spring project. Steve was looking on his Facebook Marketplace, always looking for a bargain. He happened to find this listing of two brand new windows! They were ordered incorrectly for a build job at a guy's cabin. Until the new windows could come, they were put into place for 6 weeks. So essentially they are brand new but not able to be returned because they were a custom order, and because they got used for 6 weeks. They are the same brand of the other windows we have already installed in the kitchen, laundry room and she shed.  They are 4 feet high and 6 feet wide. 

So the guy and his contractor came to terms on the mistake and now he decided to sell them. New they were over $600 each. By the time Steve was done negotiating he got them for $255 for the pair. That is $127.50 each.  

$1,200 worth of windows.  
Sold!   


Steve knew the measurements for one of these combination windows sets would fit perfectly into the south side of our kitchen. Then, after much of my insistence, he bought the other one to put in our bedroom! 

I have been begging and begging for an extra set of windows facing to the east from our bedroom. Our bedroom is very dark and dim with only one window to the side of the bed. Now that he removed that back entrance enclosure to the basement, we have been debating on adding a pair of windows to the bedroom.  Steve voted for one window, I voted for two.  He ended up buying a combo unit of THREE! LOL!!!

So you can see why we have not yet redone the siding on this part of the house. It's because we were determining what type of window (or windows) to put here. It will take a little more construction with adding a header and shoulder studs and king studs, but it will be worth it. It will brighten up the bedroom to put in this large window combination unit.  Like my finger scribble drawing from my phone? 


This is what the bedroom looks like right now and I would like the window to be at the foot of the bed shining in beautiful sunshine in the morning from the East....ahhhh  We had eastern morning light from two large windows in our bedroom in Chilton, and we really liked it.  We are also redoing the ceiling this winter in there, because those are the old closet walls that were removed to make a larger bedroom.


This is where I would imagine it could end up. I think it will be absolutely wonderful and exactly what I have been thinking....

So again, that's another project, for most likely next spring. Although Steve said we could probably work on the kitchen one yet this fall..... that one's the exact same size and doesn't take any reconstruction of the wall or studs to put it into place. 

~~~~~~

The Packer Game is on, and supper is in the oven.  Time to post this and get some salads made to go with our baked pork chops and potatoes.  


 Go Pack Go!