After 13 days, we finally felt good enough to get out and about. We're not totally over this crud yet, but at least we are feeling better. Steve said he is 80%!
We were able to make a run down to Home Depot and pick up the trim to start on the top of the beadboard and quarter round for the baseboard in the kitchen. They were 8 ft long pieces so we are able to haul them in the Saturn, wedged in from the front to the rear and closing the back hatch. That is a lot easier than hauling out our trailer on a snowy day to pick up trim wood.
It's called "Egg and Dart" plate rail trim. The pattern matches the vintage "Egg and Dart" our home has above all of the windows and doorways.
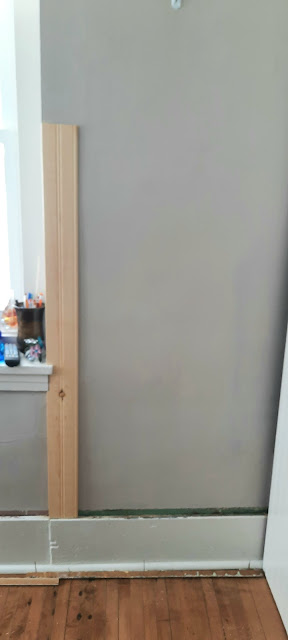
Of course, old houses are never level, even, or square! As we started on the first piece of trim, we realized the plaster wall bulged out too far in one spot and did not allow the piece of trim to set flat and flush against the wall. I remembered something I had seen on one of the HGTV shows where they actually cut away part of the plaster wall to get a piece of trim to fit. So that's just what we did!
After drawing a line, Steve used the little oscillating cutting tool and I held the end of the Shop-Vac nearby to catch most of the mess. It worked perfectly! Now that piece of trim could be recessed flat on the wall and nailed into place.
Steve started nailing the bottom trim around where the bead board meets the top edge of the existing old baseboard. This is where we put a narrow piece of quarter round and then I got down on my hands and knees and painted it all the way around the room. It looks so much better, more neatly finished by just adding a little piece of trim.
I painted the first two coats on the upper trim of the "egg and dart" plate rail. Steve cut all of the pieces to size while I took care of painting them on the island. It's a lot easier to paint trim first, rather than once it's up and on the wall. I used a little brush and was able to get in the tiny little grooves and cracks of the egg and dart design. While we were letting it dry, we finished the baseboard.
Here is the profile view shape of this trim the top has a groove for a plate rail and the bottom has a notch cut out that sets right over the rough edges of the beadboard. This is a sideways shot, but at least you can see the end detail.
Using his battery powered finishing nailer, he was able to tack tack tack the pieces up into place. Then we used a little bit of spackle to fill in all of the tiny nail holes and any gaps were filled with caulking. Again, the uneven wall makes things difficult but we sure made it look as good as we could. Once all of the spackling and caulk were dry, then I could give it a one more coat of paint to finish it off.
I really like how it sets it off along the top trim of the beadboard. I think it came out pretty neat considering that we had a crooked old wall to deal with???
I took some brighter pictures today as the sunlight was streaming in. We pushed the cabinet back into place and now this room is complete.
Here is one of those wide-angle shots that kind of distorts the view, but now this is the whole southern wall of our kitchen has beadboard on it, and then it goes around to the eastern wall. (Those are the new windows we replaced last summer).
The big cabinet is an upcycled old cabinet that we added some beadboard into the recessed panels of the doors and on both of the sides. It's amazing how much extra pantry space that allows us to have in the kitchen. It contains my big Nesco roaster, my Mix Master, the crock pot, our blender, our food processor, a waffle iron, and any overflow dry goods or canned goods that don't fit in the regular cabinets on the other side of the room.
On the other side of the room, the island and the ends of the cabinets also have beadboard highlighting them. This kind of ties it all together and makes the room coordinate both sides. Excuse the painting supplies still stacked on the island.
Now that the beadboard in the kitchen is done, NEXT is the master bathroom!!! Stay tuned.
~~~~~~~~~
We got a little bit of snow the other morning. Even though it was going to be a warm day and the snow is starting to melt on the road, Steve wanted to get out and snow blow away the bank that the snow plow left behind. It was wet and heavy. Otherwise, the temperatures were dropping down to below zero at night and that thing would freeze solid. Then we would have a hump at the end of the driveway for the rest of the winter.
While the sunshine was streaming in, I took another picture of my beautiful amaryllis bulbs. I can't believe these gorgeous blooms are just evolving and opening up and lasting so long. It's already been over two weeks and there are more stalks are coming up with more blooms.
~~~~~
Yes, today is Valentine's Day, the day for lovers and sweethearts. We dropped off little red bags over by the grandchildren's houses so they could have some treats.
ON EDIT: some of the little ones enjoying their treats, pics sent over to us this evening:
We are enjoying our Valentine's present to each other, our pretty cozy nice fireplace. Not only does it help with the heat bills, but it's also beautiful to look at and so comforting in the evenings if we sit in the living room and read or listen to music.
I think it was a pretty smart investment, made a nice improvement to the house, and it was also a very romantic gift to each other.
The sun is still out this late afternoon, actually quite strongly yet as I write this. It's already 4:30 and we are having daylight running later into the evenings. A sure sign that spring is on its way.
Someone here in town saw a robin this week and took a picture of it! It's way too soon for robins to be back yet, I think that one got a little confused? Although we have some warm temperatures coming this week, there is still plenty of winter left for us here in Wisconsin.
~~~~~~~~
During the Super Bowl last night I kept myself busy cutting strips of a bedspread for my newest rug. These are vintage white chenille bedspreads given to me by my old neighbor Charlotte. The Super Bowl was a bit boring. I wanted the Bengals to win. Oh well. I loved the commercials, especially the one with the goats from Disney Plus... and the one with Arnold was a hoot too.
I already wove up one of these Caterpillar Rugs with the help of little Claire, the youngest granddaughter. I wrote about that a few blogs back. Here she is helping me:
I delivered the first rug to Charlotte as a surprise gift. She has it proudly laid next to her bed for her toes to touch first thing in the morning.
Now I am going to weave up the second bedspread into a rug to put up for sale in my Etsy store. It makes a GREAT baby shower gift when combined with the book The Very Hungry Caterpillar. It will soon be listed in the store for sale.
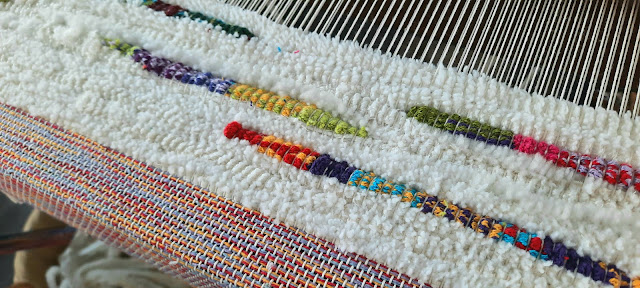
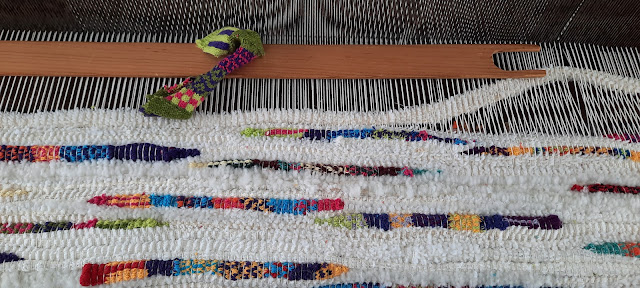
I started the header section with bright colorful cotton yarns. Then I inlay the little knit caterpillars as I weave the rug with the white chenille fabric strips.
We sure are taking our hibernation seriously in January. We really have been snuggled in and not doing much. Sorry, I let this blog slide for three whole weeks before I realized I haven't posted!
In the middle of the month on the 17th I held a meeting of our Home and Community Education group here at our home. It's a County Extension group commonly called The Homemakers. Steve calls it The Homewreckers! LOL Our membership numbers are down due to some people not feeling well, and doing social distancing to prevent the spread of covid. A few of them have traveled to the South as snowbirds, and one of our members happened to break a leg and now is at a rehabilitation center!
For the six who had made it here to our home, we had a delicous potluck meal and I had set up the dining table for our meeting after our dinner. It was a nice social event afterwards and it was really good to see some people again. Steve escaped to his brother's house down in Menasha for the day. Everybody is fully vaccinated and boosted, and practicing as much social distancing as possible. Hopefully, the numbers are falling now in Wisconsin and we can start doing things again. I had still kept all of the Christmas decorations up both inside and outside to have the house look it's best during our meeting. (plus it had been too danged cold outside to take them down yet).
The next day after the meeting, Steve said it was time to start taking things down. We came up with a different idea this year for our 9 ft tall artificial tree. Instead of taking it apart into five individual pieces, which take up a lot of room on the shelves in the garage, we came up with a different idea. Someone else had mentioned doing this and I looked it up on YouTube. A lot of people have tried different techniques to do this, but we came up with a few of our own.
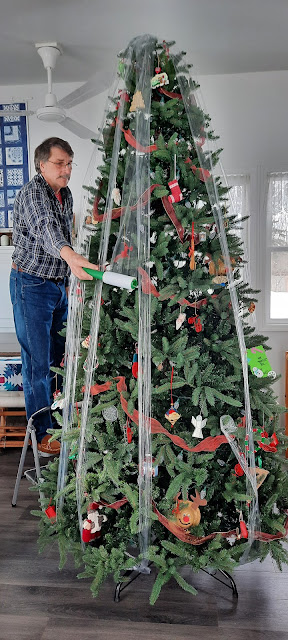
First we wrapped from the base of the tree stand up around the top and back down the base again in quadrants around the tree. About 10 good strands of this plastic rolled shrink wrap. It took two of us to get around the base and through the openings and back up again over the top.
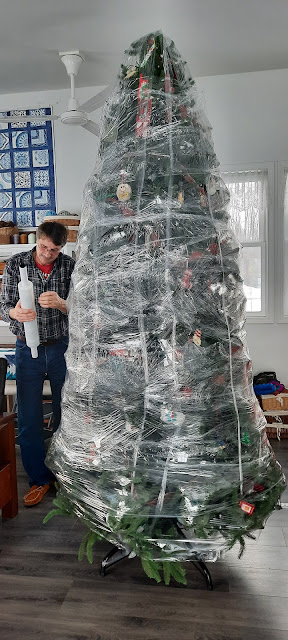
It also took two people to do the next part. One to hold the tree and keep it from rotating while the other one used the wider roll of pallet shrink wrap to go around the tree. Around and around and around we went. Working as a pair to get the tree completely wrapped. The tree still has all of the ornaments and lights and ribbons all in place. We did remove a few precious glass ornaments, but the rest of them are wrapped right into the branches of the tree.
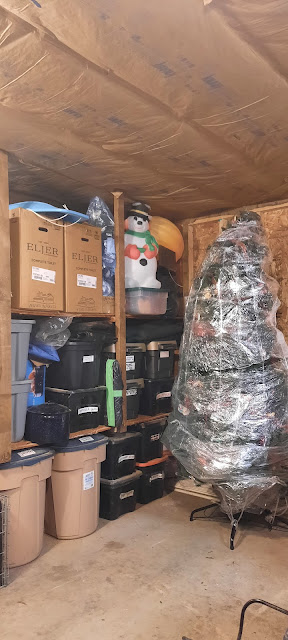
We squashed it as tight as we could around the bottom to get it narrow enough to fit through our 36 inch wide door. It was a squeeze, but we managed to get it out. By wrapping it from top to bottom first, that secured the tree to keep the center trunk pieces from coming apart as we brought it out to the garage. Once we got it into the garage, we stood it up right again and tucked it back into the corner. Hopefully it will stay nice over the rest of the winter and throughout the summer months. Next December we can carry it back in and carefully snip away the plastic with a scissors and be careful not cut into any of the wires or ornaments. A little fluffing to the branches and rearranging a bit and I think it will be just fine! Sure beats having to undecorate it all, take off the lights, then store everything away in totes.... Then take the tree apart in sections, wrap them all up in huge contractor garbage bags and stack them out on the shelf. The added plus is now there's more room on the shelves to put some of my other totes and organize the garage a little better! It's kind of the "overflow storage" for a lot of my weaving fabric and supplies.
(notice Steve's insulated ceiling in the garage!)
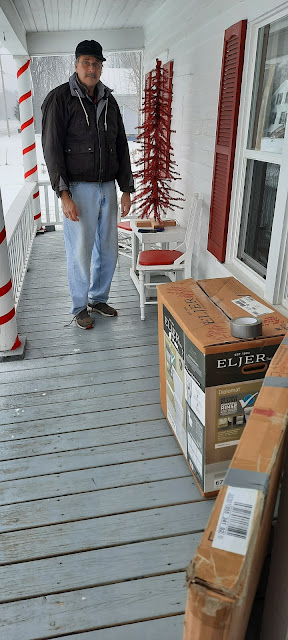
We had one warm day before the weather turned blastedly cold. It was about 35 degrees so we were able to get out and get the decorations off the front of the house. It was warm enough we really didn't even need to wear gloves so we could snip all of the ties that held everything into place.
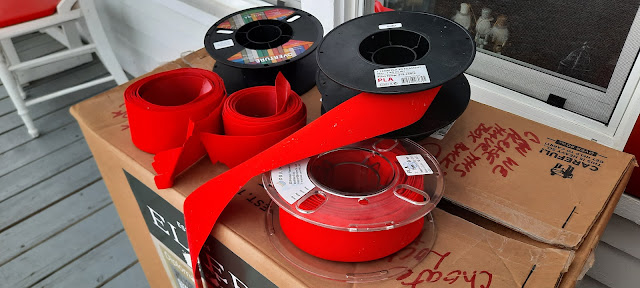
Our son-in-law, Jesse, does a lot of 3D printing. The raw material he uses comes on these big plastic spools. He saved us a bunch of them so we could wrap up our red velvet ribbons to save again. That is a lot better than just throwing it away and buying new stuff next year?
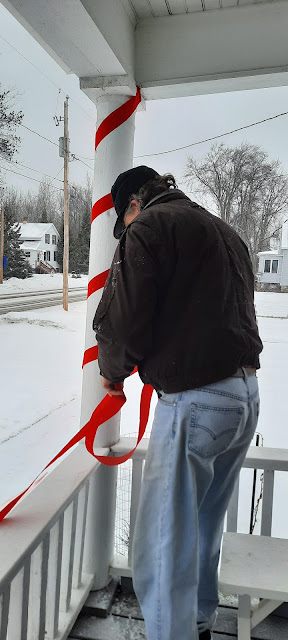
We carefully unwrapped all of the ribbon from the pillars and removed all of the lit garland from the railings. Everything is carefully layered in big boxes. The big snowflakes came down and were packed in a large flat box. The house looks so plain now!
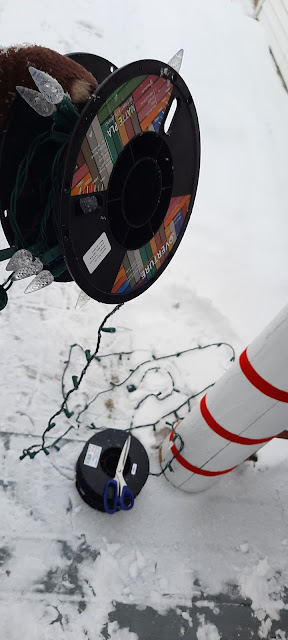
The plastic spools even worked good to take off the outside lights that we had on the pergola and tiny tree. What a nice way to store them and they are tangle-free.
Now all of the decorations are stowed away and it's time to look ahead for the rest of the upcoming winter. The holidays are over and the dreary winter weather is going to set in. We have considered maybe going away to the desert for the rest of winter, but instead we are going to hang closer to home. I think we are going to plan on a trip this summer across the United States may be heading out west on US 2 and go all of the way to Washington State. In the meantime, we will hunker down and work on some winter projects.
~~~~~~~~~~
I am pleased to say that our removal of our electric water heater and our Christmas Present installation of our tankless natural gas water heater resulted in a $30 decrease in our electric bill last month! That is almost 33% of our entire monthly electric killowatt usage! We will get an even better figure on our savings by the next bill without the added Christmas lights on it. We didn't see much difference in the natural gas therms usage from last years bill, but we will compare them again on the next bill.
~~~~~~~~
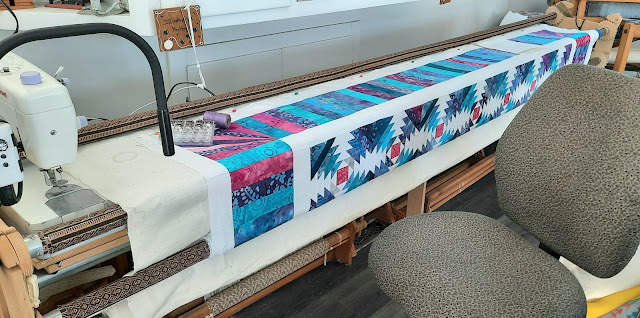
The pineapple quilt that I was working on is finally fully assembled. I got it rolled up onto my big quilting frame with the backing and the batting in place. I wanted to pick up some variegated purple / pink / blue thread for the quilt so I'm waiting to get started until the new thread comes. This is a queen size that will be for sale in my Etsy shop soon.
I really try to discipline myself that I won't start another quilt until I finish the one I'm currently working on. It keeps me from getting too many projects going at the same time. Because I wasn't going to get the thread right away, I did start on the next quilt. Shame on me!
If you've been reading my blog for a while you know that all around my house I have stained glass light fixtures. Most of them are from the same line called Belle from Menards. I have 2 bedroom ceiling fixtures, a 5 shade chandelier in the kitchen, 3 wall sconces in the She Shed, 2 reading pole lamps and 3 table lamps in the bedroom and livingroom. They are throughout the house and I really enjoy them. I even have one hanging down as a pendant over my kitchen sink.
they are all like this:
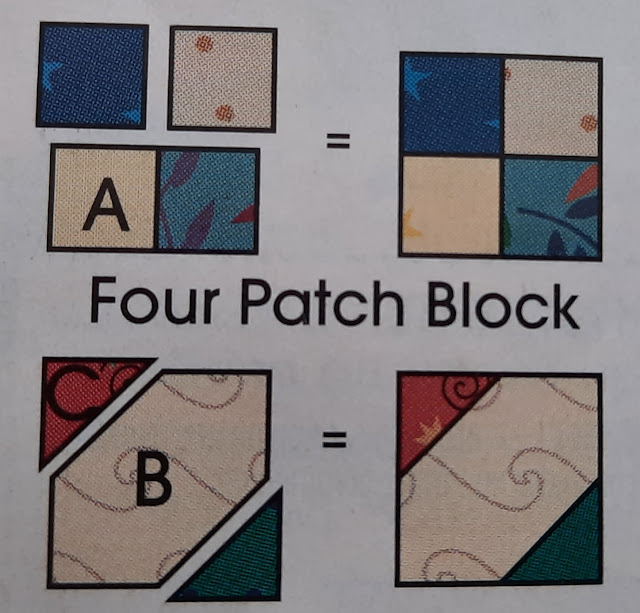
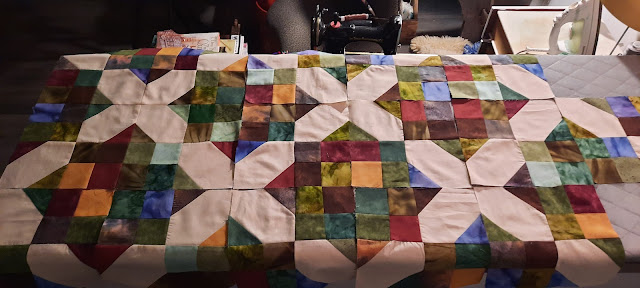
I had decided that I needed to make a quilt to match the light fixtures in the bedroom. Last summer after we installed the large window, the beautiful blue and white quilt on our king size bed looks out of place. So I decided to go through my stash of fabrics and pick out everything that was coordinating colors with this stained glass. I did have to make a run to a little quilt shop up in Marinette to pick out a few more coordinating fabrics. Other matching fabrics I had picked up last fall on our trip out to the Mississippi River along the western edge of Wisconsin. I had this quilt in mind, so I had set those fabrics aside as well. Now I had enough to begin. It's a very simple pattern, only utilizing these two blocks. It's how you put them together in a big array that makes the difference of the quilt!
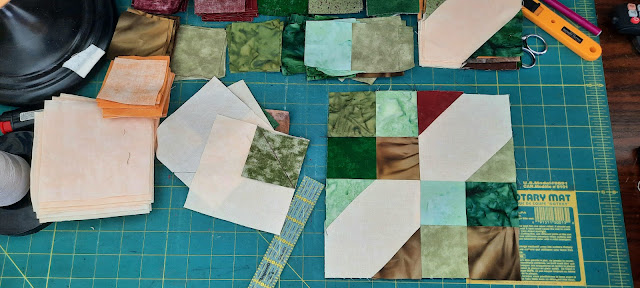
I started cutting out squares, carefully measuring and arranging my supplies. I like to have everything pretty much arranged at my fingertips while I start creating. I'd rather have it all there then fly by the seat of my pants and run too short later. That way, if there's extra fabric I can always make some into throw pillows to put on the bed after the king size quilt is completed.
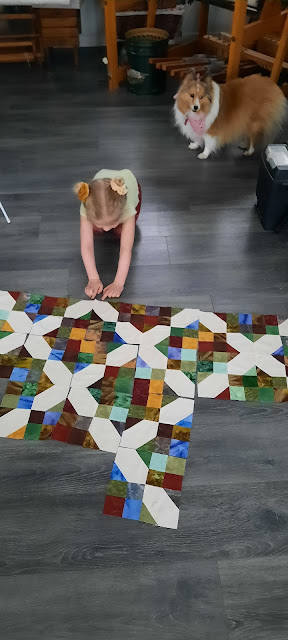
I got about 60 blocks sewn already. The littlest granddaughter Claire was over the other day, and she helped me arrange a few on the floor to get an idea of how it is going to work out. Of course, Binney had to oversee the whole process.
I won't start sewing them into strips until I get them all laid out. I am trying hard to not let any two of the same colors touch at any of the seams. So once I get it all laid out, I will carefully number each one by row and column before sewing them together.
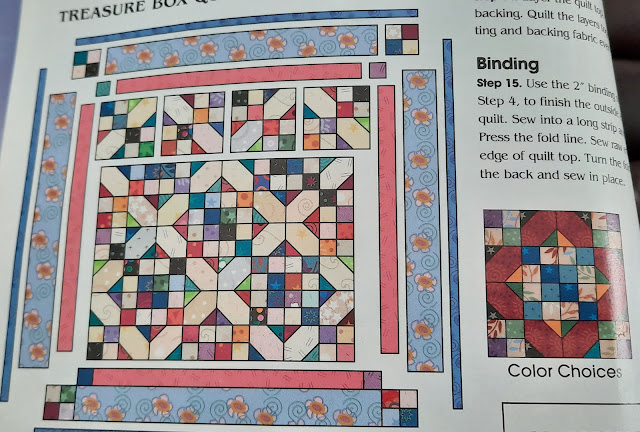
It will eventually end up looking like this... but king sized with a lot more blocks. Some nice borders and trim will round it off. I think I am going to like it. Then my sister wants my blue one for her king sized bed!
~~~~~~~~
The weather has been terribly cold, well below zero with awful wind chills. Claire's parents were going up to their cabin for the weekend, but they asked if she could kind of hang out here and stay warm with us. There would be no outside fun playing in the snow for her when the wind chills were twenty and thirty below zero!
It was nice and cozy warm in the She Shed and she was helping me weave on the big Sanna Kangas Finlander Barn Loom. She sets her little butt on the bench right next to me, just like many many years ago when Ron Kangas sat his little butt next to his grandmother Sanna, and wove rugs during the Depression.
One of my fellow members of our Home and Community Education Group, Charlotte, (who is also my dear old neighbor from when we lived on the river) gave me two white chenille bedspreads. They're absolutely wonderful to weave into thick rugs, after they are cut into long pieces. The only problem is the chenille is fluffy and makes a bit of a mess. But we don't care. The design of this rug is strips of the white chenille and interspersed throughout the rug are laid in pieces of knit fabric we call "Caterpillars"! They are very similar in color to the book about The Very Hungry Caterpillar. A rug like this makes a great baby shower gift when accompanied by a copy of that very popular book. I plan to weave up 2 rugs, and give one to Charlotte. The other will be for sale in my Etsy shop.
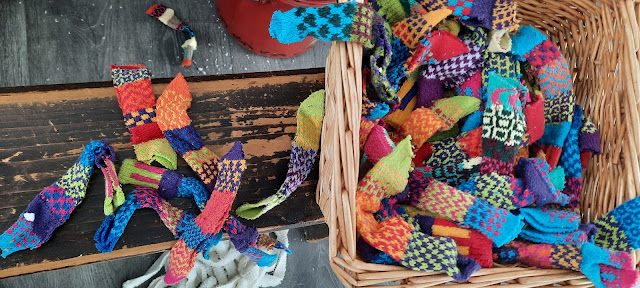
The caterpillars are actually knit pieces of surplus sock fabric that a friend buys in bales from a company out in New York called Soulmate Sock Company. These are the defective socks that are sliced apart and sold as scrap. My friend Hilary at www.crazyasaloom.com sells these by the pound. I have a box full, and I cut them a little bit smaller than how they are originally shipped. I lay them in each open shed as I weave, and they create perfectly colorful caterpillars!
Here is a little YouTube that Steve shot of us while we are weaving. You can see how it's Claire's job to pick out the little caterpillars and decide which color is next, while I take care of the beating of the overslung beater on the heavy rug loom. I am so glad that all of my grandchildren enjoy helping me with weaving, spinning, quilting, or other fun projects in the She Shed. We are making memories.
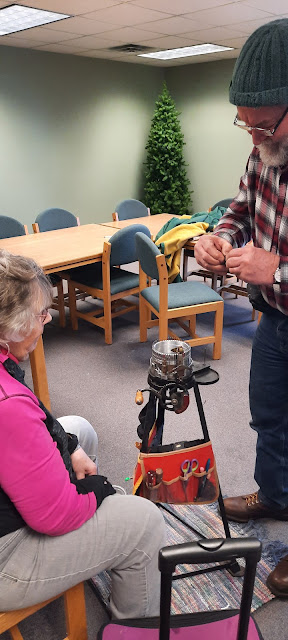
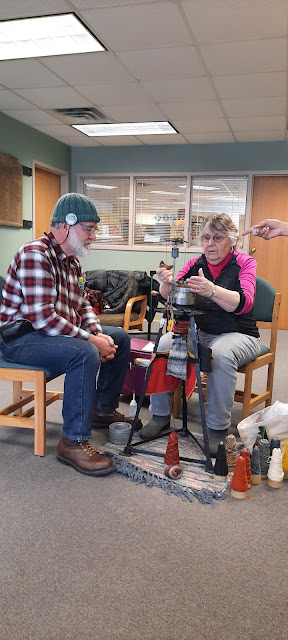
I did go to an antique sock cranking meeting last week.... It is held four times a year over in Oconto Falls. I'm glad that I did go, because a gentleman arrived from Escanaba for a first-time visit to our group. I had met him last fall when we were up there camping near the Escanaba State Fair. With the help of my sister, I had purchased my Singer Featherweight Sewing Machine from him. He restores them, as well as repairs other sewing machines. He has a fascination for the antique circular sock knitting machines and has restored a couple of them as well. I had invited him to come down from Escanaba which is about an hour and a half drive away to attend one of our meetings if he happened to want to join us. And he did! He brought along a very interesting friend by the name of Joanne who is also a very accomplished spinner and knitter. We had a great time visiting and he shared some projects with us.
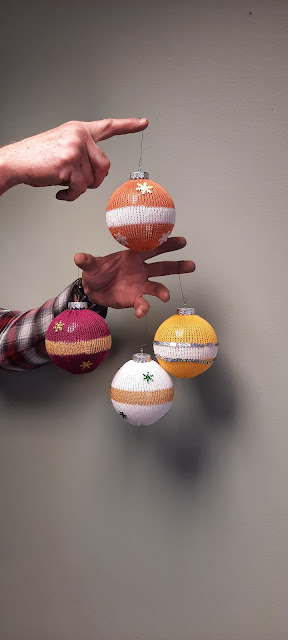
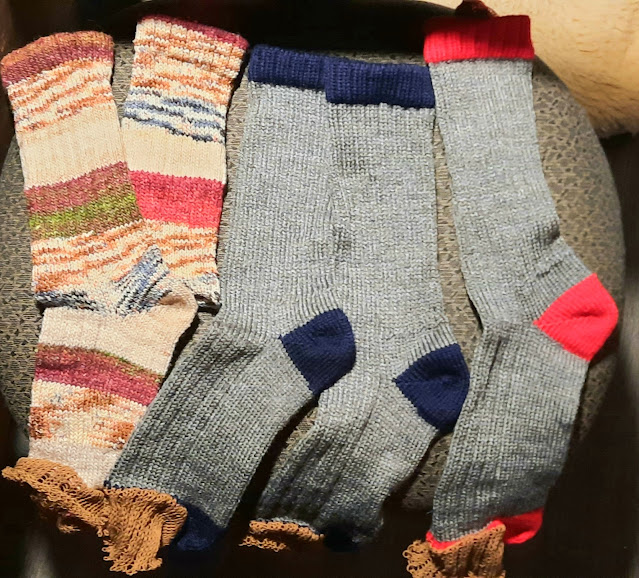
He knit these sleeves on the sock machine
and stretched them over Christmas Ornaments!
We were able to share some patterns, sources, insights and ideas. Plus laugh a lot and go get some lunch nearby. It's a whole day spent with our circular sockknitting machines.
He also was able to repair one of the other member's malfunctioning sock knitting machine for her. She was delighted that he could just fix it on the fly and she was off and running again in no time with her cranky machine.
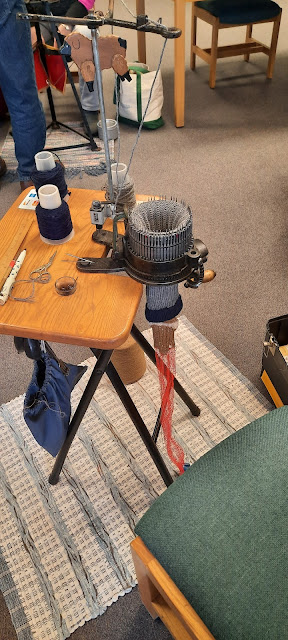
Here is my sockknitting machine. It's an oldie but a goodie. I can get a pair of socks done in about an hour, with no interruptions. But of course in a room of other knitters, that isn't so easily done. But we learn a lot and share sources of good yarns or parts or patterns.
I got a couple socks cranked up as well as a good day of fellowship and being out of the house for a bit.
~~~~~~~~
So basically that is how I was spending the month of January. Working on a couple quilts, working on some rugs, doing some knitting, and enjoying the warmth of inside of the house.
As for Steve, he was fiddling around with a few things in his garage and installed some new shop lights. He now has the entire ceiling of the garage insulated which makes it much warmer out there to work on things if we need to. The winds are no longer blasting in through the eaves along the soffits vents or the ridge vent along the top of the roof line. Nice! In the spring we will take care of hanging sheetrock on the ceiling to finish it off nicely.
So he was thinking it's time to start another project.
A couple months ago we picked up 18 bundles of new beadboard strips from a guy on Facebook Marketplace. They are 8ft long and we are going to cut them in half into 4 ft pieces. There is a section along the wall of the kitchen that we would like to cover in beadboard wainscoting 4 ft high. It will tie in the beadboard pantry cabinet we restored last summer and blend it more with the rest of the beadboard type cabinetry on the other side of the kitchen. I think it will draw it all together and coordinate it nicely. The top edge cap will have a bit of trim kind of like a plate rail and a bit of egg and dart molding underneath that will mimic the trim around all of our old fashioned window and door frames in the house.
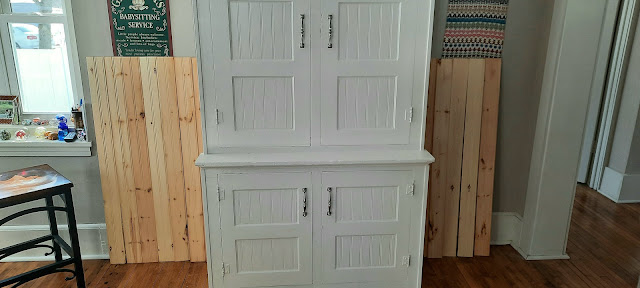
He brought in a couple pieces to lay on each side of the pantry cabinet. Of course they will be about 10 inches higher because they will start at the edge of the baseboard molding. Also they will be sealed with shellac on all of the knots to prevent bleed through and then painted the same color as the cabinets and trim in our kitchen.
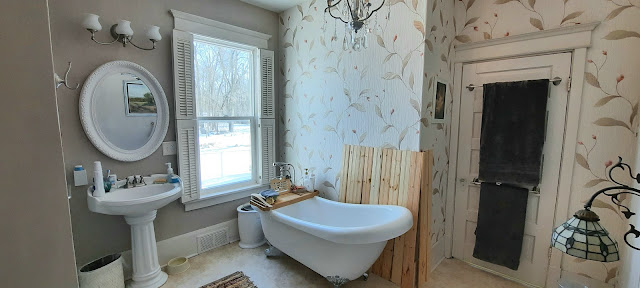
Then---- in the bathroom we are going to do the beadboard all around 4 feet high as well. I love a beadboarded bathroom. We had done beadboard in a varnished and stained type in the bathroom at our last house in Chilton. It gives such a beautiful old fashioned look to the bathroom.
This bathroom, we are going to install it and it will be painted to match. I think we're going to pull off the wallpaper on that one wall because that's too busy. I think I will like the plain clean lines of the beadboard. It will be good to get something on that wall along the side of the tub. When using the handheld shower, sometimes a tiny bit of overspray does hit the wall. I would rather it hits beadboard than the wallpaper. I'm not a fan of any wallpaper, especially in the bathroom. The wallpaper is starting to pull up a little bit on the corner near the window and I think I would prefer to get rid of it.
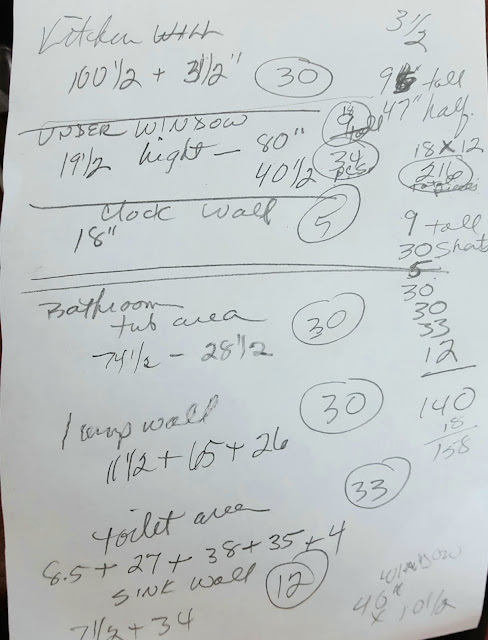
I got up my figures and Steve got out the tape measure and we figured out how many pieces we will need. It looks like we will have more than enough! That way if there are some pieces that have cracks or splits or big ugly knots, we can kind of cut around them and set those aside.
Steve started with one piece just to cut an outline of the lip edge of the windowsill and work to the right and then to the left. That is best to start with the hardest piece first and then work in each direction. The slabs of wood fit together with tongue and groove. We will be putting a white adhesive on the wall and then nailing them into place with his trim nail gun. Once all of the boards are up, I will shellac the knots and then give them two coats of my primer paint mix to make it all come together and it will look custom made!
That's as far as he got today--- one board --- because the football playoff games came on TV. This evening he is watching the second game of the day so I'd imagine we aren't doing anything more with the beadboard today or this evening. That's why I'm taking the time to write the blog while he is watching the TV.
Once the Packers lost last week and we're out of the playoffs, I kind of lose interest in any of the other playoff games. Although I will watch the Super Bowl, I'm just sad that the Packers aren't playing.
~~~~~~~~
February is going to be cold and I don't see much of a thaw coming. I think we will stay snuggled in nice and warm, put our feet up, and look out the windows of the She Shed at the snow.











 Posts
Posts

