Our Wonderful Followers who come back again and again to read about us...

Tuesday, May 7, 2013

Wonderful Weekend Weather

It looks like SPRING is finally here!!!   Our weekend weather was up in the 70's and we didn't have any plans to go anywhere.   Soooo of course, we worked on some house projects!

I will back up a bit leading to the weekend....

Thursday I had gone quilt shop hopping with two friends, Paula and Linda.  We also attended the warehouse sale for Nancy's Notions (a PBS quilting show)  in Beaver Dam.  Besides loading up on sewing stuff, I saw this fantastic pedestal fan in the clearance area of the sewing room stuff.    I loved it at first sight, and hoisted it up and over to the holding area until I was ready to check it out.  It was all metal and very heavy.  Here are us three, shopping till we were dropping!


Part of the shopping marathon was to stop at various quilting stores around Wisconsin.  We hit some in Ripon, Oshkosh, and Appleton.  (plus stopping for lunch)   On Friday, I had one more shop to go to in Plymouth so they would stamp my "passport" for all 12 shops that I had gone to.  Then I am eligible for more prizes.   On the way back from Plymouth, I stopped at a rummage sale and saw these three pretty handpainted metal buckets.  I believe it's called "rosemalling".  They are stamped 1976 on the bottom and I have no idea how much later they were painted, but I really liked them.   I chose the creamy one as a trash can for in my Loom Room.

I bought it for a whole $2... but after getting it home, I was thinking about the other two buckets... and regretting that how I should have bought all three.  The rummage sale was 20 miles from home.  On Sunday, we got in the car and drove back down there.  The rummage sale sign was still out by the road for the rummage sale, but when we pulled in the barn yard, all the sheds and barn that had the sale stuff we closed.  I knocked on the door, but the people said they were not opening until 1pm.  I told them I just wanted the two buckets, but they said I had to come back at 1pm!   I said I drove 20 miles to get them.  No dice....


We went home and worked on some projects instead.  I figured I would just pass on the buckets and not drive another 40 miles round trip to get them.  About 2pm, Steve said we could go back and see.... and we did!   Can you imagine, 80 miles total from two different round trips to get some $2 buckets?????


But the nice part was ... on the way back home from the rummage sale, we stopped by a nursery.  Steve said he wanted to buy me a tree for an early Mother's Day present.  I could pick out whatever I wanted.  We walked around and found this wonderful "Weeping Cherry Tree" !!!   This is what it will look like when it's more mature in full bloom!


The tree is created by grafting on a weeping Japanese Higan cherry top onto a stronger sweet wild cherry rootstalk of a tree...   it needs to be trimmed back each spring of any sprouts that grow upwards and just leave the weeping branches that hang down.  It will be ready to bloom into full flowers in a week or so.  Some of the older ones at the nursery were already in bloom, but we bought a younger one to make transplanting it easier. It will bear ornamental fruit, but more to the liking of birds and not really edible like cherries we know.


Last night I picked up four curved pieces of the same cement trim we put around the flower beds... and will stain them today to put around the base of the tree.   I like to make things match.  I know, kinda obsessive, but at $1.88 each piece, I can manage to add four more to the yard.

Our lawns are greening up nicely.. though the grass is not quite long enough to cut yet.  Steve has the mower tuned up and ready to cut as soon as it does though.  He actually seems anxious to get in some lawn cutting???  

All alongside of the house I have wonderful bright colored tulips opening up... reds and yellows!  So pretty and springlike!   I spent a couple hours pulling out weeds around the tulips, and once they are done and spent, I will plant some of my coleus plants along the house where I am marking the empty spaces... so there won't be any tulip bulbs disturbed.   Then I will space some pots of white petunias in between on the areas setting where the tulip bulbs will be laying dormant till next spring.  I also did a little stencil paint job on my metal watering cans....


Saturday morning Steve rented a stump grinder to get rid of the three big tree stumps in the back yard.    He cut down the two big rotting trees last January before we moved the motorhome over to the yard.  A third tree had been cut down in the past but the large stump still remained.  He ground away at each of the stumps, section by section, and soon they were all gone--- reduced to a pile of sawdust.  He also did a stump for the neighbor lady, and also the three small ones up front where we cut out the overgrown cedars.   It's like a rototiller, but cuts with a big saw blade instead of rotating tines.

Yup.. that pile of sawdust WAS a big huge tree stump!

One day this week, the landscaper company is coming to level out the yard and lay a gravel parking pad for the motorhome.  The excess black dirt from the leveling we will have piled up on top of the sawdust piles leftover from the stumpgrinding.  I will make those into flower beds.  There are already some beds of perennials back there, like peonies, lilies and some kind of snow on the mountain variety.  I can split up some of those and move things around--- and maybe add some more?

It's still too early to plant flowers here yet, the danger of frost has not passed.  I have been carrying in and out my pots of coleus that I have been wintering over inside the house. They will harden off to get used to the spring temps after being in the warm sunny Loom Room all winter.

Steve also bought me a clematis vine to add to my pretty metal trellis he got me for Xmas out alongside the porch.  There are some clematis plants there already, so we will mix them with the new one and get a whole trellis full of blooms!


While I worked on some other yard projects, Steveio was cleaning and sorting stuff in his garage.  He is quite pleased with all of the space he has in there. It's extra deep so he can get things in and out of the workshop space to the left without having to move out the Tracker. Look how far the Tracker can pull forward in there!  

He has the peg boards arranged with tools and supplies, and he hauled a load to the city recycling area of things he didn't want around.  While he was gone, I touched up the back porch where I had been staining and added a new entry mat at the doorway to the kitchen...

Seeing as I had my solid colored green stain out and a brush already wet... I went to work on the sides of the front steps!  They had been plain grey concrete for 100 years.. and had some repair patching work done recently.  They looked splotchy and sad.  I spruced them up with new green solid colored stain (that won't chip or flake or peel like paint would)   and I spruced them up!   I added a little bit of green to the pillar blocks on the corners and on each side of the door... along with a little trim line along the porch between the siding and the cutout trellis work.  Now for a few pots of bright red geraniums???


We got most of our stuff done on Saturday...  (and then spent Sunday running around buying stupid buckets)  but one other project I wanted to get tackled was the icemaker installation!  

In our last home, we had an icemaker in the door of our fridge.  In our motorhome, we have an icemaker.  But in this house, the fridge that came with the home purchase didn't have one.  (I HATE FILLING TIPPY ICE CUBE TRAYS AND FINDING LEVEL SPOTS IN THE FREEZER)

We realized the Frigidaire fridge we have is already pre-wired and pre-cut with plugs covering the holes to add on an icemaker!  For $49 at Menards, this gal was gonna be made HAPPY!   We found the correct unit for our model and read the directions.  Between the two of us, we got it installed, tapped the fresh cold water line in the basement (no water softener taste for our drinking water at the sink or the icemaker).    The whole process took less than an hour....


 the end result????


Tuesday, April 30, 2013

Painting a rain barrel, swinging door, and a parrot?

Today is a "catch up post" with things I have been wanting to finish up around here....

When we bought the house in late December... out in the back yard next to the porch was this blue rain barrel.  I loved the idea of having a rain barrel.  My Great Grandma Today had a rain barrel and we would stick our hands it in and play with the water.  We are now paying for city water and sewer here at this house.  Our last house was our own well water and our own septic.  With a rain barrel, I think what a great way to water my flowers!  

I had seen a web page about painting rain barrels...   http://www.aquabarrel.com/learn_how_to_paint_barrel.php
so I decided to paint this one!   

I used "Fusion" paint by Krylon as it's made for plastic and should last a long time.  Previously I had used "Fusion" on some plastic lawn furniture about 10 years ago in Oconto and it lasted a long time---

Here is the blue barrel alongside the house....  I washed it good with bleach and let it totally dry in the sun.  I started out by setting it up on a box.  I sprayed the top portion white, and then the bottom portion in green with upward strokes.   


Note the stem of the silk flower setting on the ground. That is what I used with the white and green paints as a "reverse stencil" for the artistic spraying on the base coats.   What fun!!!!!   My neighbors probably all think I am some kind of nut already, I don't care.   My old neighbors used to call me "Martha" when they saw me out in the yard canning vegetable on a turkey deep fryer, or dying sheets spread out on the lawn, or rinsing out sheep fleeces and spreading to dry on the floor of the garage.  Oh well.


When Steve got home from work,  I had him drill a hole with the hole saw.  We had bought this plastic spigot at the Farm and Home store (Do It Best) and they had this neato two piece plastic plug thing with a rubber gasket on the inside.  It's specifically for making rain barrels.  You screw one piece from the inside and one from the outside with the rubber gasket making a water tight seal.  Once that is in place, you screw in the spigot with a little TFE paste or plumber's tape to make a good seal.


We set the barrel up on two cement base stones so it would be raised enough to fit my watering can underneath it.  The overflow hose (which was already on the barrel) is leading off  to the side yard where the tiger lillies are coming up.   The rain coming off the back shaker porch is what runs down the gutter into the barrel.   We had a little rain overnight, and it already filled the barrel up 1/3 of the way.

 (I still have to finish staining the two upper posts that support the porch roof) 


Another project that we tackled last night was a lot of fun and turned out to be a lot less work than we thought!

When we bought the house, there were two doors stored in the basement root cellar room.  One was originally from the fiber storage room upstairs where an accordion folding door has been installed.  Right away, we took off the accordion door and replaced it with the original door that belonged there.

The other door was a "Swinging Door" that was meant for the doorway between the kitchen and the pantry (now my laundry room).  In talking to one of the daughters who were raised here, she said she never remembers that door ever being in place.  Since the house was built in 1913-14, that means the door had been removed sometime over 40-50 years ago.  It spent half of it's life stuck down in the root cellar room.  We think it was taken out because when it swung inwards, it would hit the edge of the newer cabinetry that was installed later in the pantry?

So we hauled the door up from the basement storage area and laid it on some sawhorses in the garage.  We realize that the floor in the kitchen is now much higher than it had been 50+ years ago.  Three more layers of flooring and a subfloor occupy that doorway where this door once hung.  Steve sawed  3/4" off the bottom, cut out a new notch for the swinging hardware device and wire brushed off the rusty metal parts. I coated those with new rustoleum paint.  Then I decided to tackle the finish... thinking the door would need sanding, restaining and new varnish?  Well, with soft rags and a can of Liquid Gold... all the wood came out just gleaming clean!  The old varnish was still in very good shape and preserved the finish underneath all that dirt!

BEFORE                                                            AFTER

Amazing! No refinishing needed at all!   Note--- in the background is ANOTHER blue barrel.  I might paint that one too and put it under the rain gutter behind the garage and use it to water tomatoes I want to plant back there.

Back to the door:

Since it looks so good, Steve screwed in the swinging hinge pieces and we brought the door into the house.  It is now restored back to it's original place in the kitchen!  It looks so nice there on the left of the grandtot photos.

The door to the far left is also a swinging door that leads to the formal dining room
The middle door is the one we just put into place to the laundry room. 
The door to the right leads to the downstairs bathroom, back hallway and down to the basement. 


Speaking of the laundry room... it's finally DONE!   (just about) I want to coat the newer style oak cabinets with a layer of colored polyurethane to make it match the rest of our woodwork. We moved up the washing machine, dryer and laundry sink to this room after moving the main appliances into the kitchen and removing the bottom cabinets and sink.  We have a bit of trim to finish up, but mostly the room is done and functional.  The door to the right in the right photo leads up the back stairs to the upper floor.

LEFT SIDE OF LAUNDRY ROOM                RIGHT SIDE OF LAUNDRY ROOM 


On Saturday morning, Steve went to help his brother move some exercise equipment he bought from a friend's mother.  While there, the lady was preparing for a rummage sale.  She had Steve look at her "treasures".... and he brought home some wonderful things for our home! 

This stained glass parrot is wonderful!   I hung it up on the front porch and it turns around in the breezes from the open windows.  The stuffed collie is waiting in the grandtot bedroom for a hug the next time the wee ones visit.   Ducky, our collie, came in and laid down by it last night, like a littermate. Awwww


 And these two life-sized Raggedy Ann and Andy are going to bring squeals of delight...
someone hand made them! What a nice addition to the grandtot bedroom. 

Okay.. enough blogging and pictures today. I just wanted to catch up a few things on the blog that I forgot to mention yesterday.

Gonna put on my walking shoes, and hitch up the doggies' leashes.  We are heading to the post office where I tie them to the railing and run inside to ship boxes out... they wait patiently and I give them doggie treats when I come back out again.  It's about as far as old Ducky can walk now.  Three blocks over and three blocks back and she is all done in for the day.  Almost 14 now.  Elegant old lady who thinks a stuffed collie is her littermate... what a silly dog.  Reverting to puppyhood????


Monday, April 29, 2013

Birthday Boy, Socks and Weekend House Projects

Our dear Steveio has turned... gasp... FIFTY FIVE YEARS OLD!

All of the kids and grandtots came last Saturday for his birthday party.  The poor birthday guy had to work, plus he was LATE coming home from some meetings ---  so the kids were lined up at the porch windows, looking at each car driving past the house.  "Where is Grandpa?  Where is the Tracker?" they kept asking us!

 See why my porch windows are all smeared up with fingerprints????

He finally pulled in to be greeeted by their cheers and shouts.  Soon we had them all piled in our laps...  little Mason had enough of photo posing, they had just come from a photographer for their family pics, and he said enough was enough!   So I stuffed a bottle in and held on tight.  Then Clayton started fussing that he didn't have a bottle (he is now only using a cup)  so pretty soon we had to turn them loose!

The kids had a blast playing with the toys, we took a walk to the park, and later they were running around the house up and down and all around.  It feels so good to have a house full of wee ones laughter, shouts and screams.

We grilled out burgers and brats, and finished off with a chocolate chip mint ice cream cake for the birthday boy.   He officially can now retire after working his butt off for the state for 35 years--- but he is enjoying his new transfer job at High Cliff State Park.  Guess he will hang around for a while as we enjoy our new house in Chilton.

Seems strange that only one year ago we were selling the house up on the river in Oconto.  I hope the new people are as happy in that home as we are in ours!


Also, on Monday--- I trekked back up to Oconto area to go the library in Oconto Falls.  Twice a year we gather there to share sock machine knitting tips and tricks and swap and share.  Most of us have antique old sockknitting machines.  There is a company now making new ones from the old patents from the Gearhart company.  Here is their link: Earlbacher Gearhart Company


I brought along the extra machine I had for sale.  This gal Tracy came all the way from the U.P. of Michigan, hoping someone had one for sale.  Sure enough---- she bought mine!   Look how happy she is!   I gave her a hand's on lesson right there.  Soon she was cranking yarn and even turned a heel... twice!

We had a show-and-tell time--- and each of us shared something we had done. 
It was a nice day to get out and about, 
plus I made a fellow sock-cranker happy with a new machine to play on.  


The rest of the week flew by and before we knew it, the weekend had arrived.  The weather has finally warmed up in Wisconsin to daytime temps in the 70's.  WOW!   We had opened the windows and let in fresh air.  I scrubbed some of the screens and we got some house projects done. 

The trees all got the dead branches trimmed off
We raked the yard and collected the pine cones from the tree up front
Steve cleaned all of the rain gutters from old leaves
We planted some hydrangea, lilac and transplanted some perennials
We moved some bird feeders to a better viewing spot by the dining room windows
We mounted my new scrollwork rack for the garden hose  
Steve got the water lines hooked up to the washing machine and laundry sink 
and started nailing up the trim I had stained.  

That was all the "little stuff" that we got done on Saturday.  On Sunday we got up and had cinnamon muffins and coffee out on our sunny porch.  Ahhh the sun coming up in the east streams into the porch with golden warmth.   This is what we were waiting for...  springtime on our porch! 

See? We don't work so hard ALL of the time!

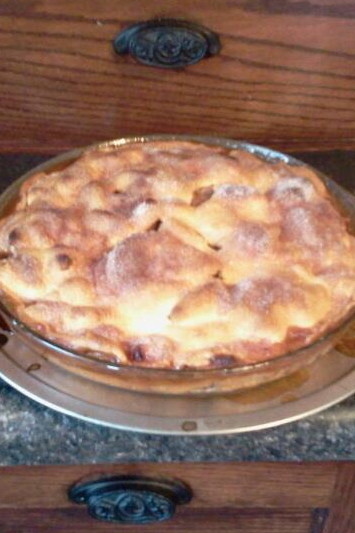
I got on a baking bug--- and bought some granny smith apples the other day.  I figured it was time for an apple pie!   Oh my the house smelled sooooo good! I sprinkle cinnamon and sugar on the top crust for added flavor.  


I missed my little baking buddy Chelsea who loves to make the apples go "round and round" on the peeler device.   Allegra likes baking chocolate chip cookies so she can eat the chips.  Jameson likes making rice crispie bars with sprinkles.  Wonder what Clayton and Mason will like to make?  They are now both one year old and time to learn how to bake with Granmuddah Pfun---


Sunday morning after muffines, Steve went to to Waupaca to help his dad with a few things.... so I got out my buckets of Cabots solid colored stain (looks like paint but don't chip, flake or peel like paint)  and started on the back stairs.  They had never been painted or stained, so it was like starting with a new project.   The wood was quite weathered, so it took three coats to cover it all up.  Those spindles take a long time and I worked on it on and off all afternoon.  Sure made a difference!

 BEFORE                                                                            AFTER 

I have to still touch up the upper rails on the shaker porch so they get spruced up too. 


Another project we worked on over the weekend was working on the front flower beds.  In my last blog, I had posted where Steve cut down all of the overgrown cedar shrubs and we exposed the lovely cut-out trellis work trim under the porch.  How pretty! 

Saturday night we picked up scalloped cement edging for the flowerbeds.  It only came in beige, red or grey cement.  So we bought the grey cement ones and I stained it all white to match the house.  My handy dandy saw horses were set out front as I stained 6 pieces at a time.  

 Whew... I look awful in this pic, but it was 8 a.m. and my hair was up in a clip.


I had 20 straight pieces and three curved ones to do to get enough to go across the front and also around the side a ways. Each one was pretty heavy... and Steve helped me place each on into place.  I think it looks so nice and neat trimmed up that way.


I am going to stain the sides of the porch steps too.  And maybe add some hunter green highlights here and there to the trim on the front of the house as a third color. 

Now if it only warms up enough to plant some hostas and other flowers in the newly made flower bed?   The side of the house is already planted with bulbs and other perennials... Coming up are tons of tulips, daffodils and Glory of the Snows tiny blue flowers.   I even hung out the humming bird feeder, hoping to attract some when they come north.   

While we were digging up the front flower bed, we ran across this tiny St. Joseph statue.  The previous owners' daughter told us they had put one in somewhere, in hopes of it helping to sell the house...  and it worked because we bought the house!  


During my years as a real estate broker, I had heard many times about burying a statue to help sell a house.  

This is the legend:   
Known in the Catholic faith as the Patron Saint of the home, Saint Joseph has been prayed to for centuries by those who wish to sell their house. Earthly father of Jesus, Joseph was made a Patron Saint because he taught Jesus to be a carpenter and made sure that he was always well housed. Interestingly, a ritual of faith developed long ago that involves burying a statue of Saint Joseph in the yard in order to sell a home. This tradition is continued by many people today in hopes of selling their home quickly and at a profitable price.  

How the Tradition Began:

  • The tradition of burying a Saint Joseph statue began in Europe around 1515 A.D. Nuns at a cloister needed to expand their lands. They began by burying medals imprinted with the image of Saint Joseph into the ground. Their prayers were heard, and within a short time they received their request. It is unclear how the use of Saint Joseph medals evolved into the use of Saint Joseph statues.


I am going to send the statue now to a fellow RVer who is trying to sell their home.  
Perhaps it will work for them... it did for this house! 


Last night Steve finished up the hookups for the laundry sink and washing machine in the new laundry room.  I will snap pics of it for the next blog.  He started nailing up the trim last night--- but I was so worn out from the day, I told him to STOP!   It was time to curl up and relax (and watch "Revenge" for the rest of the evening)  Whew.  I think we need another vacation????


.