Our Old House Projects are always a bunch of fun. We fondly refer to our 104 year old home as Our Old House. We always try to make it nicer, but try to keep the original features and restore things that were changed over the years by the previous owners.
The back side of our house has three doors! One is up on the back shaker porch for the second story. The lower portion has two entrance doors. One on the right leads into the lower back hall and down to the basement, the other door on the left goes right into the kitchen from a walkup porch.
(pic from last summer)
The back hall area was kinda sorta yucky with hokey white paneling from the 70's with brown streaks. We pulled up one small section to peek behind, and there was cracked plaster behind it. That is why they put it up in the first place. We are not about to tear it all off and re-plaster or sheetrock/drywall it.
Nope, not for a back hall, we never really see this part of the house much unless we were going down to the basement. The underside of the servants stairs to the upper level had been painted a soft yellow.... but at one time it had also been deep rich brown stained and varnished wood! The ceiling right by the back door also was lovely old stained and varnished beadboard. I wish they were still that way. Sigh. I hate when people paint wood!
We keep our coats on hooks along one wall and our shoes and boots laying on the floor under the coats. It's kinda cluttered and messy, but hey, we don't often go in and out that way, so it didn't matter. Or so I thought. Steve thought otherwise!
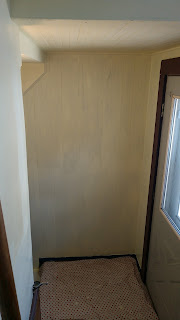
This photo was taken after we already straightened up a bit, and Steve removed a large yellow cleaning supply cabinet that had been resting on the ledge to the left....
He hung the cabinet down in the basement which made a lot more sense. I keep all of our cleaning supplies, extra light bulbs and dog grooming stuff in there. It didn't matter if it was down in the basement or on that ledge.
By moving that cabinet, it opened the space up nicely now with room to the left of the coats. Once we get the painting done, we can move the shoe rack, (really a bookcase) over to that ledge.
Steve had a day off driving the Old Fart Party Bus, so he cracked the whip and said "Git on yur paintin' clothes woman!" and we were off and running before a second cup of coffee! He removed the coat rack to save for later. It was still original wood work and original hooks, so we didn't want to get paint on it.
Steve hates painting and usually has me do the cutting in with a brush. His knee was bothering him so he let me do all the down low cutting in and he did the standing up stuff. He doesn't even need a ladder, so it was not too bad for him to do that part. Once I got all the bottom cutting in done around the stairs and baseboards, he was ready to roll the first coat. Ahhhh a soft buttery cream yellow (like our laundry room).
BACKSPLASH BEFORE
BACKSPLASH AFTER
I also re-hung the "HOME" print over the washer and dryer.
This had been left by the previous owners and I like it.
This room used to be her tiny kitchen, and we made it into a first floor laundry.
I was done with this quick project while Steve finished cooking our breakfast. I think it looks much better with all the walls and backsplash matching. We are not rubbing on the walls or really walking near the wall where the new paint is, so I think it will last. I do have extra leftover paint to use for touchup if we need it. Maybe someday we will rip down the Formica and replaster the wall? For now, good enough.
After breakfast we got the second coat done. I did a few touch-ups here and there afterwards. Before we knew it, we were removing our floor tarps and hanging the curtains back up.
These pics look kinda white from the sunshine coming in,
but really it's a soft buttery yellow color.
Steve put the wood strip with the coat hooks on it back into place.
This had originally been in the half bath when it was a closet...
now we have it in the back hall for our coats.
The shoe rack was moved to the flat area where the cabinet had been.
DONE!
That's it for today...
maybe tomorrow will be some more motorhome modifications
or perhaps a cute adorable little granddaughter doing some sewing?
Here is a preview of why we were busy this weekend:
Stay tuned!


No comments:
Post a Comment
Thanks for taking the time to comment on my blog! I moderate all comments so it may take a little while for your comment to appear.