Underneath that stuff, I will post my regular daily stuff..... kinda sorta fun, eh?
So here it goes, we are up to the letter S now!
MOTORHOME MODIFICATIONS
STARTING WITH THE LETTER S
Solar Panel Installation:
We installed solar panels and equipment in April 2010
THE COSTS ARE LISTED
AT THE END OF THE BLOG
We removed the old panels, as it’s never good idea to mix sizes. All panels should be the same wattage. Sold the old ones off on Ebay.
THE EQUIPMENT:
We purchased four 100 watt Siemens panels, a Blue Sky MPPT solar controller, a Trimetric gauge, and all the various cords and accessories to go along with it. We already have four 6volt golf cart batteries installed.

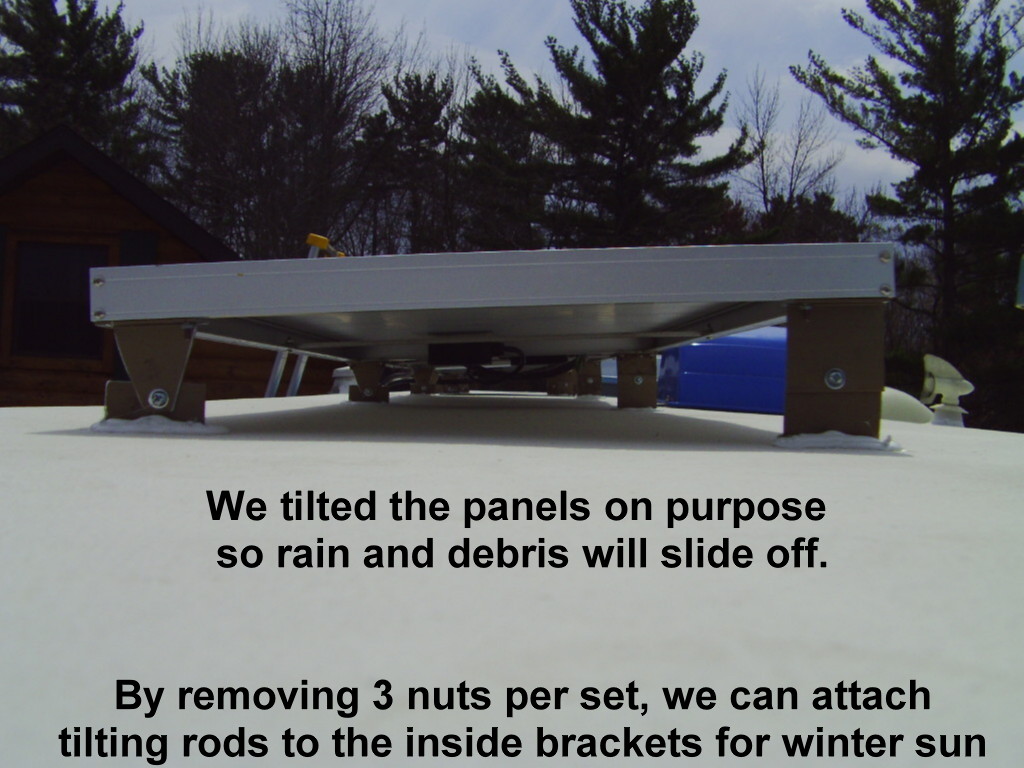
Steve made the mounting brackets out of heavy aluminum, and made them so supplementary metal rods can be wingnutted onto them to tilt them in the winter months if needed. The panels will ride flat the rest of the year, and only add the tilting rods if we deem it necessary. He pre-fitted the brackets while the panels were still on the ground, rather than waiting till they were up on the roof.


Let’s all sing together that James Taylor favorite:
Up On A Roof…………….


And I gingerly crawled up the ladder to assist. I HATE heights….ack! First step was to hook the four panels together into pairs of two.


Now they had to be wired up together and then joined to the two 8 gauge cords


Next comes the time to flip all four of the panels over and install the brackets to the roof… ohhh drilling holes in a roof can be VERY SCARY! Once a hole is drilled, you can’t UNdrill it!


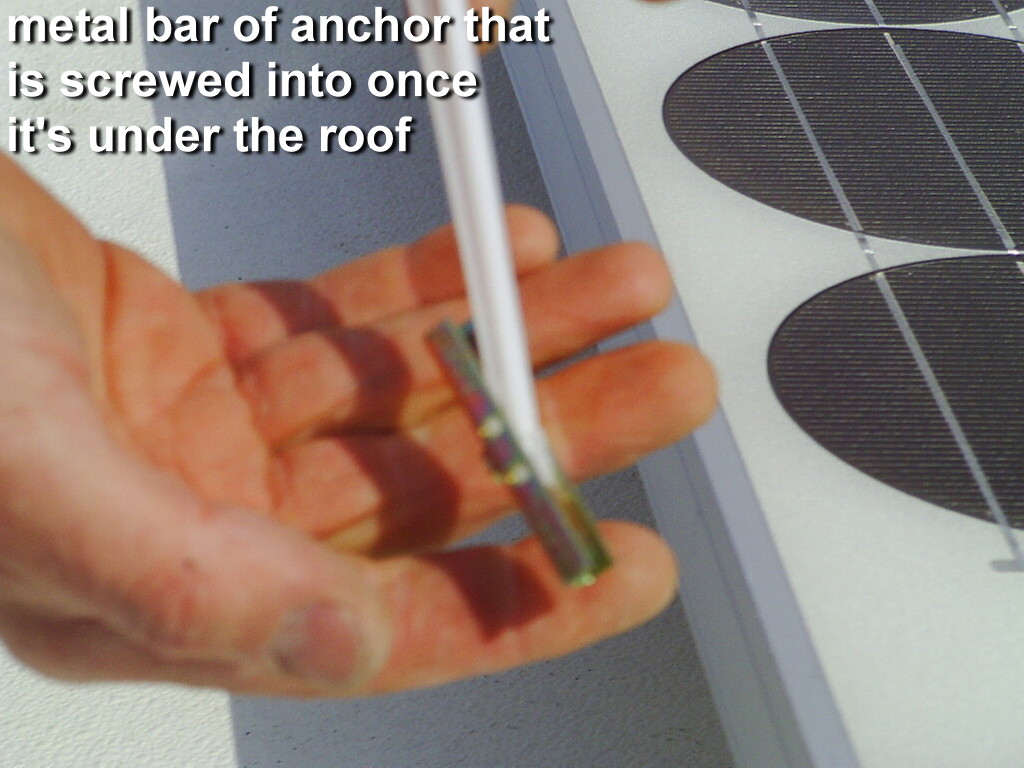
We used some rather unique fasteners. Before you get too excited seeing “plastic”, calm down. It’s only temporary nylon guides that hold the metal toggle into place … read on:


Ahhhhh now look at that ! (about four hours later)
Well, not quite. Now Steveio had to hook up the wires in the solar controller and 30 amp fuse box. Then hook the Trimetric gauge back up to the shunt and it *should* work…..


Now it’s time to get on the roof and drill down, and pull through the heavy gauge wires for the panels. Steve carries along this ladder in our rig, an Xmas present from moi.

WIRING:
We chose a location on the roof for the panels that would not have them shadowed by any objects on the rooftop, such as roof vents and air conditioners. The slightest shadow can hamper the panel's output. We plan to face the front of the rig east as much as possible when choosing parking spots, so the panels are running lengthwise along our south side (passenger side) of the rig. We already try to park this way in the hot summer to keep our fridge on the north side cooler by being in the shade.
On the passenger side of the rig is a perfect spot to run the wires down through a hole Steve will drill in the roof, through an access panel in the closet that reveals a chase for other wiring and the plumbing vent from our washer/dryer unit. Directly below this closet is the basement compartment where the solar controller will be located.


He got the solar controller mounted, wires and ground all hooked up too.

(this next photo added later .. now it's correctly wired and labelled and marked)


We cut out a section of wall and installed the Trimetric Monitor gauge and the 500amp shunt used to monitor the battery condition.


The gauge is mounted in our kitchen, and the shunt is mounted under the bed close to the batteries on the negative line. Special wires come back to the wall panel.


Voila! It works! This is like “Command Central” for seeing how many volts you have in your batteries, how many amps are being used, how much is being charged etc.

Weeeeeheeeeeee it all works!
And even in cloudy afternoon sky in April we are pulling 20 amps.
Ain’t that something?
*~*~*~*~*~*~*~*~*~*~*~*~*~*~*
P.S. We find our solar panels give us ample power to do most everything we wish when boondocking (other than run the microwave or vacuum cleaner) We run the tv's, my curling iron, recharge our cell phones and cameras, run the Galaxy Tablet, and any of the lights and water pump etc. as needed. We have to remember to start up our on board Onan generator once a month to exercise it, because we don't often need it now that we are solared up.
Three helpful links we found when exploring all our solar options were:
About a year afterwards:
Steve had the chance to buy one more solar panel that matched our other ones. (we already have four 100 watts Siemens panels on the roof) Here is the panel and he got right up there and ready to work!!!

Next, he had to tilt up the set of panels to access the connector box underneath. Our four panels are tiltable with brackets that can hold up at any angle to collect the sun's rays in the winter, if need be. But we have never had to do that. The newest panel that he is installing is on a fixed bracket that will lay flat. That bracket is from the old panel and needed a bit of alteration, but he made it work.

There... all done! Wasn't that easy? LOL ...
You can also see the little 10 watt solar panel that is used to maintain the two driving (chassis) batteries.

While up on the roof, Steveio also checked over all the seams and edges and vents, looking for any potential problem spots for leaks or damage over the winter.
COSTS OF OUR SOLAR INSTALLATION:
We removed the old 75 watt solar panel and controller, sold them on Ebay for $262
We already owned four 6 volt marine batteries @ $87.50 EACH $369
4 100 WATT SIEMENS SOLAR PANELS, (used total $894 )
BLUE SKY 50 MPPT SOLAR CONTROLLER, (used $268)
NEW TRIMETRIC GAUGE, SHUNT, THERMO SENSOR,
FROM ALT ENERGY SOLUTIONS (new $234 )
BREAKER BOX WITH FUSES ($24)
STEVE MADE THE BRACKETS AND USED 4 ga and 8 ga CABLES FOR CONNECTION (APPROX VALUE $200)
ONE ADDITIONAL MATCHING PANEL ADDED LATER: (used $65)
TOTAL: $1,792.00 after subtracting the sale of the old OEM panel and controller
Quiet, renewable, reliable energy
being able to boondock in comfort
.... priceless!


Can we borrow your Hubby. Would love to learn Solar better. My hubby is 6’ 7” can’t get on roof. But he hates electrical. How does your sewing machine plug in? Right now only DC power runs on electrical, generator is great but too much variation; worried even with a power surger. Thank you.
ReplyDelete