We had known there had been a big old octopus furnace in the house at one time, and we were kinda dreading what type of patching/repair was done to the hardwood flooring in the diningroom. We envisioned perhaps a large piece of wood screwed into place or at the very least, some plywood or barn boards to cover the hole, which was later covered by wall-to-wall carpeting.
I held my breath as Steve pulled it up....

YAY!!!!!!
The patch job was nicely done with pieces of hardwood,
and not nearly as large of an area as that we expected the space
from the removed floor grate to be....
from the removed floor grate to be....
We knew the previous Baldock/Kopf family wouldn't let us down!
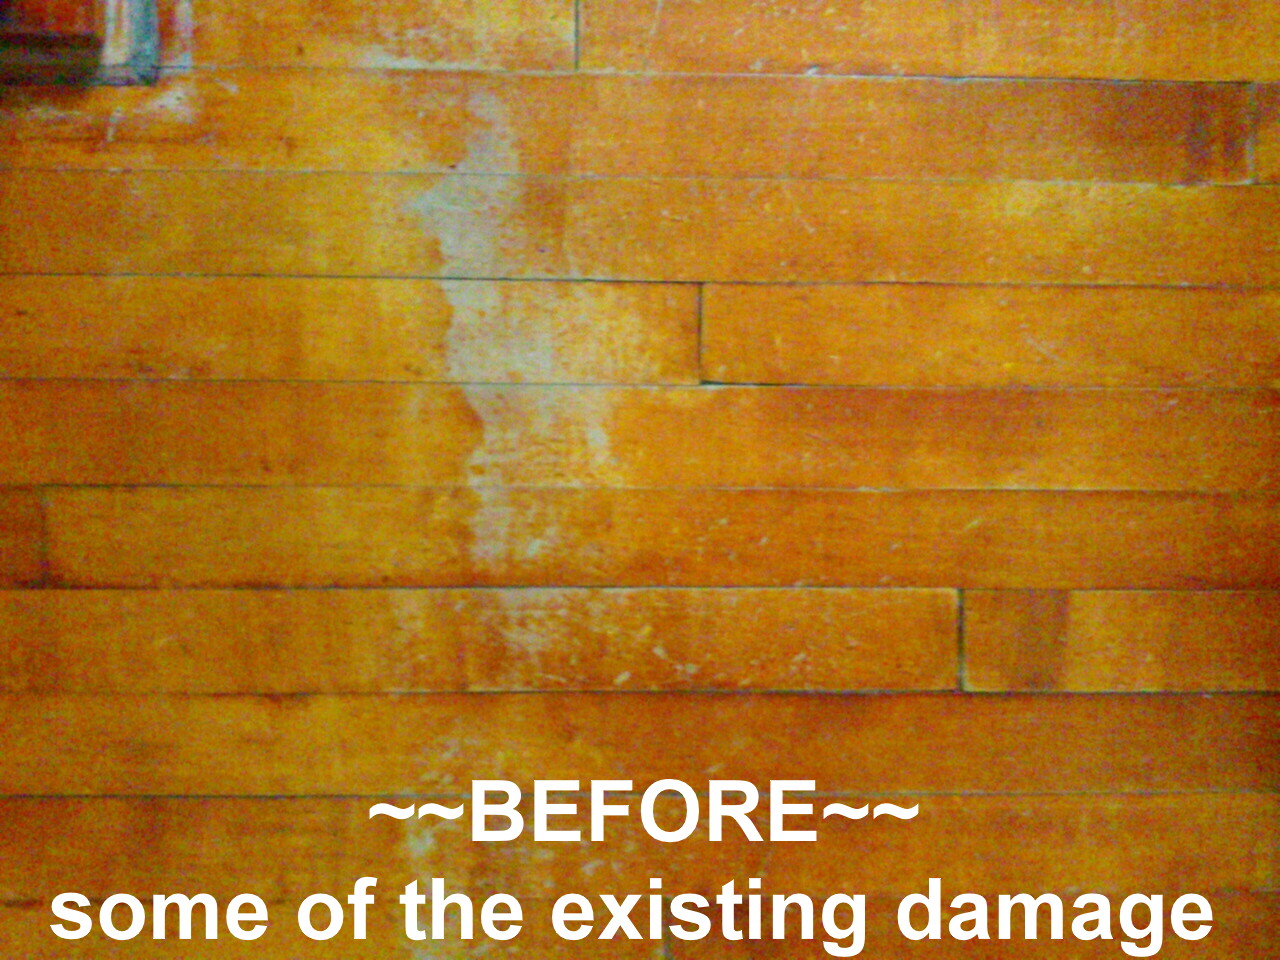
The floors weren't perfect, but who would think in a 101 year old home that they would be. Overall, most of the finish and color was very good. Some of the finish is blotted by the years of a foam carpet pad making dimpled marks in the varnish. There is a large lighter rectangular area in the middle of the room that had been covered for many years with an area rug, allowing the borders to age with UV exposure. The only way to ever be rid of that lighter center would be to totally refinish the entire floor. I was not up to doing that, so I decided that I would deal with that later by careful placement of some oriental runner rugs around the table instead of just one rug underneath.
In some areas, there was something that had been spilled years ago, making the wood grey and removed the finish. But this was not a problem...
This is where I take over. Steve doesn't care for anything dealing with painting or staining or whatever. So now it's "up to me" to make it gleam. He will later help with the cutting and piecing in of the quarter round trim to go around the room. The quarter round strips had been removed to install the wall-to-wall carpeting years ago and discarded. So that is where my Steveio can later take over with the measuring, cutting and air nail gun use to put new quarter round back up. But for now, the floor project is all mine.....
I hauled out my little power sander, put on a "fingertip" attachment and just sanded out the bad spots! It didn't take long, as there was only ONE coat of varnish on these floors... not layers and layers. I was easily able to hit bare wood in each spot with very little effort.

I worked my way across the floor, taking out anything that was too scarred up, scabbed, dripped on or worn. I know this looks just awful. Some of you are shaking your heads, I bet. Thinking I am nuts? Maybe I am? But I have a pretty good idea after doing our foyer last spring what I was facing and how it would pan out at the end.


Now it was time for the magic to begin! I vacuumed the floor thoroughly... and then lightly damp mopped it up to be sure there wasn't any dust or dog hair. Imagine that, dog hair in MY house???
Using some good Valspar Professional red oak wiping stain, I went to work. I had previously used this product on the antique cabinets in the kitchen so I knew it was a good match. I blotted on enough to soak into each area that has the grain sanded open. I let it soak into the wood for about 10-15 minutes.

Then I used clean soft rags and wiped that off.... leaving behind almost a perfect match for the original color of the floor! A tad bit too red. Next step was to use some colored Poly Shades by Minwax which is like a colored polyurethane that deepens the color just a bit more to the brown, and seals the wood back up. I didn't let this set for long, and just wiped it away.

Now I could finally do the LAST part... the FUN and REWARDING part.... spreading on the floor polyurethane .. it's a fast drying waterbased poly for floors that adds just the right shine! It is low odor so it didn't make a huge stink either.
Using a wide painting pad (less bubbles than a roller or brush) and a long handle, I could spread the new poly on evenly from a standing position. Using a hint I saw on Utube, I evenly poured the poly on using a plastic watering can using the open spout (no sprinkling holes). It helped to allow me to pour an even amount of poly in sections across the floor as I worked towards the livingroom. Better than dumping from a bucket.

Yes, you can see the lighter center of the room... and I decided to leave the big buffet in place on the two wooden planks that it rests on. We will just trim around it. Underneath that buffet is bare wood from when the house was originally built and where the previous built-in hutch stood. We moved that hutch out to my loom room three years ago, and set our buffet on two stained planks to cover that bare wood. In the future, if we do want to strip and sand and redo the entire floor, then we will move that buffet and finish the entire floor. For now.... "good enough"
We are lucky to have two sets of stairs in our home, so we could access all the other rooms in the house while this room dried. I had up a baby gate to keep the dogs only as far as the livingroom. The first coat dried fast that afternoon. I did the second coat right before bedtime so it could dry overnight.
Here is the area in front of that door that was sooo difficult. It sure turned out NICE to my eyes! Steve installed the stained threshold to make sure nothing damaged the flooring between the rooms. The soft vinyl in the kitchen is on 5 or 6 layers of flooring over the years and is considerably higher. We had to adjust the swinging door a bit to clear over the new threshold, and it works fine!


I found a pretty oriental runner rug on clearance at Menards and also a small doorway mat. They were a very, very close match to the one in our livingroom and foyer!!! They were only $22 for the 8ft runner and $10 for the door mat, and were discontinued. Oh my... what if I get three more runner rugs and go all around the table, covering the transition from the light areas to the dark areas? YES!
I called other nearby Menard's stores but could not find any left. I went online and found one more up in Marinette. I asked my new son-in-law if he was going up there in a day or so? Could he pick one up? Well, it turns out he was ON his way to Menards when I called and would gladly pick up the rug for me! He also grabbed another smaller door way rug too so I have an extra. At that price, who would pass that up? The stinkers then said I was not going to pay for them, they would be my birthday present!
Now... I needed two more long runners to complete my idea. Steve said since that second runner was a birthday present, if I could find two more that I wanted, they could be my present from him! Well, I found two of them online over at the Beaver Dam store, about 60 miles away. I tossed the dogs in the car and off we went. Done!

And here is my finished diningroom!


The trim is to go around the room where the old quarter round was pulled off years ago.
We bought enough to go around the planks that the buffet was setting on.
I also stained a wide threshold to go between the diningroom and my loom room.

It is Saturday morning---
Steve started his part of the task now,
measuring, cutting and setting into place all the trim.
He will bring in the air nailer with finish nails once he has them all into place.

Next....
the floor in the livingroom!!!!
But in the meantime, we are invited up to our daughter's home this evening in Oconto.
She had been ill and missed my birthday celebration at High Cliff 2 weeks ago.
Some of our other kids and grandkids are coming too.
Now we get to go and cuddle the grandtots tonight!


Your "floor work" looks as good as your "ceiling work".
ReplyDeleteMel
Hey hey Paula... But I didn't have my faithful assistant here helping me :(
DeleteThis comment has been removed by the author.
DeleteI shudder to think what you would ever do if you bought a new construction house to live in... :cD
ReplyDeleteLOL.. but Paul, our last house we DID build from new. Steve and I did it all ourselves and after it was done, we were kinda "bored. Until we had to get it ready 15 years later to sell it! Then we had a whole bunch of projects to work on a deadline! No fun.... Here is a link to when we were selling it: http://kareninthewoods-kareninthewoods.blogspot.com/2012/04/this-is-it-home-is-on-market.html
DeleteI love old homes and yours is beautiful. You did a great job on the floor. Love all the natureal wood in your home.
ReplyDeleteThanks Jo , we especially like the woodwork, and we were sooo glad nobody painted over it all those 101 years!
DeleteLooks good to go. You did a great job.
ReplyDeleteThanks, next up is the living room!
Delete