This guy!
My oh my, that Steveio is back at it again. He just dismounted the door leading from the bathroom into the dining room. It was in pretty rugged shape. The wood has been gouged up and banged up, and painted over with many layers of paint. This home had been a rental from the 1970s until 2015. It suffered a lot of years of abuse by tenants, especially on these beautiful old wooden doors.


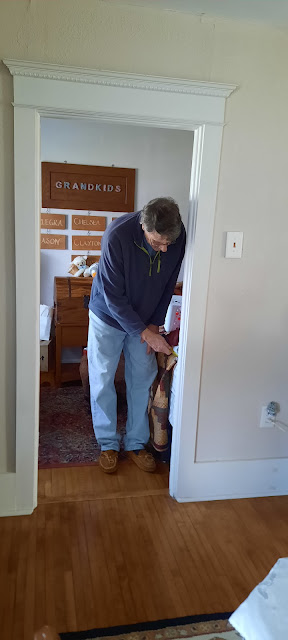
Steve has been taking them off, one by one, and bringing them out in the garage. He removes all of the old layers of paint and varnish with a heat gun. It strips off pretty easily. Then he brings them back in the house to double check their fitting, as he keeps rearranging the doors on our house! Now this one that he removed from the bathroom he is going to put over on the grandkids bedroom. Because he already found a different door for the bathroom and restored that one last week.
Once he gets all the paint off, then it's time for me to put on a coat of our own trim paint that matches our house. It would be nice to leave them as original wood, but nothing else in the house has been left as original wood, so they do need to get painted again. They are still pretty scarred up wood tones and patched and sanded, and wouldn't stain as nice as one would think anyhow. I know it seems like a shame to paint them again, but this way everything matches throughout the house.
So this is been his project for the last week or so, in and out and in and out with doors. He brings them into his garage and gets to work on them.
P.S., this is the decorated little pergola walkway
that goes between the she-shed and his garage.
It's all dolled up for Christmas,
just like the front of the house.
Here is one of his finished doors. It is between the dining room and the main bathroom. It looks so nice after we put on our old fashioned crystal door knobs. He is really doing a great job. (I do the touch ups).
When he rearranges the doors, the little latches in the jambs are not always lined up properly. He has been making little "Dutchman Patches", a woodworking technique that puts a piece of wood into a place where there was an old latch, and nobody can tell when he is done. He is fixing up the door frames before he brings the doors back in. Of course, in an old house, nothing is straight and square. It takes a lot of measuring and back and forth marking and scribing to get it just right.
As I wrote in my last blog post, he also has been covering up our fake molded plastic-y looking bifold doors on our closets. He's been covering them with panels of beadboard and it sure looks a lot better! It gives it an Old Farmhouse-y look. Even though, back in Old Farmhouse days of the 1800s, people didn't have big closets. They just had a few pegs on the wall to hang up their Sunday Best or their everyday work clothes. Take their choice and grab it off the peg. We are so spoiled with choices of clothes and big closets to store them in.
I think these bi-fold doors look nice with the beadboard paneling on it. It kind of matches and harmonizes with the beadboard wainscoting that we put in the master bathroom, seen through the doorway.
So far he only put on two of the crystal door knobs on the two center pulls of the bifold panels. But I think I want them on all four, like we had before. I kind of use one knob to open the doors and the other knob to push them closed again. So we will see. He said that he can add them easily, even though the doors are already mounted into place.
Now he is working on the ones for the guest room/office. And then we might do something with the ones down in the she shed using v-groove board that matches down there.
It's so cute, each time he's done with one of the plastic-y looking hollow core doors, we set them out by the road with a free sign on them. Then I go on our local buy sell trade Facebook group and post what's called a "curbside alert". I gave the dimensions and said that there's a free door here to pick up and post our address. Within 5 minutes this one got picked up this morning. The guy even wrote back to say "thank you"!
Reuse
Repurpose
Recycle!!!
Oh, here's another project Steve worked on last week. I forgot to post about it. Since we moved our bed in our bedroom on an angle, we no longer have bedside tables within easy reach from the head of the bed. What we miss the most is a spot to put the individual controllers for our heated mattress pad. Also Steve likes to keep his glasses near the bed. That way if he gets up in the middle of the night he can still see without stumbling over stuff. So we needed just a little spot to put those things that didn't take up a lot of room.
I came up with this idea and briefly explained it to Steve. A little shelf for each of us that can screw up from underneath into the window frame. Each of us has a window frame right by the head of our bed, why not attach a type of a shelf? They can be easily detached and unscrewed and nobody would even know they had been there there.
In a matter of a few minutes out in the garage he put these two little shelves together with a little lip edge so nothing falls off. His is a little longer to also hold his glasses. I painted them up to match.
See, here is where they go? On each side of the bed. We really like having the bed on an angle this way, it gives a little more room and direct access to walk from the bed to the bathroom at night. As we are older now, we make more trips! When the bed was on the other wall, Steve had to walk around three sides of the bed to get to the bathroom. Now he gets a direct shot! LOL
Remember a few blogs back I mentioned about stopping at the ReStore in Green Bay? I found this pendant light fixture that matched my other lights for only $6. It's normally $39 new in Menards. I grabbed it, not even knowing where I was going to put it. But I wasn't going to leave it sit there on the shelf.
Steve took a look at my beautiful antique lamp that I have in the bathroom. Don't worry, it's far away from the bathtub or the sink. The lamp is beautiful but the old socket housing on the end had been cracked one time when it got tipped over. It had a different shade on it that I really didn't care for. In just a few minutes Steve was able to disassemble the old socket and shade and reattach the new one and change the wiring. Now it's all back together and works perfectly!
~~~~~~
While he is busy in and out and in and out today, I am working on my quilt. I do a couple swaths back and forth of my free motion stitching and then take a break. Like to write this blog! Then I go back to it. It's very pleasant in the she shed today. I have soft Christmas music playing and we are expecting some snow later on.
Here are my little hooks and swirls stitches that I'm doing on the quilt. I just love this pattern and it's so much fun to do. The machine just glides across the fabric, being guided by my hands, with each little loop and swirl and curve created all by myself. There's nothing computerized or automatic here! The stitches go where I put them, and are spaced evenly by my speed of moving the machine. Fancier big long-arm quilting machines have a "stitch regulator" that speeds up or slows down the stitching according to your movements. Not this one. It's all "by myself" to make the stitching even.
I have also whipped up some winter hats! I knit when we are traveling, or when we are sitting out on the front porch, or watching a movie. I listed them in my Etsy store, so if anybody's interested in a cute little hat for a Christmas present, there they are. They are only $10 plus shipping, they are a bargain!
In case you think that I defer all of my mechanical stuff over to Steve to take care of, here is what I do. Each time before I start another quilt I give my beautiful antique Singer Featherweight a "spa day". Actually I do all of my sewing machines, so they work right when I need them to. I take it apart and clean out any of the gunk or fuzz or lint. Then I lube all of the gears and then I add oil to all of the moving parts. Everything is cleaned up and freshened up.
The electric motor has two different grease ports. I clean them out using a little plastic straw that is actually the center part of a plastic type Q-tip. I use it to get the gunk out of the ports and then I refill it with new grease specifically made for these beautiful old Singer sewing machines. I get it at the Featherweight store online.
https://singer-featherweight.com
After everything is all spiffied up, I put it all back together, attach a new needle, and do a test swatch. Good to go!
Speaking of that,
it's time for me to go
and get back to work on my quilt!
Tomorrow's blog I will talk about the wonderful day I spent with our two youngest granddaughters...


Hello This is Abel Here in Austin,Tx I don't commemt much but every evening I go and see if you have posted. Just want to say that i really enjoy reading your posts. How do you all get the energy to do everything you all do. You all remind me of the Energizer Bunny just keeps on going. The Singer sewing machine in your post is just like the one my Mom used to have way back when. Anyway, I really enjoy everything you post, This Blog is my favorite of all the ones I read. Thanks so much for posting. I have been reading your posts all the way back before you all moved into this new house.
ReplyDelete