Back in February, we dressed up our dark brown painted kitchen cabinets with some nice creamy white paint (called String of Pearls). We added some beadboard panels to the sides of the cabinets to match the beadboard that was already on each side of the island. We were very pleased with the results! It really lightened and brightened up the orginal kitchen in this little old National Folk Farmhouse.
Here is a blog post of that project:
https://kareninthewoods-kareninthewoods.blogspot.com/2020/02/beadboard-and-beetle-bug.html
The kitchen was very nice, but I really didn't care for the horizontal glass block tiles that were put in as a backsplash. It was a fad about 10 years ago, and I never cared for that style even back then. The previous owner said it was his first time laying tile, and the project was a little crooked as well. It kind of kept the kitchen "dark" looking and too many contrasting patterns.
We were watching an HGTV show a few weeks ago, and I saw a cute farmhouse kitchen with beadboard backsplash. It caught my eye.... Yes! That is what I wanted!
For under $20, we could transform the kitchen backsplash!
So last week when we were picking up the windows for the motorhome, we called ahead to Home Depot and arranged a curbside pick-up. I brought along an extra scrap piece to be sure the beadboard was the same as what we had before (they had 2 kinds on the website). Steve brought along a battery operated saw to buzz the 8 foot long piece into two smaller pieces to fit in the back of the Saturn. Home Depot will also cut your panels to size for free inside of the store if you wish.

We put the beadboard sheets into the basement on sawhorses with a tarp underneath to catch any drips. It's too cold now out to paint in the garage anymore this year. See my 4 little window boxes of coleus plants? They winter over in the basement, in windows that face the south for sun exposure. I can water them and not worry about runoff from the drainage holes in the bottom of the window boxes. It just goes on the floor and down the channel to the sump pump. I painted two coats onto the panels and the trim pieces we would need for the edges.
On Tuesday, Steve said it was a good day to get started. He gathered the tools and started to measure up to be sure what we were going to get cut out correctly. Of course, with an old house, the walls and cabinets are crooked, so it took careful measuring and scribing to get it just right.
Steve loves this heavy duty adhesive
from Loc-Tite that holds panels tight really well.
We cut the first panel to size, and it takes two of us on the table saw to cut the sheets safely. I found this table saw at a rummage sale one day, on a bargain of a bargain of a bargain, and the guy even delivered it for me! $50. It was a nice surprise for Steveio, and we have gotten a lot of use out of it.
Steve dry fit the piece of beadboard, and marked out the sections for notches around the cabinetry, and the opening for the outlet. He measures three times before he cuts it out, just to be sure.
For the first piece, he spread the adhesive right onto the clean glass block tiles. It clung nicely and we were able to press the panel right into place.
Look at that...
Now to add the next piece and the trim,
and a bit of caulk along the bottom edge.
A while back I saw these really pretty little beadboard style outlet covers. They are made from some kind of stone resin, not flexible cheap plastic. They looked kind of old fashioned. I remembered the old black bakelite ones in our house in Chilton that had ridges like this too. Soooooo I splurged, and bought two for the countertop area and two more for the sides of the island. Sometimes we need a little "luxury".
The outlet covers helped hold the beadboard into place while the adhesive dried. I used tiny pushpins on the edges to hold it as well. Steve carefully ran a bead of caulk along the edges, and in the corner. Once the white caulk cures and dries, I will touch it up with some paint to match.
Wow.. it really brightened up in that corner of the kitchen! I like how clean it looks and less distracting of the other patterned brown/grey/silver glass block tiles. I think it looks more old fashioned and stylistic to the era.
So here is the right half of the kitchen backsplash done. It sure looks different to us. I am glad we are making the changes.
That was enough for one day... I am slipping back under the weather again, and I think I needed to soak in the tub and get some hot steamy air into my lungs. When is this stuff ever going to go away? This has been hanging on since Sept 15, and seems to keep relapsing every time I feel better?
We both got a good night's sleep, so this morning, we decided to tackle the other half of the counter backsplash. Right after coffee, Steve started measuring up and scribing a new piece of beadboard. I wasn't even out of my jammies yet! What a go go go guy!
This time, he decided to put the Power Grab adhesive on the back of the panels of each piece before sliding them into place. Either way works fine, but he wanted to try it out to see if there was a difference. I think the most important part is that the surface you are adhering to must be clean and free from any grease or dampness.
Now he got the corner pieces set. I was surprised to learn there was one more strip of undercounter LED lighting that we never knew was there before!!! It was by the microwave, and we never saw it over the last year that we have owned the house! LOL I was also able to stick up the transformer box for the undercounter lighting again. I know it's hanging down in the pic, because we wanted to find the brand of this style. We want to buy one more strip to put over on the angled corner on the right side of cabinets too.
Now we just had to stick on the trim piece. Don't ya know, that tube of Power Grab ran out, so he had to go open up a new tube, for this one last piece of trim. ACK!
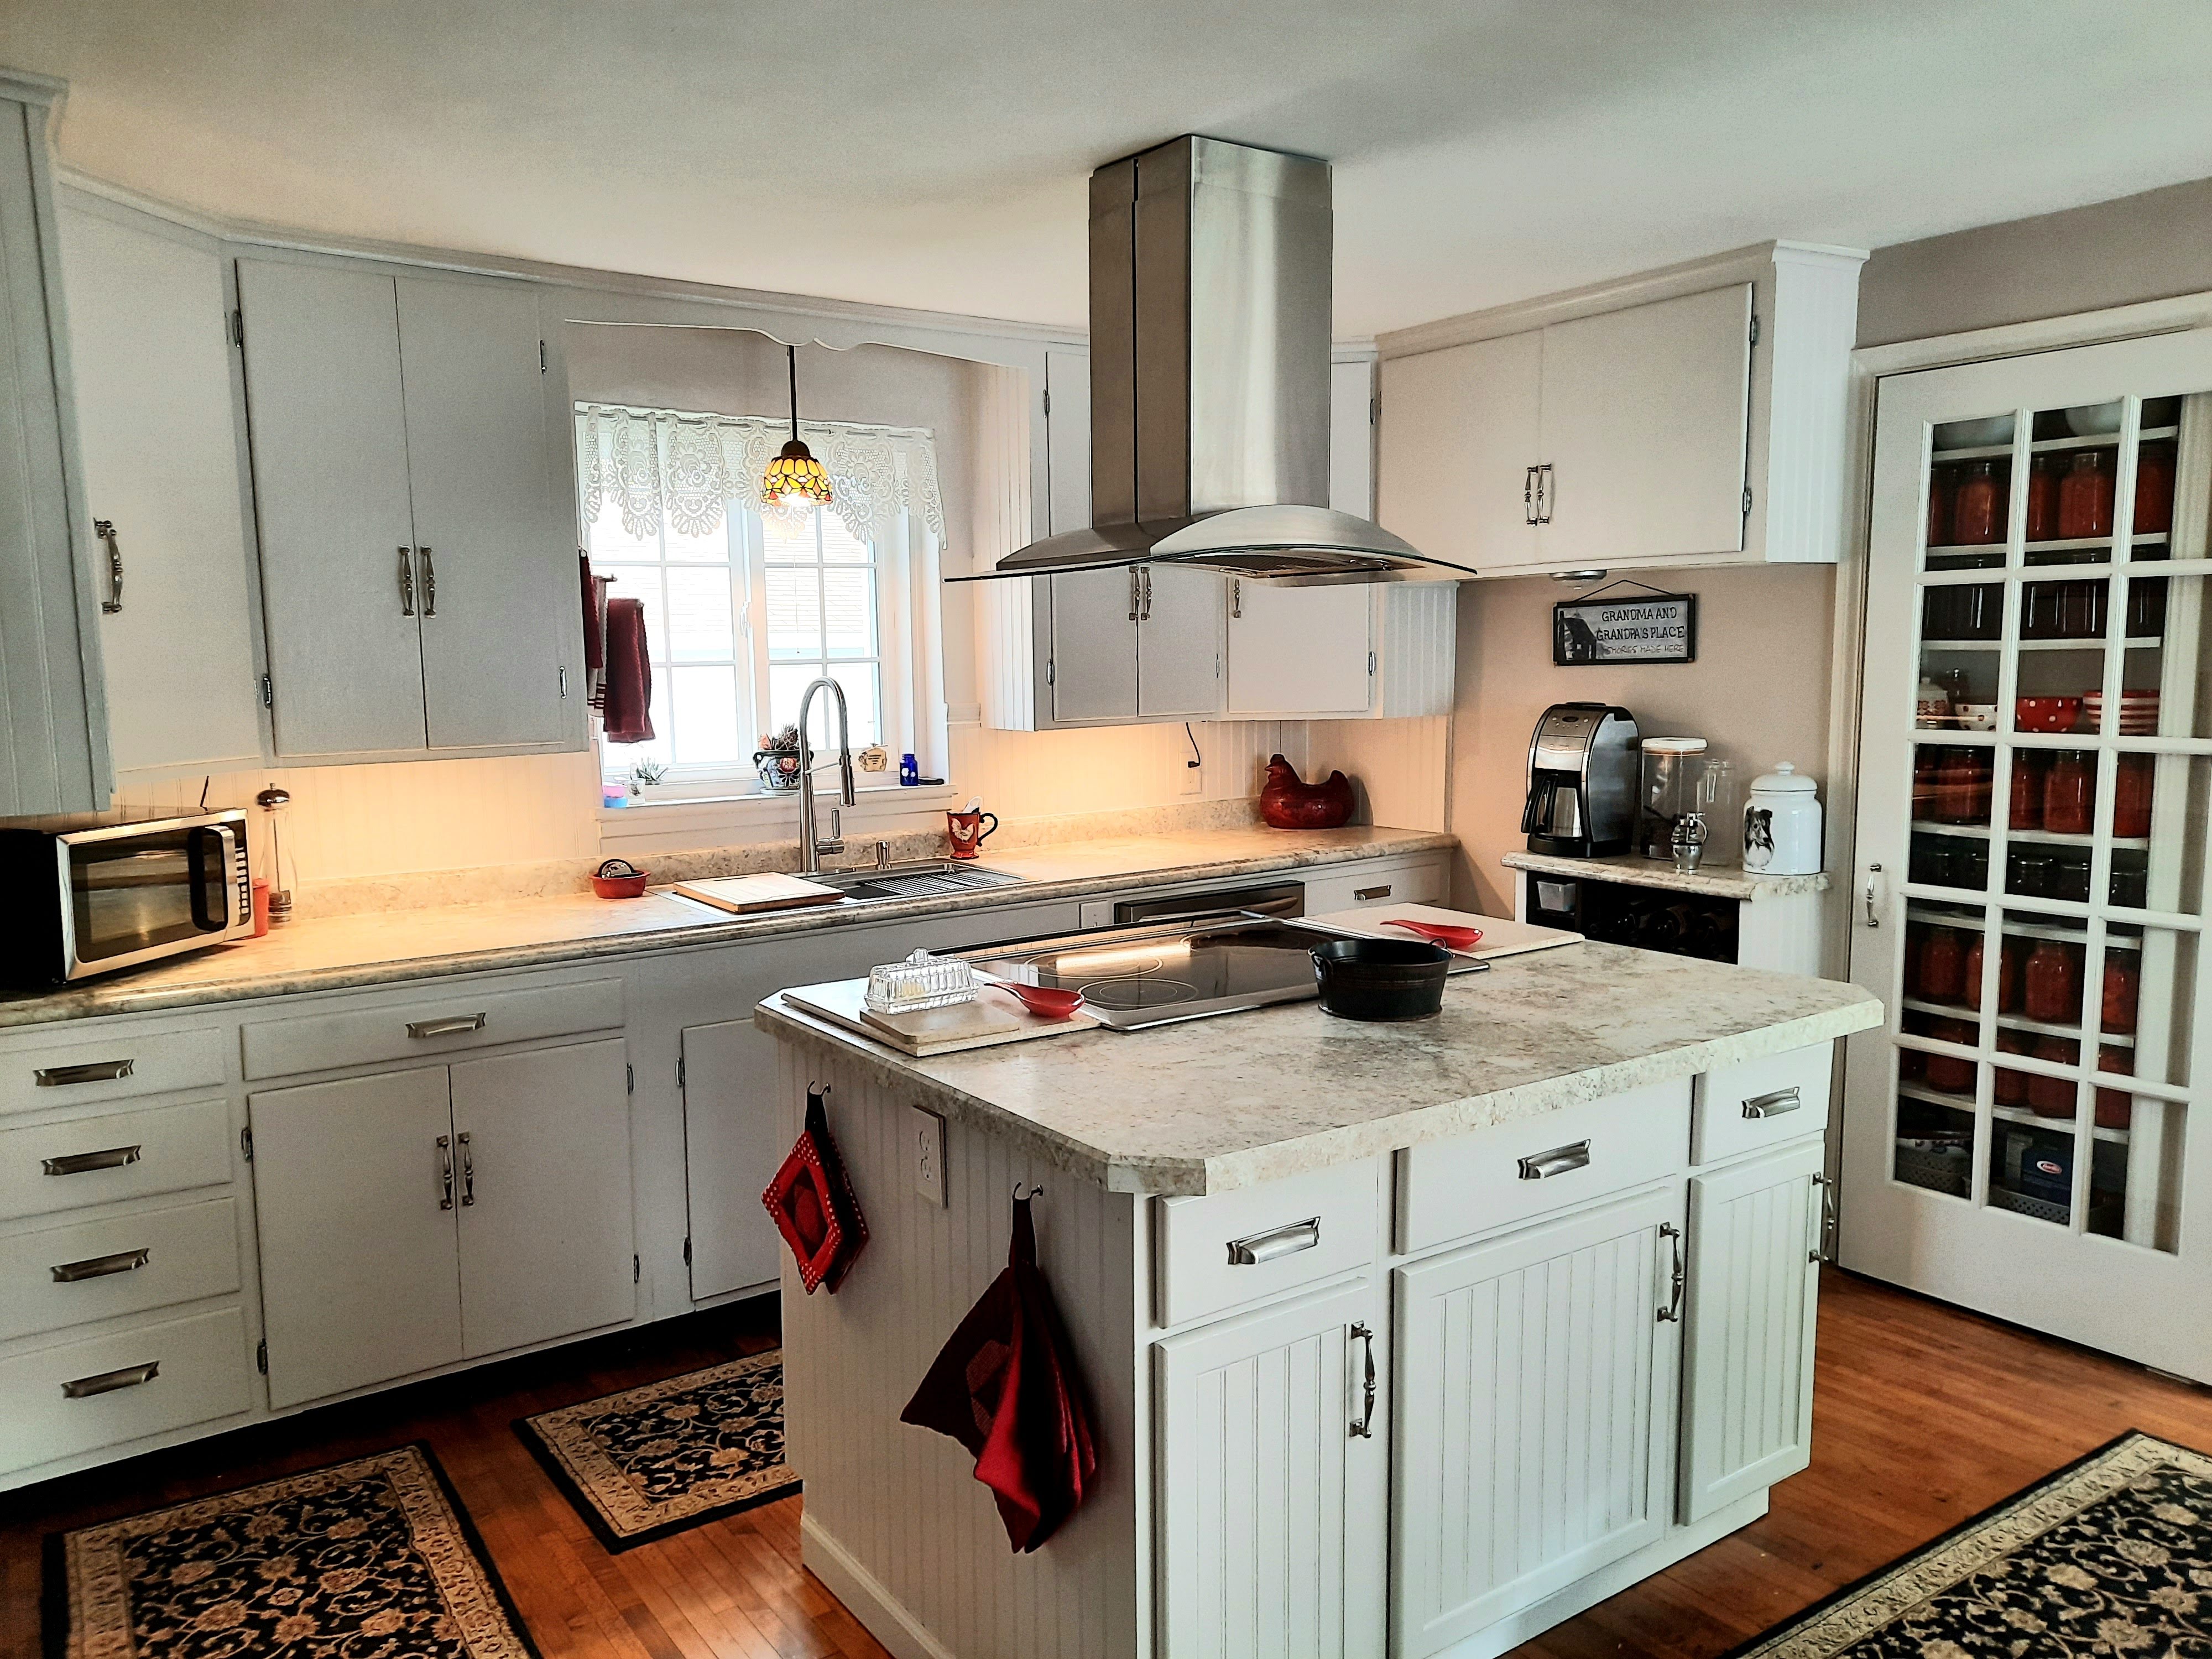
There... all smoothed out and caulked and set into place. Now the backsplash matches the ends of the upper cabinets, and the sides and drawer fronts on the island.
It really makes the kitchen much brighter and cleaner and cripser. It's not a glaring white, it's a soft creamy pearl color. With the stainless steel appliances and hood vent, complemented by the cabinet and drawer pulls, I think it all coordinates together.
I put the microwave back into the corner, and the little things here and there on the countertop. I have a big red nesting chicken I got while shopping at a thrift shop years ago with my friend Vicky. She talked me into it. Now I keep treats in there for the grandkids when they visit.
(see? it needs a bit more light by the chicken)
I have a little red chicken coffee mug, left behind by the sellers that I keep my dish washing vegetable scrubbing brush in. I have a little ceramic pot and dish from our grandkids in Green Bay for pot scrubbers, sink plug and some odds and ends that seem to accumulate in the kitchen. I like a clear countertop and not any clutter. Then when I start a baking or cooking project, I don't have to clear things away first.
Steve also made a little addition to my new Sink Of My Dreams... It came with a wooden cutting board. But he said we should also have a nylon/plastic one for cutting meats on. Never a good idea to cut raw meat on a wooden board, even if it is sealed with mineral oil. So he took my big white one and cut it down on the saw, sanded the edges smooth and it fits on the sink too!
"So there you have it"
as Steve is known to say...
my Farmhouse Kitchen is now finished!
Today, we heard the city crews come up to the front corner of our yard. Just Monday afternoon Steve had set out the branches from the hunk of tree that he had Gary cut down for us. Our city takes note of where branches are on the edges of the streets, and comes back and chips them up with the chipping truck. Then we can go to the city lot and get free wood chips!
(oops it was windy and the front porch flag
flipped up and over the pole)
Tonight, I think we are going to curl up and watch tv.
Maybe it will be another HGTV show,
and we will get more ideas for another project?
Wait and see.


To me, the beadboard backsplash is a HUGE improvement! Well done once again.
ReplyDeleteIt sure looks a lot brighter in here this morning. It's a cloudy winter Sky day and it really made an improvement inside.
DeleteVery nice!!!
ReplyDeleteThanks! As you know from reading us for a long time, this is what we do for fun.
DeleteYou have an eye for seeing where changes are needed and this was a WIN! I love what you have done with all of your remodels and the kitchen is just one more on your list of many.
ReplyDeleteBit by bit we keep making this house our own. Putting our signature on it makes it comfortable.
DeleteYour kitchen looks fantastic. I love the brighter look and how homey it feels.
ReplyDeleteI was really trying to keep the farmhouse style and that horizontal glass block just was too modern for me. I like old-fashioned stuff.
DeleteThe kitchen looks fantastic! As always the work you two do is professional and creative.
ReplyDeleteHope you're feeling better soon. Take care.
Today is a little better. Not so much phlegm. I'm just hoping things can get back to normal.
DeleteFrom the beginning to now is so much better. That white sure perks things up.
ReplyDeleteMUCH IMPROVED! Soon you'll run out of projects and will then have to pack that RV and head south for the winter... Your sock business would be a huge hit in Arizona at the "Vendor" days held at the RV parks around the valley.
ReplyDelete