I am going to start off the new year with posting some of our motorhome modifications at a time. I will post repairs, modifications, or neato things we have found for RVing. I have lots of pics in my files so I will do them in alphabetical order.
Underneath that stuff, I will post my regular daily stuff..... kinda sorta fun, eh?
So here it goes, we are up to the letter C now!
Oh that Steveio..... He always has it in his brain to do some more modifications to the motorhome. He loves to think about stuff to do to it, thus making it more comfortable for when we travel.
When we bought our rig in 2006, it had TWO couches.... It made wonderful seating for when the family came along. Sadly, the couches were very uncomfortable, but they both jacknife open into twin/full sized beds. We liked having the extra bed space for the family if they got rained out of their tents when camping with us. With grandkids coming along now, it's nice to have a bed for them inside. Let their parents sleep in the tents.. heh heh.

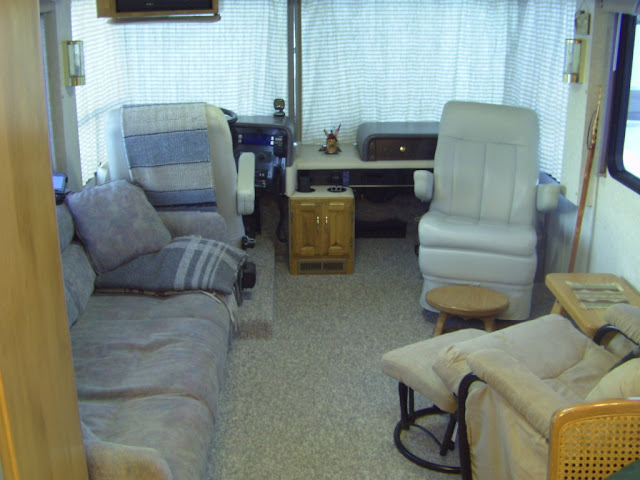
But... the couches were very worn looking and saggy and faded ugly peachy pink and frosty blue tiger stripes. I am NOT kidding! See?

At that time, 12 years ago, I bought a big bolt of nice blue upholstery fabric in a corduroy with faint imprints of leaves.... and I re-covered those couches! Hauled out my Grandma's old Singer sewing machine and went to work. Whew, it was a job and Steveio helped me with it. We didn't change the cushioning, just covered over the existing fabric.


By removing the last couch, we are not losing much storage space, because we only stored a couple sleeping bags and a folding chair under the couch. There was a snakey air duct from the furnace that also ran under the couch too.

We shortened up the duct so it still blows, but it's behind the grid we adapted with a new hunk of wood, and stained to match.


By that time, in 2012, we were living in our motorhome full time. We had sold our Oconto house and were parked at a friend's cottage. We were near UWGB for Steve to finish up his work time there before transferring to High Cliff State Park.


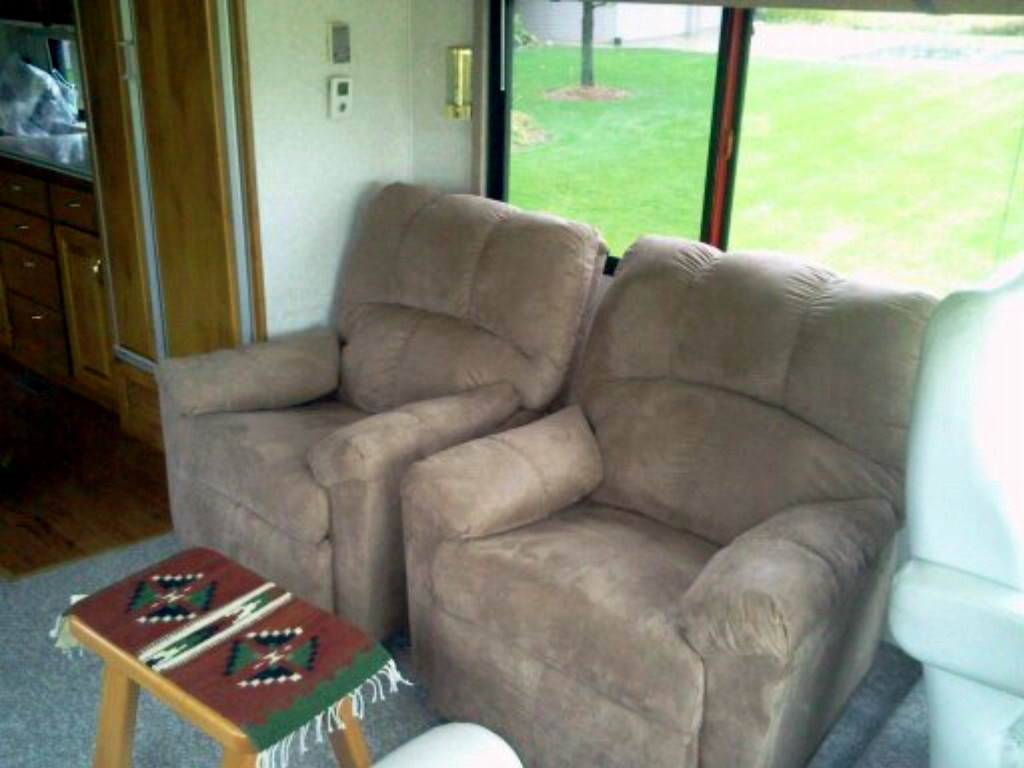
There.. no more hitting the wall when we recline! The seat portions actually scoot forward when you want to recline, and it does not hit the wall behind. Thus-- called a "Wall-hugger" design by La Z Boy. We have a lot more room now in front of the loveseat.
The little bench type coffee table with the woven mat in the foreground also doubles as a stand for my table loom. It can roll up to the seat for me to weave, or roll away on the casters to the other side wall when not in use.
This last change was done almost six years ago... and we like this La Z Boy recliner loveseat so much we have not changed it since. I think we are done with the seating evolution of "Couches To Chair To Recliners To Loveseat".
Steve came up with this great idea to add more shoe space in my side of the closet in our motorhome. It is a simple horizontal board with two other vertical boards secured underneath. It sets right in place and does not need to attach permanently. It can be removed with ease if we ever wish to have more length rather than shoe cubbies.
Underneath that stuff, I will post my regular daily stuff..... kinda sorta fun, eh?
So here it goes, we are up to the letter C now!
MOTORHOME MODIFICATIONS
STARTING WITH THE LETTER C
Couches To Chair To Recliners To Loveseat:
This evolution went through FOUR stages to get where we are today. Oh that Steveio..... He always has it in his brain to do some more modifications to the motorhome. He loves to think about stuff to do to it, thus making it more comfortable for when we travel.
When we bought our rig in 2006, it had TWO couches.... It made wonderful seating for when the family came along. Sadly, the couches were very uncomfortable, but they both jacknife open into twin/full sized beds. We liked having the extra bed space for the family if they got rained out of their tents when camping with us. With grandkids coming along now, it's nice to have a bed for them inside. Let their parents sleep in the tents.. heh heh.


I guess the designers chose Tiger Stripes for a Safari Serengeti?
At that time, 12 years ago, I bought a big bolt of nice blue upholstery fabric in a corduroy with faint imprints of leaves.... and I re-covered those couches! Hauled out my Grandma's old Singer sewing machine and went to work. Whew, it was a job and Steveio helped me with it. We didn't change the cushioning, just covered over the existing fabric.

It sure made a huge difference,
and although they were still uncomfortable, they were all we had.
That was okay for a while, but later on Steve got it in his brain next to take out ONE couch. So we did. We drove to GoodWill and had them haul it right out the door as a donation. Then we drove across the street to Shopko where they had a Euro Chair and Ottoman on sale. For $90 Steve was happy, but I still had an uncomfortable couch. But hey, it was working, so I didn't complain.

Since then, we bought a nice heavy queen air mattress for when the grandkids slept over. We just shove the Euro Chair up front between the pilot and copilot seats.... and that queen mattress sets nicely on the floor between the couch and the wall. It was VERY comfortable and the kids opt to use that instead of the folded out couch/bed if they stay over. And now with the couch gone, my passenger seat can rotate around to face the livingroom area to be used for more seating. (the driver's chair will not turn with the other couch there)
Zoom ahead another year or two.
Now, Steveio got it in his brain to take out the OTHER couch and the Euro Chair --- and purchase two recliners instead. This would leave us a lot more room for things like my table loom, or sock machine, or spinning wheel... which could be left set up when in use and not stowed away each time. (that was his reasoning and "bribe" to me)
We stopped at one store that had some nice recliners, but the price was out of line. Then we saw some fancy leather recliners, again wayyy too expensive for our budget. $900 each! ouch! After a few more stops, we went out for lunch. Then we stopped at ONE MORE STORE.... you know how that goes?
Well, we found some very comfortable Simmons recliners, on sale of a sale of a sale and top it off, a $40 rebate on each chair too. Soooo at a final price of only $129 each, we bit the bullet and he got his danged chairs.
PLUS---- THEY ARE MADE IN AMERICA~!!
The backs of the chairs slide up and off for ease of getting them in the motorhome door. So they are shipped in two pieces, ready to load up.
We had to remove the couch from the motorhome first. It's fairly easy with extending it out flat, setting it up on end, removing the arms, and walking it out the doorway sideways like a mattress, with one of us on each end.

By removing the last couch, we are not losing much storage space, because we only stored a couple sleeping bags and a folding chair under the couch. There was a snakey air duct from the furnace that also ran under the couch too.

We shortened up the duct so it still blows, but it's behind the grid we adapted with a new hunk of wood, and stained to match.

We carried in the two new recliner chairs and set them up,
They can be put both on the driver's side... or both on the passenger's side....

I think I liked them both on the driver's side the best.
Or they can be put one on each side if we wish. Steve liked them best this way.

Kinda nice to have flexibility---- and they can be mounted down right through the floor once we decide where we want them. Steve built the little side table as well.
Now we can turn the driver's chair around,
like the passenger chair does,
to add to the livingroom area seating.
We can also put out the air mattress for the grandkids
if we turn the chairs tight to the wall.

By that time, in 2012, we were living in our motorhome full time. We had sold our Oconto house and were parked at a friend's cottage. We were near UWGB for Steve to finish up his work time there before transferring to High Cliff State Park.
We had the recliners in our motorhome for only one year. Yep, one year. Steve started "thinking" again!
One thing we noticed is that the recliners are not very practical. They needed to be pulled out sooo far into the room if you want to recline on them. They waste about 12-14 inches behind each chair. And if you don't pull them out far enough, they catch on the edge of the window frame when putting them back upright. Even though the recliners were only one year old, it was time to make a change....


Sooooo we went shopping for the "wall hugger" style recliners. We looked at all the big furniture stores in the city. Ewwww pretty high prices on the La Z Boy brand, but they seemed to have the nicest "wall hugger" design. We discovered that we liked the loveseat idea instead of 2 separate chairs (like our blogger friends Janna and Mike had in their motorhome)
There is a small mom and pop style furniture store in a small town, not too far from where we were parked, so we headed over there. Not only did they have what we wanted, a real name brand La Z Boy loveseat in a nice color, and in stock... but on SALE! For a LOT cheaper than what the big stores in Green Bay had! They will deliver it for FREE right into the motorhome! Plus, I feel better supporting a small town store (McMahons of Luxemburg) Steve also knew one of the salesmen who had kids the ages of our sons and they played ball together.
We gave away the two beige recliners to our son Dan and daughterinlaw Heather. They could use them in their house, with a large livingroom to put them in. No "wall hugging" needed for their room.
One thing we noticed is that the recliners are not very practical. They needed to be pulled out sooo far into the room if you want to recline on them. They waste about 12-14 inches behind each chair. And if you don't pull them out far enough, they catch on the edge of the window frame when putting them back upright. Even though the recliners were only one year old, it was time to make a change....


There is a small mom and pop style furniture store in a small town, not too far from where we were parked, so we headed over there. Not only did they have what we wanted, a real name brand La Z Boy loveseat in a nice color, and in stock... but on SALE! For a LOT cheaper than what the big stores in Green Bay had! They will deliver it for FREE right into the motorhome! Plus, I feel better supporting a small town store (McMahons of Luxemburg) Steve also knew one of the salesmen who had kids the ages of our sons and they played ball together.
We gave away the two beige recliners to our son Dan and daughterinlaw Heather. They could use them in their house, with a large livingroom to put them in. No "wall hugging" needed for their room.
It was easy to take out these two recliners in two pieces each and haul away in our son's truck. They came out the day before our delivery for a cook-out and took the chairs back home with them.
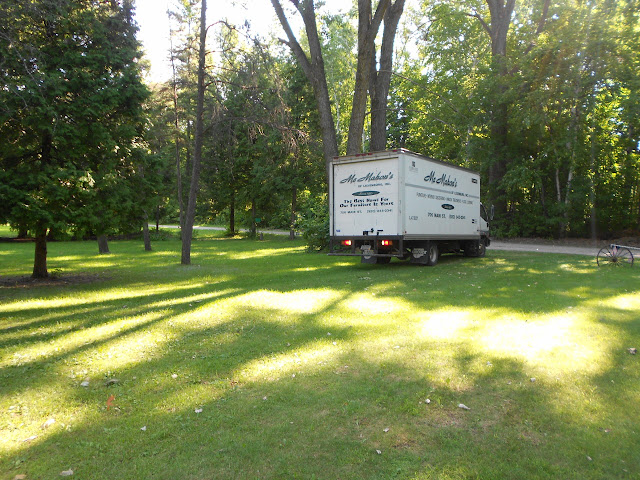
The next morning, the furniture store found us,
and delivered our new loveseat!
Backed in their delivery truck right up in front of the motorhome.

Quick as a wink, they hauled in the seat base bottom piece
through our narrow 24" motorhome door.
(we measured in advance)

They adjusted the bottom screws
for the padded carpeting on the feet.

While they went to the truck for the back rests,
I snapped a pic of the seat base

They snapped the clips on the backrest sections
and pushed it into place!

The little bench type coffee table with the woven mat in the foreground also doubles as a stand for my table loom. It can roll up to the seat for me to weave, or roll away on the casters to the other side wall when not in use.
This last change was done almost six years ago... and we like this La Z Boy recliner loveseat so much we have not changed it since. I think we are done with the seating evolution of "Couches To Chair To Recliners To Loveseat".
Closet cubby:

It works really well to stuff 2 pairs or so in each section.

It only takes up about 5 or 6 inches of closet height,
and there is still a base floor to the closet to stack things.
(I carry a spinning wheel sitting upright in the closet,tucked between the clothes for added security)
~~~~~~~~
Whoooeeeee the weather temps dropped significantly. We are only at 4 above zero, and even with the sunny looking skies, the wind chills are 15 below right now. Tonight it is going to be about 5-10 below, with windchills in the 20 below or lower. Now if we could just get some SNOW to cover the ground and look nice. If we have to be cold, I would like it to at least "look" like winter!
I am staying inside and cozy warm. I rolled my quilt backing fabric onto the Handi quilter frame. It's a coffee bean print, but it's rolled on upside down so you can't really see the pattern in the pic. It has to be rolled on evenly and smoothly with no wrinkles or changes in tension.
Here is the backing just as I started to roll it on

Next, I roll on the quilt top, with all of it's pretty blocks face up. It also has to be rolled on smoothly without any wrinkles. This is a king sized quilt 100 inches wide.

Steve did a modification to my quilting frame for me. The ends of the poles were just stuck through the white frames and had only a little silver snap button to hold them in place. Kinda like a tent pole button. Well, sometimes they would pull back through and unsnap. Suddenly my quilt poles would fall to the ground! Not good! Soooo he removed the silver snap buttons, drilled holes all of the way through the pole ends, and bought these nice gold snap rings to hold the ends in place. Now they are snug tight to the frame on the inside too, so the gears mesh and the little ratchet locks work correctly! What a guy!


P.S. I made my own red side tension clips
from potato chip bag clips and bungee cords!


Here is a video clip I made of how it works:
Here I am all set up and ready to go!
What a great way to spend a cold frosty Wisconsin day!


I blog frequently and I seriously thank you for your content.
ReplyDeleteThis great article has really peaked my interest.
I am going to book mark your website and keep checking for new information about once a week.
I subscribed to your RSS feed as well.