Of course, old homes need updates, repairs and maintenance. We try to keep things as original as possible, but comfortable for modern day living.
One of the features on Our Old House is called a "Shaker Porch" off the upstairs back hallway. Two years ago we replaced the horizontal railings to get them up to code by raising the upper rail height per code and putting in vertical spindles. At that time, we knew the two corners posts were firmly attached, but the center post was not tall enough to support the raised upper rail. We only use it to air out a quilt or comforter from time to time, or just open up the door to let fresh air in upstairs.
Two months ago, our son Dan and soninlaw Waylen moved a king sized mattress over the railing of the back shaker porch ---and we noticed that the railing was a tiny bit loose. Last weekend I had the grandkids out on the porch for a look-see... (they had never been out on it before) and I noticed that center post was top not only loose, but also rotten! That can be dangerous!
Time for Steveio and I to do a little "Our Old House Task" ---- we happened to have ONE extra 4x4 post leftover from doing our big backyard fencing project. It was already stained white and ready to be used.
First Steve had to measure and cut away a notch from the other post... the base and bottom portion was still good, only the top was rotting. He drew lines and got out his tools. I held the post.
First Steve had to measure and cut away a notch from the other post... the base and bottom portion was still good, only the top was rotting. He drew lines and got out his tools. I held the post.
He made a notch part way up and then took measurements to make corresponding notch on the new post. This would be better than trying to remove the whole post, which is mounted and sealed to the rubber roof material, and enclosed with an aluminum surround. Who wants to make leaks on the flat rooftop to the porch ceiling below? He could use what is there and make the repair. What a smart guy!
He started with the skil saw,
but had to swap over to the sawzall to get through the post.
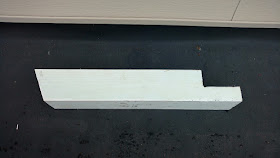
Here are the two cuts off the post. Yup.. that is some rotting wood. But for 104 years old, it's not so bad afterall.
Before we attached the new section, I coated it liberally with a solution called Wood Hardener from Minwax. It makes a firm solid surface of soft wood, and hardens up to a resin like texture. We used this on a doorway tread and also on the subfloor boards when we replaced the bathroom flooring in our motorhome.
It dried up while we were having lunch... and Steve prepared the post to go on the new base. Measure three times, cut once. It worked out and he brought up the piece to put into place.
I held the top while he drilled a big hole right through both pieces. I didn't have a lot to do so far except hold things and take pictures. LOL But my part comes next after he runs a big thick bolt through the whole thing....
I got out some spackle to cover the cracks while he drilled the top section to the horizontal board. Then I filled those holes too with some spackle. Now I got out my brush and some white solid color stain to cover the repair areas. I touched up a bit here and there.....
(now I just have to sweep off the sawdust)
There ya have it (as Steve is prone to say) Now the railing is not only safe, but also looks good again. Another project completed around Our Old House!
~~~~~~~
On a fiber note:
Here is my quilt I made.
It is now worth $2,759.00 !!!!
I sold this quilt to a lady who donated it to a raffle fundraiser for her local dog rescue in Nevada.
And it has a week to go yet and will most likely go higher!!!!
~~~~~~~~
On a family note:
HAPPY ANNIVERSARY
to our oldest daughter Erin and husband Waylen!
Two years ago, Waylen joined our family
and we so happy to have new addition of new baby Claire
to join sister Chelsea and brother Clayton.


No comments:
Post a Comment
Thanks for taking the time to comment on my blog! I moderate all comments so it may take a little while for your comment to appear.